The Triumph Dolomite Club - Discussion Forum

The Number One Club for owners of Triumph's range of small saloons from the 1960s and 1970s.
It is currently Fri Apr 19, 2024 11:13 pm

All times are UTC+01:00


Post new topic  Reply to topic  [ 357 posts ]  Go to page Previous 13 4 5 6 724 Next
Author Message
PostPosted: Fri Sep 14, 2012 10:41 pm 
Offline
Future Club member hopefully!
User avatar

Joined: Thu Oct 06, 2011 1:13 am
Posts: 3173
Location: The continent
Quote:
I suppose thats a reference to the House of ORANGE? :lol:

Steve
Yes it is. My wife is driving a Royal family car also. Her's is only bigger than mine but nothing to be ashamed off. :oops:
Attachment:
2500yvonne.jpg
2500yvonne.jpg [ 117.53 KiB | Viewed 6169 times ]

_________________
Classic Kabelboom Company. For all your wiring needs. http://www.classickabelboomcompany.com


Top
   
PostPosted: Thu Sep 27, 2012 6:52 pm 
How is this most glorious of Sprint's coming along...?! Has any work started on the 'build' or are you just getting yourself ready...?! This is just going to be amazing when it is done, truly amazing... :wink:


Top
   
PostPosted: Thu Sep 27, 2012 9:31 pm 
Offline
TDC Staffs Area Organiser
User avatar

Joined: Wed Oct 18, 2006 2:08 pm
Posts: 5429
Location: The Old Asylum
Not a huge amount to report so far i'm afraid. Unlike some other restos because i've started with in effect a spare shell I haven't had to remove all the compnents from the donor, the bad news is that as a result I haven't taken any bits off to renovate.

My first task has been purchasing simple things like some nice new nuts and bolts and working on a plan which I have written up. So far the work has been limited to fitting lots of blanking grommets, the rear lights, front indicators and side lights and the bonnet striker plate. Next up i'm going to look at the door latches and fitting the door strenghtheners. I've also started to build up a box of bits to have blasted, coated with an anti rust coating prior to painting or powder coating. Finally I have organised a few bits which i'd like to have cleaned and passivated to make them look nice.

I have also ordered a new wiring loom as it'll be easier than removing the old one which has been hacked about a bit. This has a 5 week or so lead time which suits me as i'll be away in a week or so. I have asked them to go to the factory to have a look at the build process so i'll certainly add some pics of that. Really until the loom arrives I can't do a huge amount.

_________________
Mark

1961 Chevrolet Corvair Greenbrier Sportswagon
1980 Dolomite Sprint project using brand new shell
2009 Mazda MX5 2.0 Sport
2018 Infiniti Q30


Top
   
PostPosted: Sun Sep 30, 2012 9:35 pm 
Offline
TDC Staffs Area Organiser
User avatar

Joined: Wed Oct 18, 2006 2:08 pm
Posts: 5429
Location: The Old Asylum
As I mentioned not a huge amount has happened so far but I thought it was worth adding a few pictures to the thread.

Adding the grommets is pretty boring job but one that is quite satisfying. I ordered various sized ones only to discover I had a tub full already so now I have enough to do about 20 Dolomites!

Image

Also I thought some easy jobs like adding lights would be something that provide a quick win. Here the new back lights have been installed. Also new front indicator units shown here on the bench awaiting installation. Both are new old stock.

Image

Image

I also decided yesterday to fit the door handles. This was actually more difficult than I expected as excess paint had built up in the various apertures meaning it took ages to do but looks good. The original handles were quite badly pitted so I replaced them with new ones I had in stock (old ones on the right!)

Image

Image

Also removed and cleaned the roof vents which I was going to fit except the u clips I had in stock were just slightly the wrong size and shape. The original ones were quite corroded so it would seem a shame to reuse them. Again not a big job but one that's easy whilst I wait for the loom

Image

I also spent some time today removing and cleaning the door catches. I was happy with two of them but the other two are quite corroded, I thought it was dirt first of all. I'll use the two good ones and try and dig out some better front ones from the stores.

Image

I removed the two rear door stiffeners. These seem to be in a galvanised finish. One has unfortunately been covered in orange paint and the other one is OK albeit with a little surface corrosion. I'm going to see if I can clean off the paint and re-use that part. I have a galvanisers/platers close by so I might see what they can do. I don't really want to re-use this part in it's current form even if it will be hidden.

Image

My final job was to find some home for the furflex trim which I removed from the donor car. I'll have to remove it again at some point to trim the interior but it's better than leaving it in a box in the way!

As well as fitting a few small parts i've spent a lot of time looking at various parts on the donor to assess how to fit things and also looking at small clips and things I will need. I had a good poke around the donor and it really is quite badly bodged. Lots and lots of orange overspray and some pretty nasty rust, around the bulkhead is particularly bad. I also for my own amusement shone a light into the sills to find that neither side sports the stiffener piece in it and the passenger side one in particular seems to be full of rust shale for most of the length. Twards the rear on that side the inner sill seems to have gone very soggy and is pretty rotten under the underseal. This sill I had 'repaired' not that long ago but it was a bit of a bodge job and I was never happy with it. Here's a few pics

Bulkhead (picture doesn't show the structural filler and huge cracks!)

Image

Nice patch on the inner wheel arch

Image

Passenger side footwell, made mostly of seam sealer and biscuit tin (this was carried out before I bought the car by a 'Triumph Specialist'. The joint is very rusty when you poke it and the loss of the ribbing means it's pretty weak too.

Image

_________________
Mark

1961 Chevrolet Corvair Greenbrier Sportswagon
1980 Dolomite Sprint project using brand new shell
2009 Mazda MX5 2.0 Sport
2018 Infiniti Q30


Last edited by SprintMWU773V on Wed Jul 26, 2017 2:08 pm, edited 1 time in total.

Top
   
PostPosted: Mon Oct 01, 2012 1:27 pm 
Well progress is most certainly being made there and it looks superb sir... :wink:


Top
   
PostPosted: Tue Oct 16, 2012 7:35 pm 
Offline
TDC Staffs Area Organiser
User avatar

Joined: Wed Oct 18, 2006 2:08 pm
Posts: 5429
Location: The Old Asylum
Today I visited Autosparks nr Nottingham to have a look at how they are building me a new wiring loom. I thought it sounded interesting and they were only too glad to welcome me and allow me to take a few pictures.

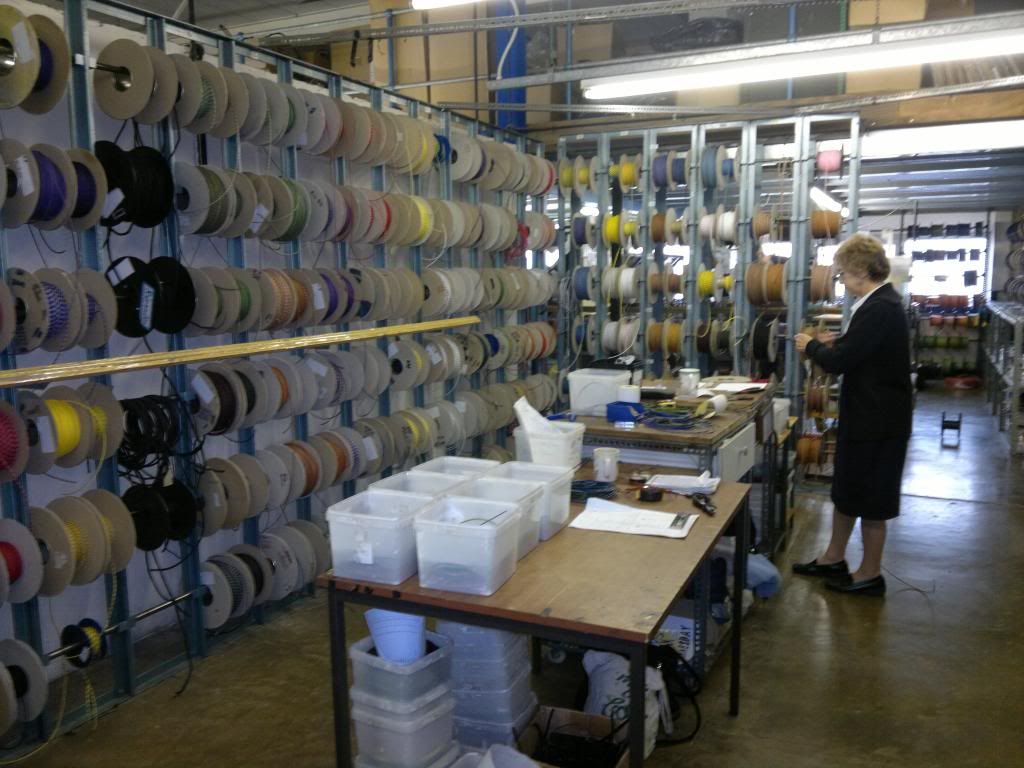
They build a wide variety of looms for a huge variety of cars at the factory which is quite a big operation in fact. They hold large stocks of the different colour, thickness or wire and can also add a brading to wire if required using the brading machine which is pretty neat.

They hold several thousand types of loom as samples and the measurements etc are taking from the sample and a schematic plan produced. This is cross referenced with the wiring diagram to see if there might be any issues. With the loom plan laid out the wires are first cut to size before a peg board is laid out to indicate the general shape and size of the loom. The wires are laid out according the the plan and where required connectors are added to secure the loom and help assist with the assembly.
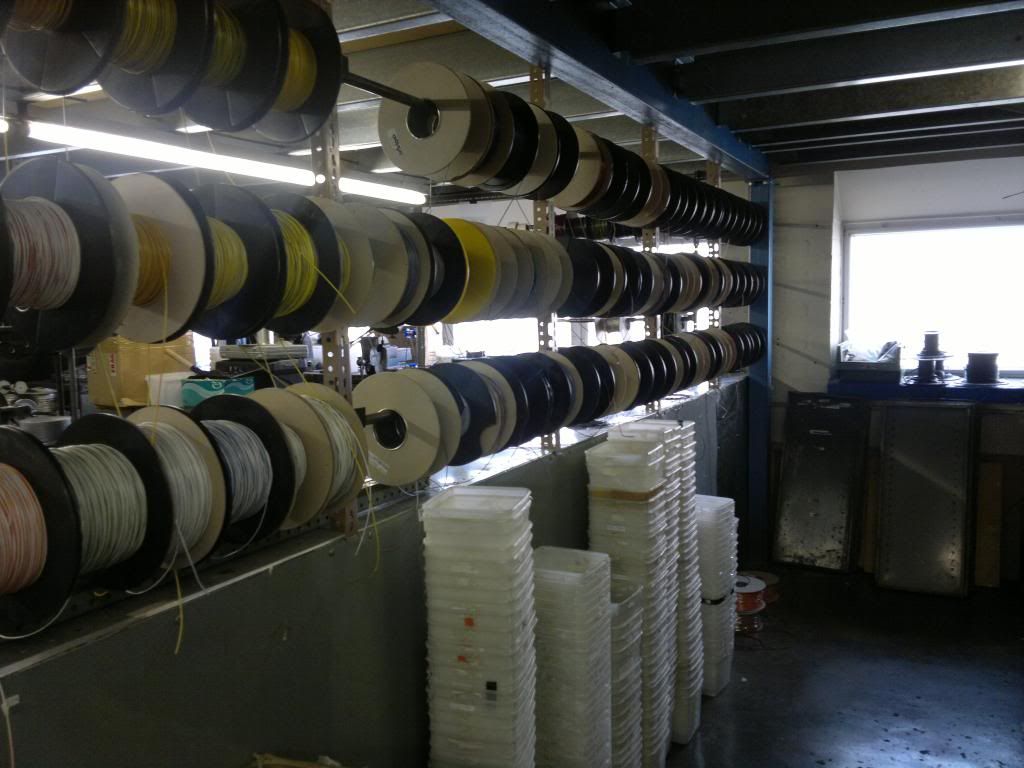
Image
Stocks of wire

Image
Wire cut to size and type

Image
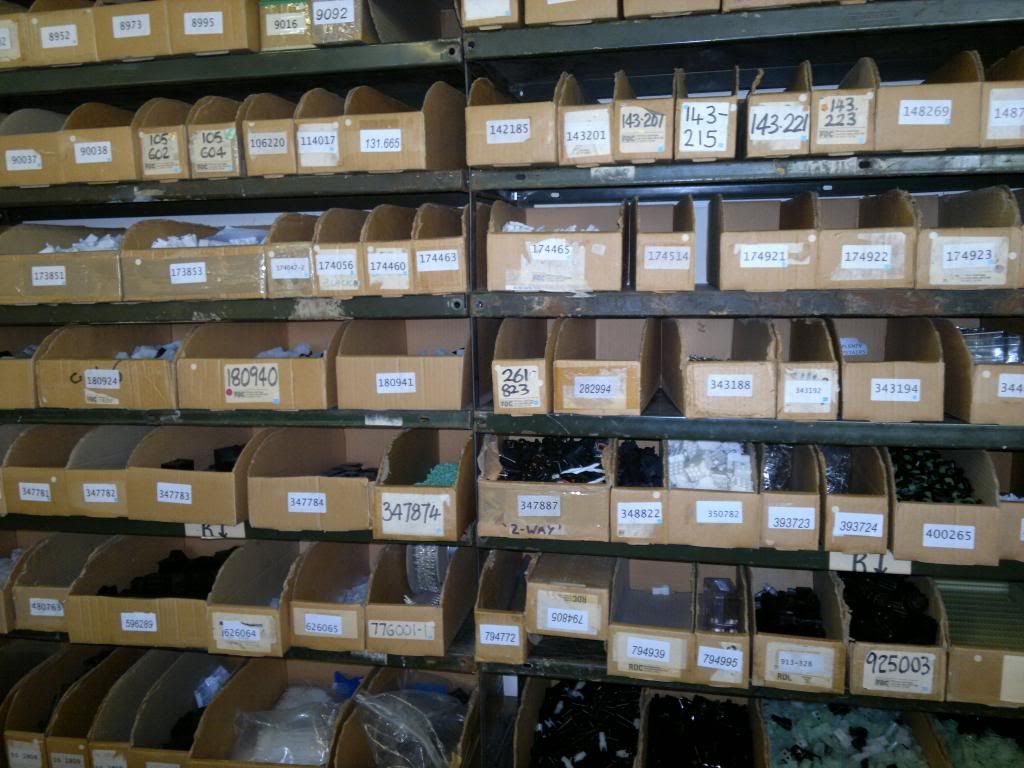
A huge range of connectors in stock

Image
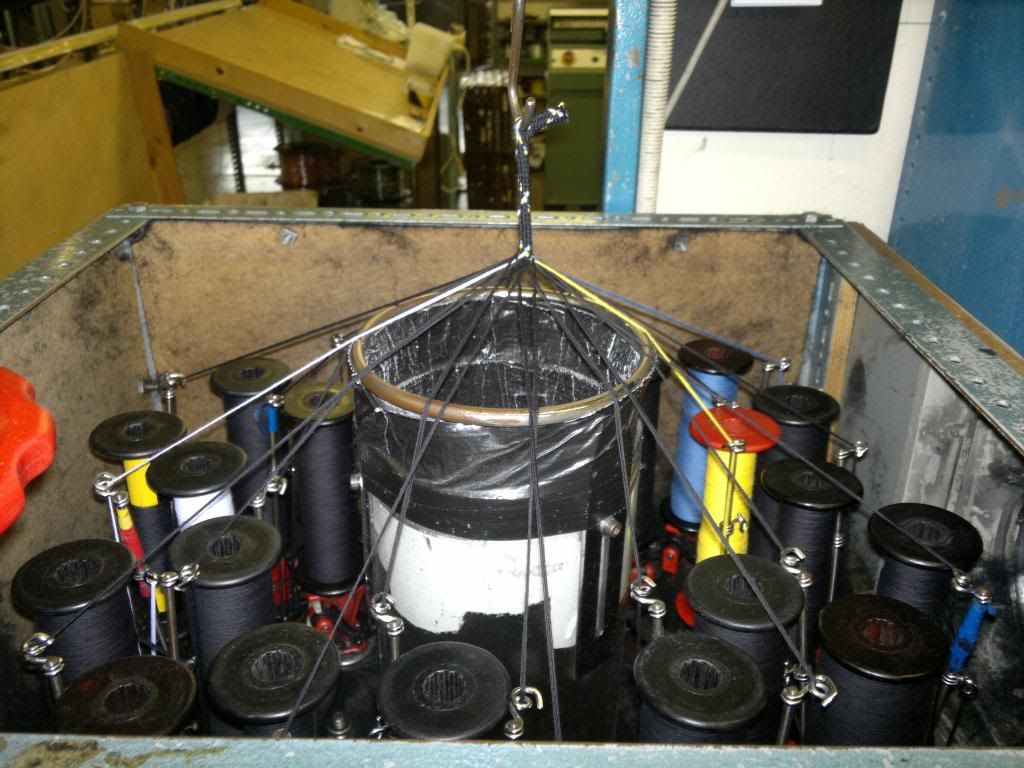
The braiding machine (not used for a Dolomite but still cool)

Once the loom is completed it must then be wrapped using a loom tape. This tape is not sticky but it does sort of stick to itelf as it is wound on. The ends are usully finished in heat shrink to stop it from unravelling. Then bullet connectors and other pieces are crimped or soldered on before the loom is checked over for faults. Then the loom is finished and ready to be held either as stock or direct to customers like me.

Image
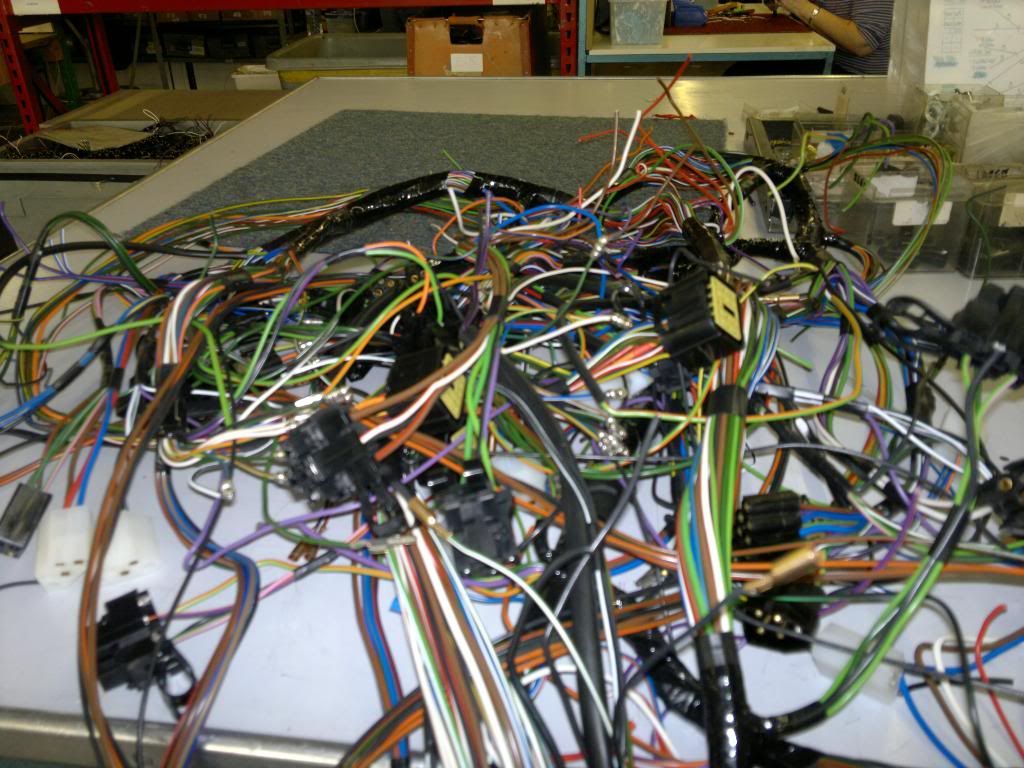
A near finished late Mini loom

I opted to have a complete loom as it seemed easier. It is pretty standard except I have opted to add some relays to the headlights which are also fused. As you can see the main loom is currently set out on the peg board but the rear section and the dash section are nearing completion. These can be plugged into the harness quite easily.

Image
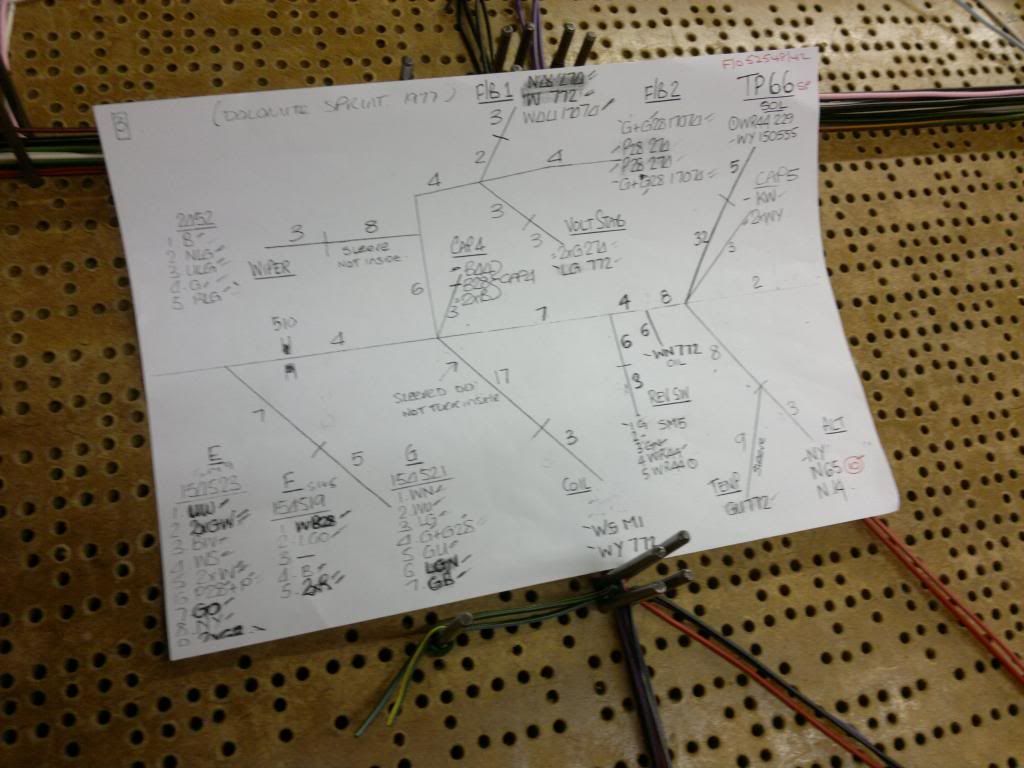
Here's the plan for my loom

Image
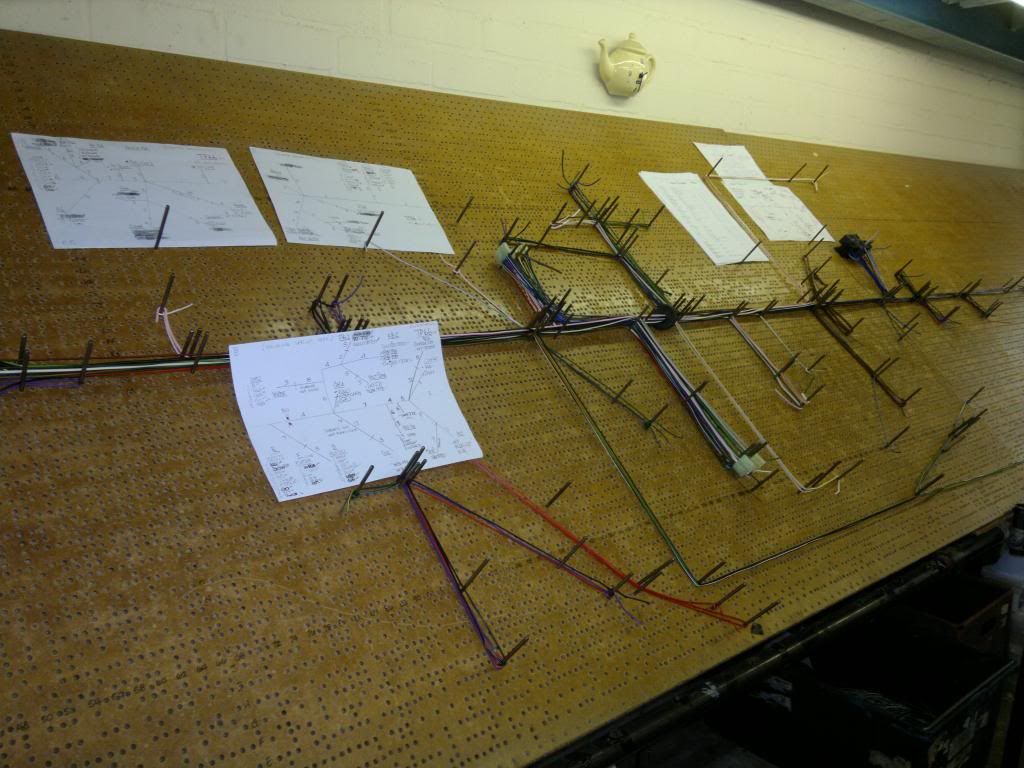
The loom is laid out on the peg board

Image
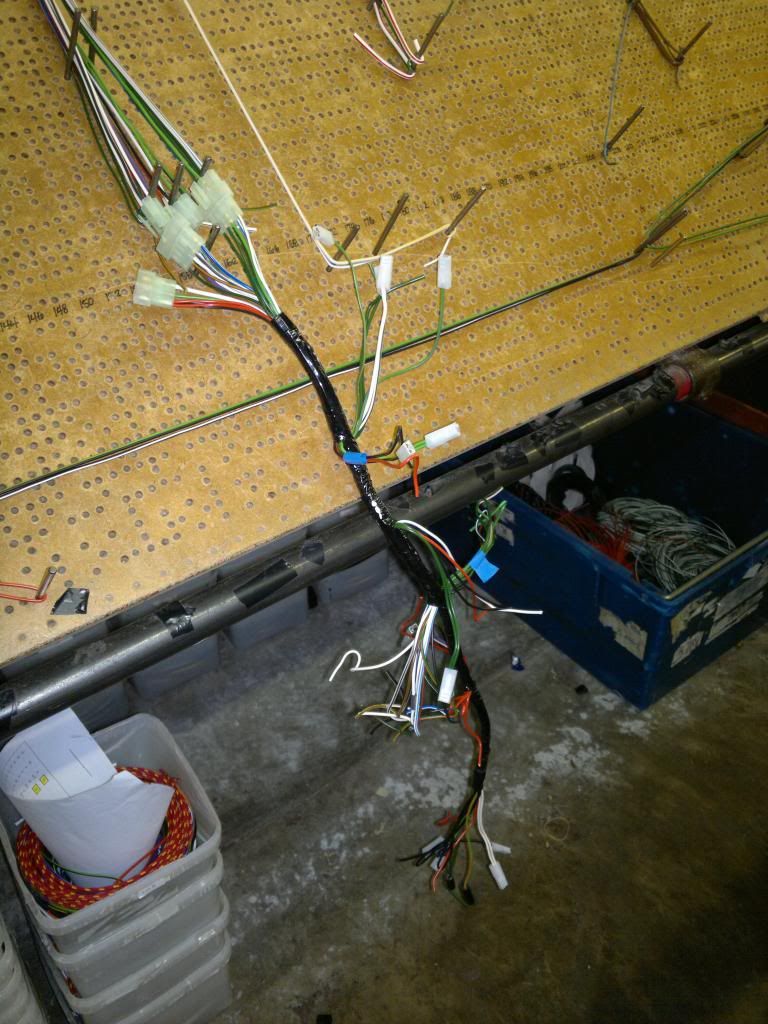
The dash loom plugs in easily

Image
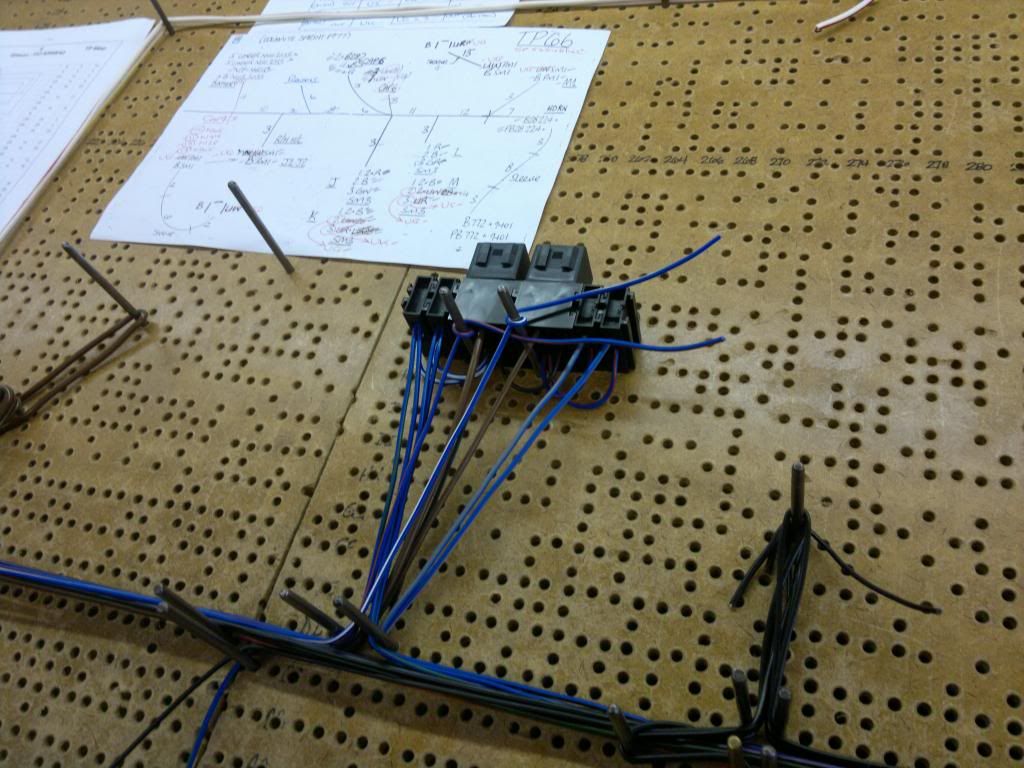
Added relays, need to find a home for the box

Image
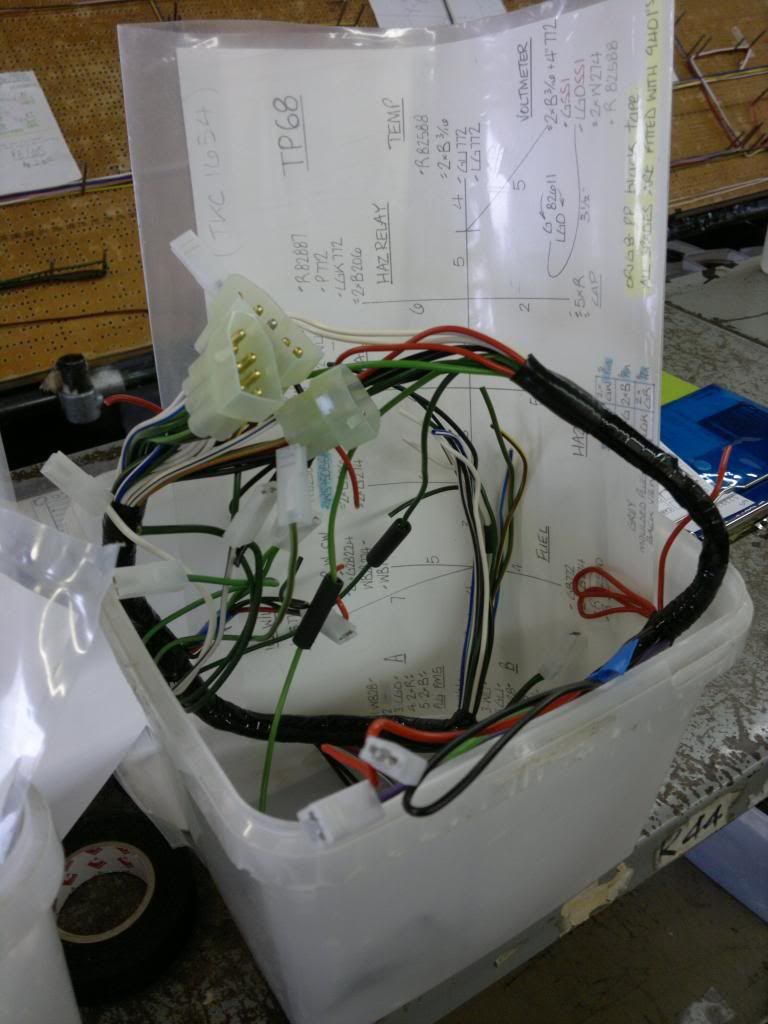
One of the looms awaits final testing, I forget which one.

So there's still some way to go on my loom but it should be with me in the next few weeks. In case you fancy your own brand new loom then be quick as it'll be easy and quick for them to make one as the board is already laid out. They have not made a Dolomite one in a while and this is a one off. By contrast the board on the other side was for a Jaguar MK2 and they were making 35 off for stock! The price for a complete loom including the mod was £400 which given the work that goes into it I think is actually very reasonable.

_________________
Mark

1961 Chevrolet Corvair Greenbrier Sportswagon
1980 Dolomite Sprint project using brand new shell
2009 Mazda MX5 2.0 Sport
2018 Infiniti Q30


Last edited by SprintMWU773V on Wed Jul 26, 2017 2:09 pm, edited 1 time in total.

Top
   
PostPosted: Tue Oct 16, 2012 9:54 pm 
Mark, many thanks for taking the time and trouble to share this fascinating aspect of car restoration with us. Love it. :D


Top
   
 Post subject: I am ............
PostPosted: Wed Oct 17, 2012 5:23 pm 
Offline
TDC Member
User avatar

Joined: Thu Aug 09, 2007 1:22 pm
Posts: 6481
Location: Caithness, Scotland
:) At the risk of being misunderstood, your thread is pretty dull Mark.


That is because everything is coming together so well.


The section covering the wiring loom being made is very informative, a future Dolly Mixture article I hope......

_________________
TDC Forum moderator
PLEASE help us to maintain a friendly forum,
either PM or use Report Post if you see anything you are unhappy with. Thanks.


Top
   
PostPosted: Wed Oct 17, 2012 10:25 pm 
Offline
TDC Staffs Area Organiser
User avatar

Joined: Wed Oct 18, 2006 2:08 pm
Posts: 5429
Location: The Old Asylum
I don't want it to get too exciting, not too many setbacks but sure there will be some challenges to come. They'll definately be a DM article on the loom as I have more info to add plus of course many members don't come on and read the threads. There should be the next part of my resto in the next mag and I already have part 3 lined up. I think Steve is quite pleased as it will give him plenty of copy for the foresseable future!

_________________
Mark

1961 Chevrolet Corvair Greenbrier Sportswagon
1980 Dolomite Sprint project using brand new shell
2009 Mazda MX5 2.0 Sport
2018 Infiniti Q30


Top
   
PostPosted: Thu Oct 18, 2012 2:20 am 
Offline
Future Club member hopefully!

Joined: Tue Sep 25, 2012 2:08 am
Posts: 387
Location: Christchurch, New Zealand
Mark

When Ian uses words like dull I assume it is because the picture of the pegboard at Autosparks has a well used look about it. It is not shiny like the paint on your car. I can only drool and wonder why I even bother trying to put my car back together from so far away. You lucky folk.

And I have decided, after waiting patiently for many years to receive a model train set for Christmas, (and becoming resigned to the fact that I am never going to get one) that I would prefer a pegboard and some wire instead. It looks like so much more fun laying out all those different coloured wires, fitting plugs (and points??) and going around corners and following all those instructions. Do they hang lots of little lights off the ends to see if they work?

And to think it is all going to be hidden in your car. I think I would have run it on top of the carpet just so I could look at it.

Grand looking project.

Robert


Top
   
PostPosted: Thu Oct 18, 2012 9:21 am 
Offline
TDC Member
User avatar

Joined: Thu Aug 09, 2007 1:22 pm
Posts: 6481
Location: Caithness, Scotland
Quote:
They'll definitely be a DM article on the loom as I have more info to add plus of course many members don't come on and read the threads.
Excellent news Mark.
(Please mention that you have a restoration thread on this forum too.)

_________________
TDC Forum moderator
PLEASE help us to maintain a friendly forum,
either PM or use Report Post if you see anything you are unhappy with. Thanks.


Top
   
PostPosted: Thu Oct 18, 2012 11:50 am 
Offline
Future Club member hopefully!
User avatar

Joined: Tue Oct 03, 2006 5:52 pm
Posts: 7568
Location: Halifax, West Yorkshire
Mark, I think you've overcome the biggest challenge in that you have a decent bodyshell that will last a bit longer than the original one. It is just a matter of rebuilding your car around the new shell and with the new loom you've already eliminated the potential electrical problems.

_________________
Toledo Man

West Yorkshire Area Organiser & forum moderator
Meetings take place on the first Wednesday of the month at 8.00pm at The Old Brickworks, Wakefield Road, Drighlington, Bradford, BD11 1EA

1972 Dolomite 1850 auto (NYE 751L - Now for sale)
2003 Volvo XC90 D5 SE (PX53 OVZ - The daily driver)
2009 Mercedes-Benz W204 C200 CDI Sport (BJ58 NCV - The 2nd car)
1991 Toyota Celica GT (J481 ONB - another project car)
Former stable of SAY 414M (1974 Toledo), GRH 244D (1966 1300fwd), CDB 324L (1973 1500fwd), GGN 573J (1971 1500fwd), DCP 625S (1977 Dolomite 1300) & LCG 367N (1975 Dolomite Sprint) plus 5 Acclaims and that's just the Triumphs!

Check my blog at http://triumphtoledo.blogspot.com
My YouTube Channel with a bit of Dolomite content.

"There is only one way to avoid criticsm: Do nothing, say nothing and BE nothing." Aristotle


Top
   
PostPosted: Thu Oct 18, 2012 2:37 pm 
Never has the phrase 'better-than-new' seemed more apt...!!!


Top
   
PostPosted: Thu Oct 18, 2012 4:53 pm 
Offline
Future Club member hopefully!

Joined: Tue Oct 03, 2006 9:45 pm
Posts: 11179
Location: Middlesex
So how much would the price come down if more looms were ordered with the lighting relay mods in place...

This is the way to go as halogen lights replace the defunct sealed beams.....and would we have some variants to cope with old style column switches, instruments and hrw?

Just some random thoughts....but I could well be in the market for one...!

Jonners

_________________
Note from Admin: sadly Jon passed away in February 2018 but his humour and wealth of knowledge will be fondly remembered by all. RIP Jonners.


Top
   
PostPosted: Thu Oct 18, 2012 5:04 pm 
Offline
TDC Staffs Area Organiser
User avatar

Joined: Wed Oct 18, 2006 2:08 pm
Posts: 5429
Location: The Old Asylum
Don't forget I have gone for a complete loom with everything but you can buy just various parts of the loom e.g. the rear loom, dash etc. To add the modification to the loom as I ordered it was £30 to take into account the various parts and of course the time thinking about modification and how it would best be done.

I imagine if there were demand for a number of looms then prices would come down a little. As I mentioned in the piece they were making 35 off for a Jag but I imagne that would be way too many for a Dolomite Sprint. They list their prices here - http://www.autosparks.co.uk/index.php?cPath=464 I think they are correct and plus VAT.

_________________
Mark

1961 Chevrolet Corvair Greenbrier Sportswagon
1980 Dolomite Sprint project using brand new shell
2009 Mazda MX5 2.0 Sport
2018 Infiniti Q30


Top
   
Display posts from previous:  Sort by  
Post new topic  Reply to topic  [ 357 posts ]  Go to page Previous 13 4 5 6 724 Next

All times are UTC+01:00


Who is online

Users browsing this forum: No registered users and 101 guests


You cannot post new topics in this forum
You cannot reply to topics in this forum
You cannot edit your posts in this forum
You cannot delete your posts in this forum
You cannot post attachments in this forum

Search for:
Jump to:  
Powered by phpBB® Forum Software © phpBB Limited