I've been getting on with my subframe assembly. I had a head start as the vast majority of the parts were already prepared so it's just a case of putting it all together.
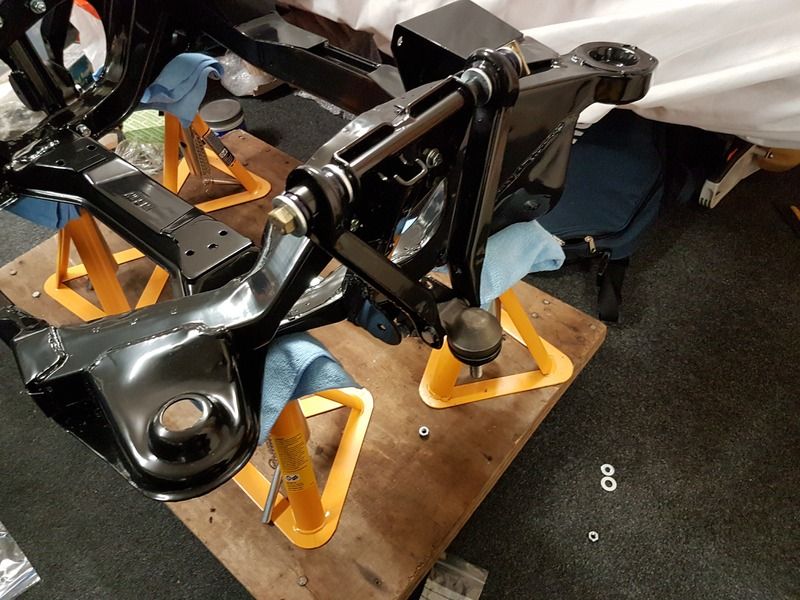
The subframe itself is an Ebay find of several years ago. It's new old stock and was blasted and powder coated so it looks lovely. Moving it from house to house and around the garage had dislodged a surprising amount of blasting media from inside so my first job was to hoover that up before putting it on some stands on a moveable board so I can wheel it around easily.
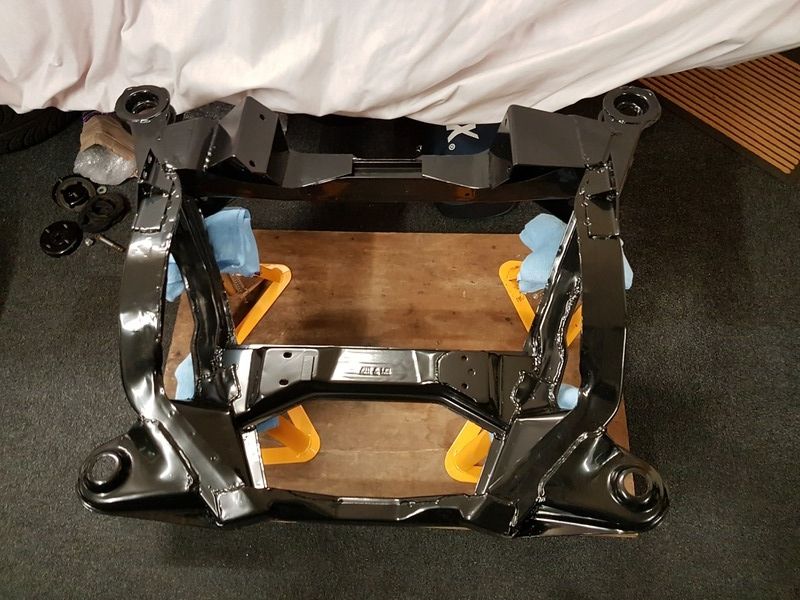
I started with the angle brackets which the upper wishbone pivot goes through. I figured that as this is required to move freely that it would be worth applying a bit of grease to the shaft of the long bolt, movement is certainly smoother as a result. The only problem I had with these brackets was having the wrong length bolts so I fitted some 3" ones and then replaced them when the corrects shorter ones arrived.
So far I've added just the one camber shim. When I took the old subframe apart I had 2 thick shims each side but the car had been lowered quite a bit. I've fitted one for now and then I can adjust once I've got the engine in the car and set my suspension set to the final height.
I then added the upper ball joints. I had several sets to choose from, in the end I opted for some Motorcraft branded ones. As these are not re-greaseable I whipped off the gaitors and worked some grease into the joint as best I could. I'm still debating swapping them as they are surprisingly stiff vs some others I have. I do have some Stanpart ones which are re-greasable and seem less stiff so I might yet swap them. Upper wishbones are new old stock fitted with Superflex polyurethane bushes.
Lower wishbones are again new old stock items fitted with the correct joint/bush. I chose not to have these powder coated as I wasn't sure it could be done without damaging the bushes so I simply masked off the bushes and spray painted them with chassis black. You can't really tell the difference!
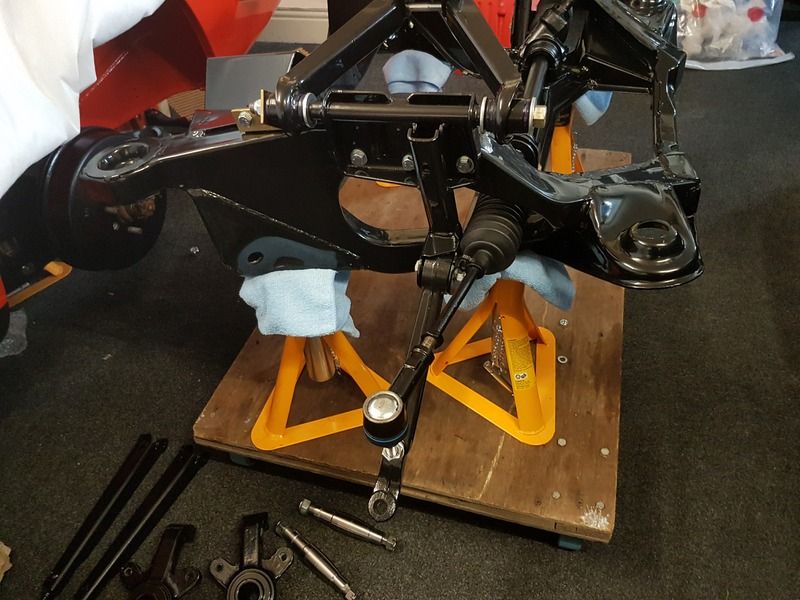
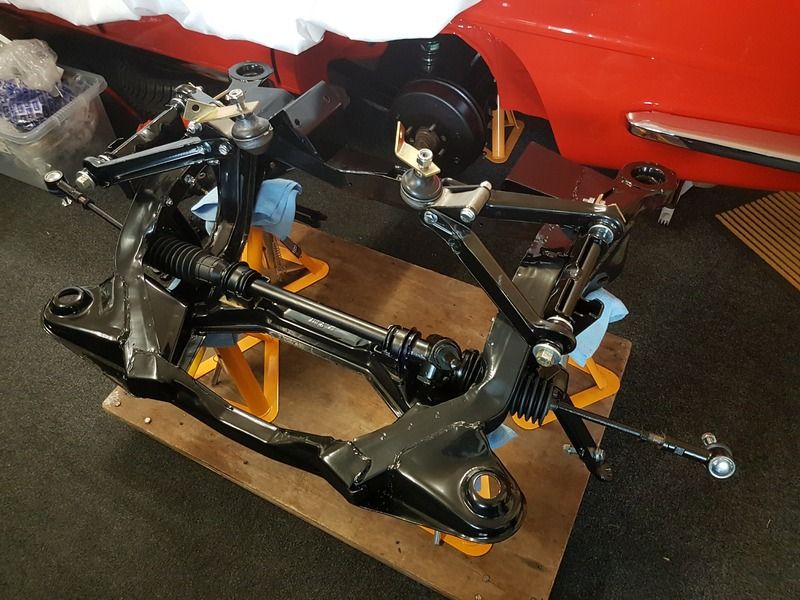
I then hit a bit of a wall in terms of being missing some correct sized bolts and washers so couldn't fit the drag struts and I was also missing some correct sized washers for the stub axles on the uprights so instead opted to fit the steering rack. This is a club re-conned unit so should be good. It fitted up quite easily using new brackets and Superflex bushes. I also added the track rod ends, again I worked some grease into the joints before fitting. I thought I had some re-greasable ones somewhere but perhaps I didn't actually buy them after all. One side of the rack doesn't have the best thread on it so I might run a die down it, though typically I don't have one of the right size.
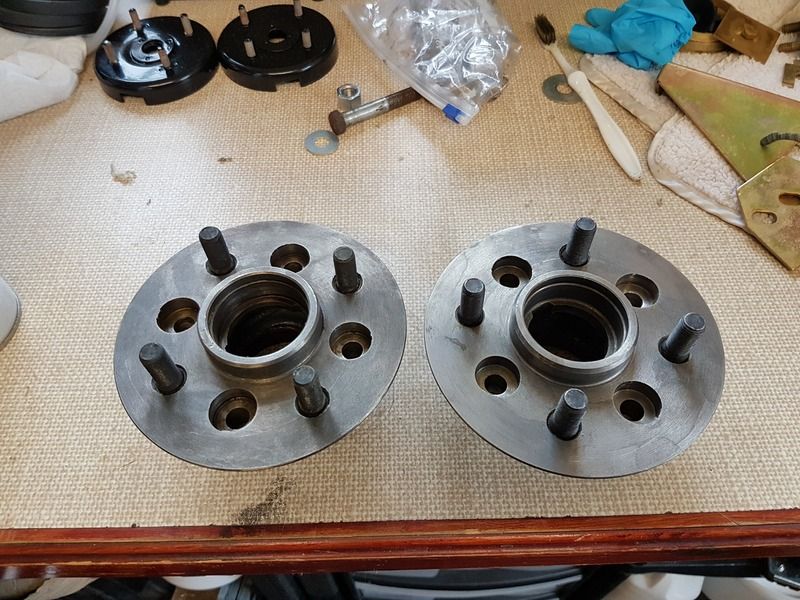
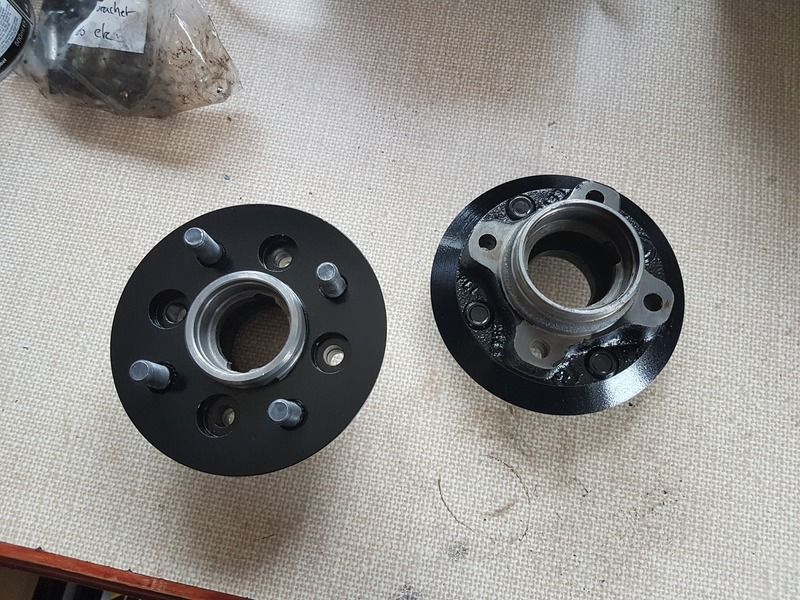
Whilst I wait to pick up some bolts and bits from work I had time to spare so decided to paint the front hubs. These are from Mick Dolphin and came with the correct sized studs, unlike my existing ones. They came covered in storage grease but were unpainted so after a soak in some de-greaser and a little more work with some brake cleaner and a cloth they were ready for masking and painting. I had some spare brake calliper paint so used that, it's tough and doesn't require a primer. I cured the paint in the oven and they look good. I have new bearings to fit to these, somewhere I have some old outer races I can use to assist the fitting. Sadly my press is at my parents in Bristol so I might have to borrow the one at work. I figure a press is a bit easier than using a big hammer and lump of wood!