The Triumph Dolomite Club - Discussion Forum

The Number One Club for owners of Triumph's range of small saloons from the 1960s and 1970s.
It is currently Tue Apr 16, 2024 5:16 pm

All times are UTC+01:00


Post new topic  Reply to topic  [ 46 posts ]  Go to page Previous 1 2 3 4 Next
Author Message
PostPosted: Sun Feb 23, 2014 11:12 am 
Offline
Future Club member hopefully!
User avatar

Joined: Tue Oct 03, 2006 5:42 pm
Posts: 3936
Location: Forest of Dean
Quote:
Toledoman- I would have sworn blind that you're supposed to get the engine up to running temp before setting the valve clearences? :shrug:
TM is correct, stone cold.

_________________
1978 Pageant Sprint - the rustomite, 1972 Spitfire IV - sprintfire project, 1968 Valencia GT6 II - little Blue, 1980 Vermillion 1500HL - resting. 1974 Sienna 1500TC, Mrs Weevils big brown.


Top
   
PostPosted: Tue Feb 25, 2014 10:01 am 
Offline
Future Club member hopefully!

Joined: Thu May 17, 2012 9:34 pm
Posts: 867
Hi Ben
You need a big puller and plenty of leverage to get the bottom pulley off - it can be a bit of a nightmare.. I think there is a proper puller made for the job - maybe someone on here has one they would lend you? I think its quite likely the timing is out - it sounded like it to me. I have a strobe light here if you want to reset it properly.
Give me a shout when your in Norwich..
Matt.


Top
   
PostPosted: Tue Feb 25, 2014 6:02 pm 
Offline
TDC Member
User avatar

Joined: Wed Sep 27, 2006 10:59 am
Posts: 1500
Location: Coventry
Proper puller here in Coventry, loan may be arranged

_________________
BWJ
1966 Triumph 1300 Royal Blue
1966 Triumph 2000 Blue
1965 Triumph 2000 black and rust
1967 BSA B40wd green
2018 Jaguar E pace 2018
NOBODY expects the Canley Inquisition!


Top
   
PostPosted: Wed Feb 26, 2014 7:15 pm 
Matt- I will be in Norwich from 28th-31st of March. I have 2 gigs and my sister's birthday happening in those 4 days, but there will be plenty of time to play with cars!

Triumph1300- Given you aren't too far from me, I'll PM you about loaning the puller once I've sorted my dodgy steering, so that I can pick it up.


I put my stamp on the 1500 yesterday; furry dice in the back window, a plastic rat on the parcel shelf, and...
Image
...a bumper sticker! :mrgreen:


That's the important stuff dealt with, so on to the hard bit. I pulled the spark plugs and...
Image
Image
Image
Looks pretty pink to me. Good detective work people! I decided I'd have a crack at fixing the timing myself. Scouring the manuals I figured it would be easy work, but I fell at the first hurdle. The manual told me to turn the adjusting screw on the distributor until half of the scale on the vacuum advance was exposed, but mine doesn't have a scale:
Image
What do you suggest? Also why doesn't it have the scale on it?

A few bits and bobs I ordered have arrived, including an oil filter. It's a WIX brand, 'WL7213', this is right, right?


Thanks for reading


Top
   
PostPosted: Wed Feb 26, 2014 7:29 pm 
Offline
Future Club member hopefully!

Joined: Thu May 17, 2012 9:34 pm
Posts: 867
You need a strobe light... handily i have one.
:D
Prob be about most of Saturday if you want to play..


Top
   
PostPosted: Fri Feb 28, 2014 1:13 pm 
Hi Ben,

Glad to see you're getting on with the project. Give me a call today re the tools you need.

Projectorcat :!:


Top
   
PostPosted: Fri Feb 28, 2014 4:45 pm 
Offline
Future Club member hopefully!

Joined: Mon Feb 02, 2009 1:38 pm
Posts: 107
Location: Watford
The scale is usually on the vacuum advance bit but if it has been replaced it may no longer be there. Just work out where the mid point is and leave it there, set the timing and then use the fine adjustment on the thumbwheel to adjust if needs be on the strobe, it's basically a method of fine tuning the timing. you can advance or retard it in a limited way just by the thumbwheel

Hope this helps

Iain
Quote:
Matt- I will be in Norwich from 28th-31st of March. I have 2 gigs and my sister's birthday happening in those 4 days, but there will be plenty of time to play with cars!

Triumph1300- Given you aren't too far from me, I'll PM you about loaning the puller once I've sorted my dodgy steering, so that I can pick it up.


I put my stamp on the 1500 yesterday; furry dice in the back window, a plastic rat on the parcel shelf, and...
Image
...a bumper sticker! :mrgreen:


That's the important stuff dealt with, so on to the hard bit. I pulled the spark plugs and...
Image
Image
Image
Looks pretty pink to me. Good detective work people! I decided I'd have a crack at fixing the timing myself. Scouring the manuals I figured it would be easy work, but I fell at the first hurdle. The manual told me to turn the adjusting screw on the distributor until half of the scale on the vacuum advance was exposed, but mine doesn't have a scale:
Image
What do you suggest? Also why doesn't it have the scale on it?

A few bits and bobs I ordered have arrived, including an oil filter. It's a WIX brand, 'WL7213', this is right, right?


Thanks for reading


Top
   
PostPosted: Tue Mar 11, 2014 12:13 pm 
Offline
Future Club member hopefully!

Joined: Thu May 17, 2012 9:34 pm
Posts: 867
Hi Ben
Nice to meet you and the car on Sunday. Hopefully its running a little better now and the work we did was worthwhile.. Give us a look next time your about, we can see about getting some more done.
Matt.


Top
   
PostPosted: Wed Mar 12, 2014 6:30 pm 
Thanks for your help Matt, was great to spend some time with an actual car enthusiast (most of my friends aren't). Other Matt was a laugh too. The car is running much better now. Good luck with your MoT, not that you need it!

I'll do an update on the car soon, for anyone interested.


Top
   
PostPosted: Wed Mar 12, 2014 7:16 pm 
Quote:
for anyone interested.
Yes please. :)


Top
   
PostPosted: Wed Mar 12, 2014 7:18 pm 
Offline
Future Club member hopefully!
User avatar

Joined: Tue Oct 03, 2006 5:52 pm
Posts: 7567
Location: Halifax, West Yorkshire
Please keep the updates coming.

_________________
Toledo Man

West Yorkshire Area Organiser & forum moderator
Meetings take place on the first Wednesday of the month at 8.00pm at The Old Brickworks, Wakefield Road, Drighlington, Bradford, BD11 1EA

1972 Dolomite 1850 auto (NYE 751L - Now for sale)
2003 Volvo XC90 D5 SE (PX53 OVZ - The daily driver)
2009 Mercedes-Benz W204 C200 CDI Sport (BJ58 NCV - The 2nd car)
1991 Toyota Celica GT (J481 ONB - another project car)
Former stable of SAY 414M (1974 Toledo), GRH 244D (1966 1300fwd), CDB 324L (1973 1500fwd), GGN 573J (1971 1500fwd), DCP 625S (1977 Dolomite 1300) & LCG 367N (1975 Dolomite Sprint) plus 5 Acclaims and that's just the Triumphs!

Check my blog at http://triumphtoledo.blogspot.com
My YouTube Channel with a bit of Dolomite content.

"There is only one way to avoid criticsm: Do nothing, say nothing and BE nothing." Aristotle


Top
   
PostPosted: Fri Jun 27, 2014 11:01 pm 
Offline
Future Club member hopefully!

Joined: Thu May 17, 2012 9:34 pm
Posts: 867
Nice to see you today again Ben - car is running very sweetly! Impressed....
Matt.


Top
   
PostPosted: Sun Dec 07, 2014 1:30 am 
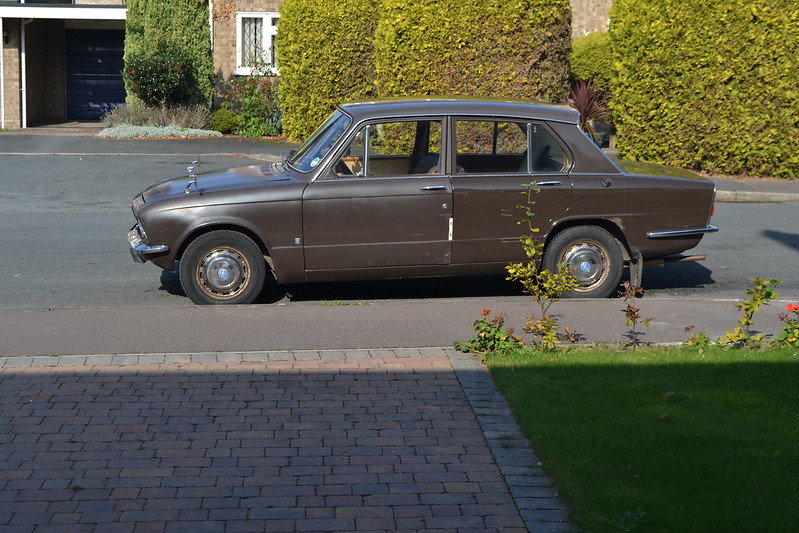
Time for a well-overdue update. Let's see how much I can remember... :-k

The car has been surprisingly reliable for a cheap banger, and is pretty solid underneath. Most noticeable problems I've had are:
-Sticking float valve
-Intermittently working starter motor
-Horns not working
-Most of the electronics failing
-Knocking, squeaking, bouncing, wallowing suspension
-Steering woes (potentially lethal)
-Rust
-Water leaks everywhere

So, carb saw some attention and is better, the 'hold' part of the starter solenoid needed re-soldering, the wire to one horn (which had been cut by a PO for no apparent reason) was fixed and the other horn taken apart and cleaned up, the fuse seats and terminals were cleaned, utterly useless and entirely knackered front shocks replaced with shiny old-stock and some welding has been done.

To add to the list of work carried out; the brake system was overhauled with new master cylinder seal (old one leaked), the brake flexi-hoses all replaced and new fluid, plus lots of sanding, kurusting, zinc primering and top coating of rust bubbles (still on-going, sort of). Rather alarmingly this car has been running around since '06 with an all-original brake system. Even more incredibly, I've been to two separate MoT stations (don't ask) with horribly cracked brake lines and spongy brakes without either picking up on it!

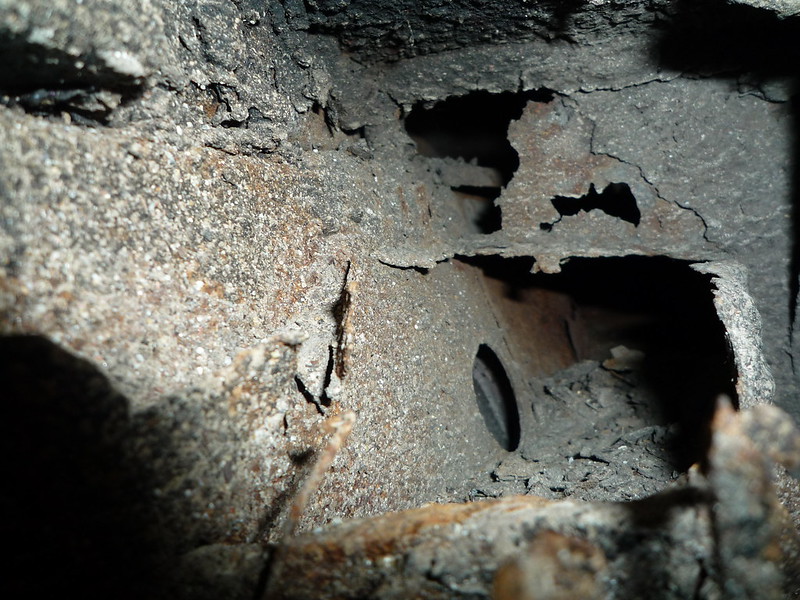
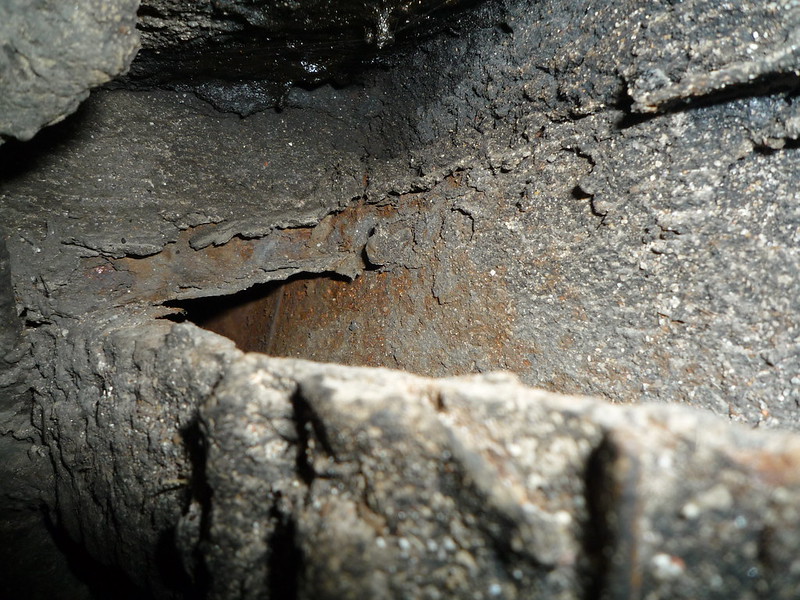
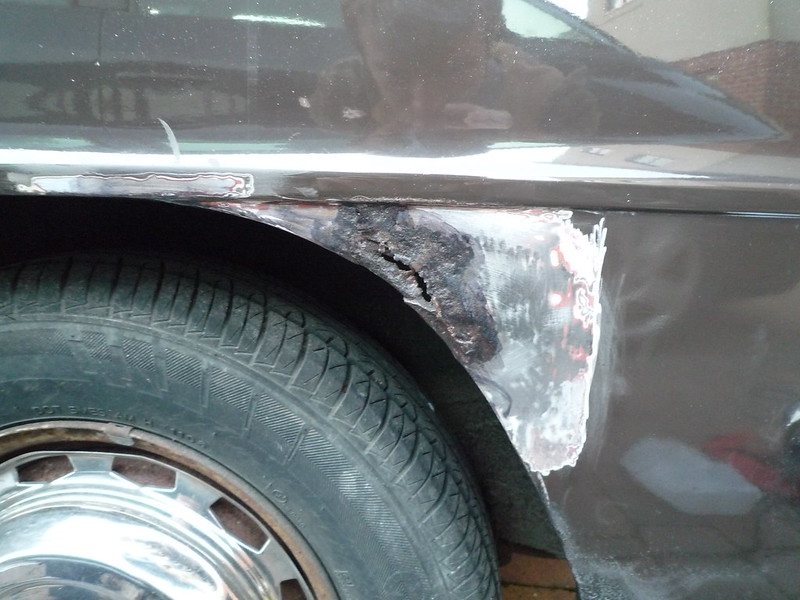
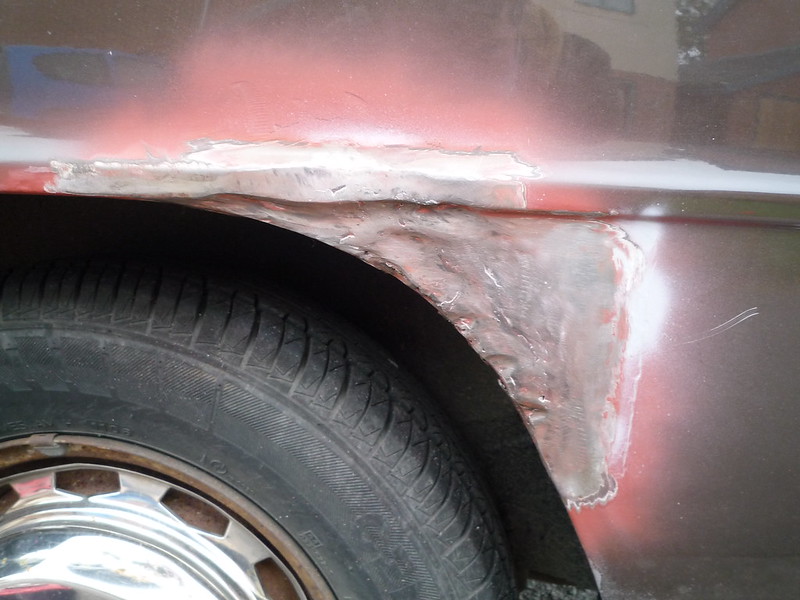
I had to get some welding done to the rear arches to get it through the MoT, which was BS tbh because the holes were nowhere near anything structural. What a fuss that caused. Hole in the sill needed seeing to too. More rusty holes were found in the arches whilst I was kurusting etc and was dealt with by Matt on a friend's drive whilst I stood around trying to look useful. I recently found a small 2" long hole in the chassis rail under the passenger footwell, shouldn't be a big problem to fix. The worst I've found so far is the inner-wing supports in the front wheel arches. Fortunately Matt and I managed to remove a rust-free pair from a scrap Dolly along with a pair of plastic guards which will replace the metal ones behind the front wheels. That's a job for another day though...

So up to the last week then. Whilst Elwood has yet to leave me at the mercy of the AA, my luck has finally run out. I realised that there was an excessive amount of moisture coming out of the exhaust, and took a look inside the expansion tank. Bubbles. I've noticed that every time I fix a leak in the cooling system, it will pressurise for a trip or two and then lose pressure again. Considering this and having taken a second look at the video I uploaded to the forum previously I reckon the head gasket has been blown since long before I've owned it. Quite amazing how many miles I've racked with a 1 1/2L kettle! :lol: I'm having issues with water getting into the front footwells, and yes I've cleaned out the bulkhead drains. The boot has some leaks too and I'm having a terrible problem with condensation on the front and rear windows. The temp gauge has given up, and the clutch is rattling badly. But worst of all was the new steering coupling, which I only meant to use as a temporary solution, snapped. Luckily that was whilst inspecting it, not hurtling down a country road with a car-load of friends :shock: Also I snapped one of the windscreen washer line T-junctions, but whatever. I've ordered superflex bushes to restore the original steering coupling, and drive doughnuts.

So with all that said, it sounds like this car has been trouble, but for what it is, it's been anything but. I've had great fun with it, even going to Hungerford and back with a friend to spend a few days with another friend. Conveniently that was when the starter decided to play up. Luckily we had another car (dodgy British chavved up Rover MG with mesmerisingly shiny paint) and two people to push when we decided to use mine. I moved back to Norwich after dropping out of Uni and have to manufacture excuses to use my car now; it's done very few miles since I've moved back but that's not helped by lack of 'J' word (read: job).
I should say that many of the jobs done so far have been done by or with the help of Matt. He has been very very helpful and not once mocked my paintwork or interior or lack of glovebox or the fact that my house has chimneys and his doesn't :---) :mrgreen:

Time for some pics.

Somehow someone put the cover back on with one of the bolts on the wrong side of the plate. Clever.
Image

The source of the rattle that lead me to replace the timing chain. Oh well, it needed doing.
Image

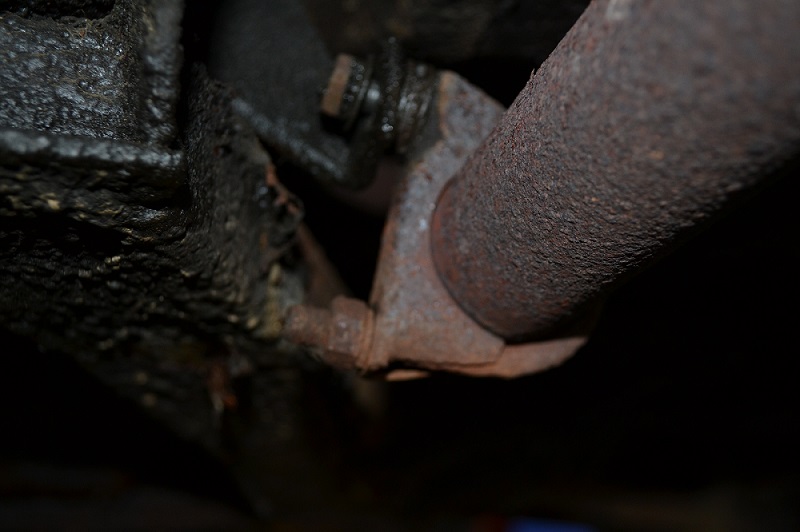
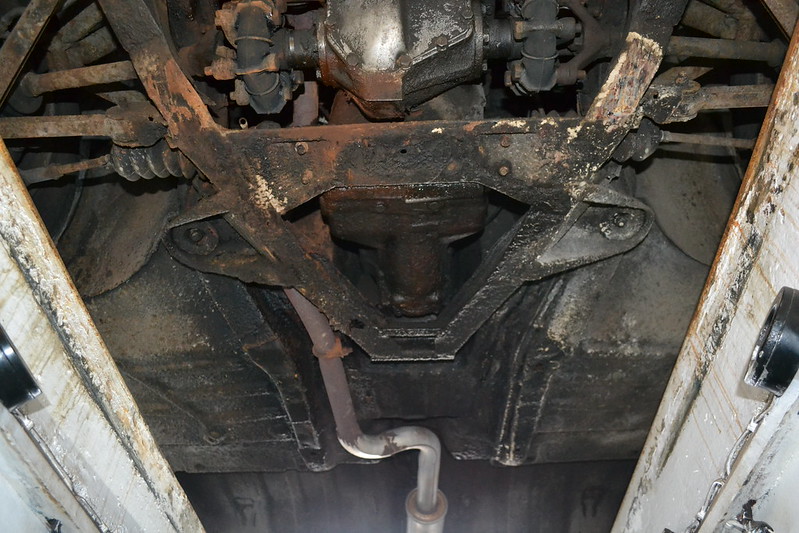
Took advantage of the MoT stations' inspection pit to take some pics and tighten that loose exhaust clamp.
Image

Amazingly bad bit of exhaust welding. Wonder how many horsepower I'm losing in that bend alone?
Image

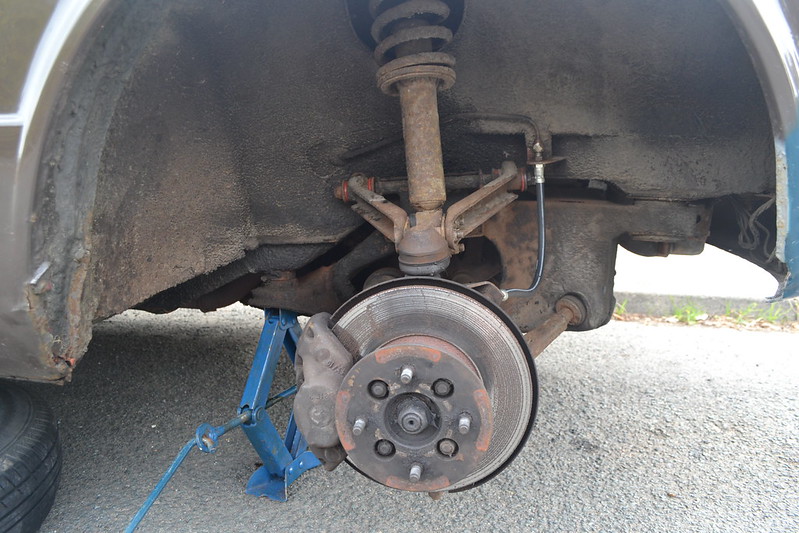
Lovely new brake hoses and some new bushes too. Shocks have since been replaced and are a vibrant blue.
Image

Half way through T-Cut and waxing.
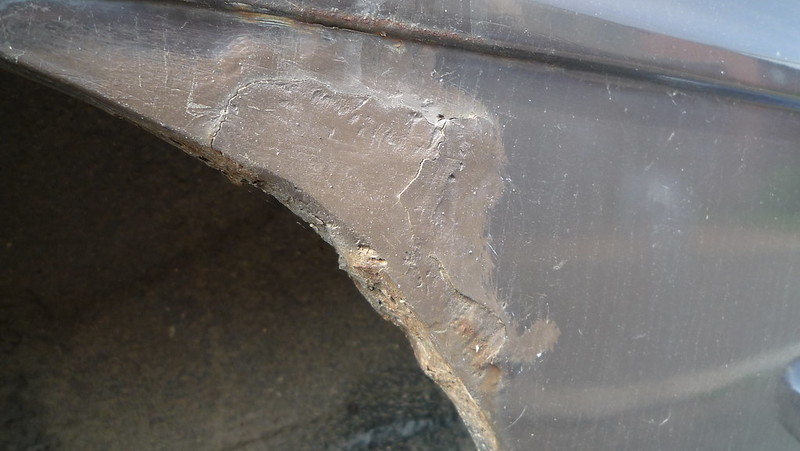
Image

Horror!
Image

Factory fresh! The rest of the car? Pillaged. Rusty.
Image

Eugh!
Image

Mmmm...
Image

Under the petrol tank. Same the other side. Fixed for MoT.
Image

Image

Hmm...
Image

Fresh steel.
Image

Getting there...
Image

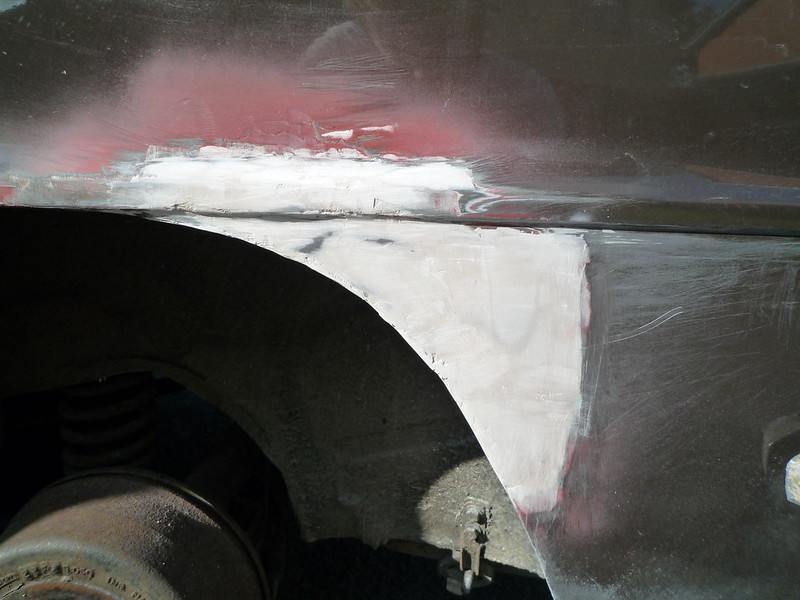
Not perfect, but solid. Pretty pleased with that.
Image

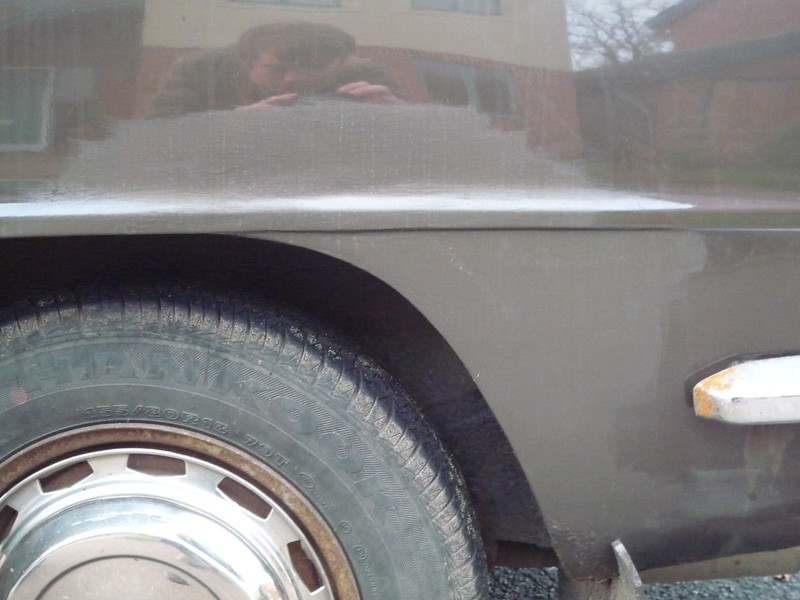
Other side needed doing too.
Image

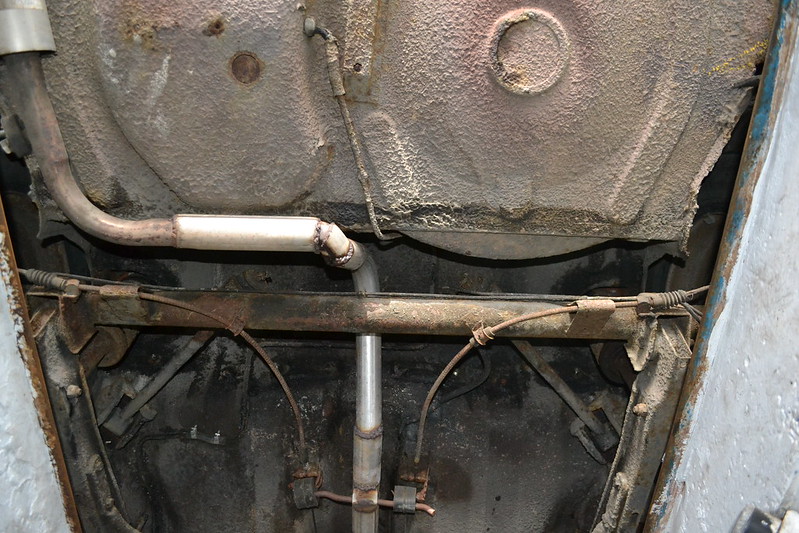
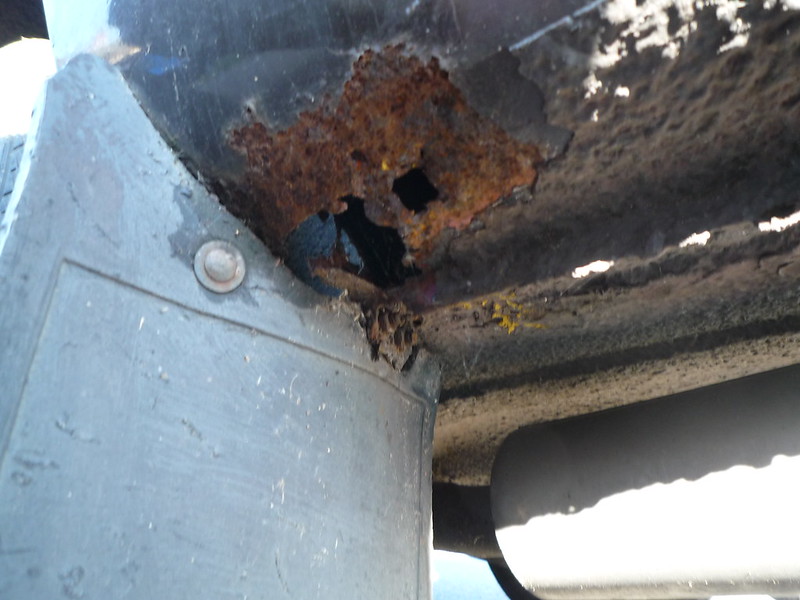
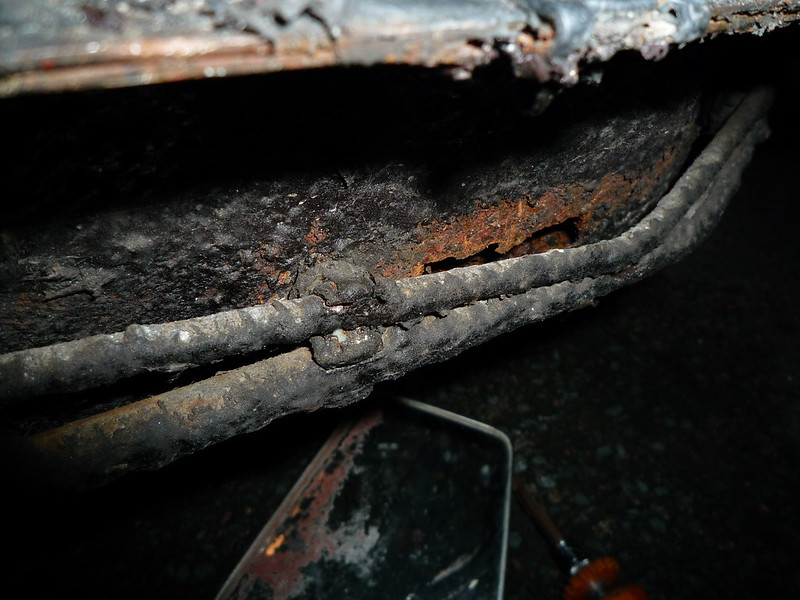
This needs attending to. Funny how the lines shielded the chassis from the underseal, causing the rust.
Image

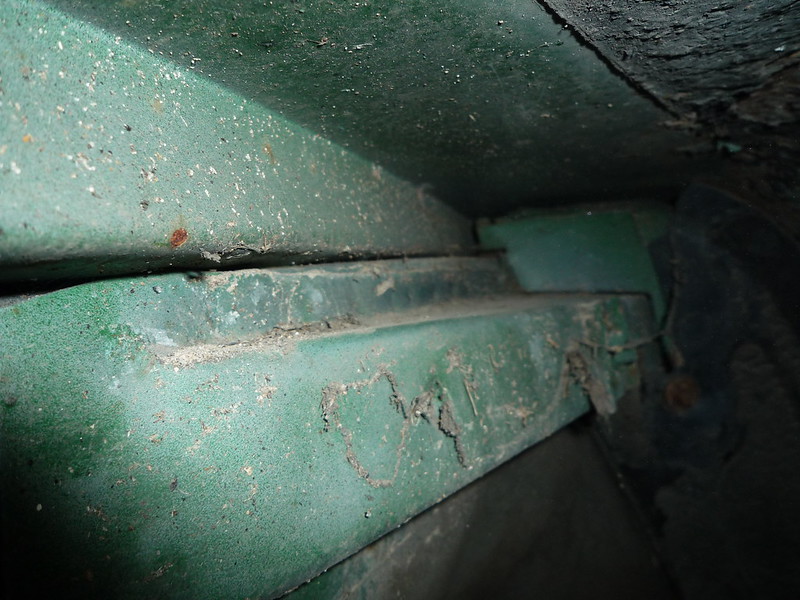
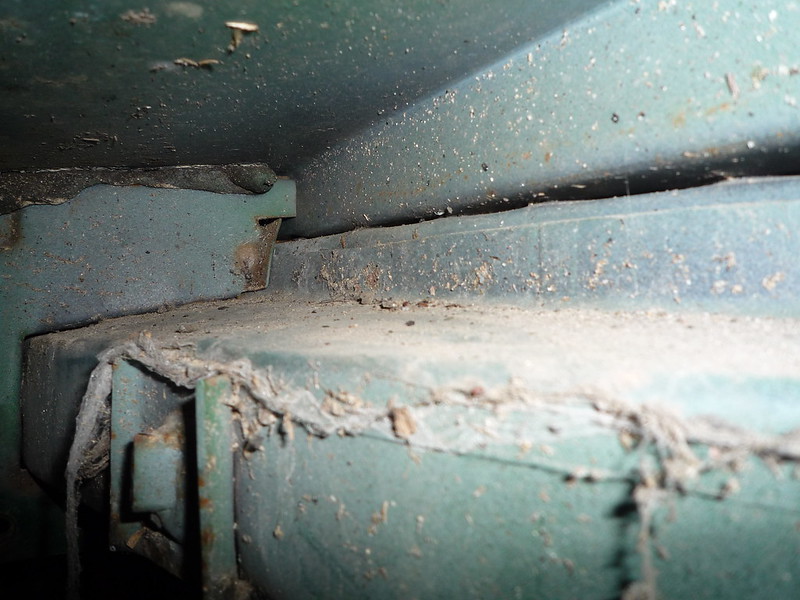
One of the places water was getting in was around the gearbox tunnel, which was held on by 3 bolts. Water draining out of the bulkhead ran down and seeped through the gap.
Image

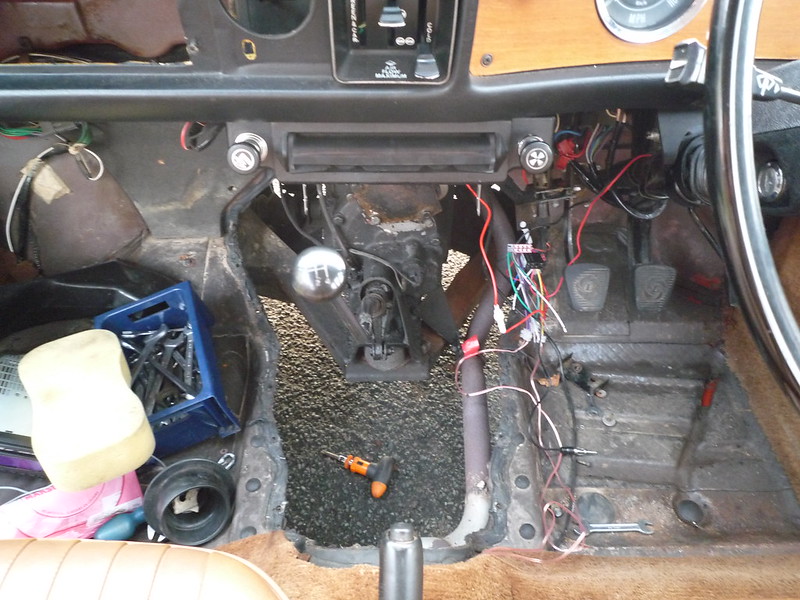
There's an awful lot of slop in the gearstick, caused by that bottom joint. It needs a collette and some washers to sort it out.
Image

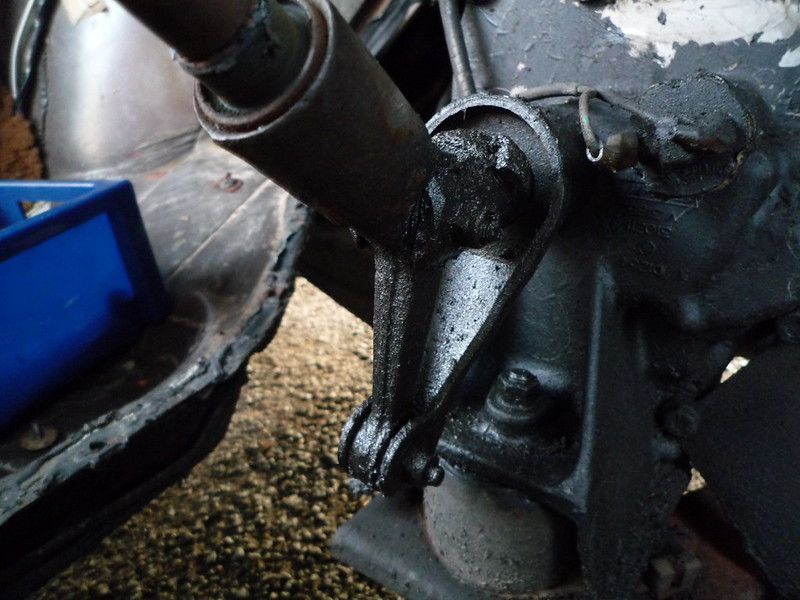
I asked my Dad to turn the steering wheel side-to-side so that I could see if it was the bushings that had perrished, and I watched the bolt sheer and disappear. This is the stuff of nightmares.
Image

I've fitted a radio and speakers (22nd birthday present) and enlisted the help of my youngest sister to make a cover for the new parcel shelf. I think it's fantastic!
Image

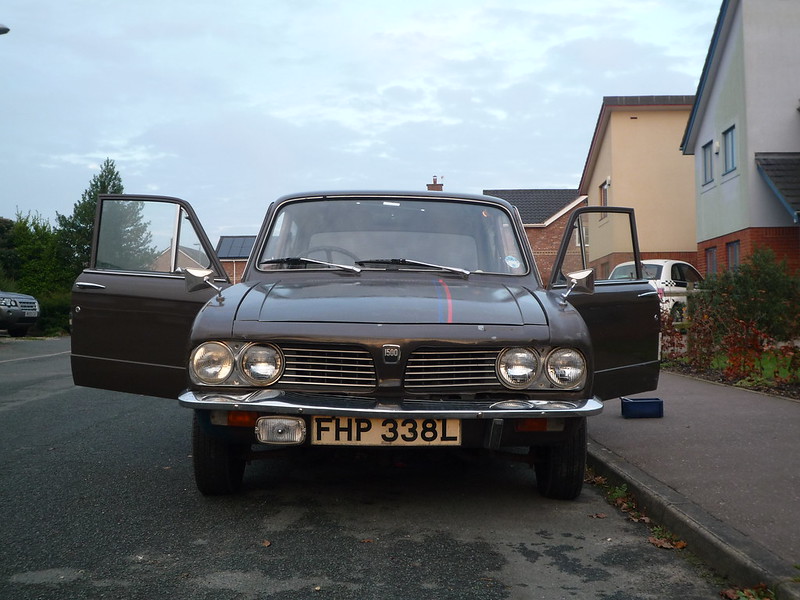
A final picture for you (for now). The spot lamp was a £10 purchase from the NEC, which was epic by the way. I now have myself a Dolomite mug (not a Sprint one I should add!).
Image

I'm sure I've forgotten a few things, but I'll add them in another update. One question I have is about the head gasket that I need, apparently there's more than 1 to choose from, even though 1300s and 1500s have the same bore. Can anyone shed some light on that one? I need to get it replaced ASAP, probably get a head skim depending on what I find when I get it apart.

I'll probably write up a list of bits that I need and post it in 'Wanted', and link it to here. I urgently need a driver's door seal, and would like a 1300fwd steering wheel, not that Father Christmas is listening :(

Wordy, I know, but if you've made it this far, congratulations! :sozzled: Thanks for reading.


Top
   
PostPosted: Sun Dec 07, 2014 10:58 am 
Offline
Future Club member hopefully!

Joined: Thu May 17, 2012 9:34 pm
Posts: 867
Quote:
Matt. He has been very very helpful and not once mocked my paintwork or interior or lack of glovebox or the fact that my house has chimneys and his doesn't :---) :mrgreen:
:lol:

I like your glovebox. Its... capacious. Not that great at being a glovebox though.


Top
   
PostPosted: Sun Dec 07, 2014 4:30 pm 
Thanks for the update :-)


Top
   
Display posts from previous:  Sort by  
Post new topic  Reply to topic  [ 46 posts ]  Go to page Previous 1 2 3 4 Next

All times are UTC+01:00


Who is online

Users browsing this forum: No registered users and 18 guests


You cannot post new topics in this forum
You cannot reply to topics in this forum
You cannot edit your posts in this forum
You cannot delete your posts in this forum
You cannot post attachments in this forum

Search for:
Jump to:  
Powered by phpBB® Forum Software © phpBB Limited