The Triumph Dolomite Club - Discussion Forum

The Number One Club for owners of Triumph's range of small saloons from the 1960s and 1970s.
It is currently Tue Mar 19, 2024 6:50 am

All times are UTC


Post new topic  Reply to topic  [ 589 posts ]  Go to page Previous 134 35 36 37 3840 Next
Author Message
PostPosted: Mon May 16, 2016 3:34 pm 
Offline
TDC Member
User avatar

Joined: Wed Jul 04, 2007 12:27 pm
Posts: 1904
Location: Hampshire
I was trying to avoid the selfies! :lol:

I'm not doing another one, this took me ages!


Top
   
PostPosted: Mon May 16, 2016 3:44 pm 
Offline
TDC Member
User avatar

Joined: Sat Apr 12, 2014 11:02 pm
Posts: 2279
Location: Nr Kenilworth
Quote:
I was trying to avoid the selfies! :lol:

I'm not doing another one, this took me ages!

Yes put some trousers on next time :lol:

Lovely finish BTW :thumbsup:

Tony

_________________
Membership 2014047


Top
   
PostPosted: Mon May 16, 2016 3:58 pm 
Offline
TDC Member
User avatar

Joined: Mon Nov 07, 2011 9:57 am
Posts: 713
Location: Dorset
Your sump has a better paint finish than the bdoy of most of the cars I've owned.


Top
   
PostPosted: Mon May 16, 2016 6:16 pm 
Offline
Future Club member hopefully!
User avatar

Joined: Thu Oct 06, 2011 1:13 am
Posts: 3173
Location: The continent
Quote:
Quote:
I was trying to avoid the selfies! :lol:

I'm not doing another one, this took me ages!

Yes put some trousers on next time :lol:

Lovely finish BTW :thumbsup:

Tony
I thought that was the dipstick.

Jeroen

_________________
Classic Kabelboom Company. For all your wiring needs. http://www.classickabelboomcompany.com


Top
   
PostPosted: Mon May 16, 2016 6:54 pm 
Offline
Future Club member hopefully!

Joined: Tue Oct 03, 2006 9:45 pm
Posts: 11179
Location: Middlesex
What's that awful rap song at the end of the fast and furious film's

THAT'S HOW WE ROOO__OOO__OOO___OLL
That's how we roll....

Love it...

Jonners

_________________
Note from Admin: sadly Jon passed away in February 2018 but his humour and wealth of knowledge will be fondly remembered by all. RIP Jonners.


Top
   
PostPosted: Wed May 18, 2016 9:31 pm 
Offline
TDC Member
User avatar

Joined: Wed Jul 04, 2007 12:27 pm
Posts: 1904
Location: Hampshire
Please take your shoes off before getting in the car, you'll scuff my pedals!

A quick update before the weekend. I needed the throttle pedal back together before doing the bulkhead repair so I could test it fitted ok, this then extended to everything that was enamelled so I got the handbrake and the other pedals done as well.

All the pedals have been stripped, media blasted, enamelled and reassembled with new rubbers and all joints have been regreased.

Throttle pedal...

Image

Back together including a new nos rubber, I found it helps to heat the rubber in boiling water to soften it before fitting it. I haven't used any glue either.

Image

Detail how the spring fits, the wavy washer goes on the right hand side.

Image

Clutch pedal...

Image

Image

Image

Brake pedal...

Image

Image

Image

Handbrake...

Image

Image

Image

The mounting was previously replated with the other bits I had done. The ratchet plate (bit with the teeth on) is the original just cleaned up. There is some flash rust on it but I dont want to blast it as it will prevent the handbrake from operating smoothly, it has thoroughly cleaned and inspected and there is no wear or pitting so it has been greased and refitted.

Image

The gator and grip are the originals, just cleaned up. Fit the gator before the grip otherwise you'll never get it on! To fit the grip I heated it in boiling water to soften it then slid it on with some fairy liquid in water solution.

Image

That's it for now.


Top
   
PostPosted: Wed May 18, 2016 9:55 pm 
Offline
Future Club member hopefully!
User avatar

Joined: Wed Jul 22, 2015 12:58 pm
Posts: 1293
Location: London
I think it's illegal to drive barefoot, you'll have to get some Sprint logo slippers made 8)

So when does your Haynes manual ( sorry James manual )get printed ?

_________________
NRW 581W Sprint


On the motorway no one can hear me sing!
Construed as a public service, self preservation in reality.


Top
   
PostPosted: Thu May 19, 2016 3:56 am 
Offline
TDC Member
User avatar

Joined: Sat Apr 12, 2014 11:02 pm
Posts: 2279
Location: Nr Kenilworth
Lovely work James :thumbsup:

Tony

_________________
Membership 2014047


Top
   
PostPosted: Fri May 20, 2016 7:42 pm 
Offline
TDC Member
User avatar

Joined: Wed Jul 04, 2007 12:27 pm
Posts: 1904
Location: Hampshire
Thanks Tony, and Mahesh I've chosen some special zebra print driving shoes, they will live in the car! :D

On to the bodywork and I am very happy with this afternoons progress mainly because it represents the start of the final big jobs before I can get the car back together, I think I can see a speck of light at the end of the tunnel!

First of all I'll apologise for the quality of the photos, I'm trying to work out the best way of photographing this process and the garage still isn't completely finished yet!

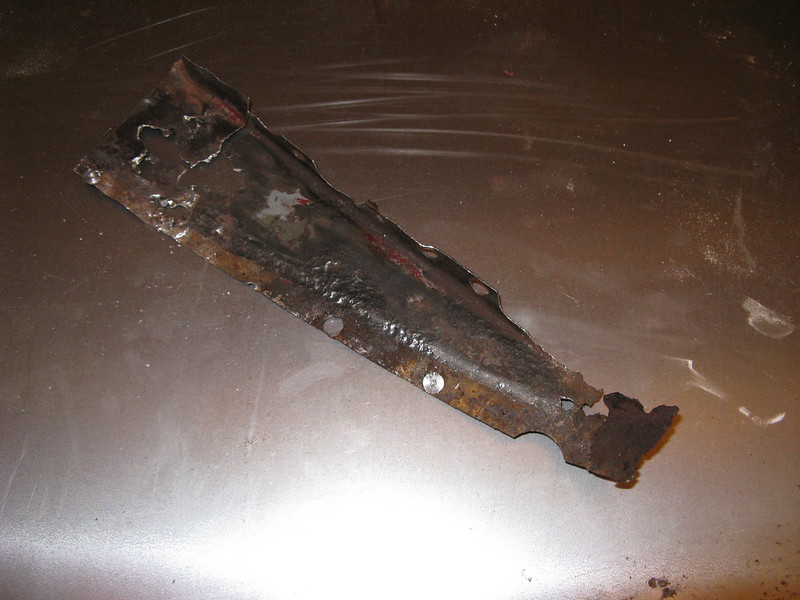
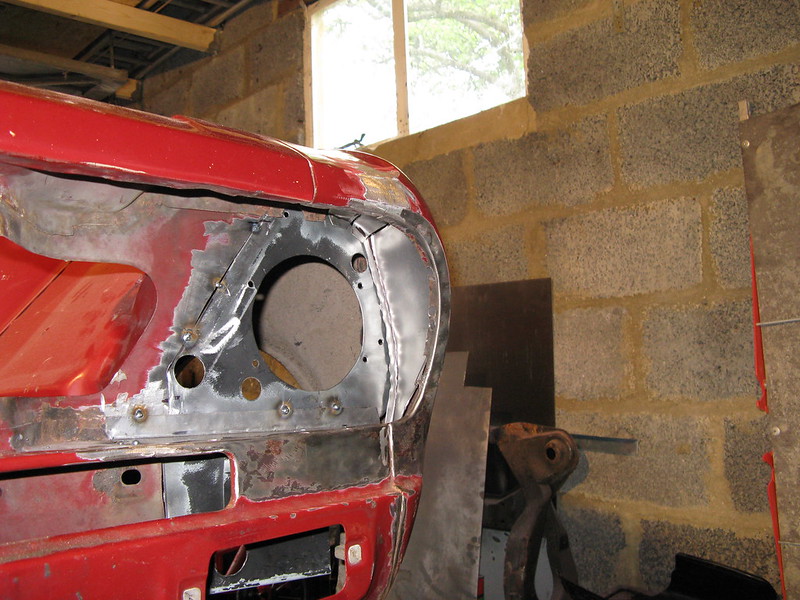
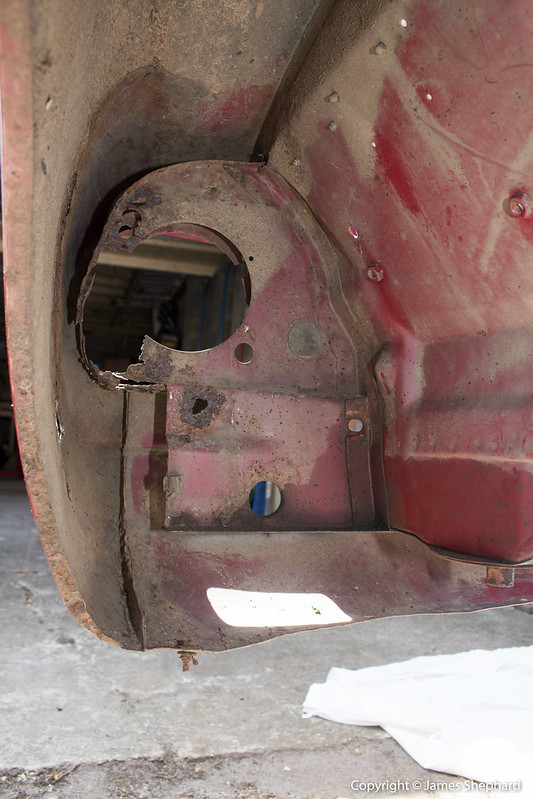
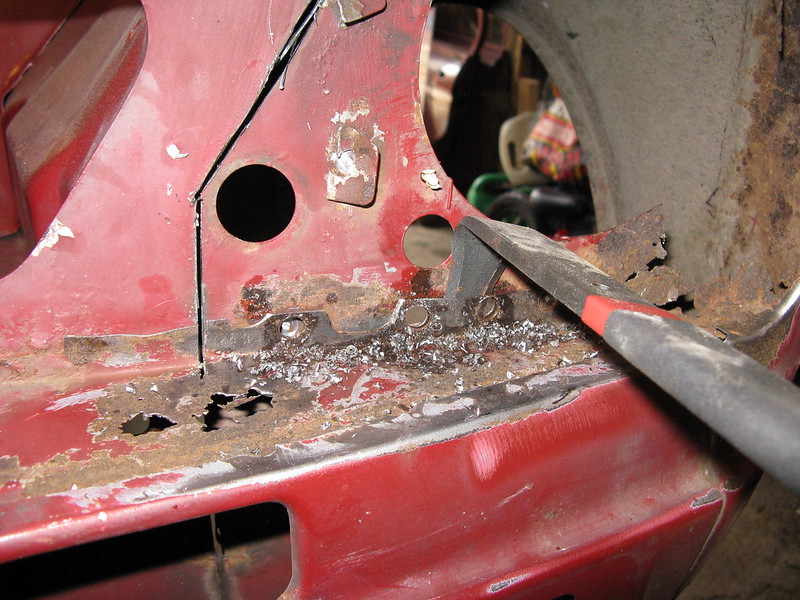
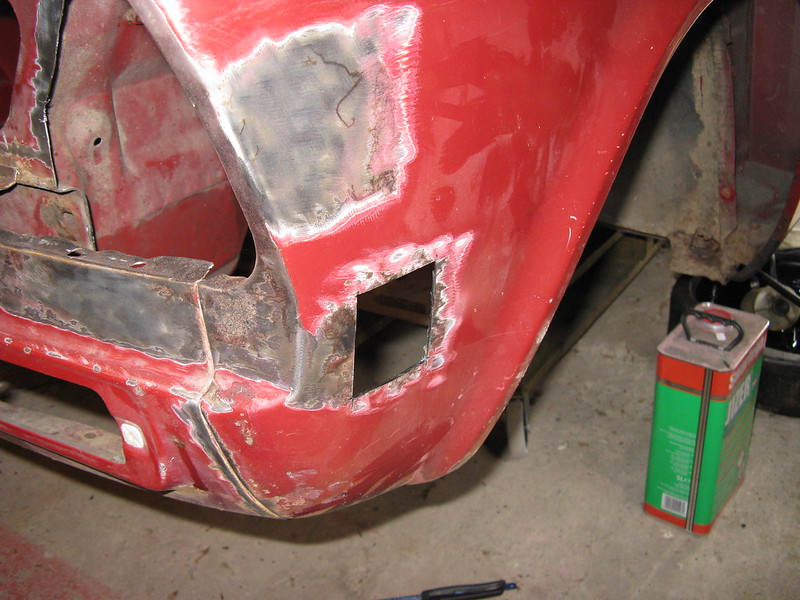
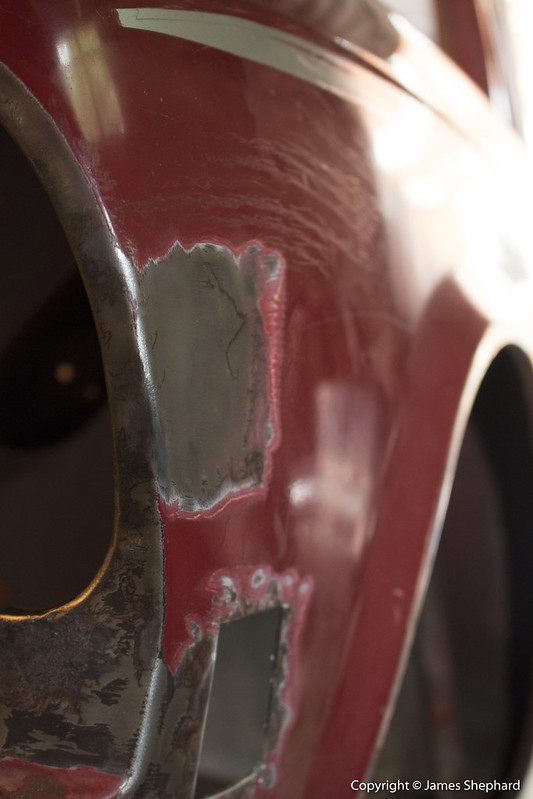
After a long agonise about whether or not I will have to take the wing off I decided to replace the near side inner panel with the wing on. The rust was pretty bad this side and most of the outer panel had completely disappeared along with the outer part of the eyebrow and the majority of the inner section.

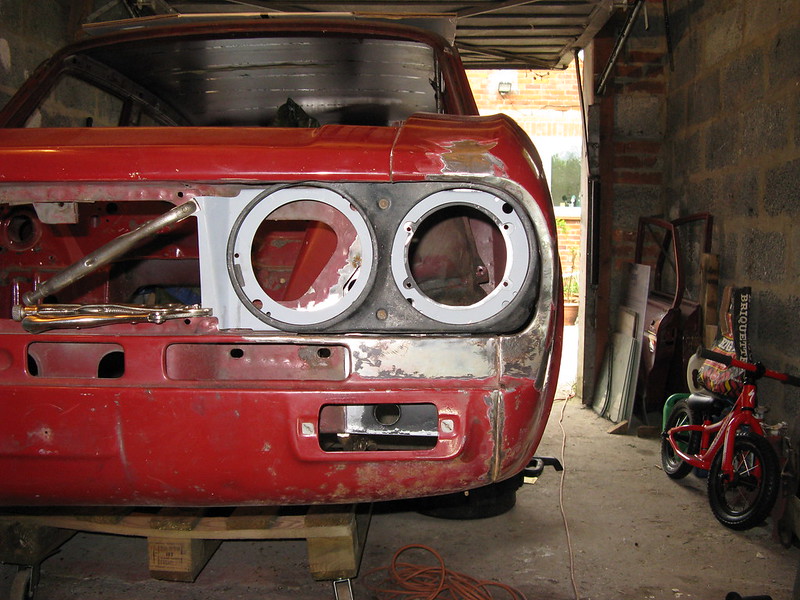
So as a recap this is basically what we started with...

Image

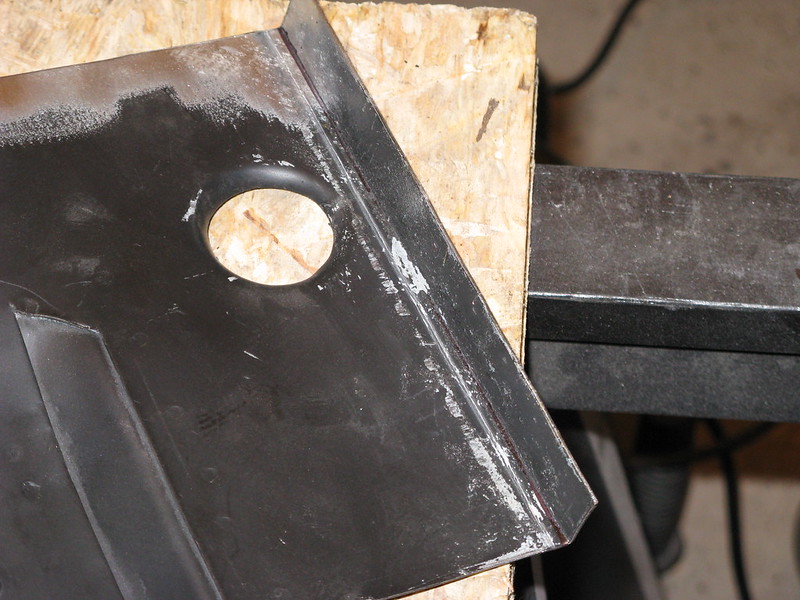
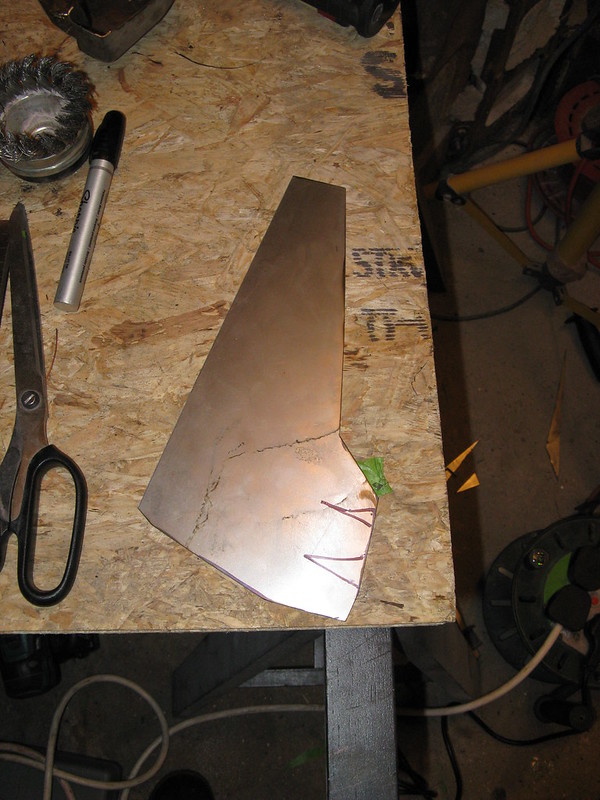
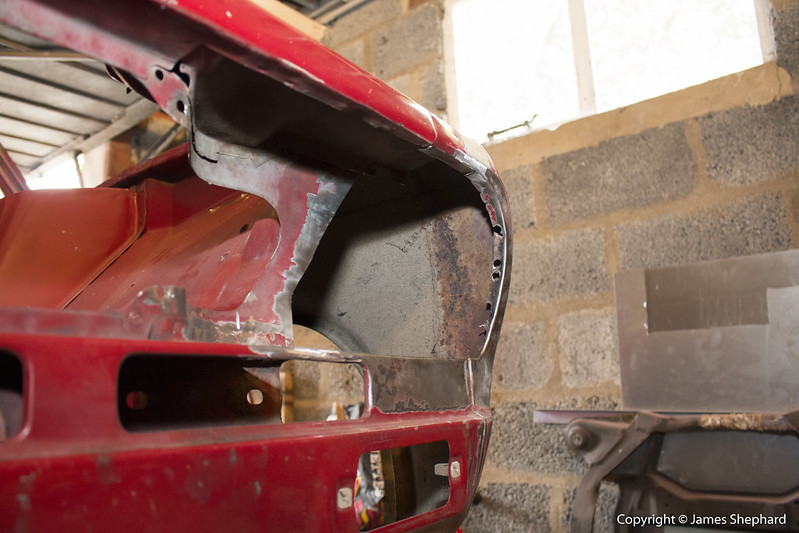
I needed a template to know how much of the old panel to remove so with some measuring I took the club repair section and sliced off the area that I didnt need as close to the join to the inner wing as I could.

Image

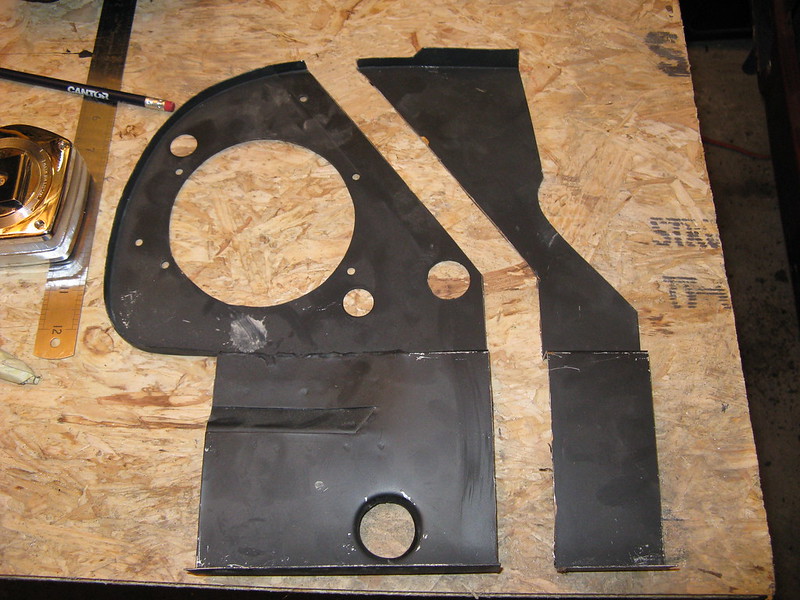
The used this as a template on the existing panel to scribe a line to cut.

Image

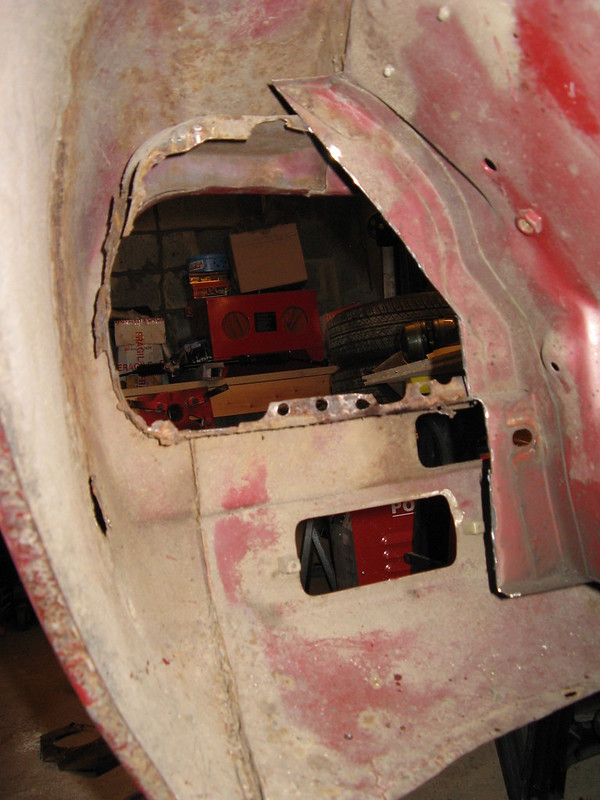
The cutting isnt easy this side due to the clearance and the rotation of the grinder meaning that you end up with a face full of sparks!

Image

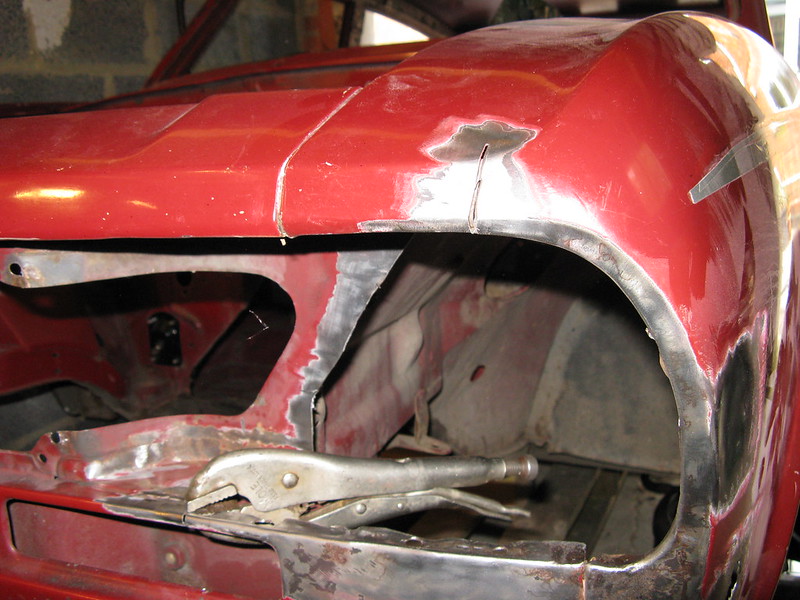
The test fit is pretty good...

Image

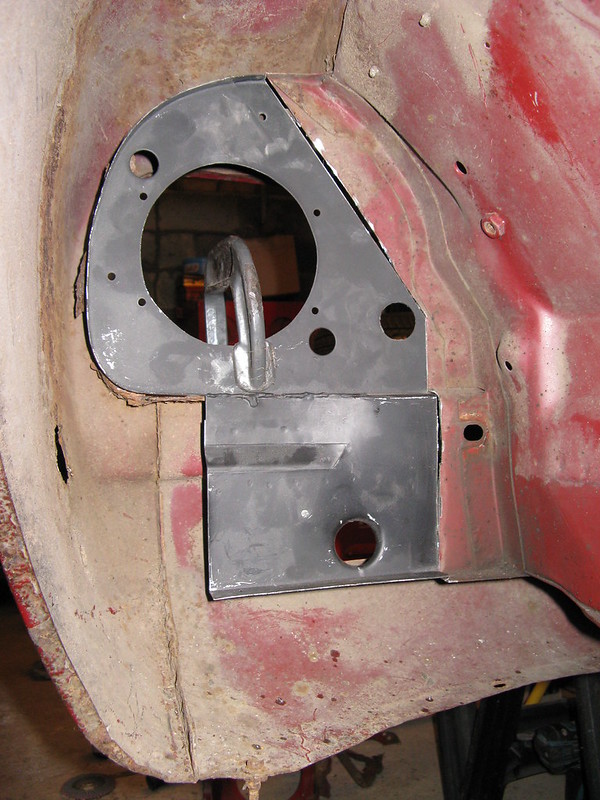
Theres a slightly wide gap up the side here but I think I can bridge that with weld or maybe have a plate behind.

Image

As expected when removing the surface rust from the area I found a few more holes, so more sections were cut away.

Image

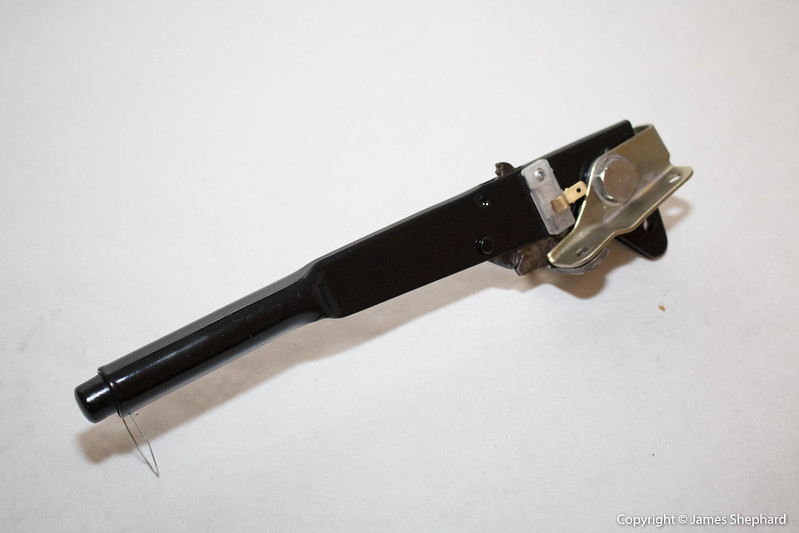
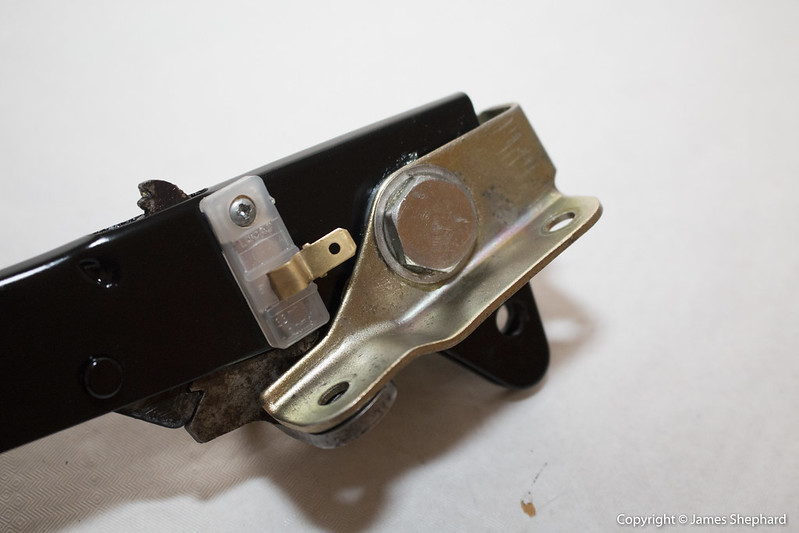
The tool is a weld splitter, really useful.

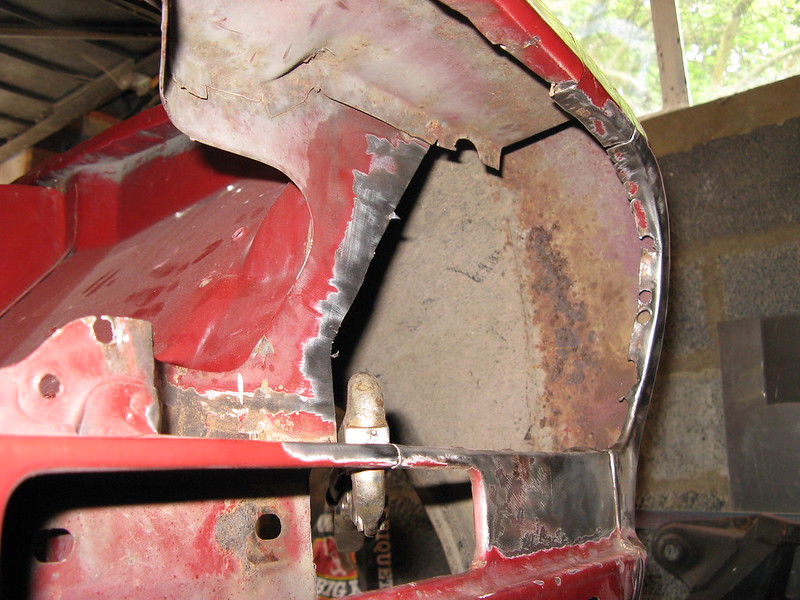
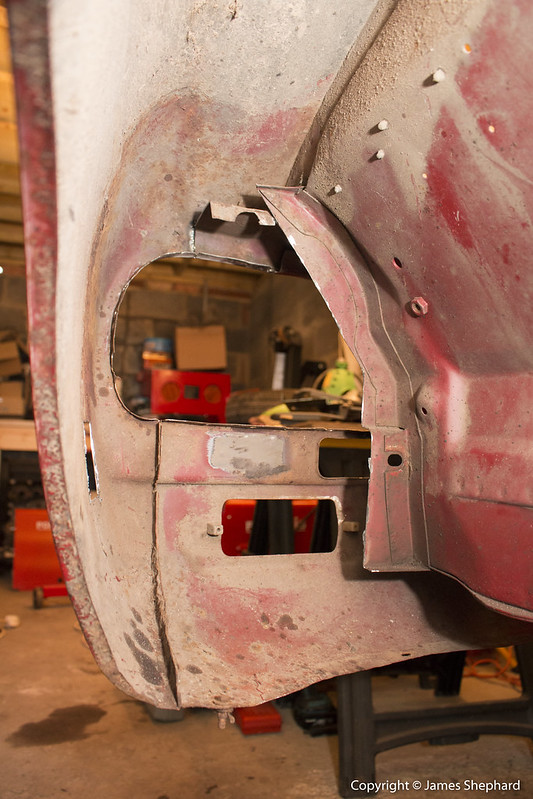
With the bottom section cut away I could concentrate on the eyebrow which wasn't as bad as it looked.

Image

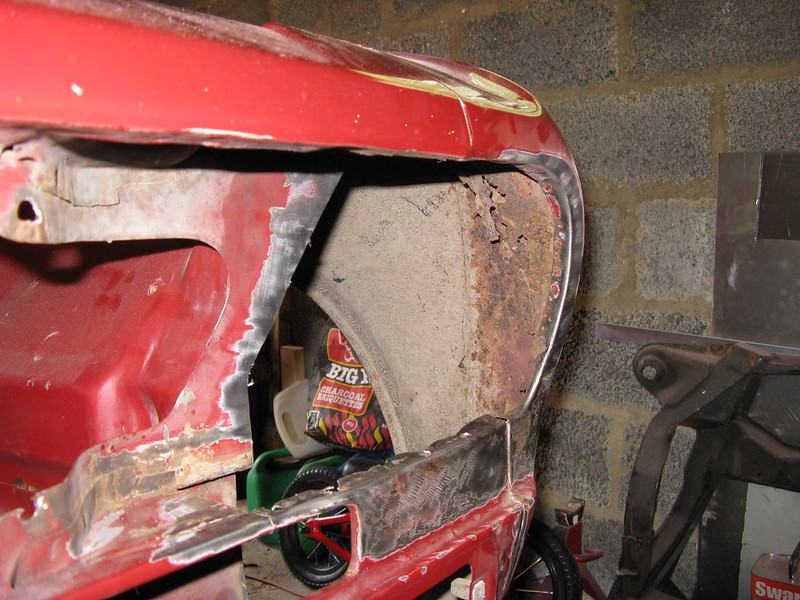
That came out easier than expected excet I had to cut a slit in the wing to remove the top section but that was easily welded up.

Image

Image

The bumper mount hole was rusted through so I cut that out for good measure!

Image

With the eyebrow and inner section removed I was able to push out the mysterious dent which appeared whist the car was in storage!

Image

So tomorrow I have some fabrication work to do to make some repair panels, just the eyebrow and lower panel and repair some seams.

Image

On the whole I think it will go back together nicely.

Image

Image

Image

Image

Image

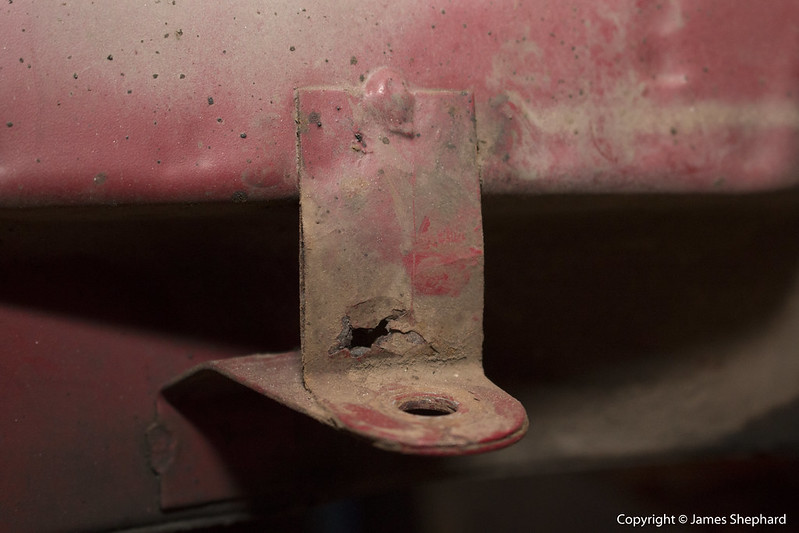
Then I noticed that the brake hose hanger had a hole in it so I'll have to do that as well! :lol:

Image

Pleased so far. :D


Top
   
PostPosted: Fri May 20, 2016 7:44 pm 
Offline
TDC Member
User avatar

Joined: Wed Jul 04, 2007 12:27 pm
Posts: 1904
Location: Hampshire
These are the shoes Mahesh! I think they're great. 8)
Attachment:
KUD006_3AYW_F0G3Z_2.png
KUD006_3AYW_F0G3Z_2.png [ 388.54 KiB | Viewed 2962 times ]


Top
   
PostPosted: Fri May 20, 2016 8:37 pm 
Offline
Future Club member hopefully!
User avatar

Joined: Wed Jul 22, 2015 12:58 pm
Posts: 1293
Location: London
Excellent, next Burlens order I will get some tags with Sprint on them, how many pairs ?

_________________
NRW 581W Sprint


On the motorway no one can hear me sing!
Construed as a public service, self preservation in reality.


Top
   
PostPosted: Fri May 20, 2016 9:18 pm 
Offline
TDC Member

Joined: Fri Jan 08, 2016 9:00 pm
Posts: 1014
Quote:
These are the shoes Mahesh! I think they're great. 8)
Attachment:
KUD006_3AYW_F0G3Z_2.png

I thought you were joking!!
They're ridiculous!
Actually..........

Maybe the start of a new trend........


Top
   
PostPosted: Fri May 20, 2016 10:28 pm 
Offline
Future Club member hopefully!

Joined: Fri Feb 14, 2014 7:27 pm
Posts: 383
Location: Bristol
Great work James, as always! I feel your step by step photos of the bodywork repairs will prove very useful to other owners repairing their cars, and will make it easier for people to assess how much work would be involved and the best to go about it. In a way, it's a pity that your car isn't in worse condition as that would provide more scope for you to cover repairs, but you probably won't agree! :lol:


Top
   
PostPosted: Sat May 21, 2016 4:13 pm 
Offline
TDC Member
User avatar

Joined: Wed Jul 04, 2007 12:27 pm
Posts: 1904
Location: Hampshire
Quote:
Great work James, as always! I feel your step by step photos of the bodywork repairs will prove very useful to other owners repairing their cars, and will make it easier for people to assess how much work would be involved and the best to go about it.
Thanks, much appreciated!! :D
Quote:
In a way, it's a pity that your car isn't in worse condition as that would provide more scope for you to cover repairs, but you probably won't agree!
I need one that I can actually drive so maybe the next one will be!! :wink:


Top
   
PostPosted: Sat May 21, 2016 4:29 pm 
Offline
TDC Member
User avatar

Joined: Wed Jul 04, 2007 12:27 pm
Posts: 1904
Location: Hampshire
I'm having problems with my eyebrows......

I started off this morning but fabricating a repair piece for the front valence...

Image

I use the masking tape method of making a template...

Image

Transfer to sheet, cut out and put in a bend, forgot to photo!

I had to adjust the inner repair panel slightly to provide a seamless repair.

Image

Tacked everything on to check alignment...

Image

Image

It took a while but I managed to get it aligned pretty much spot on...

Image

I then moved on to repairing the eyebrow, I thought I'd try to fabricate a repair section first...

Image

Image

It looks ok here but I just couldn't get the fit right. It's a complicated shape to make so I thought I'd rather give up and install the club fibreglass eyebrows I had...

Image

Removing the remaining section was really easy, I simply drilled out the spot welds, it also gave me the opportunity to inspect the metalwork here as well.

Image

I needed to bend the seam down to allow me to get the new eyebrow in, unfortunately I just cannot make it fit to my car, it's a bit too short for some reason.

So feeling rather tired I decided to call it a day and revisit this tomorrow, there's no point trying to push on and get annoyed, especially with the level of finish Im trying to achieve. Plus there's no huge rush, I want to do a proper job and a lot of the work I have done this side will make the other side 100% easier.


Top
   
Display posts from previous:  Sort by  
Post new topic  Reply to topic  [ 589 posts ]  Go to page Previous 134 35 36 37 3840 Next

All times are UTC


Who is online

Users browsing this forum: No registered users and 1 guest


You cannot post new topics in this forum
You cannot reply to topics in this forum
You cannot edit your posts in this forum
You cannot delete your posts in this forum
You cannot post attachments in this forum

Search for:
Jump to:  
Powered by phpBB® Forum Software © phpBB Limited