The Triumph Dolomite Club - Discussion Forum

The Number One Club for owners of Triumph's range of small saloons from the 1960s and 1970s.
It is currently Sun Apr 28, 2024 6:32 am

All times are UTC+01:00


Post new topic  Reply to topic  [ 61 posts ]  Go to page Previous 1 2 3 4 5 Next
Author Message
PostPosted: Sat Jun 05, 2010 10:27 am 
Good strong colour and lots of fun ahead. Yep, a thread to watch with interest.

Good on you.

Ken


Top
   
PostPosted: Sat Jun 05, 2010 11:03 am 
Offline
Future Club member hopefully!
User avatar

Joined: Wed Oct 04, 2006 8:10 pm
Posts: 1264
Location: Darn saarf..
Nice one..looks a great project 8). That rear axle Yellow is waaayy out there!! The person who did that certainly had imagination...great to see :thumbsup:


Top
   
PostPosted: Sat Jun 05, 2010 1:51 pm 
Offline
Future Club member hopefully!

Joined: Tue Oct 03, 2006 9:45 pm
Posts: 11179
Location: Middlesex
When doing the cooling system I would refill with 25% distilled water and bluecol. Troible is when you run the engine you can expect the water pump to leak.

If it just driblles through the slot and stops consider yourself lucky. If it keeps leaking it needs a new seal kit. Lots of threads to read on that job...
but it need the inlet manifold to come off and makes a good time to do the carbs...

Dont worry about running it for short periods with a leaky pump. Keep an eye that the oil doesnt go to mayo (very unlikely) and it will be happy til you sort it.


Jonners

_________________
Note from Admin: sadly Jon passed away in February 2018 but his humour and wealth of knowledge will be fondly remembered by all. RIP Jonners.


Top
   
PostPosted: Sat Jun 05, 2010 6:05 pm 
hi,
Thanks for all the kind comments. Golly is now safely in the garage, waiting for this party thing we have going on to die away
Hoping to make a start on her proper tomorrow, so will take loads of pics and upload here. All the tyres went down overnight, so although I wasn't going to use them, its a bit of a pain to know if it is left in one place too long it becomes un-pushable.
Bloody hard work moving her with the brakes sticking, I may have to just pull the pads and shoes out to allow me ease of moving.

I keep looking at the paint knowing that if I cut a bit it'll come out brilliant. But I daren't touch it or I'll be off on a tangent, and never get the engine running. Nice to know that a lot of people like the colour. I thought it was just me.
Thanks for the info re the water pump Jonners. These are a bit of a pain aren't they? will probably put one in as it makes sense.

One question, At the bottom of the steering column, where it passes through the bulkhead and attaches to the intermediate shaft. Is there a bearing supposed to be there. Mine is flapping about in the breeze at that point. Can't really see what is supposed to be there. If you grasp the steering wheel at the 12 and 6 o clock position it moves massively at that point.
Any ideas?
Pics tomorrow with luck!!


Top
   
PostPosted: Sat Jun 05, 2010 6:11 pm 
There's a little nylon bush that's meant to go in there to support the lower column. Fitting is more a fiddly task than a difficult one, there's loads of advice on the forum about the bulkhead bush though, and about how to drive out the pin in the column adjuster and drop the column to facilitate the fitting of that bush.

The car does look good, methinks you have a real bargain there, especially given that it has the new gearbox and that gold seal engine.

:thumbsup:


Top
   
 Post subject: As.............
PostPosted: Sat Jun 05, 2010 10:21 pm 
Offline
TDC Member
User avatar

Joined: Thu Aug 09, 2007 1:22 pm
Posts: 6483
Location: Caithness, Scotland
You have an 1850, bulkhead bush removal and replacement is quite easy, but
you need to employ an assistant.
Before you start make sure the wheels are in the straight ahead position.
1. Under the bonnet, remove the (top) bolt from upper steering shaft
and slacken the top bolt in the lower coupling.
2. Inside car, slacken clamp on steering column.
3. Pull the lower column section up towards steering wheel.
4. You can now remove the old bush and fit a new one.
I suggest you use Superflex (from Chris Witor or Wins International).
Remember to apply some copper grease to the bush.
5. While you hold the upper steering shaft, get your assistant to push
(using a stick) the lower column through the bush and into the upper
steering shaft. Ensure the steering wheel is kept in the straight ahead
location during this operation.
6. Refit bolt and please use a new nyloc nut (5/16"UNF)
and fit a nyloc to the lower coupling bolt and tighten.
7. Tighten steering column clamp.


No.5 is the tricky one, please be patient.


Hope this description is clear,

_________________
TDC Forum moderator
PLEASE help us to maintain a friendly forum,
either PM or use Report Post if you see anything you are unhappy with. Thanks.


Top
   
PostPosted: Sat Jun 05, 2010 10:48 pm 
Ian, forgive me if I missed something obvious on the last two occasions I changed bits down that end of the column on mine (bush, then apart again some Months later for the new lower coupling), but surely, without driving the pin out of the clamp, the lower (fixed mast) part of the interior section of the column will stay put when you raise the wheel into the car, and all you'll achieve will be to loosen the upper (sliding) section of the column, since the splined end remains in the same position regardless of where you put the steering wheel end on its swivel? :scratchin:


Top
   
 Post subject: Hmmmm.................
PostPosted: Sat Jun 05, 2010 11:02 pm 
Offline
TDC Member
User avatar

Joined: Thu Aug 09, 2007 1:22 pm
Posts: 6483
Location: Caithness, Scotland
What I described John, is how I did this particular job on my car.

The steering column is fixed when attached to the upper steering coupling. The possible adjustment is then
the steering wheel being altered relative to the driver, in other words, it is the upper section that slides.
Does that make sense?
(I think your theory relates more to a T2000 column John?)
I must consult the workshop manual.......

_________________
TDC Forum moderator
PLEASE help us to maintain a friendly forum,
either PM or use Report Post if you see anything you are unhappy with. Thanks.


Top
   
PostPosted: Sat Jun 05, 2010 11:31 pm 
I've not done one on a T2000 so couldn't pass comment there, but did find it necessary to take apart the adjuster to get the job done on my Dolomite.

At this point, I'm not going to be too surprised to find that removal of that pin, and taking out the clamp bolt weren't essential after all, but I couldn't see a short cut on the occasions when I did that.


Top
   
PostPosted: Sun Jun 06, 2010 12:13 am 
Offline
TDC Member
User avatar

Joined: Tue Oct 03, 2006 5:48 pm
Posts: 8460
Location: Winscombe, North Somerset, England
I've done this lots of times. No need to loosen anything inside the car. Undo & remove the top bolt on the steering coupling UJ in the engine compartment. Then, inside, lever under the washer to retract the column. Fit new bush, either from the engine side or inside (I usually do it from the engine side), then carry on at point 5 & 6 of Ian's list. :D

_________________
Sprintless for the first time in 35+ years. :boggle2: ... Still Sprintless.

Engines, Gearboxes, Overdrives etc. rebuilt. PM me.


1997 TVR Chimaera 450


Image


Top
   
PostPosted: Sun Jun 06, 2010 12:47 am 
Offline
TDC Member
User avatar

Joined: Tue Oct 03, 2006 4:50 pm
Posts: 5723
Location: Next to my Computer
Yup, as per Mart, the steering column can remain in place. As I've suggested before if you are doing it alone the steering column itself makes a wonderful slide hammer...


Top
   
PostPosted: Sun Jun 06, 2010 12:08 pm 
Quote:
Yup, as per Mart, the steering column can remain in place. As I've suggested before if you are doing it alone the steering column itself makes a wonderful slide hammer...
Except that it won't move in and out when the clamp is pinned together, meaning that the lower column can't be separated from the upper, so would you have removed the bracket that attaches the upper column to the dashboard? :?


Top
   
PostPosted: Sun Jun 06, 2010 1:39 pm 
Offline
TDC Member
User avatar

Joined: Tue Oct 03, 2006 5:48 pm
Posts: 8460
Location: Winscombe, North Somerset, England
No, the lower column moves fine with the upper clamped. :D

_________________
Sprintless for the first time in 35+ years. :boggle2: ... Still Sprintless.

Engines, Gearboxes, Overdrives etc. rebuilt. PM me.


1997 TVR Chimaera 450


Image


Top
   
PostPosted: Sun Jun 06, 2010 9:16 pm 
Sorry, really confused now. If they remain clamped together, then how can the two parts move together unless one of two things happens:
1) The bracket behind the dash is dropped, allowing the clamped column to move in and out.
2) The Mills pin in the clamp is driven out, allowing the lower column to move relative to the sliding, upper section?

The lower section of the column is anchored within the rear face of the clamp, and won't move, relative to the bulkhead, until it either comes down with the brackets or out with the square bolt that holds the adjuster tension.

I'd find it less confusing were it not for the fact that I needed to do this twice (three times if you count the stalk switch change), and in no way would that lower column move through the bulkhead when its bearing was still fixed inside. :scratchin:

Perhaps, for the benefit of Golly's owner, someone could post a diagram to explain how exactly it can be done without freeing the column off in one of those ways?


Top
   
PostPosted: Sun Jun 06, 2010 9:52 pm 
Hi,
The party is over It's time to call it a day, it time to play,
With the Dolly!!

Todays plan was to see if it was possible to get any life from the engine.
To see if I could get it turning, firing, and maybe even 'running'.
Image
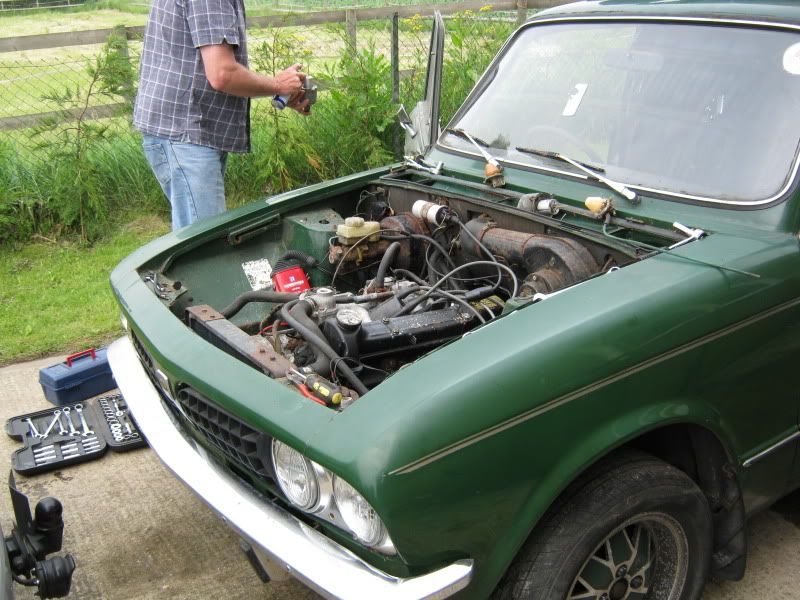
We took the bonnet off, this gave us a lot more room to work on the engine.
Took the plugs out and injected oil into the bores.
Turned the engine over by hand, turned very easily and freely.
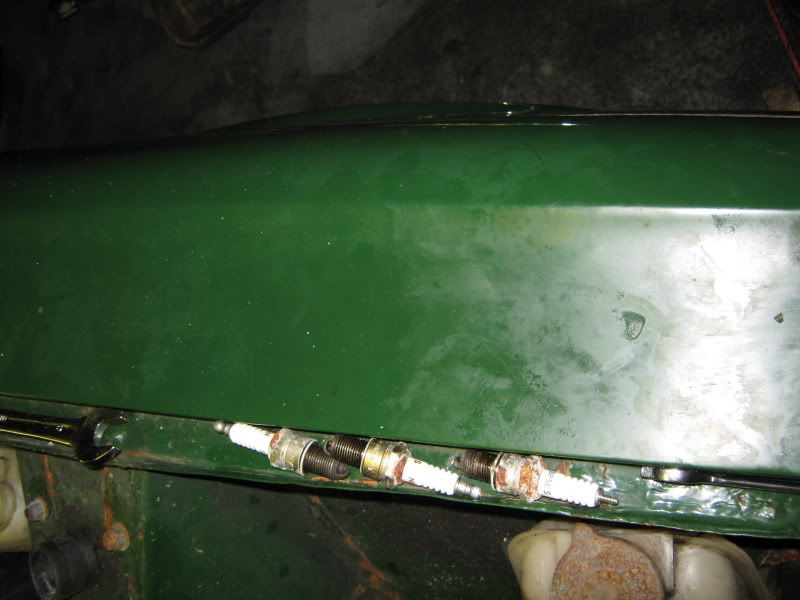
Then fitted new plugs.
Image
Took the carb dashpots and float chamber tops off.
re-set the jets, at the right hieght,
Freed off the choke mechanism.
Loads of WD40 every where.
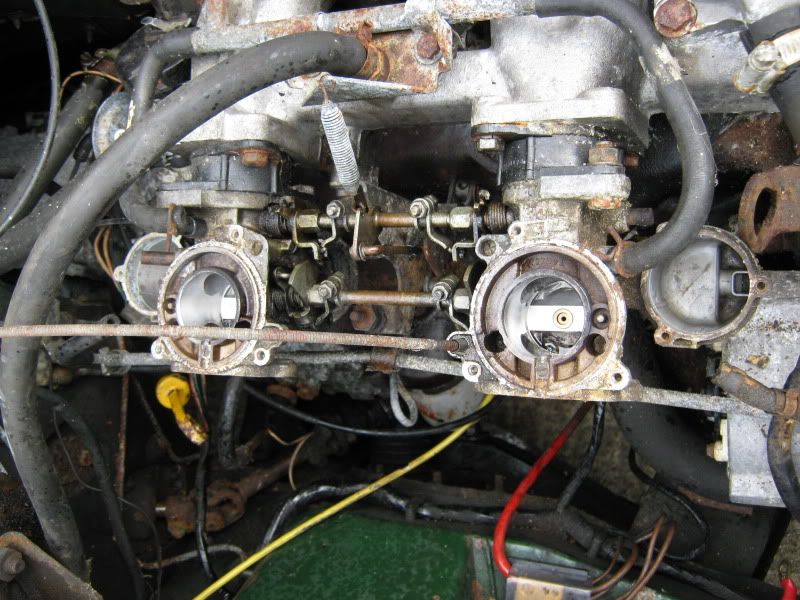
Blew out the flaot chambers and inspected the float assemblies.
All in excellent condition.
Image
Dashpots though were a different affair.
Seized solid
Image
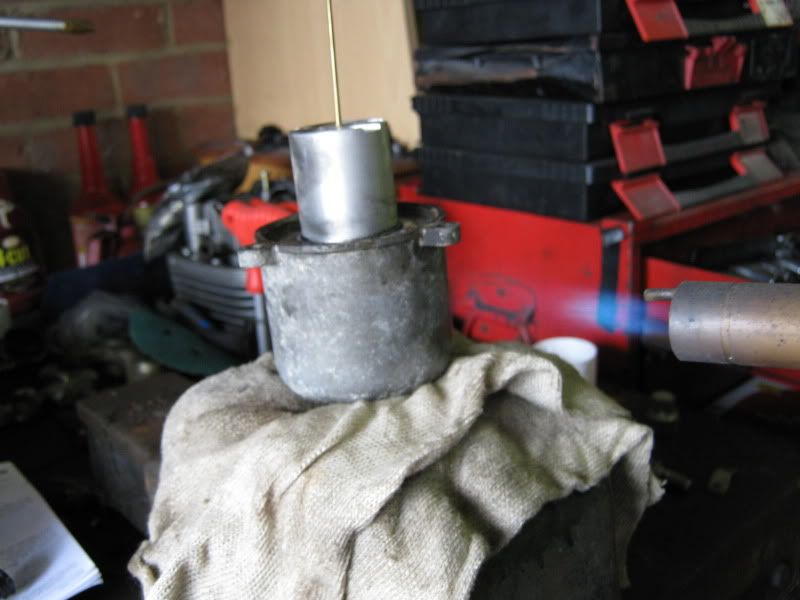
Had to use heat to free them off.
Took our time and managed to get them nice and smooth.
Filled the dashpots with oil,
re-fitted the float chamber tops,
Fitted a temp battery,
and managed to get it cranking.
Rigged up a temp fuel supply,
got fuel pumping through the pump,
So pumped fuel into the float chambers
ready for a spark
Image
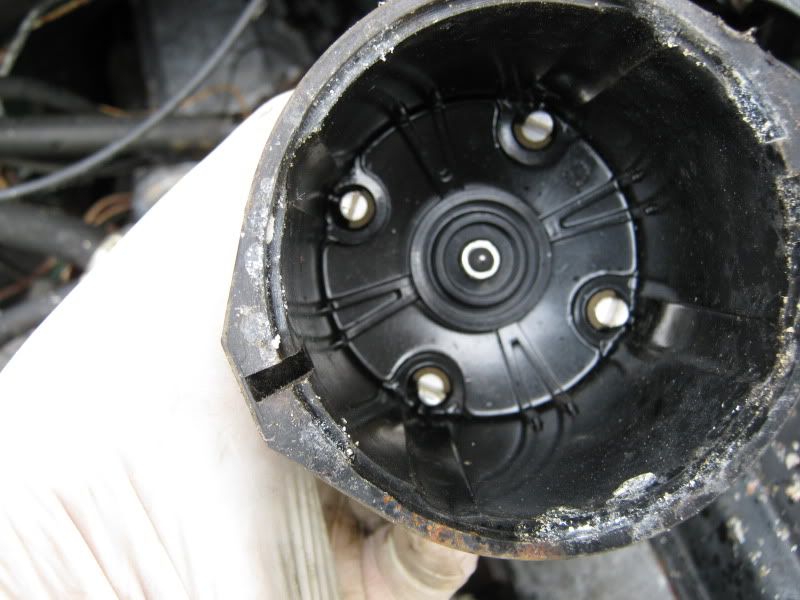
Dist cap looked fairly new,
as did the points and condenser.
Checked the gap which was out.
So, re-gapped the points,
Re-fitted the cap and all leads etc.
And went for a start up.
Cranked a while firing but not catching,
Then........................
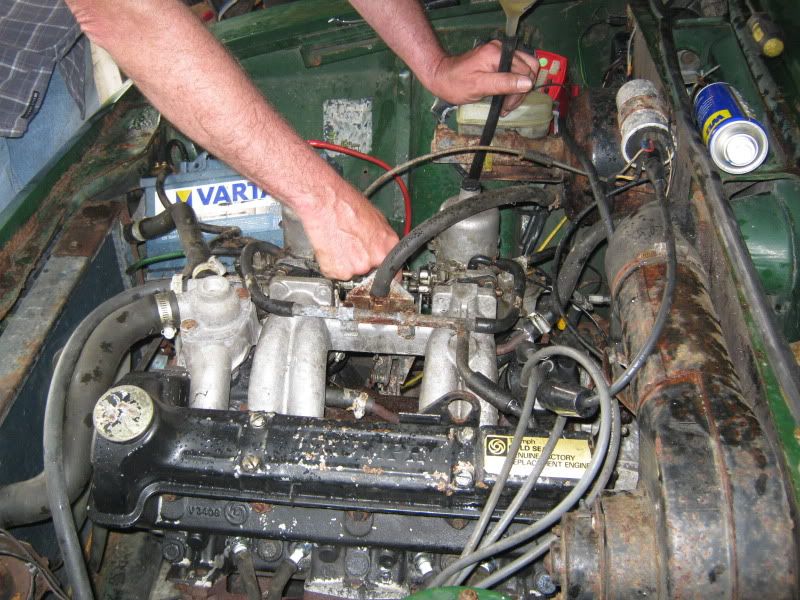
Image
Away she went.
You can't see it in this shot, but she is running.
Sounded great.
Stopped it, I only wanted to hear it run first,
Now was time to check the cooling system
Two top most hoses were split.
So we managed to 'bodge' them so they didn't leak,
Enough so that we could run it up to temp, just to check the motor properly.
They held water quite well. The cooling system had only lost a small amount whilst standing all them years.
The car will have a full set of hoses fitted before it goes anywhere.
Any way. Re-started the engine, and this time allowed it to warm up to temp.
The engine didn't sound good....................................................
It sounded bloody brilliant. One of the sweetest sounding engines I've ever had the pleasure to own.
Stu from Oz was dead right when he said it's good when you find things are better than you thought.
it really makes you get on and feel good about the whole project. Even though I am still right at the beginning.
Now making a list of all the items I am going to replace on the engine itself so i can move on to the next 'system'
Image
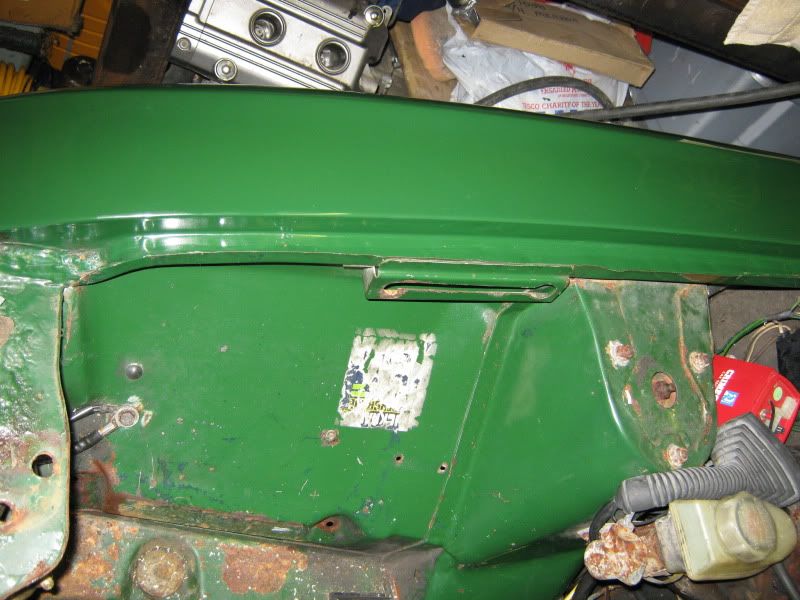
This what the N/S wing looks like
I got carried away and got the polish out,
and polished the O/S wing
Image
Only polished the top and the inner wing slightly,
But the colour came straight through.
Looks gorgeous.
The colour code is HAE. Does anyone know what it is called?
So I am feeling quite good now. The first high point in the restoration.
Where next?
I'll keep you up to date.
Martin.


Top
   
Display posts from previous:  Sort by  
Post new topic  Reply to topic  [ 61 posts ]  Go to page Previous 1 2 3 4 5 Next

All times are UTC+01:00


Who is online

Users browsing this forum: No registered users and 3 guests


You cannot post new topics in this forum
You cannot reply to topics in this forum
You cannot edit your posts in this forum
You cannot delete your posts in this forum
You cannot post attachments in this forum

Search for:
Jump to:  
Powered by phpBB® Forum Software © phpBB Limited