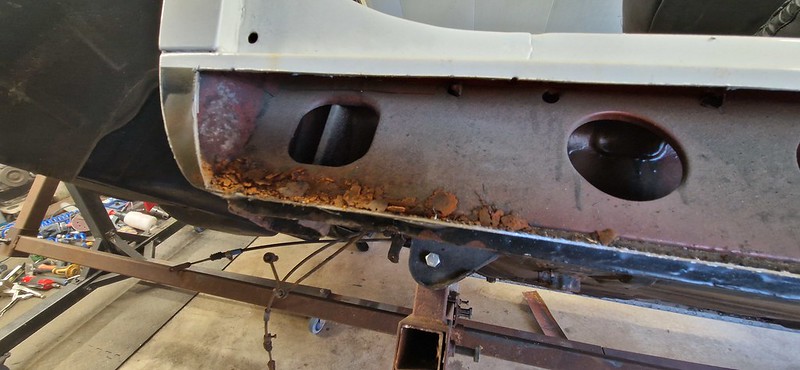
The Triumph Dolomite Club - Discussion Forum

The Number One Club for owners of Triumph's range of small saloons from the 1960s and 1970s.
It is currently Sat Apr 27, 2024 9:15 am

All times are UTC+01:00


Post new topic  Reply to topic  [ 44 posts ]  Go to page Previous 1 2 3
Author Message
PostPosted: Tue Mar 05, 2024 8:45 pm 
Offline
TDC Member
User avatar

Joined: Wed Aug 16, 2017 2:06 pm
Posts: 631
Location: Outer Hebrides
So neat but wouldn't expect anything else.

_________________
Triumph Dolomite Sprint,RNK 957W

Built 26/6/1980 (one of the last built), Auto, Porcelain White - Genuine Mileage 52,820 (warranted).

Only 3 previous owners, (2 within the same family).

Supplied by Lavender Hill Garage Ltd, Enfield, London, by garage owner Jimmy Metcalfe on 30th September 1980 to Geoffery Robinson, Enfield.

Club Membership No: 2017092


Top
   
PostPosted: Tue Mar 05, 2024 10:53 pm 
Offline
Future Club member hopefully!

Joined: Sun Nov 16, 2014 12:46 am
Posts: 425
Location: Midhurst, West Sussex.
Looks very good James.

In one of your posts, referring to fitting the sills, you said "I am going to do this a slightly different way from what I have done in the past so bear with me here!" Is this the way that you have attached the new outer sill to the top part of the old one? I seem to remember that you normally fit the top of the new sill under the horizontal threshold part of the old one, whereas this time you have fitted it over the vertical face just below the threshold. I imagine this way it is easier to keep the correct line of the sill along the length of the car.


Top
   
PostPosted: Wed Mar 06, 2024 2:25 pm 
Offline
TDC Member
User avatar

Joined: Wed Jul 04, 2007 12:27 pm
Posts: 1911
Location: Hampshire
I normally drop the inner sill lower Glen. I then extend the seatbelt reinforcements and jacking points down and use some folded steel to join the reinforcer panel to the inner sill. This means that I can retain the upper fold on the outer sill.

It all really depends on how bad the upper part of the sills, jacking points and inner sills are.

Car has been turned around and rotated, am having a tidy up today in preparation for tomorrow. The other sill is original and looks much better, however, given the internal state of the NS I am expecting much of the same on this side.


Top
   
PostPosted: Wed Mar 06, 2024 4:47 pm 
Offline
TDC Member
User avatar

Joined: Wed Jul 04, 2007 12:27 pm
Posts: 1911
Location: Hampshire
Turned around ready for the other side!

Image

This side is much better, still needed opening up though. There is more wax protection in this side which probably helped somewhat.

Image

Image

You can see the water line on the sill, the rear did have some small holes.

Image

I can get away with a small repair at the rear of the reinforcer

Image

The front isn't bad, but does need repair.

Image

Image

Looking down the inside it all looks fine, I think a spray with some rust converter at the rear, let that dry then a good spray of some Dynax S50 and it will stop that rust in its tracks.

Image

Image

Image

Again, here at the rear jacking point you can see where the water has been sitting, I may have to replace the rear section of the inner sill, there's no point in me doing the whole thing. I'll see how it is after I remove the crushed jacking pad.

Image

A clean up, small repair to the rear of the reinforcer and I can fit a new club sill. Then just a repair to the front nose and I'll fit the wing bottom, four new jacking points and it can go onto the dolly for the rear panel replacement!


Top
   
PostPosted: Wed Mar 06, 2024 8:44 pm 
Offline
TDC Member

Joined: Mon Dec 12, 2016 9:53 pm
Posts: 1710
Location: Harrow Middlesex
2 or 3 drain holes in the bottom of the sill may help

Dave


Top
   
PostPosted: Thu Mar 07, 2024 4:23 pm 
Offline
TDC Member
User avatar

Joined: Wed Jul 04, 2007 12:27 pm
Posts: 1911
Location: Hampshire
Quote:
2 or 3 drain holes in the bottom of the sill may help

Dave
Yeah, I've been thinking about drain holes and the best way to do them. If not done right they'll just fill the sills with water as you drive along on a wet day and cause more problems than they solve.


Top
   
PostPosted: Thu Mar 07, 2024 4:26 pm 
Offline
TDC Member
User avatar

Joined: Wed Jul 04, 2007 12:27 pm
Posts: 1911
Location: Hampshire
Repaired the rear end of the sill ready for the outer to go on.

I ended up replacing the inner sill as it was the right thing to do.

Image
Then just did a small repair to the reinforcer, nothing too taxing!

Image

Image

Image

Outer skin is ready to go on now.


Top
   
PostPosted: Thu Mar 07, 2024 11:09 pm 
Offline
Future Club member hopefully!

Joined: Sun Nov 16, 2014 12:46 am
Posts: 425
Location: Midhurst, West Sussex.
Quote:
I normally drop the inner sill lower Glen. I then extend the seatbelt reinforcements and jacking points down and use some folded steel to join the reinforcer panel to the inner sill. This means that I can retain the upper fold on the outer sill.

It all really depends on how bad the upper part of the sills, jacking points and inner sills are.

Car has been turned around and rotated, am having a tidy up today in preparation for tomorrow. The other sill is original and looks much better, however, given the internal state of the NS I am expecting much of the same on this side.
Ok. Thanks James.


Top
   
PostPosted: Fri Mar 08, 2024 4:46 pm 
Offline
TDC Member
User avatar

Joined: Wed Jul 04, 2007 12:27 pm
Posts: 1911
Location: Hampshire
No progress shots of the sill being fitted I'm afraid, just "here, its finished" photos!

Image

Image

Image

The inside of the sill nose was a bit more rotten than I thought so I'll just be doing the same type of repair to the reinforcer here.

Image

Image

Image

Getting there! :lol:


Top
   
PostPosted: Tue Mar 19, 2024 4:12 pm 
Offline
TDC Member
User avatar

Joined: Wed Jul 04, 2007 12:27 pm
Posts: 1911
Location: Hampshire
I just cracked on and finished I'm afraid, I wanted to get the car off of the rotisserie for now.

Image

Image

Image

Image

Image

Solid!


Top
   
PostPosted: Tue Mar 19, 2024 4:36 pm 
Offline
TDC Member
User avatar

Joined: Wed Jul 04, 2007 12:27 pm
Posts: 1911
Location: Hampshire
The rear panel has a dent in it where the bumper mounts. I cannot for the life of me get it out so as I have one I'm just going to fit a new rear panel, I've done these before, it's pretty easy.

I don't know if I have done a how to for this. Apologies for the photos, I only decided to do this how to half way through removing the panel!

First job is the worst! Lay on your back and locate the seam where the rear panel joins the boot floor. Locate and carefully drill out the spot welds, the aim here is not to damage the boot floor panel, you will thank me later! Dont worry too much about the centre brace yet.

Image

Image

Next, take an angle grinder and slice the boot floor next to the bottom folded seam where it joins the lower part of the rear wings, along the red line. Don't worry about trying to seperate the seam at the moment.

Image

Cut around the reinforcer in the middle of the boot floor.

Inside the car cut the inner reinforcer panel away from the corner pieces. The, working outside cut down the outside edges of the outer panel close to the seam. NOT all the way to the top! There's an overlap here that needs separating where it joins the wing. (Photos from VA276 to give you an idea of what it looks like)

Image

Image

Now you should be able to pull off the old rear panel with reinforcer together.

Image

Then I use a belt file to go around and remove the spot welds from the leftover seams and to tidy everything up. You don't have to remove the corner pieces but these had some damage which I wanted to repair so I did.

Image

Ready for a test fit!

Image

Test fit the new panel

Image

Image

Image

Happy with that!!

Fitting in the next post, I need a glass of wine!


Top
   
PostPosted: Wed Mar 27, 2024 5:10 pm 
Offline
TDC Member
User avatar

Joined: Wed Jul 04, 2007 12:27 pm
Posts: 1911
Location: Hampshire
Fitting!

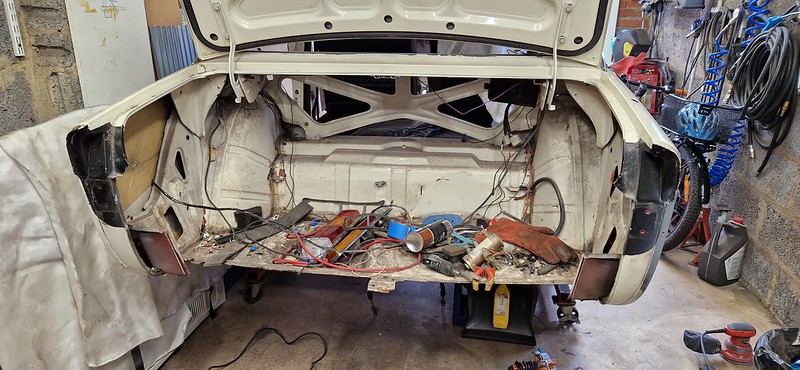
Get the panel on, clamp it in place along the seams starting at the top, don't worry about the boot floor yet, it will pull round.

Make sure everything lines up, close the boot as well and make sure that lines up.

Image

Image

Image

Image

Then starting at the top I plug weld the seam down each side making sure that the panel remains aligned.

Image

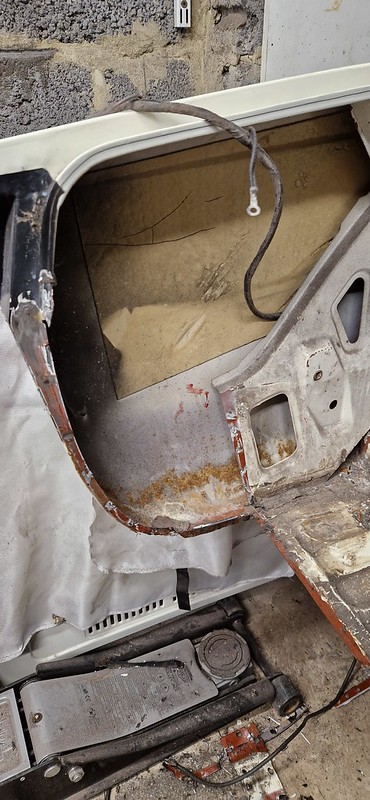
Then I use a jack with some steel box section to lift up the bottom of the panel to meet the boot floor. This is where it pays to be careful and not distort the boot floor when removing the old panel.

Then you can clamp the outer seams in place.

Image

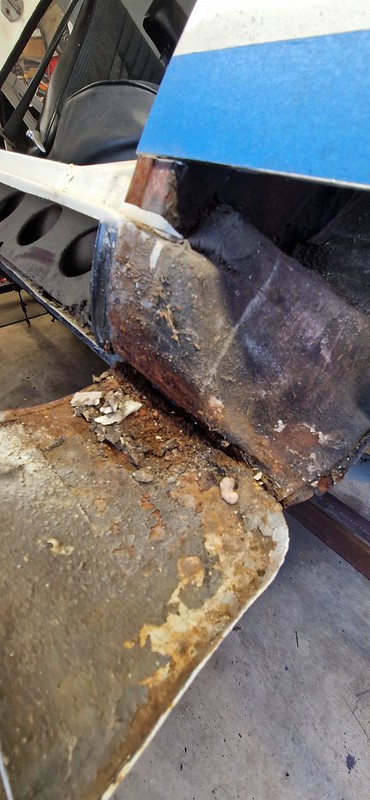
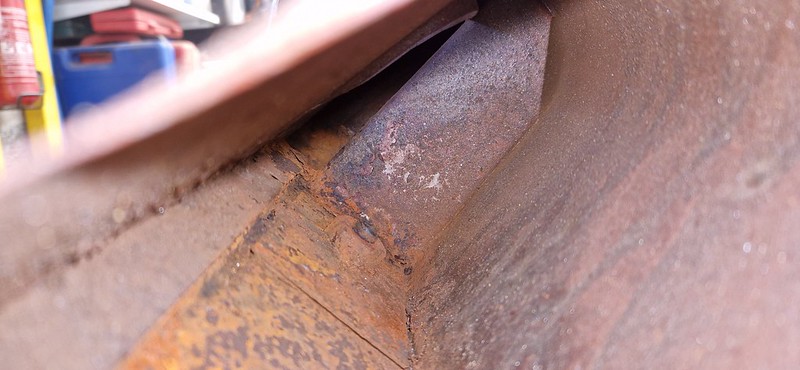
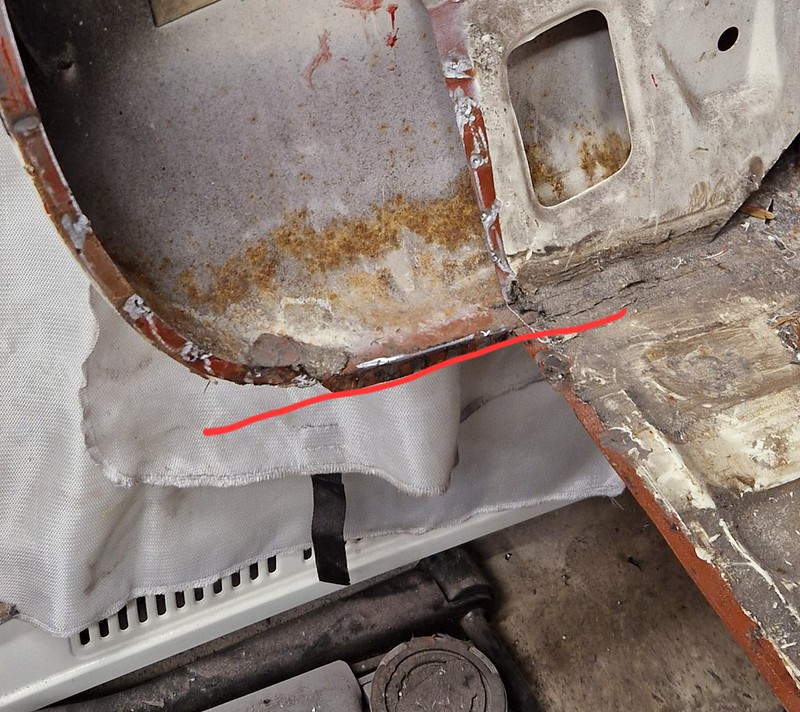
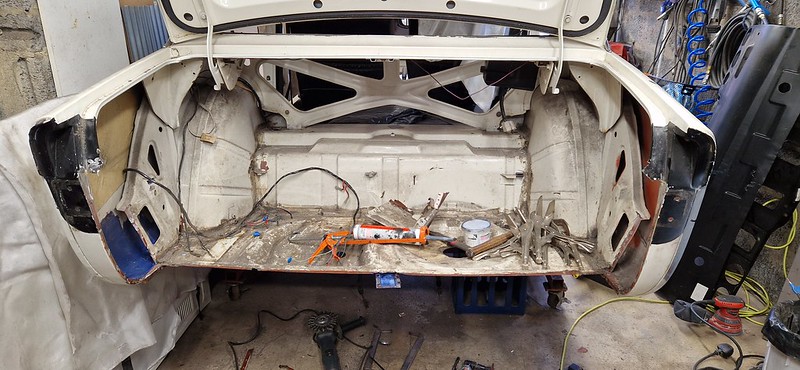
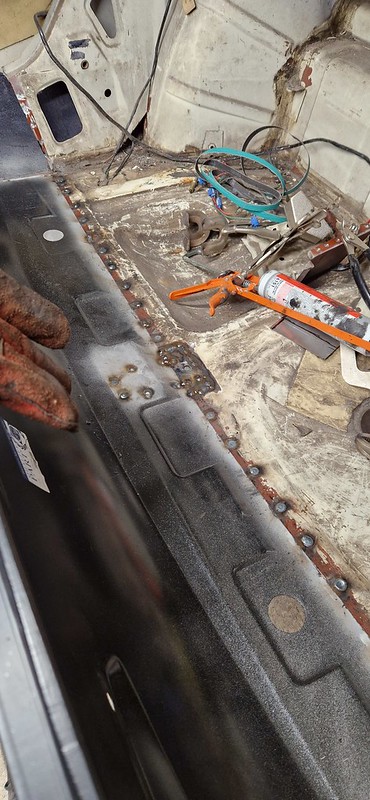
The first thing I do is make sure the centre reinforcer is aligned and then weld that back on, this helps support the boot floor for the next stage. I had to cut out a section of the boot floor to repair here...

Image

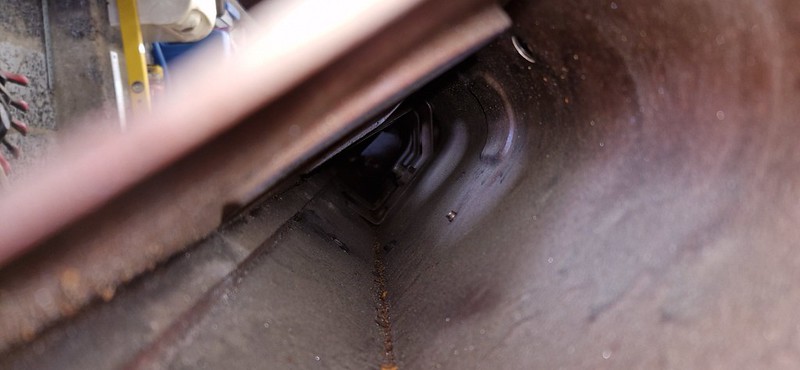
Then working inside I just plug weld the boot floor to the rear panel then lastly plug weld (or spot weld if you have a spot welder!) the outer seams on. Followed by the joints around the boot corners.

Image

Image

Image

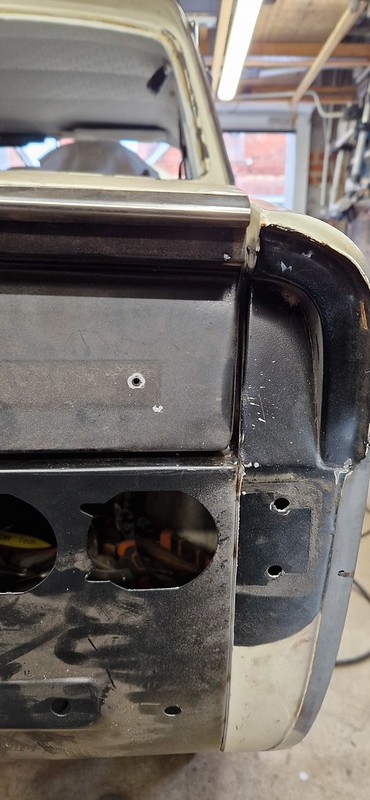
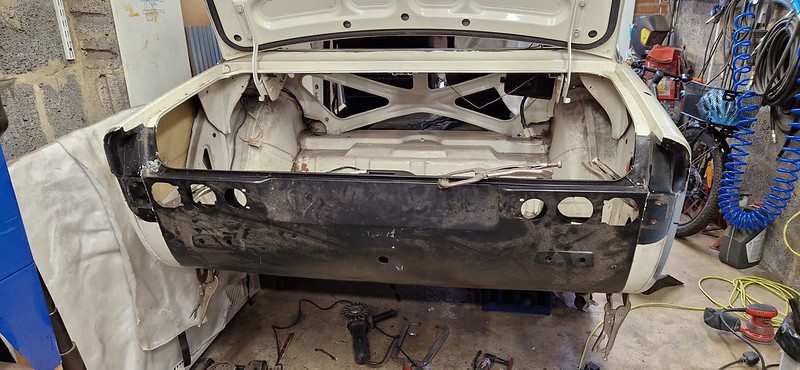
Thats the outer rear panel on! Now to the inner.

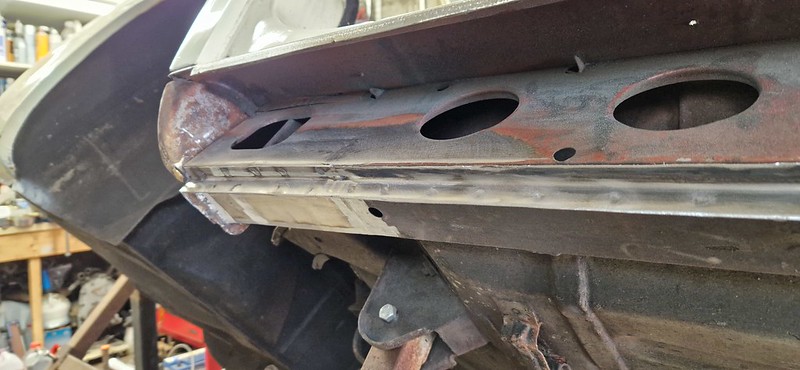
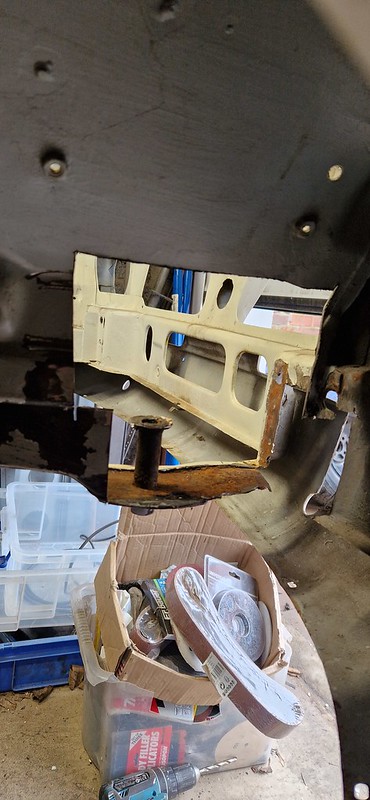
Again, prep the seams, I have a hole punch and use that for my plug welds. The panel can then be bolted to the outer panel to align and secure it.

Image

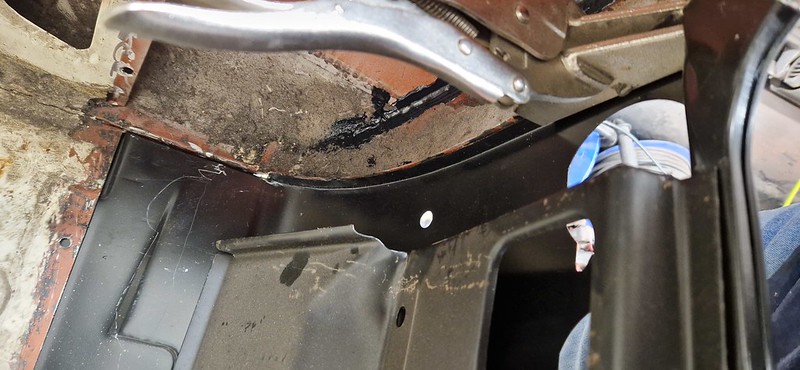
This is critical, if you mount the panel too low then the boot striker won't align and the boot wont close, so the lip has to be flush with the top of the panel.

Image

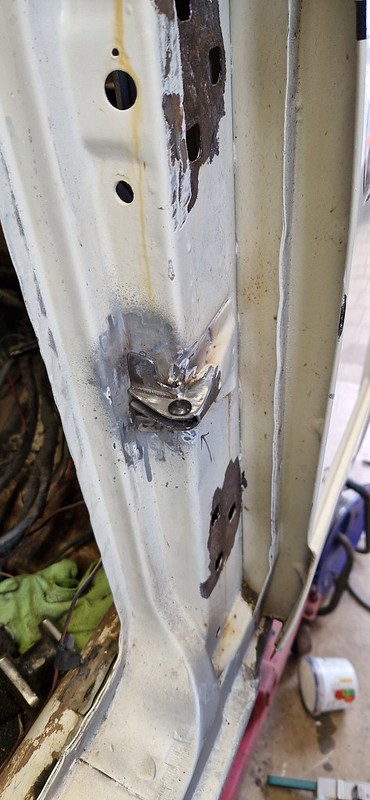
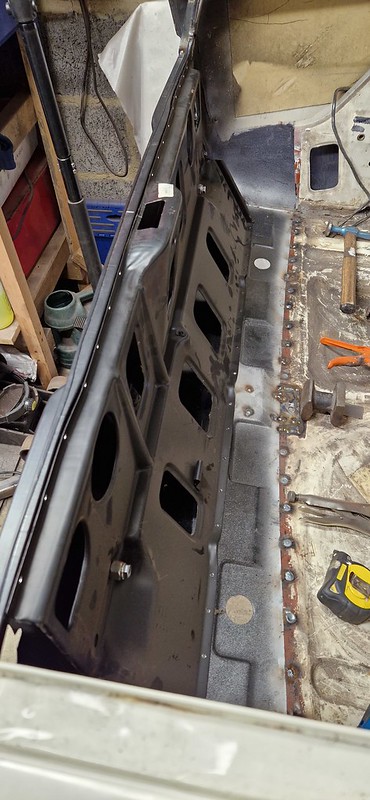
What I do now is plug weld the panel closest to where the boot latch striker fits. Fit the striker and close the boot to make sure it engages properly. Mine is tight because the boot seal is quite thick.

If that's all good then go ahead and plug weld the top of the panel to the boot seam.

You can then weld the centre bracket to the panel followed by the lower seam to the outer panel, sorry no photo of that!

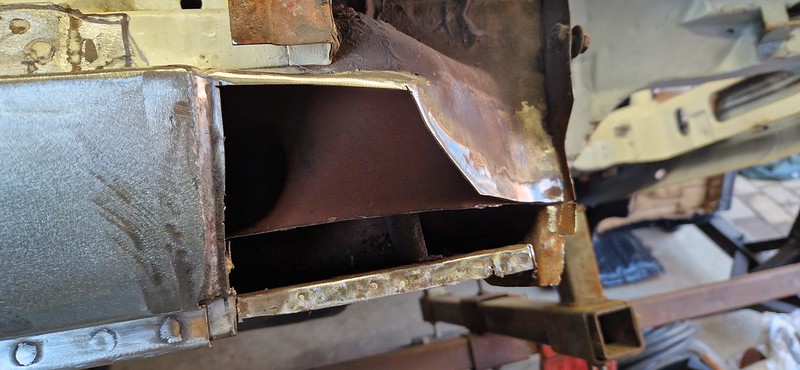
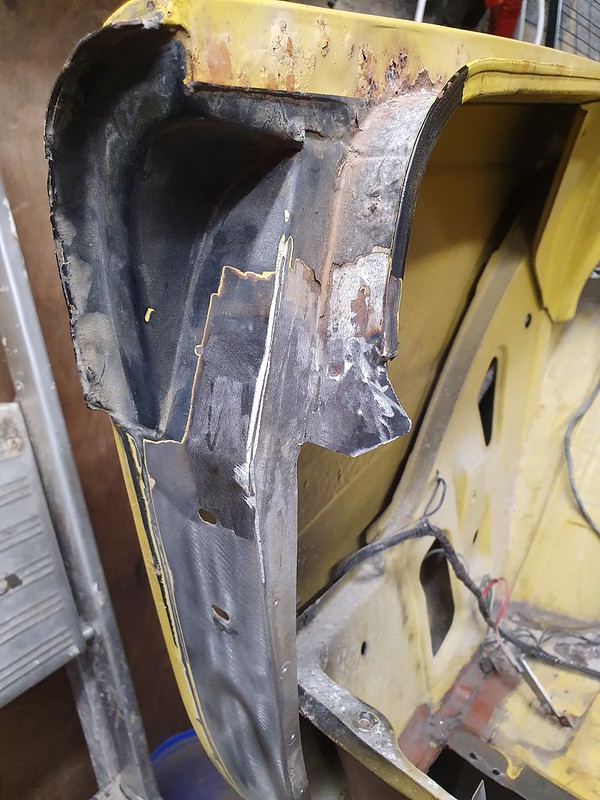
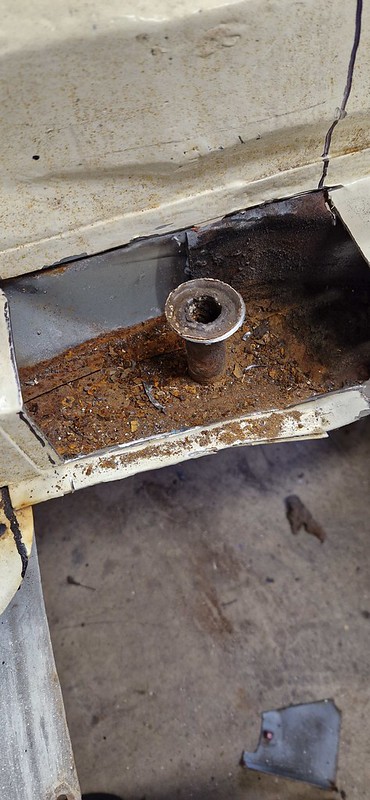
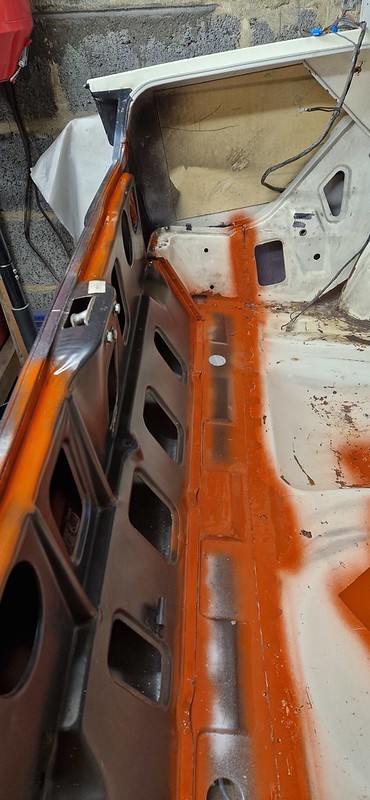
Then I fit the boot reinforcer corners...

Image

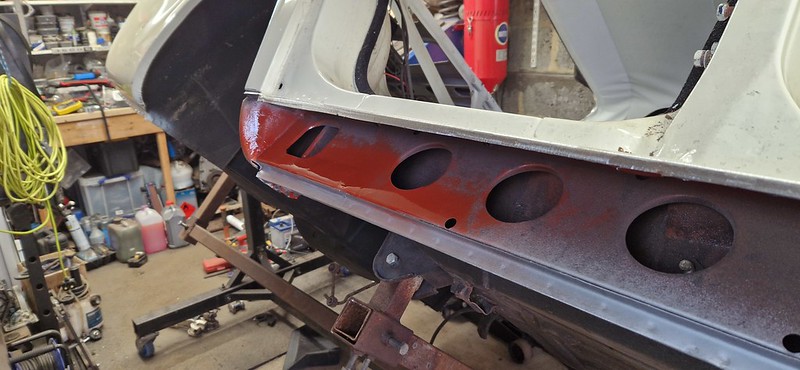
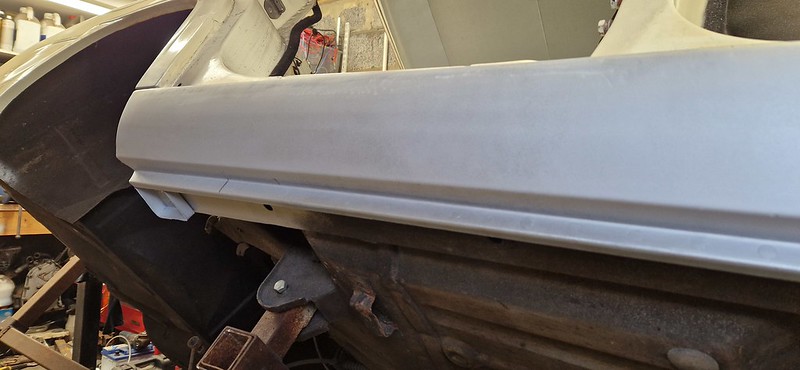
And you are done! I have just dressed some of the welds that were a bit messy and protected everything

Image

Image

This is an early car so I don't need the later holes that were on the panel

Image

Final thing to do is to coat the seam with some seam sealer as per the factory.

Image

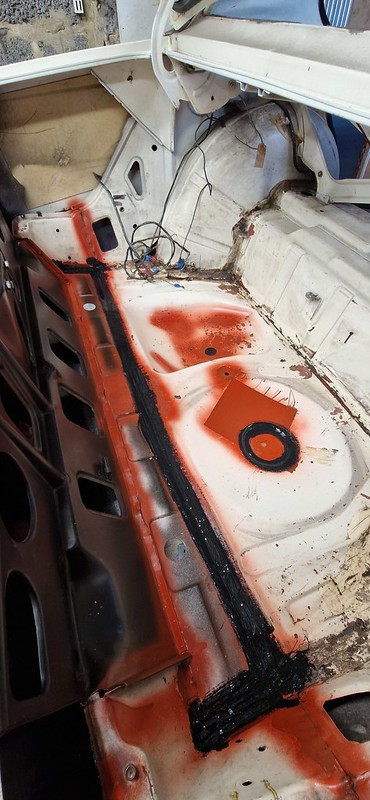
Done, ready for paint!


Last edited by James467 on Wed Mar 27, 2024 5:25 pm, edited 1 time in total.

Top
   
PostPosted: Wed Mar 27, 2024 5:14 pm 
Offline
TDC Member
User avatar

Joined: Wed Jul 04, 2007 12:27 pm
Posts: 1911
Location: Hampshire
I have just been working from the back of the car to the front finishing off little bits that needed doing, radio aerial delete, small rust holes etc....

Image

The standard A post rust repair...

Image

The door check strap was doing that annoying click when I opened the door so I have repaired the bracket as well as the check strap itself.

Image

Image


Top
   
PostPosted: Wed Mar 27, 2024 5:24 pm 
Offline
TDC Member
User avatar

Joined: Wed Jul 04, 2007 12:27 pm
Posts: 1911
Location: Hampshire
Chassis leg repair.

I am doing this as a seperate post so it's easily searchable.

Unfortunately the chassis leg has suffered where its been standing outside, again I think water has got into it and just sat rusting out where it was repaired previously. It looked ok from the outside, but after I looked inside with my borescore it didn't look good.

However, it's a great opportunity to show how to fit the club chassis leg repair kit!

It looks ok, but like I said, inside its not great.

Image

See! :lol:

Image

Actually the lower panel is ok as is the tube, the rust hasn't taken too much hold, it looks like its come from the upper part where the battery sits. The usual battery acid leakage then! Pretty typical, NWL has the same problem and I'll be doing the same repair on that so this is good practice.

Image

Image

It looks very drastic! I'm not replacing that part but even if I was I would leave the lower panel in place to keep the alignment correct.

Image

That's it for today, the rust encapsulator has to work its magic

Image


Top
   
Display posts from previous:  Sort by  
Post new topic  Reply to topic  [ 44 posts ]  Go to page Previous 1 2 3

All times are UTC+01:00


Who is online

Users browsing this forum: No registered users and 3 guests


You cannot post new topics in this forum
You cannot reply to topics in this forum
You cannot edit your posts in this forum
You cannot delete your posts in this forum
You cannot post attachments in this forum

Search for:
Jump to:  
Powered by phpBB® Forum Software © phpBB Limited