Ken
Triumph 1500TC Now A Rolling Resto :-) Most Photo's Restored :-)
-
Purplebargeken
Re: Restoration Triumph 1500TC
Good steady progress and your abilities and confidence are going to grow with each bit you tackle. Nice one mate. I'll have to pop over, Colchester isn't a million miles away and I'll bring my 'lecky file too 
Ken
Ken
-
DazasDolly
- Guest contributor

- Posts: 1162
- Joined: Sun Mar 14, 2010 7:44 pm
- Location: Colchester, ESSEX
Re: Restoration Triumph 1500TC
Hello Ken
Your welcome any time. Tea biccies and sarnies always to hand
Had a night off tonight was not feeling too good and then it chucked it down big time. Back to it tomorrow.
All the best
Darren
Your welcome any time. Tea biccies and sarnies always to hand
Had a night off tonight was not feeling too good and then it chucked it down big time. Back to it tomorrow.
All the best
Darren
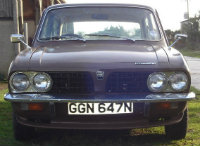
1974 Triumph 1500TC In Maple Brown, (MABLE) GGN 647N
1968 Triumph Vitesse Saloon 2L MK2 Not for the faint hearted, mega restoration
1973 Triumph Spitfire In Mimosa
1968 Triumph Vitesse Saloon 2L MK2 Not for the faint hearted, mega restoration
1973 Triumph Spitfire In Mimosa
-
DazasDolly
- Guest contributor
- Posts: 1162
- Joined: Sun Mar 14, 2010 7:44 pm
- Location: Colchester, ESSEX
Re: Restoration Triumph 1500TC
Hello There
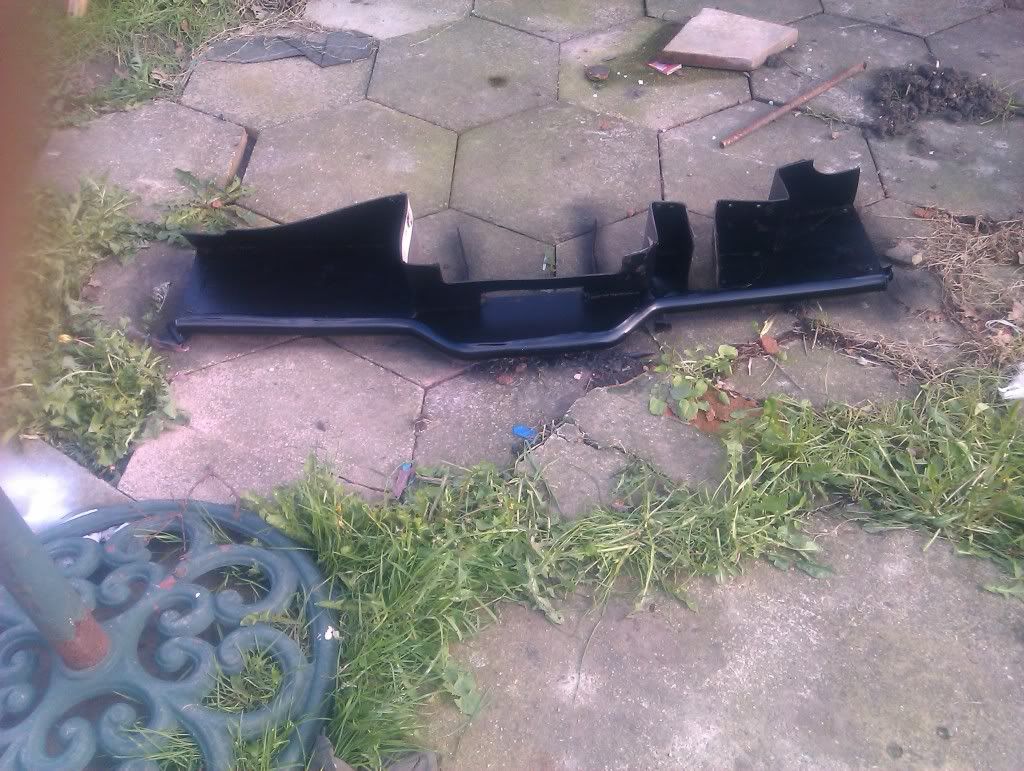
This afternoon I decided to paint my new manifold and also put a nice coat of black spray on the lower parcel shelf.
Thought I would do the holes on the bottom of the sill so I could weld up tomorrow. My last hss drill broke after 2 holes, and that was with me letting the drill do the work. O well onto the other side and let me have a look at what I have to do.
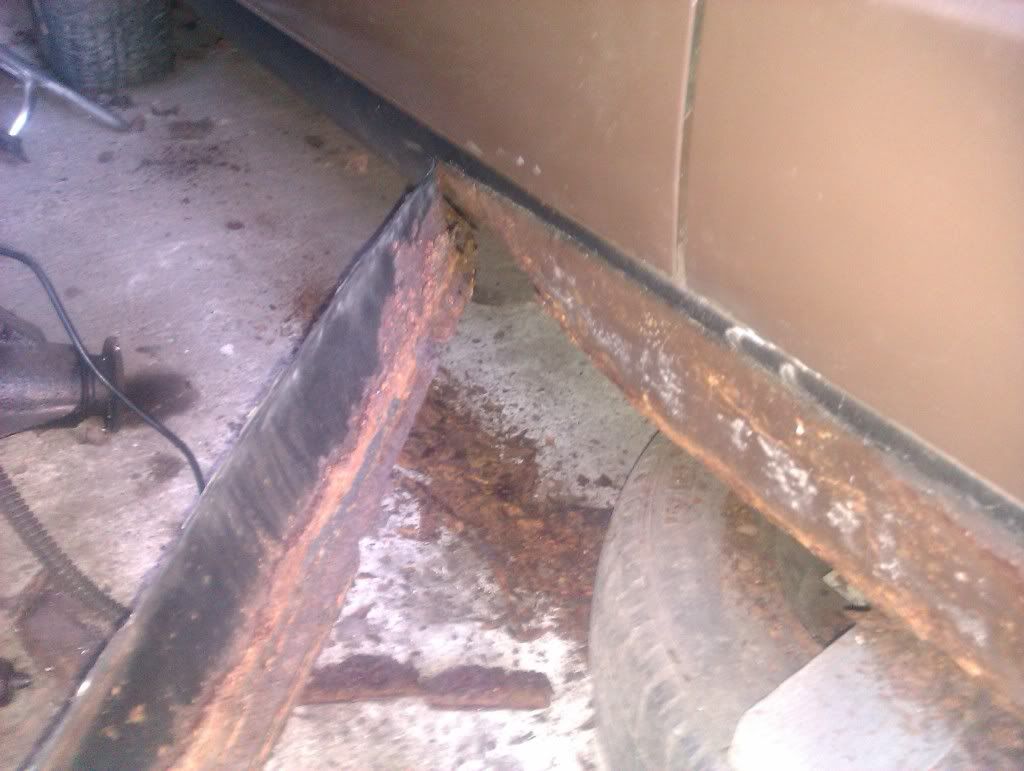
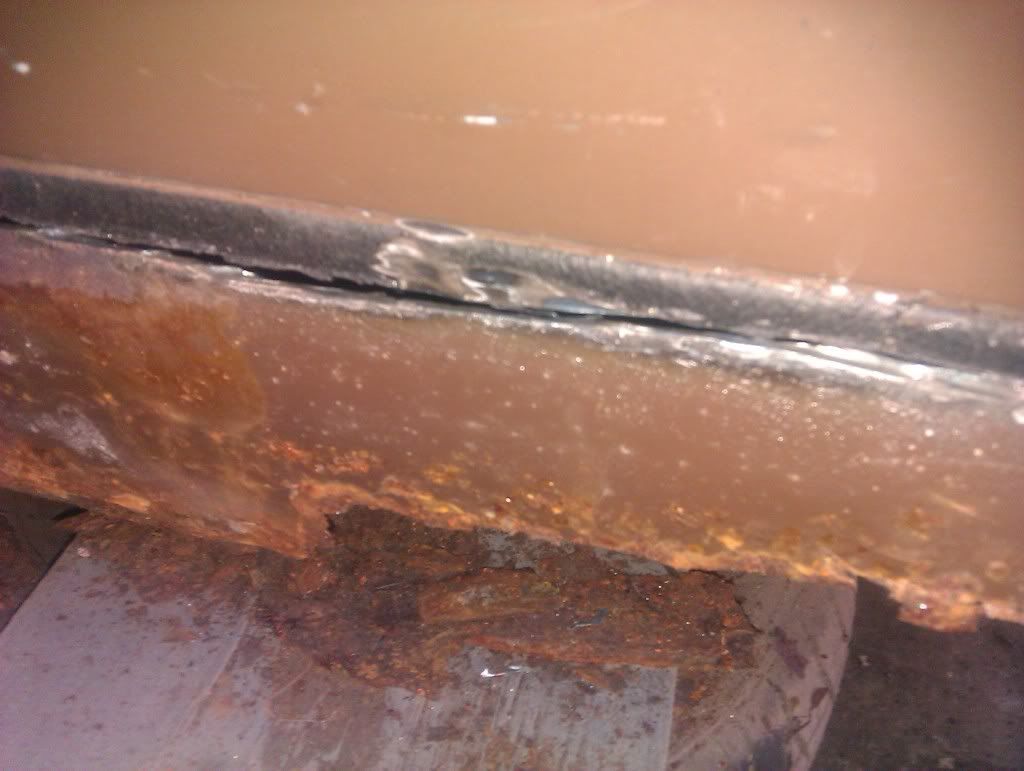
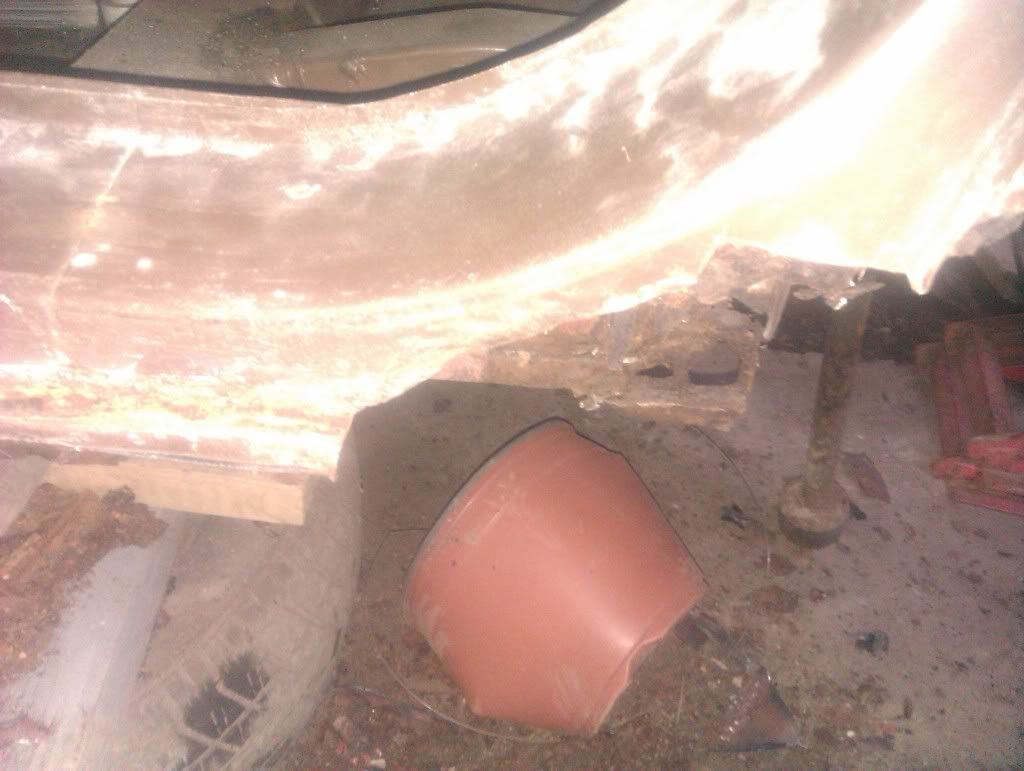
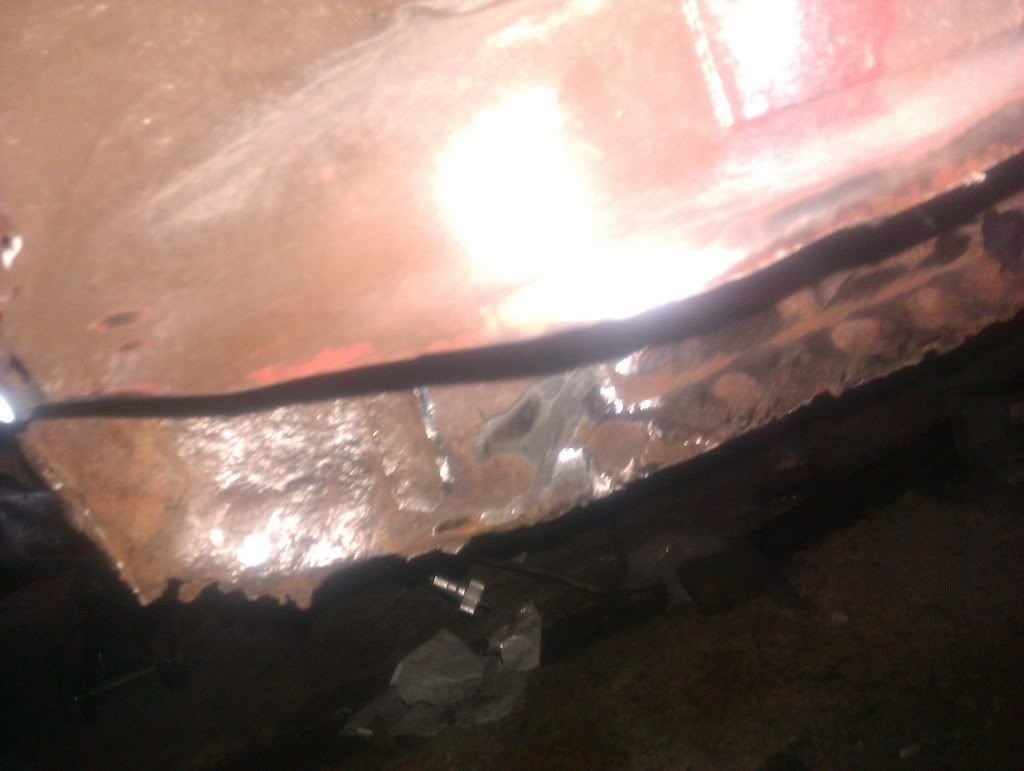
Started cutting the n/s sill with the grinder and yet again it had the previous sill underneath, and to top it off looks like the original sill underneath in the same shade of brown as the car. Once I had cut the sill the bottom half of the sill nose fell to pieces.
Tomorrow I will look at cleaning up the the inner sill and see what damage there is.
Some more pics:


As always thoughts and comments always welcome
All the best
Darren
This afternoon I decided to paint my new manifold and also put a nice coat of black spray on the lower parcel shelf.
Thought I would do the holes on the bottom of the sill so I could weld up tomorrow. My last hss drill broke after 2 holes, and that was with me letting the drill do the work. O well onto the other side and let me have a look at what I have to do.
Started cutting the n/s sill with the grinder and yet again it had the previous sill underneath, and to top it off looks like the original sill underneath in the same shade of brown as the car. Once I had cut the sill the bottom half of the sill nose fell to pieces.
Tomorrow I will look at cleaning up the the inner sill and see what damage there is.
Some more pics:
As always thoughts and comments always welcome
All the best
Darren
Last edited by DazasDolly on Sun Feb 04, 2018 9:47 pm, edited 1 time in total.
1974 Triumph 1500TC In Maple Brown, (MABLE) GGN 647N
1968 Triumph Vitesse Saloon 2L MK2 Not for the faint hearted, mega restoration
1973 Triumph Spitfire In Mimosa
1968 Triumph Vitesse Saloon 2L MK2 Not for the faint hearted, mega restoration
1973 Triumph Spitfire In Mimosa
-
JPB
Re: Restoration Triumph 1500TC
Why, oh why do people do that? Stick cover sills on and let the originals rot way underneath I mean. 
I reckon that you'd be facing much less rust now had the job not been bodged back when those cover sills went on. But hey, you'd also be having less fun and you wouldn't have learned to do bodywork anything like as quickly.
Would you say that the second sill isn't hiding quite such a mess as the first one? It all looks very savable in any case, but if you ever despair at the size of the task just count the hours you're putting in and ask a pro bodyshop what they'd be charging. This will make you feel very satisfied indeed.
-
DazasDolly
- Guest contributor
- Posts: 1162
- Joined: Sun Mar 14, 2010 7:44 pm
- Location: Colchester, ESSEX
Re: Restoration Triumph 1500TC
Hello John
It looks a lot better than the other side, I was just annoyed that it had been bodged like the other side.
Should be able to save a lot of the diaphragm this time, and possibly the soffitt, I was hoping to get out today but it's looking less likely now as this weather is shocking and I have no heating in there or doors on the front . And I have had a virus since Monday.
I will see what it's like tomorrow.
All the best
Darren
It looks a lot better than the other side, I was just annoyed that it had been bodged like the other side.
Should be able to save a lot of the diaphragm this time, and possibly the soffitt, I was hoping to get out today but it's looking less likely now as this weather is shocking and I have no heating in there or doors on the front
I will see what it's like tomorrow.
All the best
Darren
1974 Triumph 1500TC In Maple Brown, (MABLE) GGN 647N
1968 Triumph Vitesse Saloon 2L MK2 Not for the faint hearted, mega restoration
1973 Triumph Spitfire In Mimosa
1968 Triumph Vitesse Saloon 2L MK2 Not for the faint hearted, mega restoration
1973 Triumph Spitfire In Mimosa

Aye indeed..........
It is just like page 10 all over again.......
I always think that starting on the other side means you're getting somewhere,
the second half is easier .
When you are done Darren, I suggest you bore holes in the sills under the treadplates for access to inject cavity wax.
Doing it this way will hopefully the sill members' joint is well protected.
I always think that starting on the other side means you're getting somewhere,
the second half is easier
When you are done Darren, I suggest you bore holes in the sills under the treadplates for access to inject cavity wax.
Doing it this way will hopefully the sill members' joint is well protected.
TDC Forum moderator
PLEASE help us to maintain a friendly forum,
either PM or use Report Post if you see anything you are unhappy with. Thanks.
PLEASE help us to maintain a friendly forum,
either PM or use Report Post if you see anything you are unhappy with. Thanks.
-
DazasDolly
- Guest contributor
- Posts: 1162
- Joined: Sun Mar 14, 2010 7:44 pm
- Location: Colchester, ESSEX
Re: Restoration Triumph 1500TC
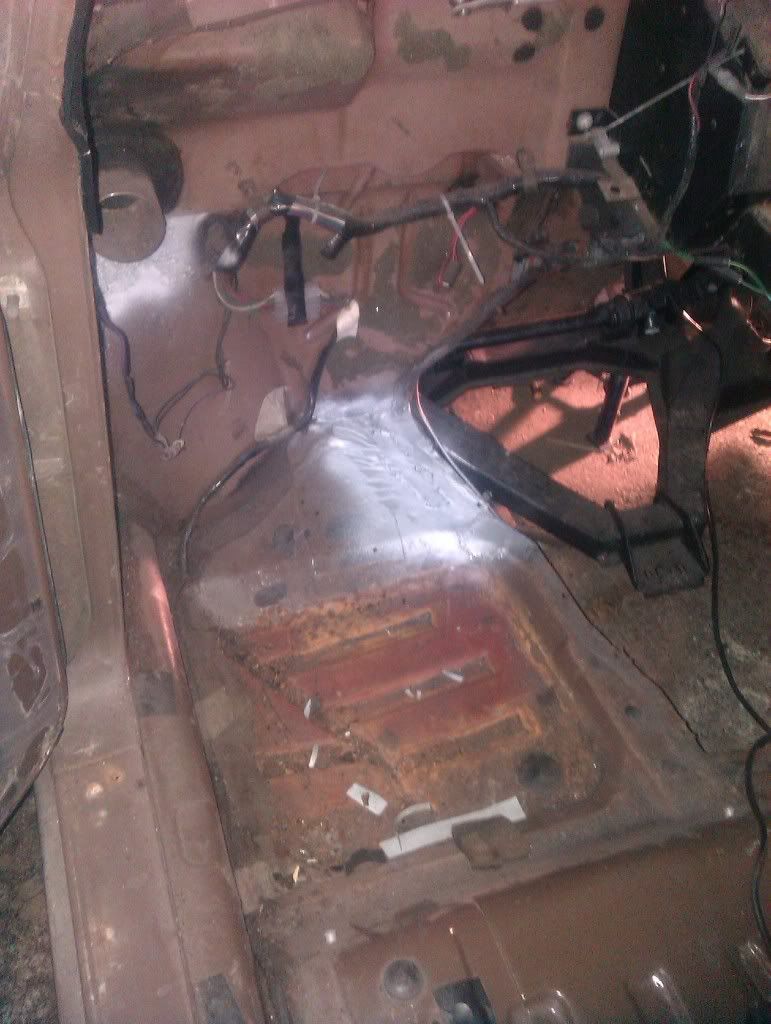
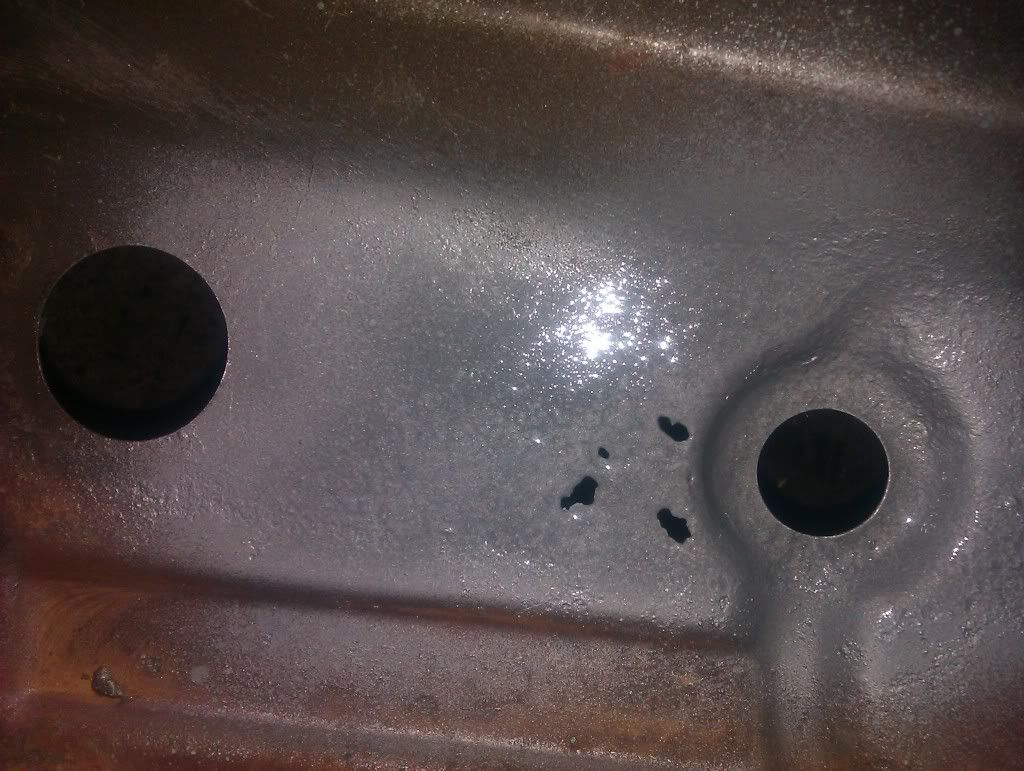
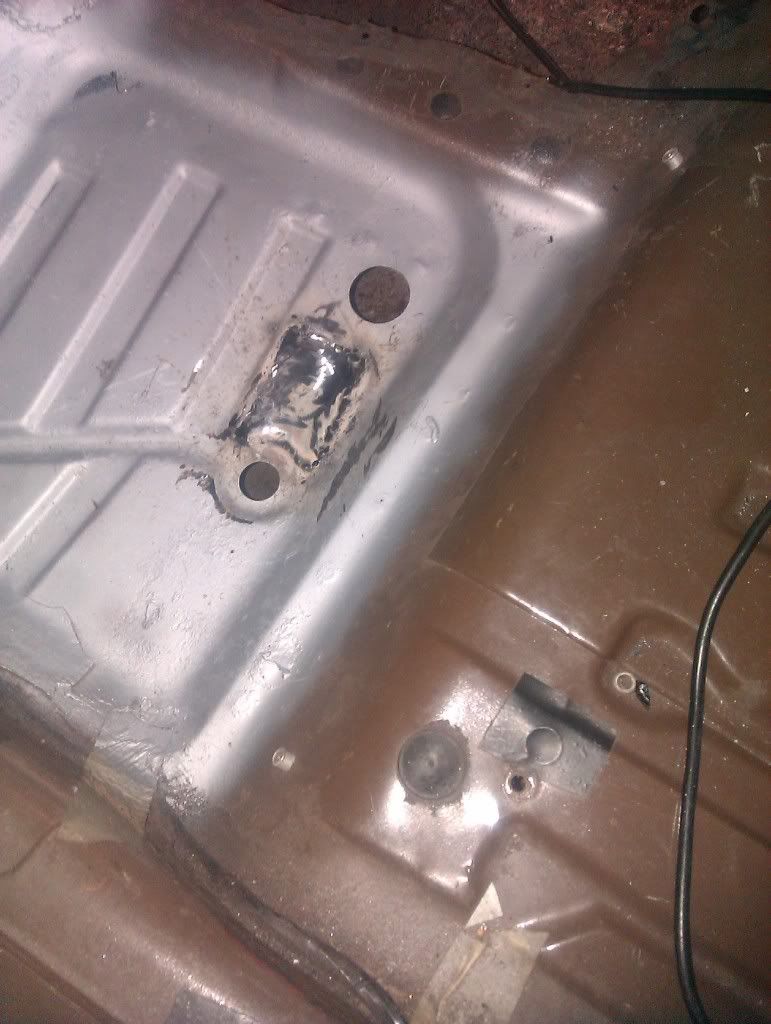
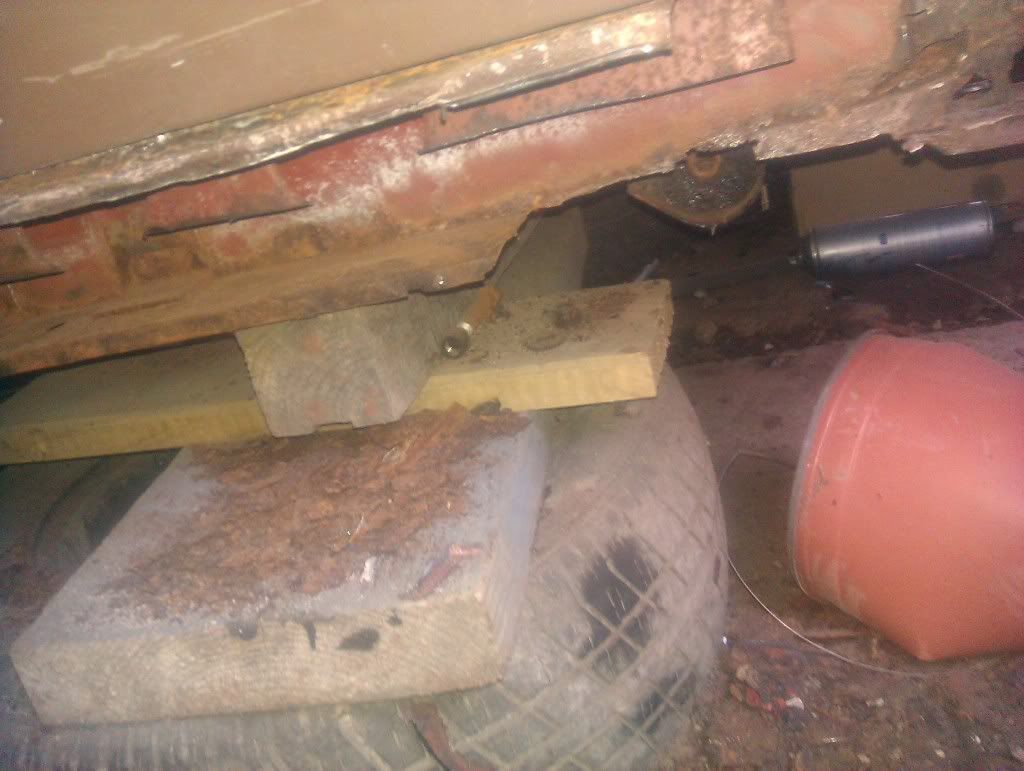
well it' been a long day today, my mate little Wayne from work came to help me out for the day, and made my brake lines. Just got one more section to do once Mr Paddock delivers my flexi hoses.
While Wayne was doing the brakes I fancied a change from doing the sills and so I thought I would do the passenger side foot well. There was a couple of holes that needed some new metal. So I cleaned up the areas with the grinder and made the plate's too fit. Once they were welded in, I got the drill with the wire brush on the end and cleaned of all the loose rust etc. And came across a small section with four more holes in . So I made a plate up and got that welded in.
In the mean time Wayne had finished the brake lines and began to drill the holes on the bottom of the cover sill for me ready to do the welds. Then he pinched the welder from me and welded a way Thanks mate.
So after welding the extra plate in the foot well I then primed it with another coat of zinc primer. I grinded off the welds on the cover sill, and give a woosh of zinc. While Wayne was the painting the footwell.
It was nice to just do a variety of jobs for a chance
Anyway Pics

Tomorrow's another day, with a walk up the road to see the Vitesse first things in the morning and then back to it.
All the best
Darren
While Wayne was doing the brakes I fancied a change from doing the sills and so I thought I would do the passenger side foot well. There was a couple of holes that needed some new metal. So I cleaned up the areas with the grinder and made the plate's too fit. Once they were welded in, I got the drill with the wire brush on the end and cleaned of all the loose rust etc. And came across a small section with four more holes in
In the mean time Wayne had finished the brake lines and began to drill the holes on the bottom of the cover sill for me ready to do the welds. Then he pinched the welder from me and welded a way
So after welding the extra plate in the foot well I then primed it with another coat of zinc primer. I grinded off the welds on the cover sill, and give a woosh of zinc. While Wayne was the painting the footwell.
It was nice to just do a variety of jobs for a chance
Anyway Pics
Tomorrow's another day, with a walk up the road to see the Vitesse first things in the morning and then back to it.
All the best
Darren
Last edited by DazasDolly on Sun Feb 04, 2018 9:49 pm, edited 1 time in total.
1974 Triumph 1500TC In Maple Brown, (MABLE) GGN 647N
1968 Triumph Vitesse Saloon 2L MK2 Not for the faint hearted, mega restoration
1973 Triumph Spitfire In Mimosa
1968 Triumph Vitesse Saloon 2L MK2 Not for the faint hearted, mega restoration
1973 Triumph Spitfire In Mimosa
-
JPB
Re: Restoration Triumph 1500TC
Hmm, that floor simply wasn't rusty enough. I remember welding a repair into a far larger area of the floor of a green 1500HL that was at the time a mere five years old. 
It's still good to see this thorough work taking place, even if you were giving your mate the satisfaction of closing off along the sill. You must be a very patient man, I'd be holding my breath and quite possibly turning blue if I'd let someone else finish a job that I'd taken that far by myself.
It's still good to see this thorough work taking place, even if you were giving your mate the satisfaction of closing off along the sill. You must be a very patient man, I'd be holding my breath and quite possibly turning blue if I'd let someone else finish a job that I'd taken that far by myself.
Hi.........
Darren,
I am going to sound critical so please bear with me as I have two points.
No. 1 is a small one concerning the floor repairs. I always weld a patch onto such a section from the outside (underside),
the patch itself being a little oversize. This ensures a waterproof join. On the inside I apply some seam sealer.
No. 2 concerns the brake pipes.
I don't think what you have done is best because you have used copper pipe and also not made a very good shape.
Copper is prone to failure as a result of fatigue caused by vibration. For this reason it is better* to use Kunifer (copper/nickel)
brake pipe on the axle. (Kunifer is much dearer than copper and a little bit more difficult to shape.)
The pipe itself needs to be shaped in a way that it is not compromised by the sliding that the wheel cylinder will do under braking.
(* steel is the best in this respect but it is weakened by corrosion...)
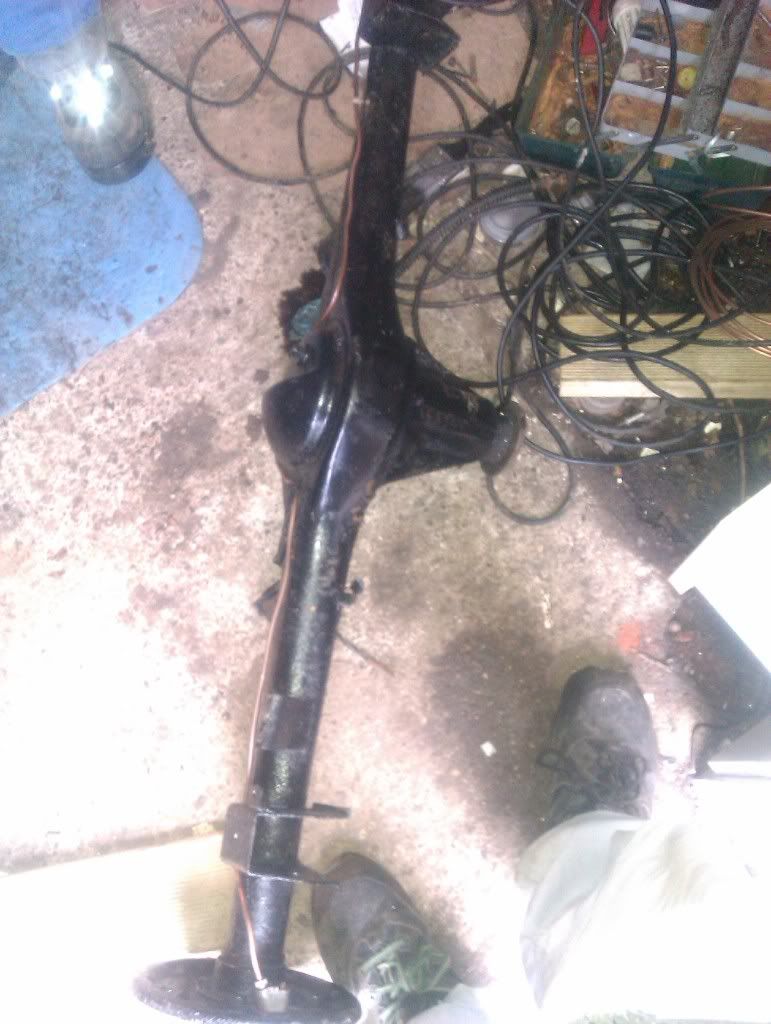
Once you have finished the second sill you will need to look at the back wheel arches. The axle really needs to be removed
for access. I will give you pointers as to what to expect when you get to there.
I agree with John, I would have wanted to finish the sill myself .
I am going to sound critical so please bear with me as I have two points.
No. 1 is a small one concerning the floor repairs. I always weld a patch onto such a section from the outside (underside),
the patch itself being a little oversize. This ensures a waterproof join. On the inside I apply some seam sealer.
No. 2 concerns the brake pipes.
I don't think what you have done is best because you have used copper pipe and also not made a very good shape.
Copper is prone to failure as a result of fatigue caused by vibration. For this reason it is better* to use Kunifer (copper/nickel)
brake pipe on the axle. (Kunifer is much dearer than copper and a little bit more difficult to shape.)
The pipe itself needs to be shaped in a way that it is not compromised by the sliding that the wheel cylinder will do under braking.
(* steel is the best in this respect but it is weakened by corrosion...)
Once you have finished the second sill you will need to look at the back wheel arches. The axle really needs to be removed
for access. I will give you pointers as to what to expect when you get to there.
I agree with John, I would have wanted to finish the sill myself
TDC Forum moderator
PLEASE help us to maintain a friendly forum,
either PM or use Report Post if you see anything you are unhappy with. Thanks.
PLEASE help us to maintain a friendly forum,
either PM or use Report Post if you see anything you are unhappy with. Thanks.
-
DazasDolly
- Guest contributor
- Posts: 1162
- Joined: Sun Mar 14, 2010 7:44 pm
- Location: Colchester, ESSEX
Re: Hi.........
Hello Iansprint95m wrote:Darren,
I am going to sound critical so please bear with me as I have two points.
No. 1 is a small one concerning the floor repairs. I always weld a patch onto such a section from the outside (underside),
the patch itself being a little oversize. This ensures a waterproof join. On the inside I apply some seam sealer.
No. 2 concerns the brake pipes.
I don't think what you have done is best because you have used copper pipe and also not made a very good shape.
Copper is prone to failure as a result of fatigue caused by vibration. For this reason it is better* to use Kunifer (copper/nickel)
brake pipe on the axle. (Kunifer is much dearer than copper and a little bit more difficult to shape.)
The pipe itself needs to be shaped in a way that it is not compromised by the sliding that the wheel cylinder will do under braking.
(* steel is the best in this respect but it is weakened by corrosion...)
Once you have finished the second sill you will need to look at the back wheel arches. The axle really needs to be removed
for access. I will give you pointers as to what to expect when you get to there.
I agree with John, I would have wanted to finish the sill myself
Thank you for the comments.
1) 2 of the patches in the foot well are above the chassis leg so couldn't be done from the underside. I do get what your saying about the 3rd patch and was going to use seam sealer but mine had gone hard in the tube
2) Concerning the rear brake pipe, that isn't the final fit, tbh I'm totally unsure on what to do. This is because I'm not sure whether to do pig tails as John suggested very much earlier in the restoration or the the flexi's that go into the rear wheel cylinders.
I have one small bit of welding on that sill today, and that is to seal the ends of the three joints with the mig.
Many thanks
All the best
Darren
1974 Triumph 1500TC In Maple Brown, (MABLE) GGN 647N
1968 Triumph Vitesse Saloon 2L MK2 Not for the faint hearted, mega restoration
1973 Triumph Spitfire In Mimosa
1968 Triumph Vitesse Saloon 2L MK2 Not for the faint hearted, mega restoration
1973 Triumph Spitfire In Mimosa
-
pollystag
Re: Restoration Triumph 1500TC
hi darren,
nice work there, im starting a new job close to you monday (fingringhoe rd rowhedge) any chance of popping round one day to have a look?
cheers steve.
nice work there, im starting a new job close to you monday (fingringhoe rd rowhedge) any chance of popping round one day to have a look?
cheers steve.
-
JPB
Re: Hi.........
Well the coils would prevent the pipes snapping through fatigue quite so soon (the reason some countries' C&U regs don't allow copper to be used for brake pipes in any location, even where they don't have to move) but flexies would be a more durable and elegant solution, maybe some really short ones such as Peugeot 405 saloon rears but made to fit the Imperial unions? You'd need to weld a junction to the end of each axle tube to carry the ends of the flexies but I've done that on the (Marina, so the same casing as the one in the 1500TC) axle in a modified Rebel before now and can confirm that you'd be unlikely to blow holes through the stuff it's made from.DazasDolly wrote:Concerning the rear brake pipe, that isn't the final fit, tbh I'm totally unsure on what to do. This is because I'm not sure whether to do pig tails as John suggested very much earlier in the restoration or the the flexi's that go into the rear wheel cylinders.
Flexies will help ensure that both cylinders are able to move freely throughout their full range too. I think I'd opt for that method now I've had a while to think on it.
-
DazasDolly
- Guest contributor
- Posts: 1162
- Joined: Sun Mar 14, 2010 7:44 pm
- Location: Colchester, ESSEX
Re: Restoration Triumph 1500TC
Thanks John
I've had a bit of an idea, and will pm you once i've got the parts
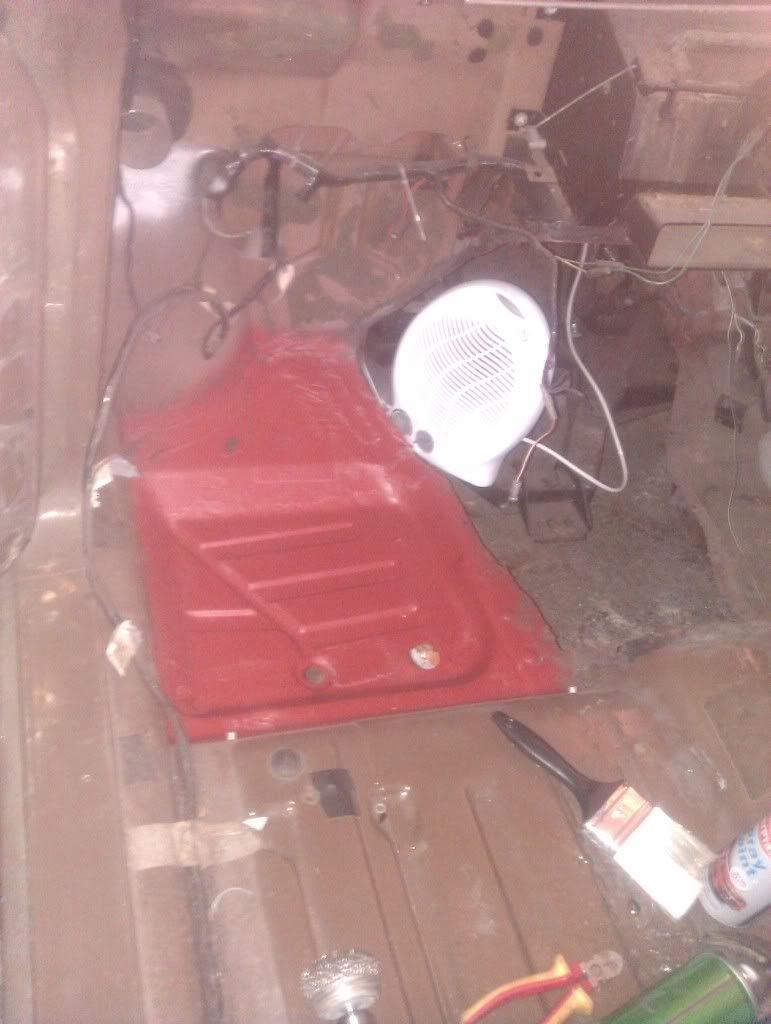
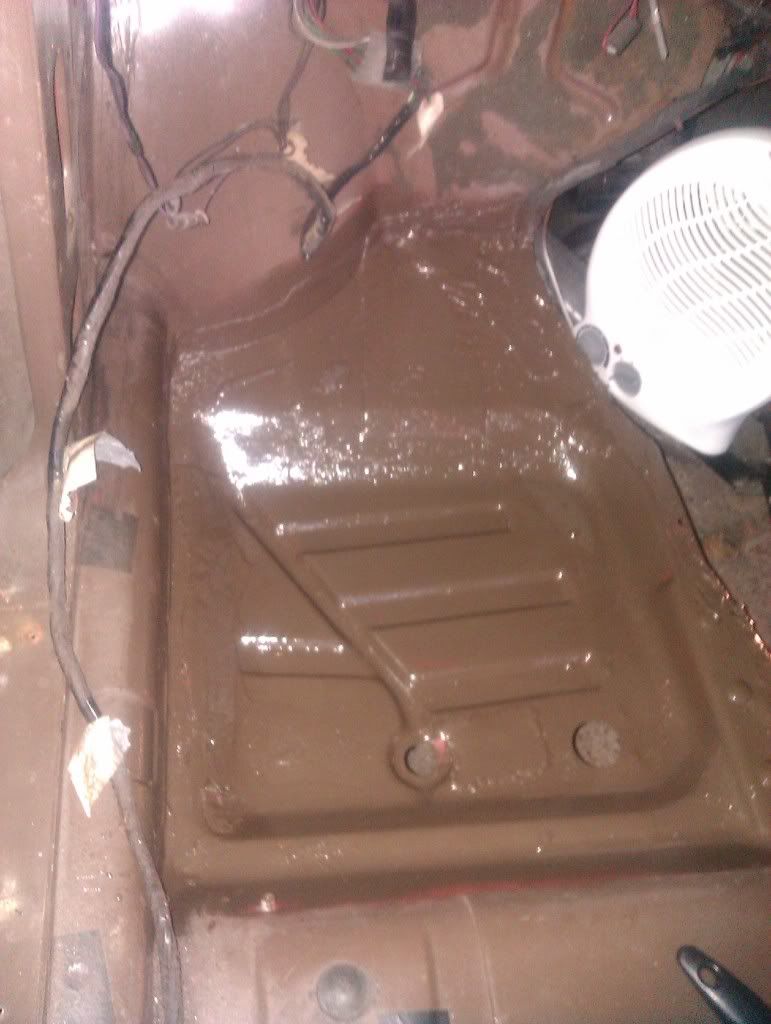
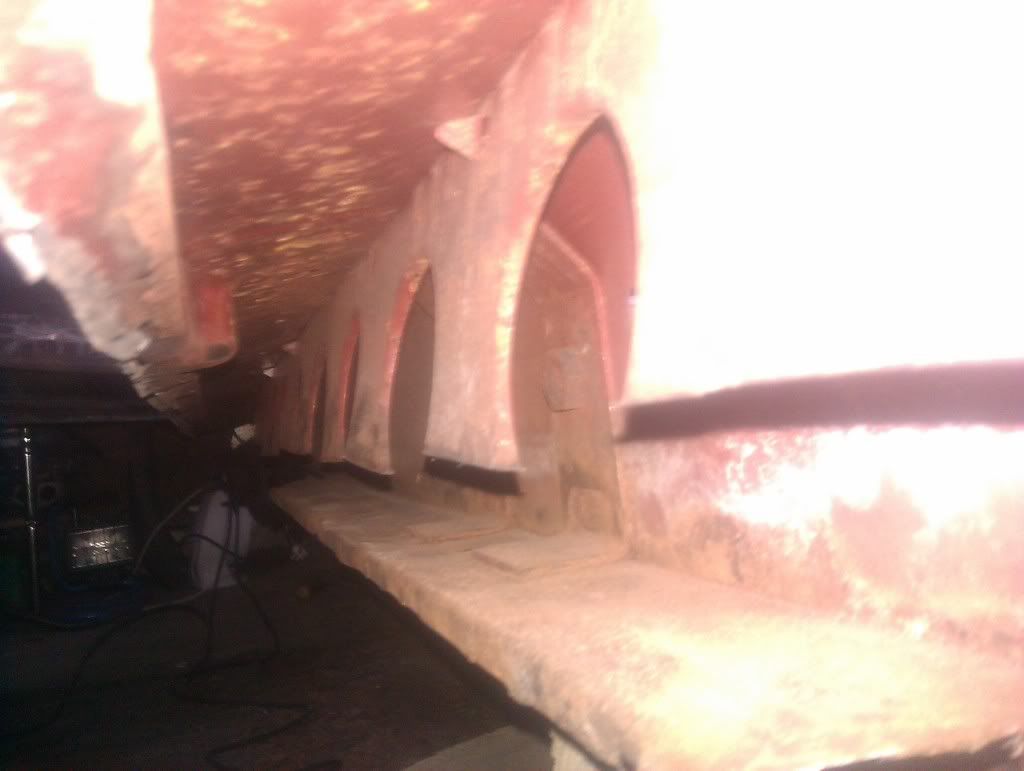
Done a few jobs yesterday for my wife so today was more about what I can put on the car to give me some more space. So with me doing the passenger side foot well I thought if I can clear inside of the car, I can double check other areas as I know I now have another hole to deal with in the drivers side passenger foot well. I think this has been caused by all the hammering on the drivers side sill when I was trying to mate things up etc. .
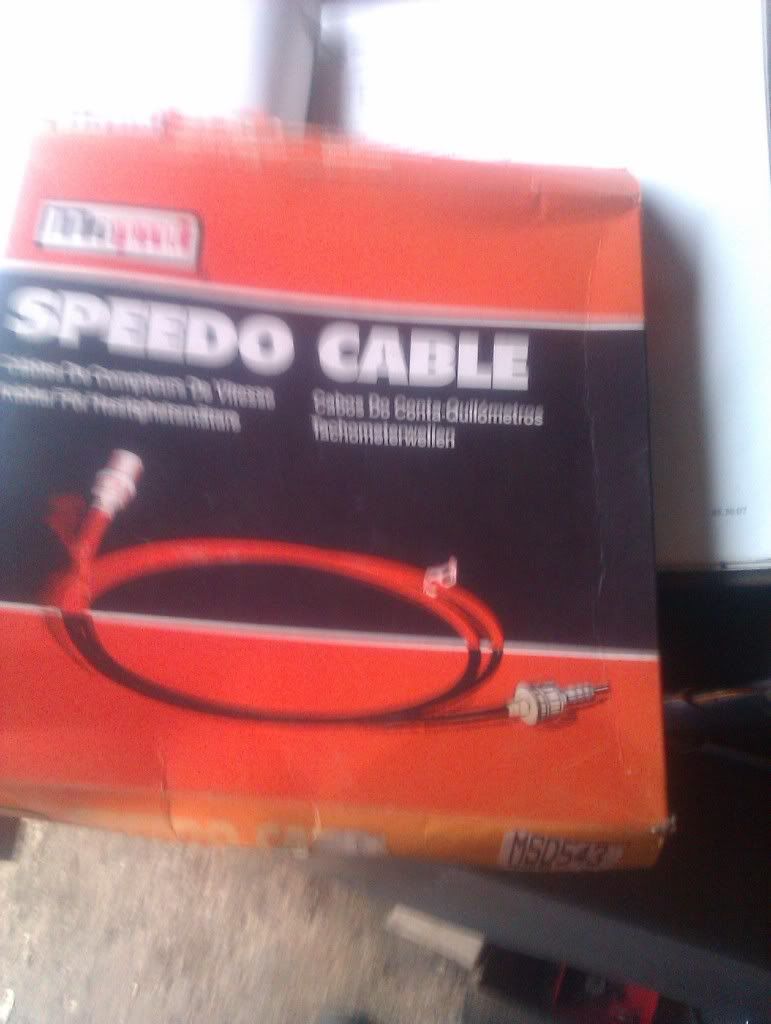
So the dash has been sitting in the car for some time and I had gone to fit before but remembered I needed some parts so undone it again. Triumphmj*123 kindly donated a speedo with the trip cable intact. So I stripped the speedo and unclipped the trip cable and it was simply push in to the back of the original. Nice easy fix.
In my part cupboard I had bought a few years a go a new speedo cable from the bay and so took the inner mostly out and greased up with some nice 70's possibly 80's grease. Took excess off and worked it back into the outer tube ready to fit to the speedo once I got to that stage.
Dash was pretty straight forward, I put some sealant around the the windscreen demister vent before I added the tube and bedded it in well. I was trying to go off the electric circuit layout in the BL service manual, then found a pic's and info for putting the clocks etc back in, really useful and easy to do the job once I had found that.
 I have 2 white and pink wires for the radio, can I use just one and then use the other for the clock?
The pics will tell the story, but it's a nice big lump off the floor of the car.
pics:
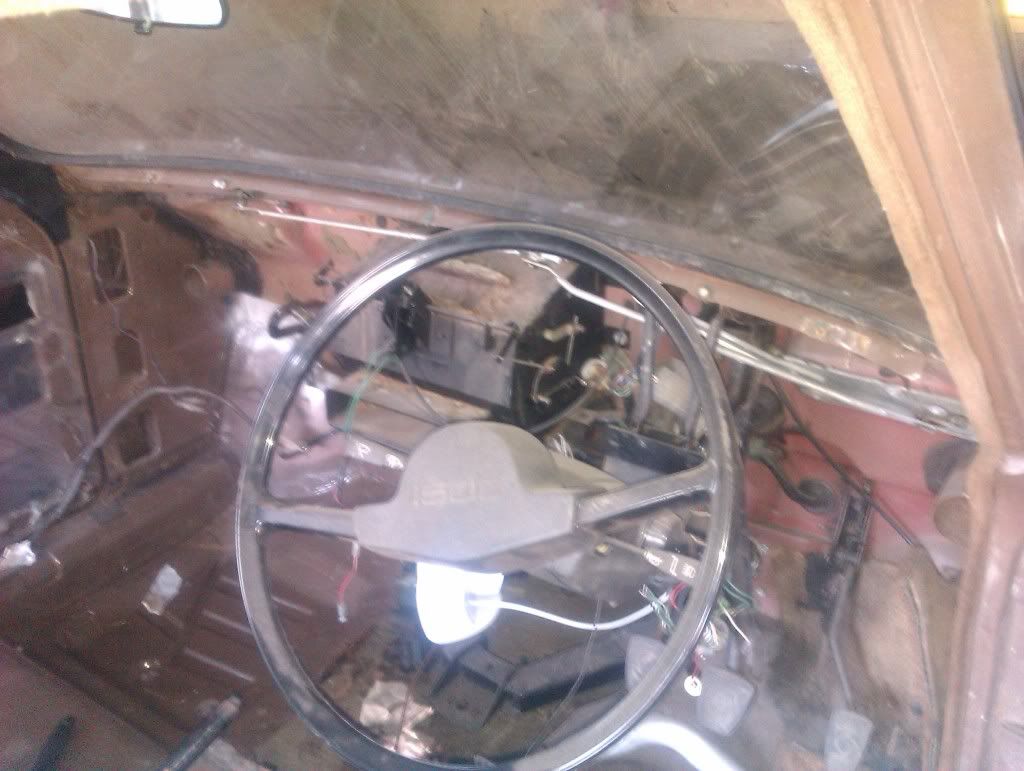
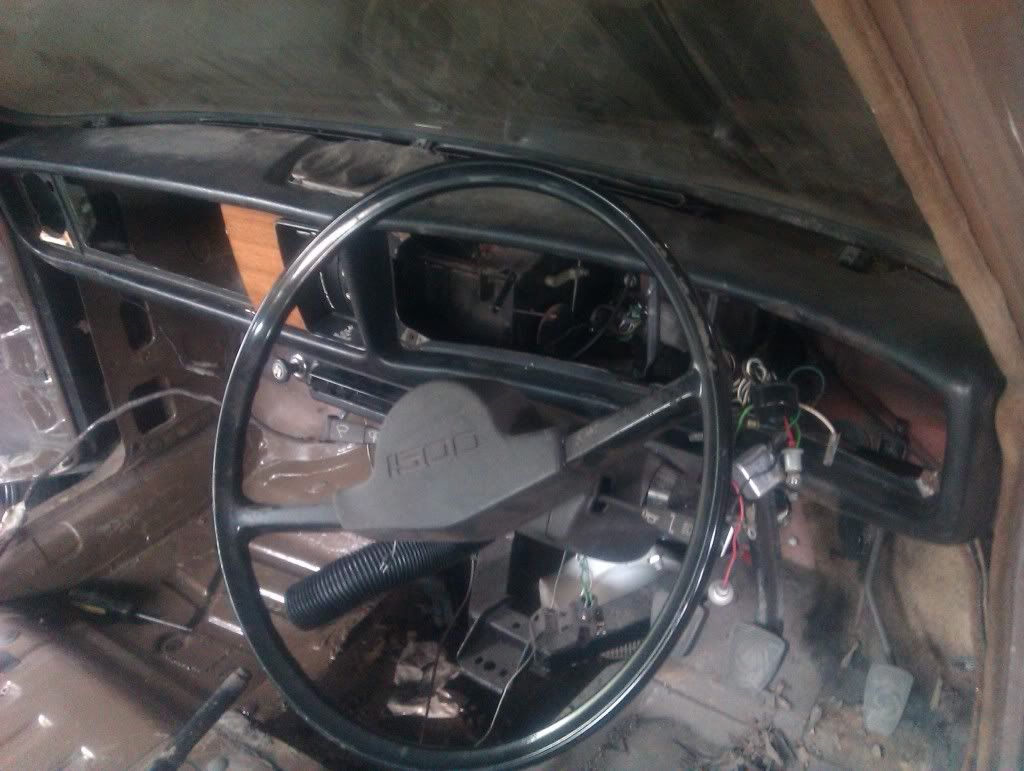
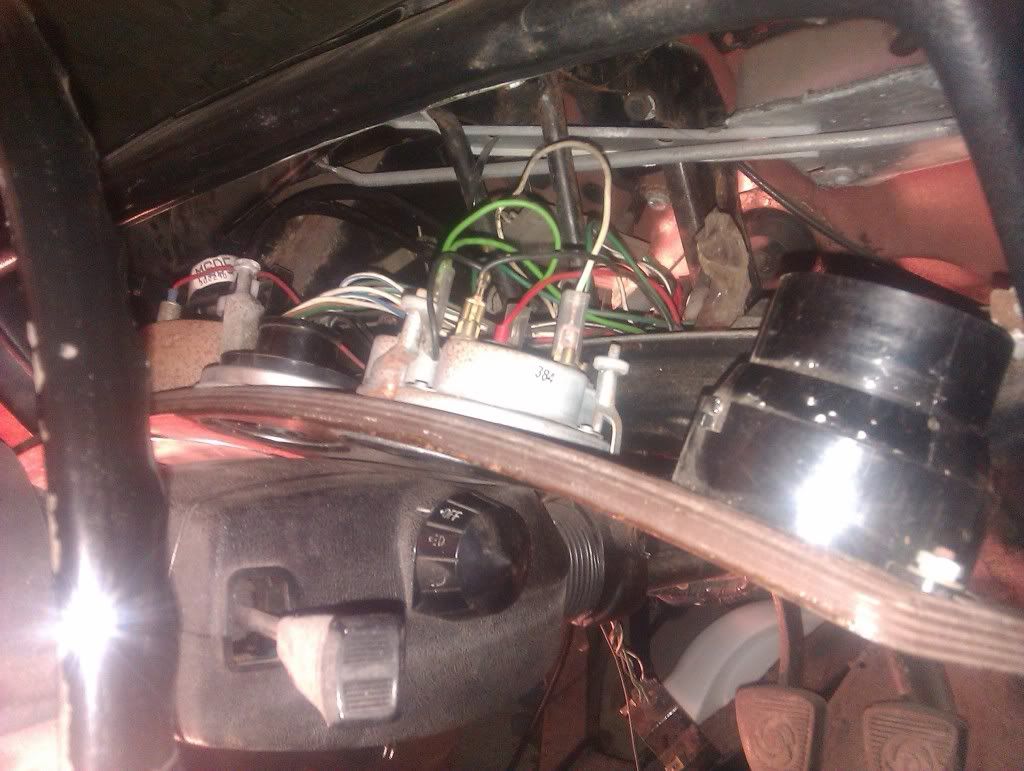
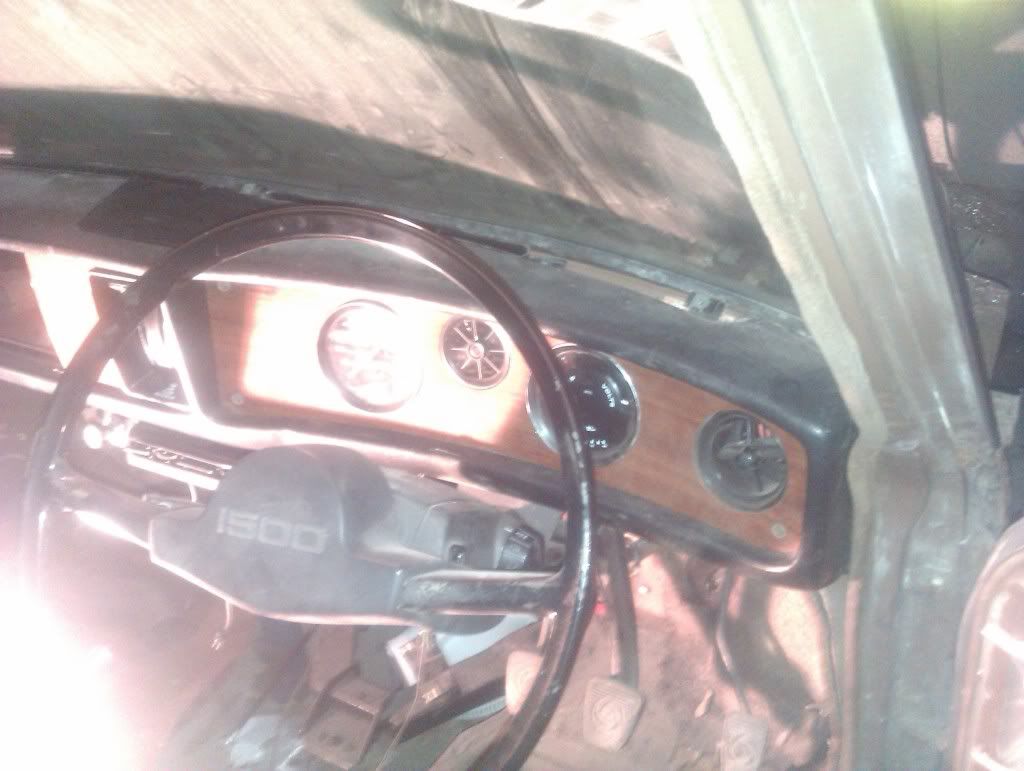
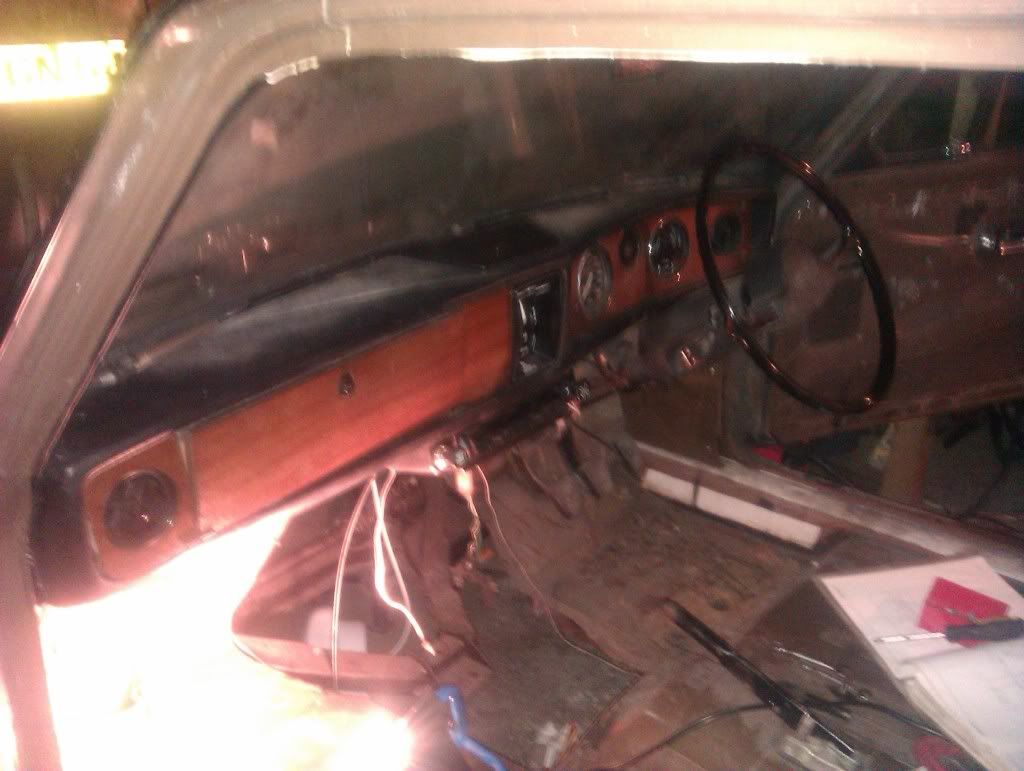
Just got to put some small wood screws into the back of the nearside ball vent, I broke it when I took it out.
Many Thanks
Darren
I've had a bit of an idea, and will pm you once i've got the parts
Done a few jobs yesterday for my wife so today was more about what I can put on the car to give me some more space. So with me doing the passenger side foot well I thought if I can clear inside of the car, I can double check other areas as I know I now have another hole to deal with in the drivers side passenger foot well. I think this has been caused by all the hammering on the drivers side sill when I was trying to mate things up etc.
So the dash has been sitting in the car for some time and I had gone to fit before but remembered I needed some parts so undone it again. Triumphmj*123 kindly donated a speedo with the trip cable intact. So I stripped the speedo and unclipped the trip cable and it was simply push in to the back of the original. Nice easy fix.
In my part cupboard I had bought a few years a go a new speedo cable from the bay and so took the inner mostly out and greased up with some nice 70's possibly 80's grease. Took excess off and worked it back into the outer tube ready to fit to the speedo once I got to that stage.
Dash was pretty straight forward, I put some sealant around the the windscreen demister vent before I added the tube and bedded it in well. I was trying to go off the electric circuit layout in the BL service manual, then found a pic's and info for putting the clocks etc back in, really useful and easy to do the job once I had found that.
The pics will tell the story, but it's a nice big lump off the floor of the car.
pics:
Just got to put some small wood screws into the back of the nearside ball vent, I broke it when I took it out.
Many Thanks
Darren
Last edited by DazasDolly on Sun Feb 04, 2018 9:56 pm, edited 1 time in total.
1974 Triumph 1500TC In Maple Brown, (MABLE) GGN 647N
1968 Triumph Vitesse Saloon 2L MK2 Not for the faint hearted, mega restoration
1973 Triumph Spitfire In Mimosa
1968 Triumph Vitesse Saloon 2L MK2 Not for the faint hearted, mega restoration
1973 Triumph Spitfire In Mimosa
-
DazasDolly
- Guest contributor
- Posts: 1162
- Joined: Sun Mar 14, 2010 7:44 pm
- Location: Colchester, ESSEX
Re: Restoration Triumph 1500TC
Fitted front Anti Roll Bar, what a pain in the backside the bolt's are to do up.
Another bit of floor space available to me.
Can't wait for the weekend so that I can do the n/s sill. All new metal has been bought today, total price for can weld through primer, tube seam sealant, 5 inch sheet with 45 degree angle on one side x 2 metres and 8inch wide x 2 metres. Total price £23. Bargain
Many Thanks
Darren
1974 Triumph 1500TC In Maple Brown, (MABLE) GGN 647N
1968 Triumph Vitesse Saloon 2L MK2 Not for the faint hearted, mega restoration
1973 Triumph Spitfire In Mimosa
1968 Triumph Vitesse Saloon 2L MK2 Not for the faint hearted, mega restoration
1973 Triumph Spitfire In Mimosa
-
DazasDolly
- Guest contributor
- Posts: 1162
- Joined: Sun Mar 14, 2010 7:44 pm
- Location: Colchester, ESSEX
Re: Restoration Triumph 1500TC
Well after the slight flood this week in the garage, I have finally got back in there. Had to sort a lot of stuff out and make some more space, I wasn't able to do much yesterday as I was working on my wife's modern.
I also have a robin nesting in my screw cupboard, hopefully have some pics soon of the chick's.
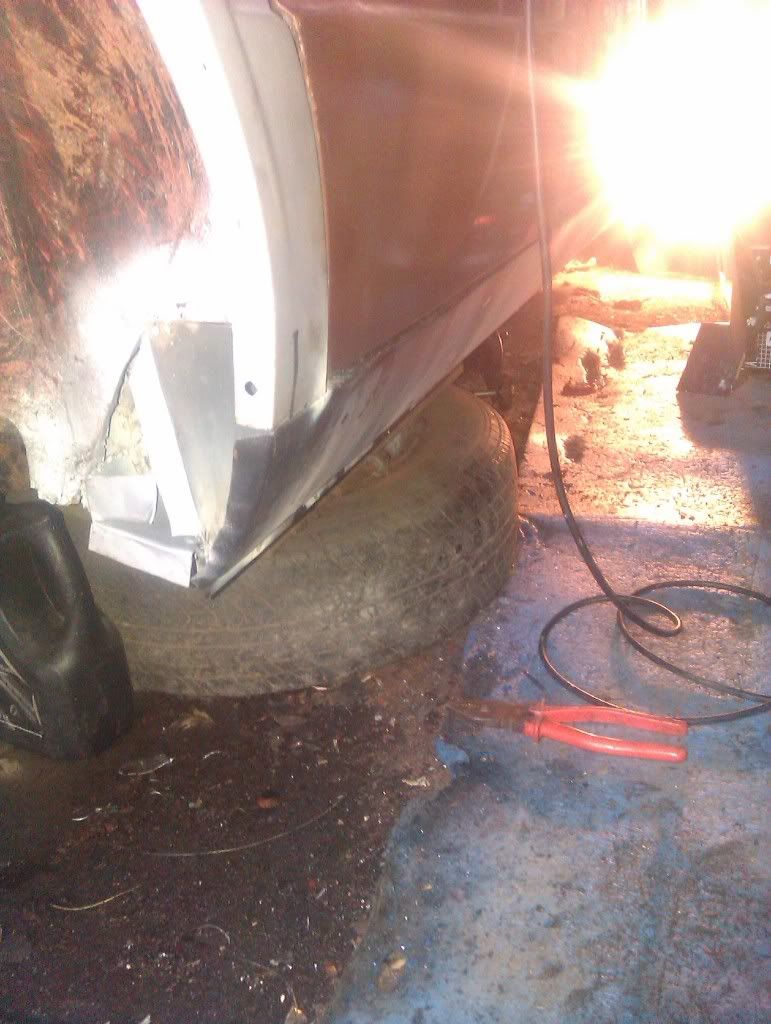
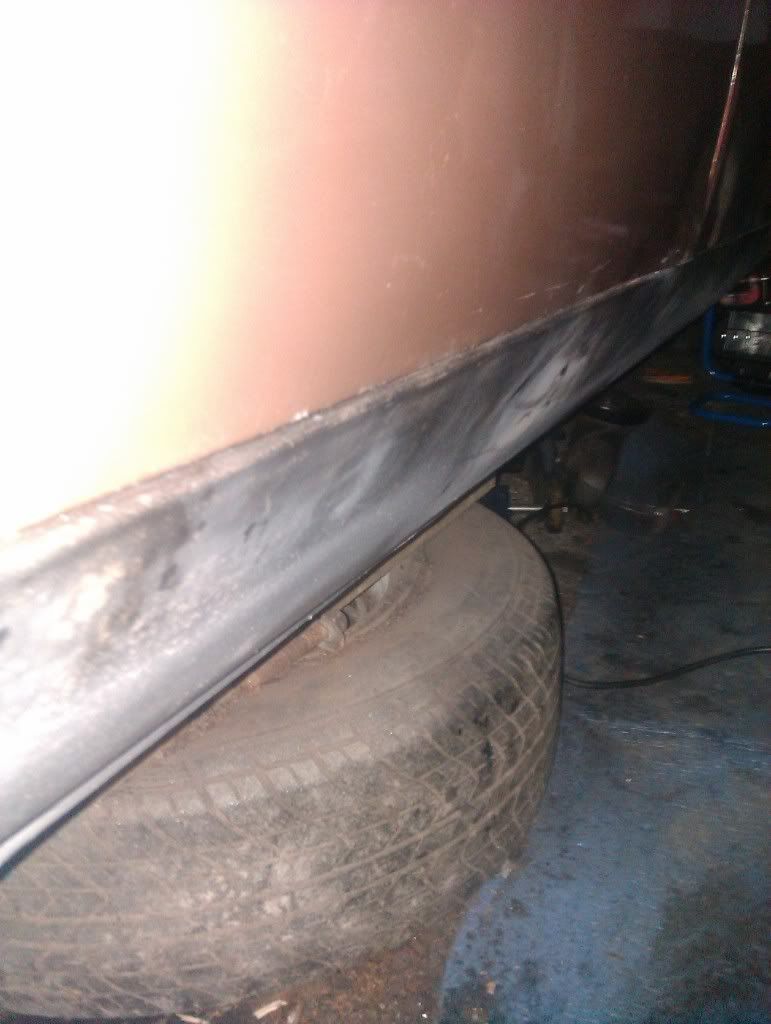
So today it was finish putting things away and cracking on removing the rot and finding yet more hole's in the n/s sill. Not sure what to do with the end nearest the wheel arch a you will see in pic's I will put them first.
Also should I just repair the soffitt or put a whole new piece in like I did on the other side. What I have left of the soffitt seem's very strong compared to what the other side was.

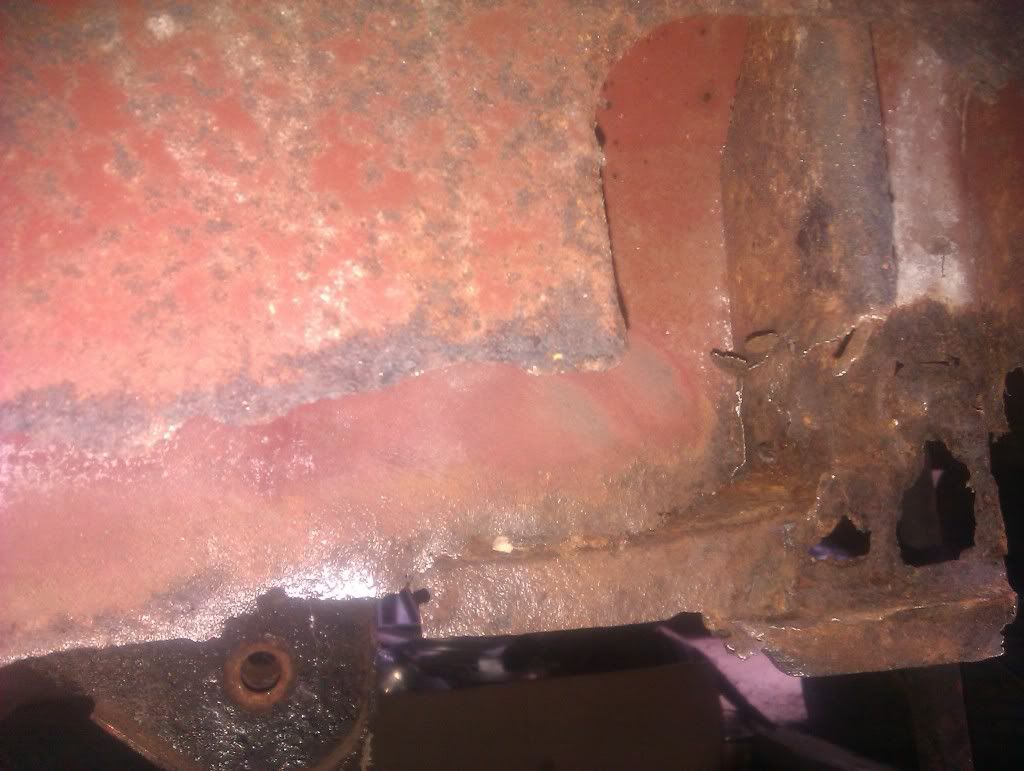
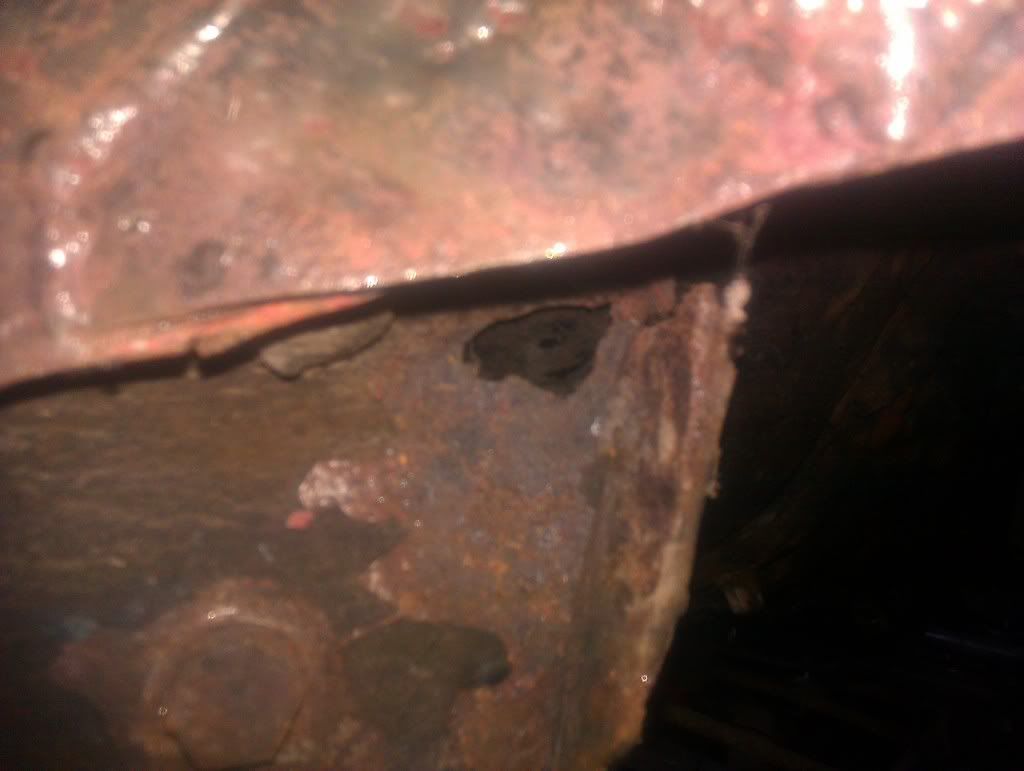

I got a pic to put on just for John tomorrow,
All the best
Darren
I also have a robin nesting in my screw cupboard, hopefully have some pics soon of the chick's.
So today it was finish putting things away and cracking on removing the rot and finding yet more hole's in the n/s sill. Not sure what to do with the end nearest the wheel arch a you will see in pic's I will put them first.
Also should I just repair the soffitt or put a whole new piece in like I did on the other side. What I have left of the soffitt seem's very strong compared to what the other side was.
I got a pic to put on just for John tomorrow,
All the best
Darren
Last edited by DazasDolly on Sun Feb 04, 2018 9:57 pm, edited 1 time in total.
1974 Triumph 1500TC In Maple Brown, (MABLE) GGN 647N
1968 Triumph Vitesse Saloon 2L MK2 Not for the faint hearted, mega restoration
1973 Triumph Spitfire In Mimosa
1968 Triumph Vitesse Saloon 2L MK2 Not for the faint hearted, mega restoration
1973 Triumph Spitfire In Mimosa