Looks great..not too bad at all. Another fab resto to keep the mojo going during the cold, cold winter.
Fab work and photo's as always James.
| The Triumph Dolomite Club - Discussion Forum http://forum.triumphdolomite.co.uk/ |
|
| VA138, the next chapter.... http://forum.triumphdolomite.co.uk/viewtopic.php?t=34307 |
Page 3 of 14 |
| Author: | xvivalve [ Sun Jan 13, 2019 10:42 pm ] |
| Post subject: | Re: VA138, the next chapter.... |
I have a reasonable scuttle panel already cut from a car |
|
| Author: | Reg [ Sat Jan 19, 2019 10:08 am ] |
| Post subject: | Re: VA138, the next chapter.... |
Looks great..not too bad at all. Another fab resto to keep the mojo going during the cold, cold winter. Fab work and photo's as always James. |
|
| Author: | James467 [ Wed Feb 13, 2019 4:50 pm ] |
| Post subject: | Re: VA138, the next chapter.... |
Not a huge amount to update at the moment I am afraid, I have been somewhat hampered by the weather and getting the slant engine stand mounts done. The first thing that needed doing was to get the structure sound so I can get the dolly mounted onto the jacking points then move on to the chassis legs. First job then finish stripping the paint from the wings. 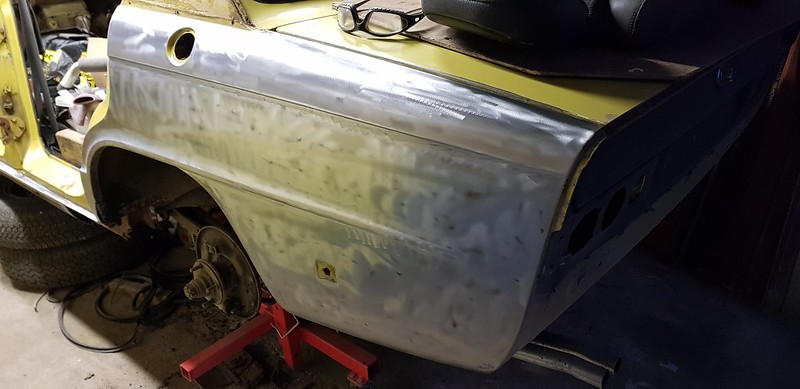 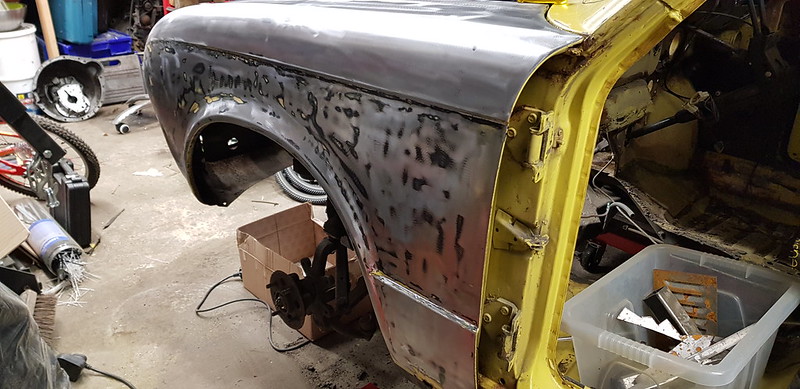 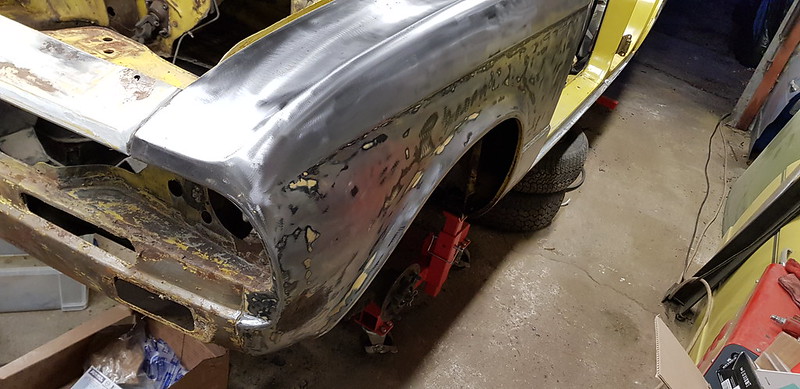 Good, no filler! I cut the bottoms of the wings to check the front of the sills, they have been repaired in the past, the repair is fine, but not up to the standard that I am looking for so I will cut it off and re do it in zintec sheet.  The wing bottom itself is not so good, I'll have to think about a replacement one of these, probably on both sides. 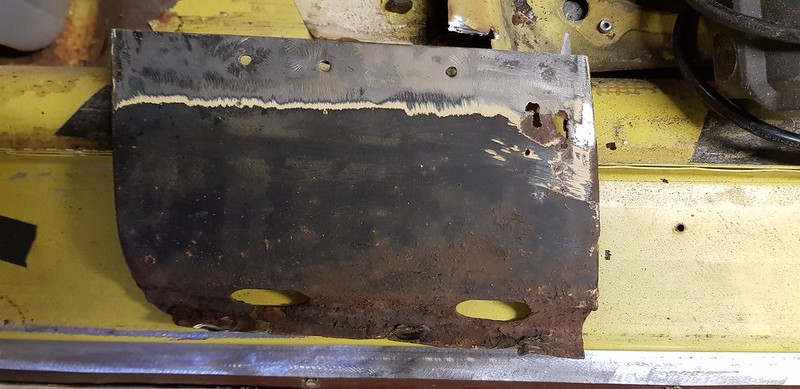  Although the sills looked ok from the outside, shining a torch down the inside of them revealed some past repairs so replacement here is the best option, along with the lower section as well. 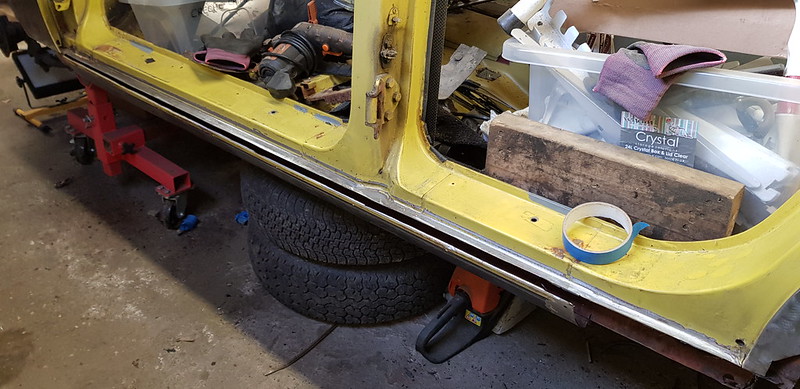 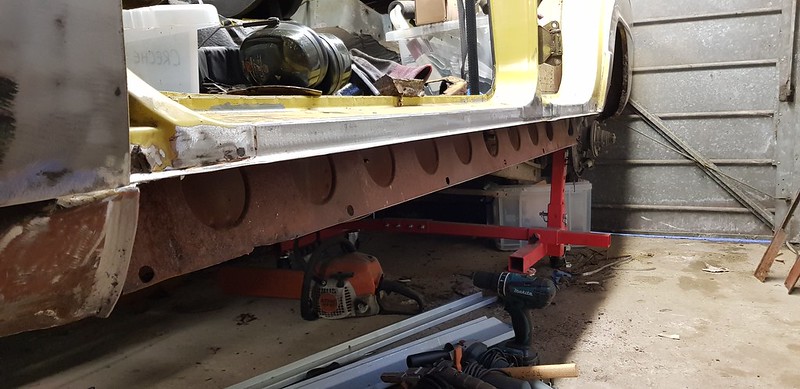 The reinforcer will need some repairs, nothing too drastic. 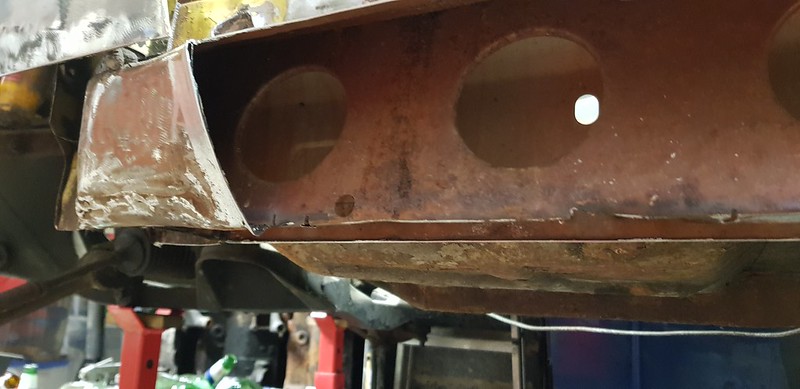 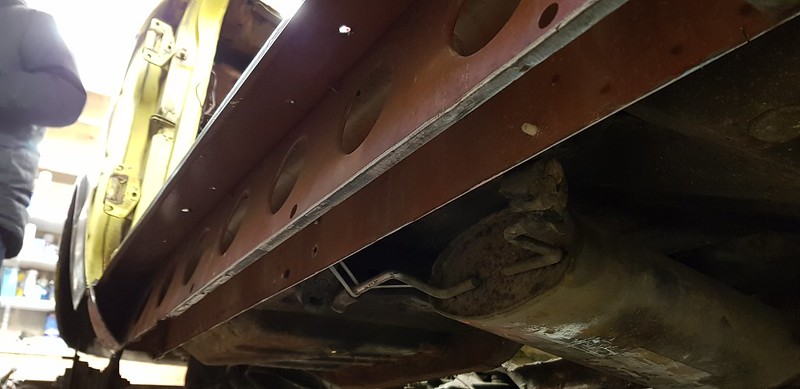 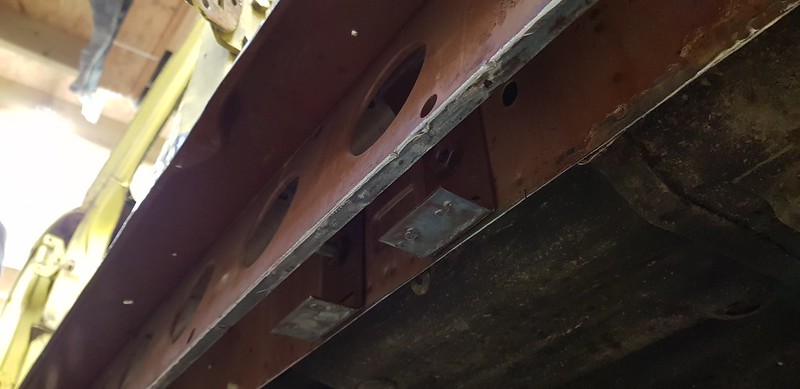 With some repairs it all should go back together quite nicely.   This is what I meant by previous repairs! 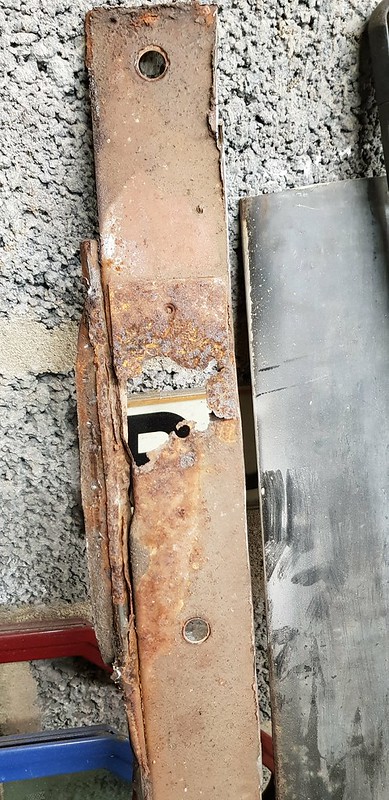  I should be able to get the jacking points repaired and the sills on this Friday and move on to the other side. |
|
| Author: | Awaiting Repair [ Thu Feb 14, 2019 12:49 pm ] |
| Post subject: | Re: VA138, the next chapter.... |
Great stuff as as usual James! Always enjoy your restoration threads, keep up the good work! Excellent photos as usual. Are the wings the original ones btw? Cheers Keith |
|
| Author: | shaunroche [ Thu Feb 14, 2019 2:07 pm ] |
| Post subject: | Re: VA138, the next chapter.... |
Quote:
Are the wings the original ones btw?
Don't think so Keith, think it's had a whole new front end including bonnet at some point as there's no holes for the bumper side fixings nor holes in the front panel for the under rider stays.....I've a feeling there will be soon though! And yes, superb work James!! |
|
| Author: | Awaiting Repair [ Thu Feb 14, 2019 8:04 pm ] |
| Post subject: | Re: VA138, the next chapter.... |
For its age, the inner diaphragm sill looks pretty good when compared to later models.... |
|
| Author: | James467 [ Fri Mar 15, 2019 4:00 pm ] |
| Post subject: | Re: VA138, the next chapter.... |
I has been ages since I have posted so I am trying to remember where I left off! I think I got here! Starting at the back I have cut all of the rust out and replaced with nice new clean steel.  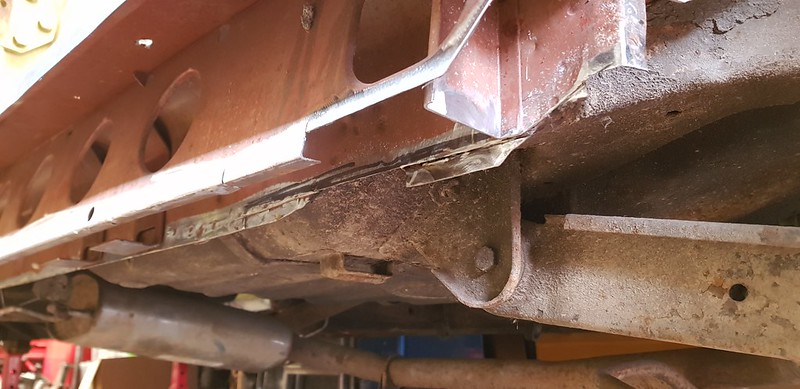   If I am honest, pretty simple repairs. I found that when test fitting the sills to allow the lower flange to sit correctly the new lower part of the inner sill has to sit lower. This isn't an issue if the reinforcer was being replaced, however in this case the inner reinforcer is in good condition and due to the slight differences in sill design it doesn't line up. 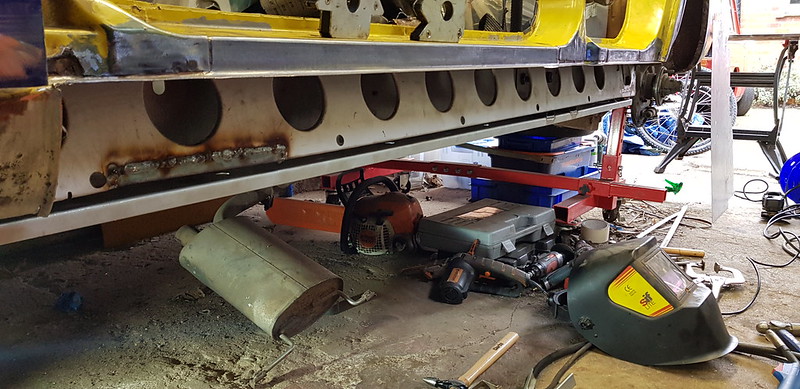 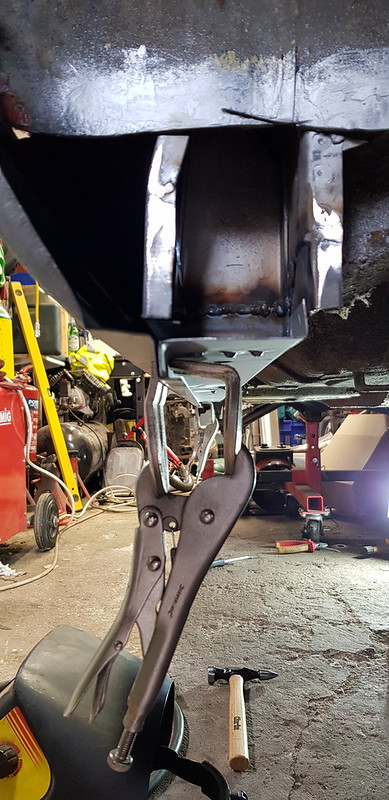 My solution is to use some box section to reinforce and reattach the seatbelt reinforment plates to the inner sill, then cut the lower lip off and replace it with a section of folded zintec plug welding it to the bottom of the inner sill, this then solved the problem.  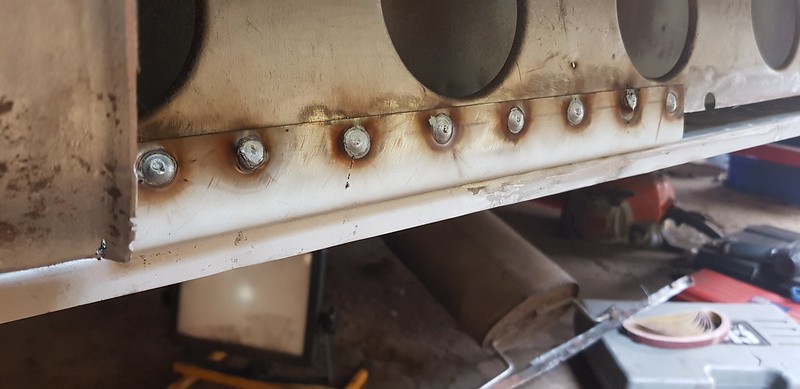 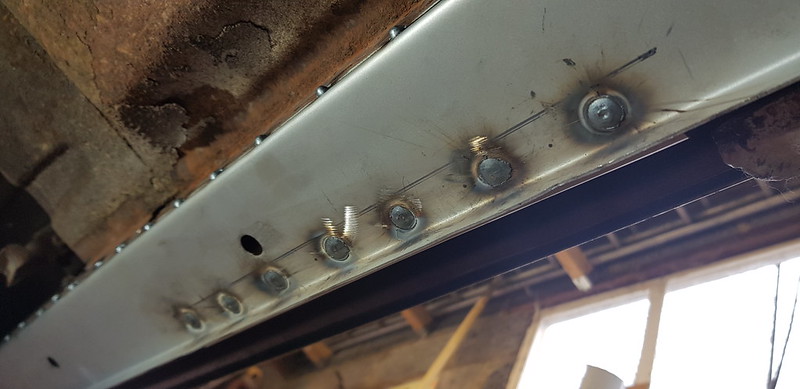 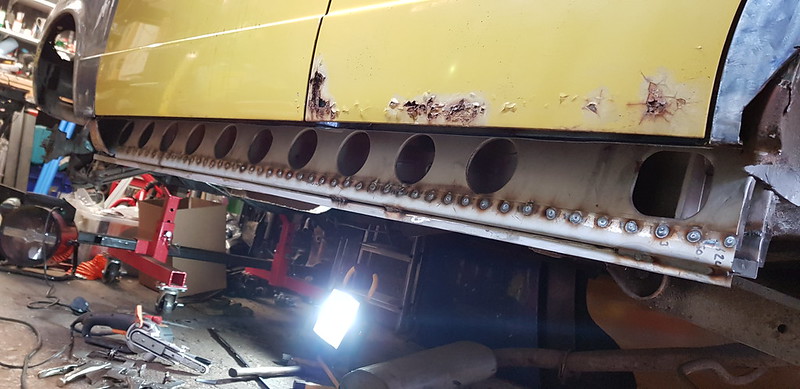 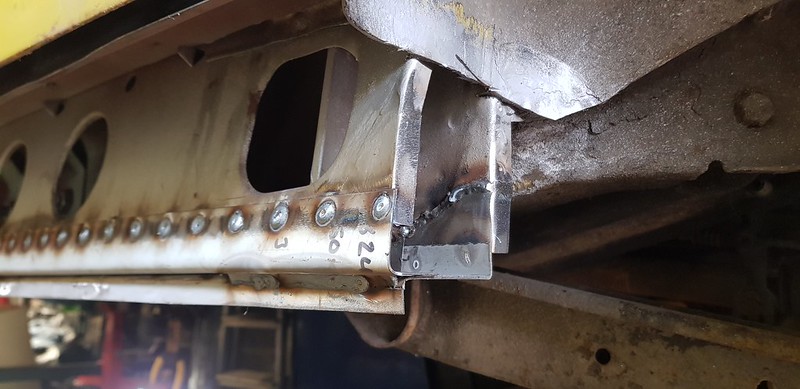 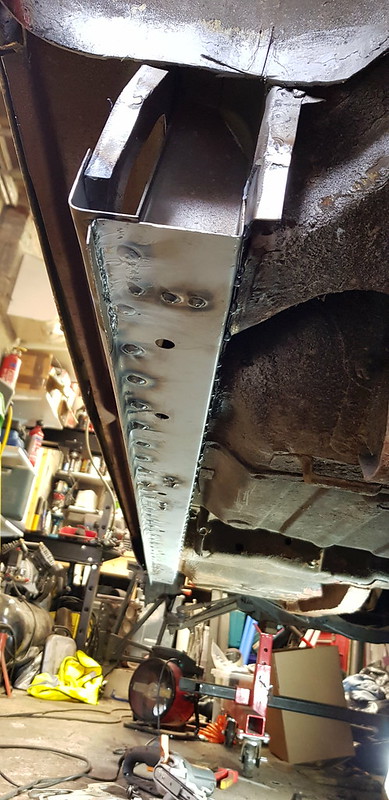 Lower inner sill tacked in place 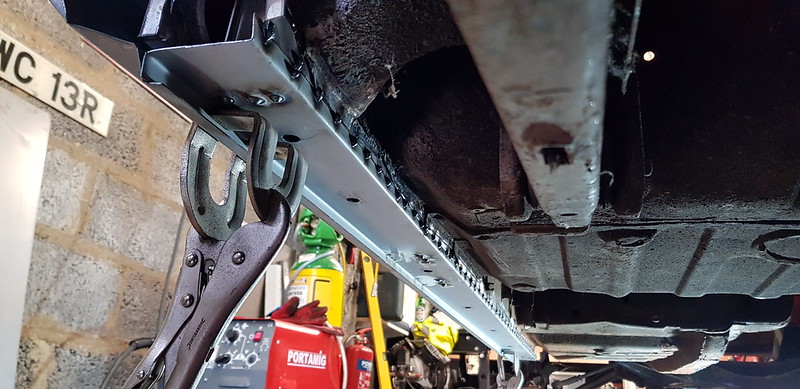 I can then get on with fitting the outer sill cover.   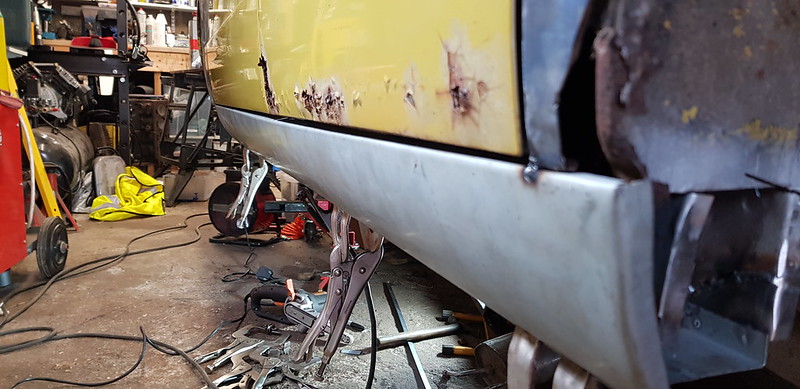 Tacked in along the top, aligned and then plug welded along the bottom seam. 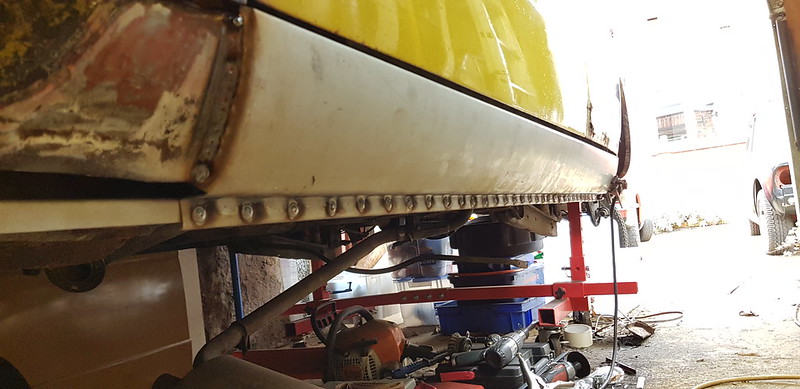  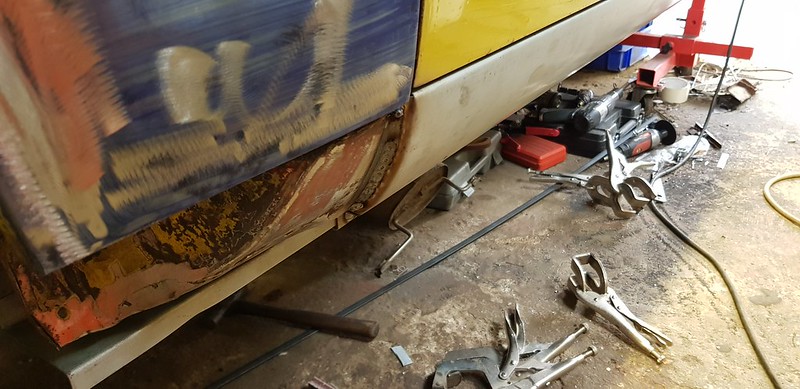 Then it is time to close in the rear jacking point and wheelarch. 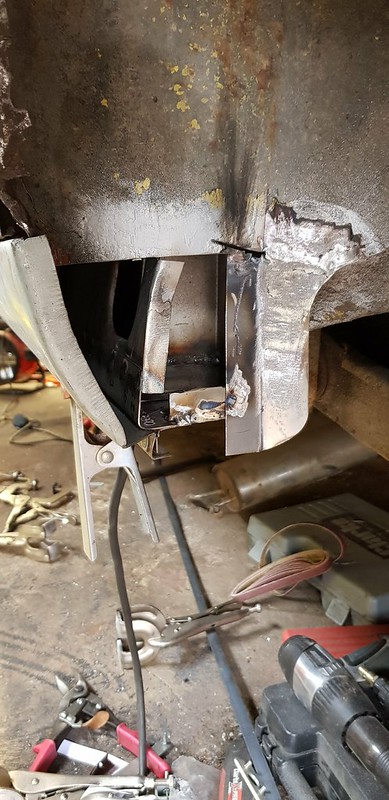  Then repair the lower part of the rear wheelarch. 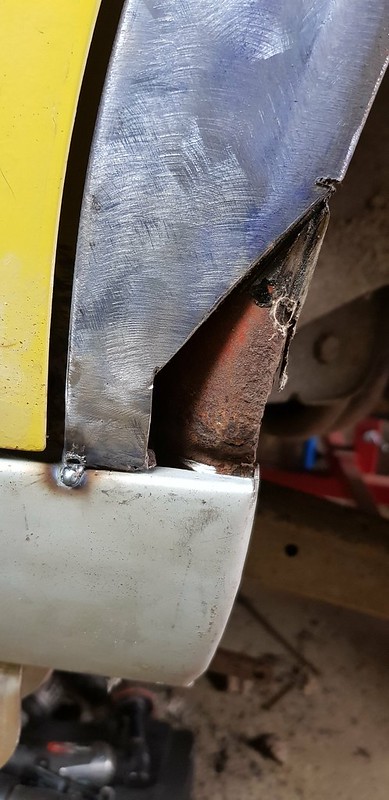  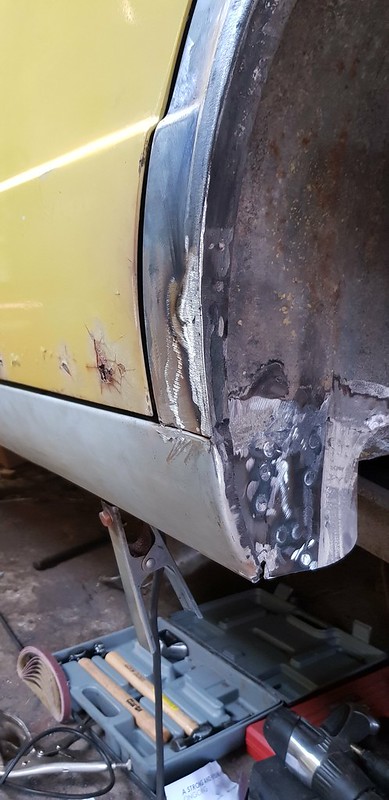 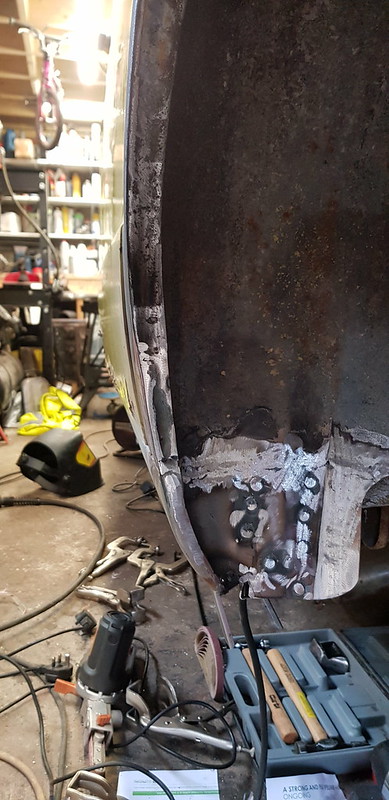 Done! 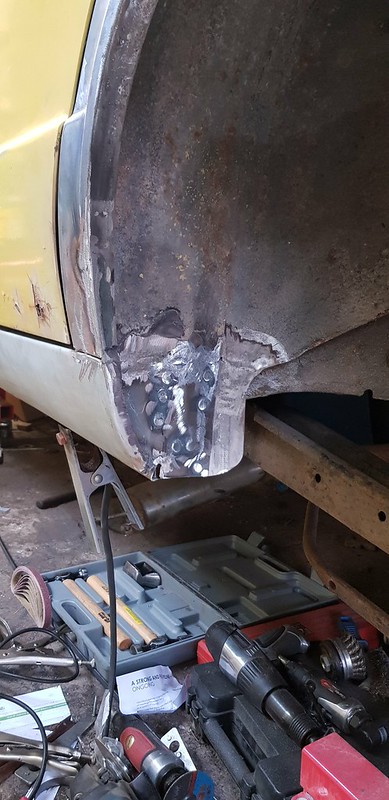  On to the front!! I will fit new jacking pads and seam weld the inner and outer sills last. |
|
| Author: | James467 [ Mon Mar 18, 2019 12:45 pm ] |
| Post subject: | Re: VA138, the next chapter.... |
This mornings job was to complete the sill repairs by finishing the front jacking point. 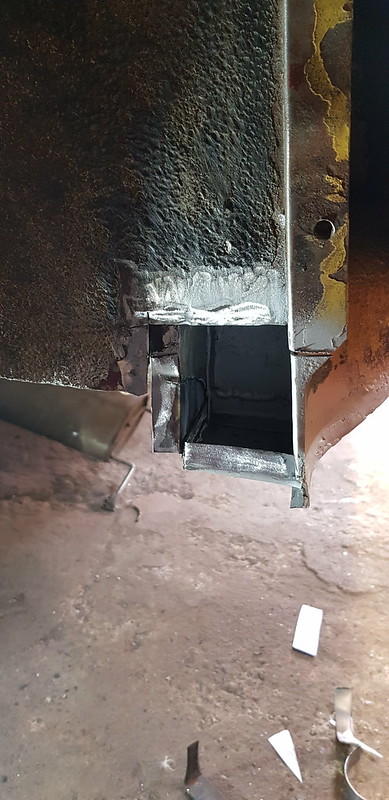  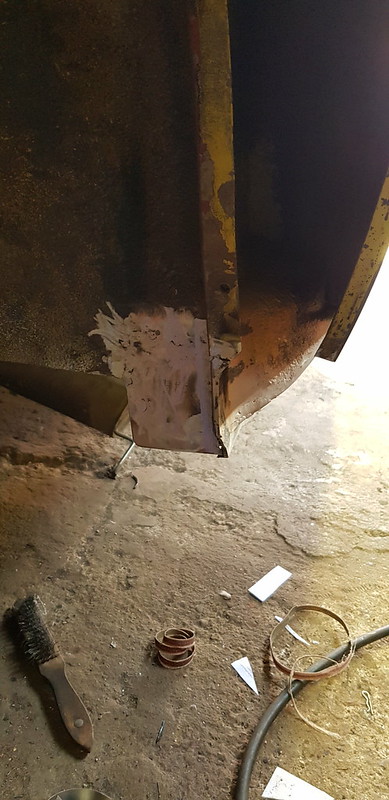 The last things to do on this side are to seam weld the sill, tidy up the welds and fit the jacking pads. |
|
| Author: | Tony Burd [ Mon Mar 18, 2019 1:20 pm ] |
| Post subject: | Re: VA138, the next chapter.... |
Nice work James. |
|
| Author: | xvivalve [ Mon Mar 18, 2019 2:31 pm ] |
| Post subject: | Re: VA138, the next chapter.... |
I think you are going to have to redo the outer cill; I can’t believe it, but your plug welds are at irregular centres! How can you sleep at night??? |
|
| Author: | Matt Cotton [ Mon Mar 18, 2019 9:14 pm ] |
| Post subject: | Re: VA138, the next chapter.... |
Superb work James and a great read. Just a question on the picture here if I may - I can see you have spot welded it to the inner cill and seam welded at the top and RHS, but what happens to the LHS as it meets the outer wheelarch area? Is it ok to seam seal this area or do you weld it here too? I have a project Sprint coming my way very soon and it will certainly need cill (s) so am pondering whether to have a go myself...with the aid of this thread and the forum for advice! Regards MC 
|
|
| Author: | Carledo [ Mon Mar 18, 2019 10:52 pm ] |
| Post subject: | Re: VA138, the next chapter.... |
Quote:
I think you are going to have to redo the outer cill; I can’t believe it, but your plug welds are at irregular centres! How can you sleep at night???
I'll bet any money you like that James' plug welds are more regular than the original factory spot welds! Perfection would be unauthentic and therefore not believable! He's just going for the "original" look! Steve But a quick question of my own, what are you planning to do with the non original horizontal lip at the bottom edge of the sill? I normally chop this off to keep it looking stock (it also lets me use a hole punch to make the plug weld holes, much quicker than laborious drilling) Since you have kept it, I assume you are going to turn it up over the soffit flange. May I therefore suggest, rather than welding it in place, a generous bead of Tiger seal, then clamping with a door skinner tool. This should stop any water ingress into the triple seam! |
|
| Author: | soe8m [ Mon Mar 18, 2019 11:02 pm ] |
| Post subject: | Re: VA138, the next chapter.... |
Quote:
I think you are going to have to redo the outer cill; I can’t believe it, but your plug welds are at irregular centres! How can you sleep at night???
During a torque simulation in solidworks it showed uneven stress on the sills and on the stressed area's the spotwelds were closer to eachother. Easy explaination.Jeroen |
|
| Author: | James467 [ Tue Mar 19, 2019 11:02 am ] |
| Post subject: | Re: VA138, the next chapter.... |
Quote: But a quick question of my own, what are you planning to do with the non original horizontal lip at the bottom edge of the sill? I normally chop this off to keep it looking stock (it also lets me use a hole punch to make the plug weld holes, much quicker than laborious drilling) Since you have kept it, I assume you are going to turn it up over the soffit flange. May I therefore suggest, rather than welding it in place, a generous bead of Tiger seal, then clamping with a door skinner tool. This should stop any water ingress into the triple seam!
To be honest Steve I was just going to leave it on the basis that the fold adds extra strength (probably not much!!!) to the lower edge of the sill there.I haven't seam sealed anything yet, I'll do that last! What is interesting is that holes have been made and taped over to allow some cavity wax (Ziebart or whatever) to be injected. However I have found absolutely no evidence of any cavity wax being used. Not really a problem, it saves Shaun having to drill holes and they are all in perfect places to get the wax gun in there. Unless Shaun, do you want me to wax protect it? But I would have thought that you probably want to do that after paint. |
|
| Author: | James467 [ Tue Mar 19, 2019 4:00 pm ] |
| Post subject: | Re: VA138, the next chapter.... |
Quote:
Superb work James and a great read.
Sorry Matt, I didn't reply to youJust a question on the picture here if I may - I can see you have spot welded it to the inner cill and seam welded at the top and RHS, but what happens to the LHS as it meets the outer wheelarch area? Is it ok to seam seal this area or do you weld it here too? I have a project Sprint coming my way very soon and it will certainly need cill (s) so am pondering whether to have a go myself...with the aid of this thread and the forum for advice! Regards MC
Yes, I did seam weld it to the sill, is that what you meant? Where the two inner wheelarch sections meet is just plug welded to replicate the factory spot welds. Underneath around the area where the jacking point is it has all been seam welded for strength. As part of the final go through I will wire brush that seam in both the wheel arches and give them a good healthy coating of seam sealer. |
|
| Page 3 of 14 | All times are UTC+01:00 |
| Powered by phpBB® Forum Software © phpBB Limited https://www.phpbb.com/ |
|