The Triumph Dolomite Club - Discussion Forum
http://forum.triumphdolomite.co.uk/

VA138, the next chapter....
http://forum.triumphdolomite.co.uk/viewtopic.php?t=34307
Page 7 of 14

Author:  James467 [ Tue Jan 21, 2020 10:33 am ]
Post subject:  Re: VA138, the next chapter....

Quote:
So what measurements did you use for the sill trim holes?
I offered up the trim to the car, it sits 20mm +/- 2mm from each end with the plastic trim pieces in. Taking into account the plastic end piece (45mm) the first hole each end is 100mm in from the edge of the panel to allow it to fit into the trim as far towards the end as possible without hitting the plastic trim. The hole on the front wing should sit almost central.

The holes along the sill are 12mm from the top as Mart said, and 17.7mm apart, this gives ten holes for the ten trim clips. I drilled the sill end holes first then used a laser line to ensure a straight edge them marked out the rest.

Holes have been drilled to 4.5mm, but I think 4.8mm would be better once painted.

Image

Author:  James467 [ Tue Jan 21, 2020 11:07 am ]
Post subject:  Re: VA138, the next chapter....

Some progress,

Looking good in the sun!

Image

The holes in the rear valance for the later cars have been welded up and a new hole drilled in the correct position for the numberplate lamp...

Image20200120_113425 by james_shephard_uk, on Flickr

The A pillar has had its welds dressed and been seam sealed...

Image

Image

The wing top has been put back on and the wing to scuttle gap set.

Image

Image

Made a new wing bottom and fitted that.

Image

Image

Image

There was a dent in the front wing, this is now gone! I just need to drill the hole for the bumper.

Image

Everything has been tidied up and given a coat of UPols finest!

Image

Image

Author:  James467 [ Tue Jan 21, 2020 11:16 am ]
Post subject:  Re: VA138, the next chapter....

The final job list....

  • Re-do the old rear inner wheelarch repair that I found
  • Repair the small hole and dent in the rear wing
  • Strip paint from roof (to ensure that there are no other pinholes)
  • Repair the pin hole in the roof
  • Four small holes in the bulkhead and dress welds
  • Drill sill trim holes
  • Seam seal scuttle
  • Gap bonnet
  • Door Bottoms
  • Re-fit windscreen for transport

Then I will roll it outside and go over each panel with a fine tooth comb, when I'm happy then Shaun can come and collect it! :lol:

Author:  dollyman [ Tue Jan 21, 2020 12:48 pm ]
Post subject:  Re: VA138, the next chapter....

What superb job James, I am sure Shaun will be well pleased 8) 8)

Tony.

Author:  James467 [ Tue Jan 28, 2020 4:30 pm ]
Post subject:  Re: VA138, the next chapter....

Cheers Tony! :-D

So, the final to do list...

  • Re-do the old rear inner wheelarch repair that I found

This turned out to be a pain! :lol:

This is what I cut out...

Image

Image

I tidied everything up, had to remove the wheel arch lip but that's ok. It also gave me access to the dent which I was able to remove.

Image

Made a repair section...

Image

Repaired the wheelarch lip...

Image

Image

There were also a couple of holes under here which I repaired

Image

Applied a coat of UPols finest

Image

Done! Thats about three things in one go checked off the list!

Next:

  • Repair the pin hole in the roof

Easy, at least this side didnt have any dents in it! I removed all the pitting as well, it's just where the seam was. I wont remove the paint, I'm confident that there are no other dents!

Image

Next:

  • Four small holes in the bulkhead and dress welds

Holes filled and welds dressed, I know most of you will look at this and probably say whats the point? It's behind the dash, you wont see it. The thing is, I'll know it's there, and it the job isnt finished until it looks right.

Image

Everything re-seam sealed

Image

Image

Then protected

Image

Image

Image

That's another two things off the list!

Tomorrow I will try to knock off as much of that list that I can so on Friday I can get the doors done.

Author:  Matt Cotton [ Tue Jan 28, 2020 10:29 pm ]
Post subject:  Re: VA138, the next chapter....

Great progress James. What will be the long term plan with the paintwork?

Author:  Awaiting Repair [ Wed Jan 29, 2020 3:17 pm ]
Post subject:  Re: VA138, the next chapter....

Great stuff as usual James. I always look forward to your updates, keep up the good work!

Keith

Author:  James467 [ Wed Jan 29, 2020 5:39 pm ]
Post subject:  Re: VA138, the next chapter....

Thanks chaps!

I finished all of the linishing off today, I'm quite happy with it.

I will refit the windscreen tonight and Fridays job will be to do the door bottoms.

Author:  dollyman [ Wed Jan 29, 2020 6:09 pm ]
Post subject:  Re: VA138, the next chapter....

Quote:
Great stuff as usual James. I always look forward to your updates, keep up the good work!

Keith
Great that you have now joined Keith 8) Are you joining us tonight?

Tony.

Author:  James467 [ Thu Jan 30, 2020 4:37 pm ]
Post subject:  Re: VA138, the next chapter....

The windscreen has been fitted! A bit of a pain in this cold weather but I got it in, it's mainly for transport and to check that it fits properly after the welding that was done.

Image

The doors are also on, 90% there with alignment, the front just has to move rearwards a couple of millimeters to equal out the gaps then I can have a look at repairing them.

Image

Image

Image

Image

Author:  James467 [ Sat Feb 01, 2020 6:35 pm ]
Post subject:  Re: VA138, the next chapter....

Update time, I don't normally work on a Saturday but the weather was good and I had no kids, well for the morning anyway!

I was looking at replacing the rear doors but looking at the way the nearside one fitted I felt that it was worth trying to salvage it.

Image

The front doors, both sides only need a trailing edge corner repair it doesn't warrant replacing the whole of the bottom skin section.

Image

Repair section roughed to shape

Image

Image

Welded on

Image

New skin

Image

Image

Whilst on the front doors I filled the old mirror mounting holes

Image

Image

Finished gapping the leading edge of the bonnet, just the rear to do.

Image

Author:  James467 [ Sat Feb 01, 2020 6:55 pm ]
Post subject:  Re: VA138, the next chapter....

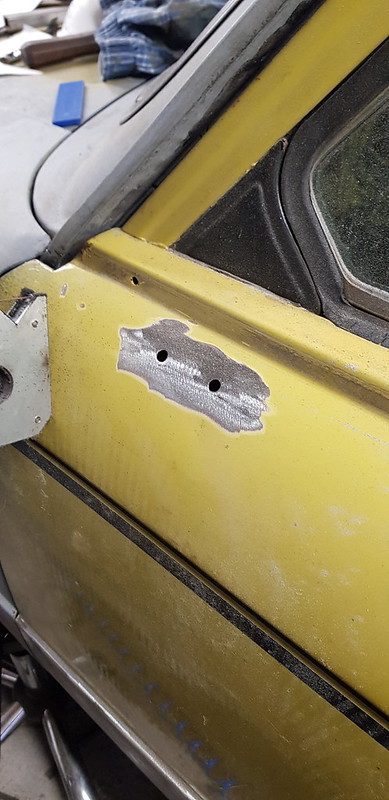
Next, the rear door.

Stripped most of the paint off

Image

There was a lot of filler on here again

Image

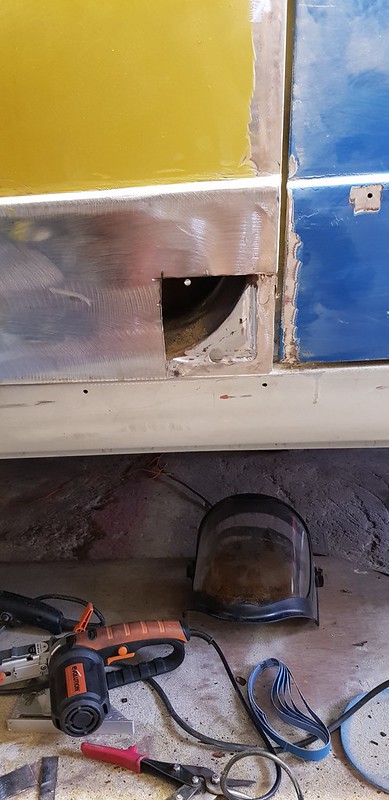
If you aren't familiar with how to remove a door skin just use a flap disc to remove the folded corner and the skin will come off.

Image

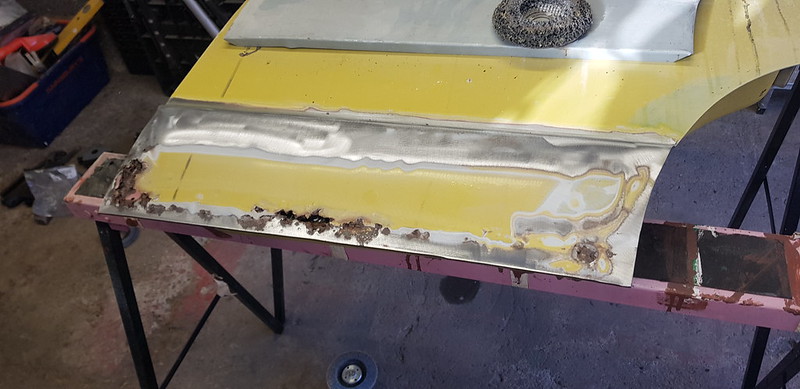
I cut the lower section leaving plenty to trim

Image

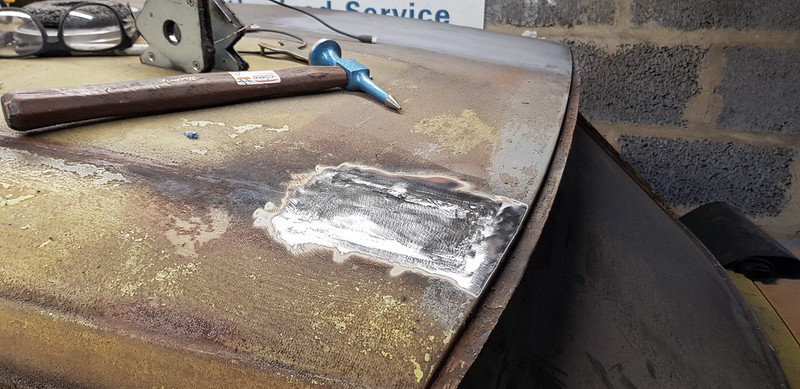
It looks worse than it is, mainly dirt. The frame cleaned up well with some rust killer on it, just a small repair needed.

Image

Image

Image

Image

Image

Then I forgot to take some photos!

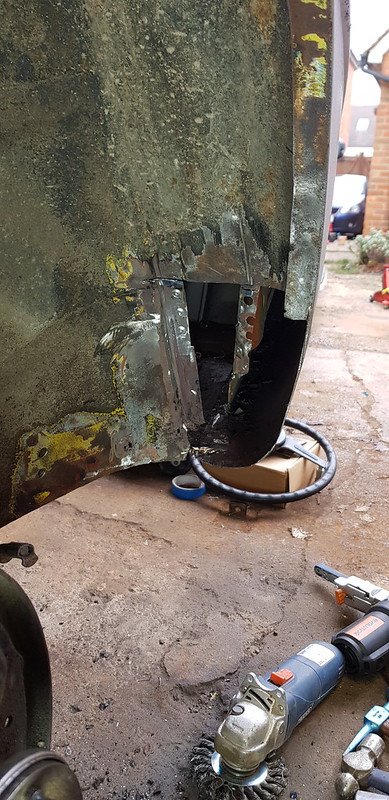
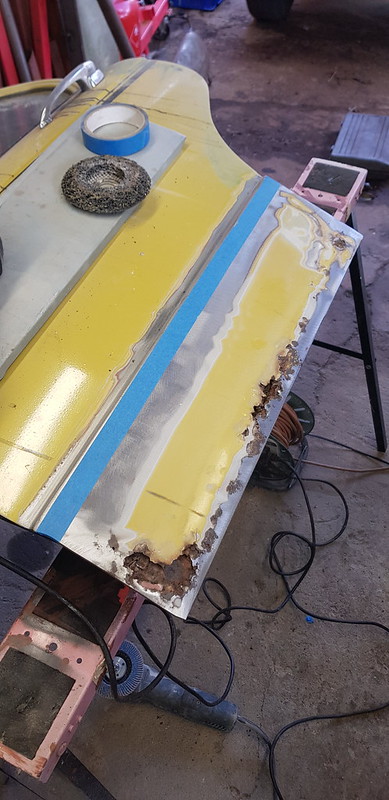
I clamped the bottom on, trimmed and fitted the top section and tacked that in place, then test fitted the door to the car to check for panel gaps, it took a few fits to get these perfect. The section where it contours around the wheelarch was miles out, so I decided to remove the fold, trim to the correct shape and reattach a section. Once I was happy with the fit I went ahead and seamed the top section.

Image

Image

Image

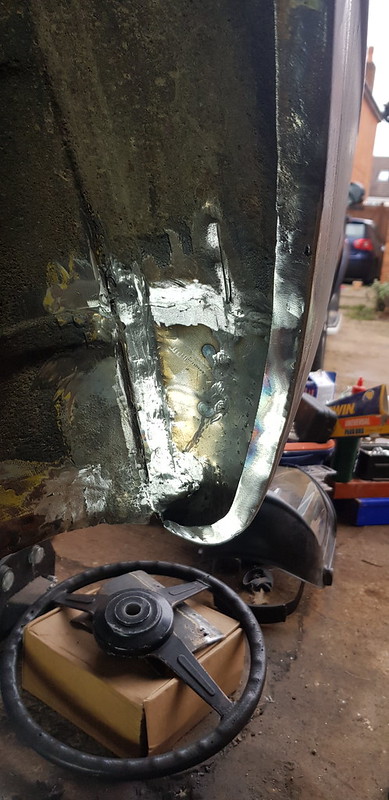
I then hammered the fold over flat clamping the lower edges of the door skin to the frame. I think some use tiger seal here but none was used at the factory, I don't believe it's worth it, if you have the skin in the right place and fold it correctly it will clamp against the frame. Just get plenty of Dinotrol or Bilt hamber in here, heated up it will creep into the seam nicely.

Image

Image

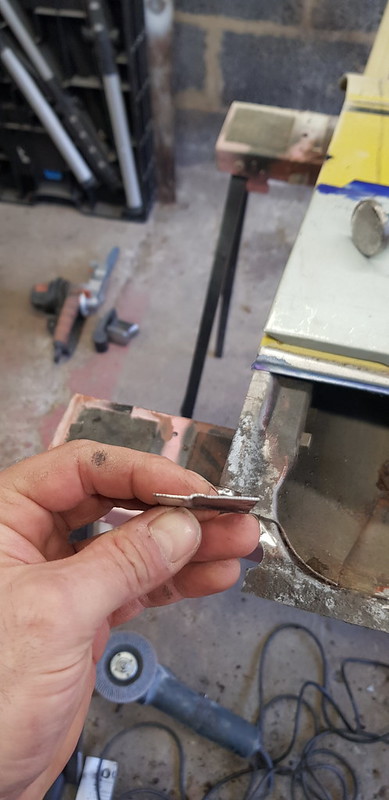
I made a new fold, then tacked it to the end of the panel. Now if this needs removing again, if you use the same process it will come off, it is not welded to the frame.

Image

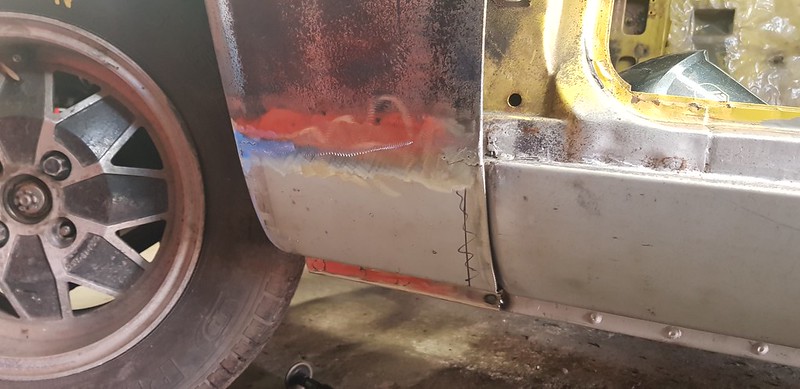
Then fitted to the car to check fit, needs a tiny gap adjustment at the bottom trailing edge but it looks good.

Image

Image

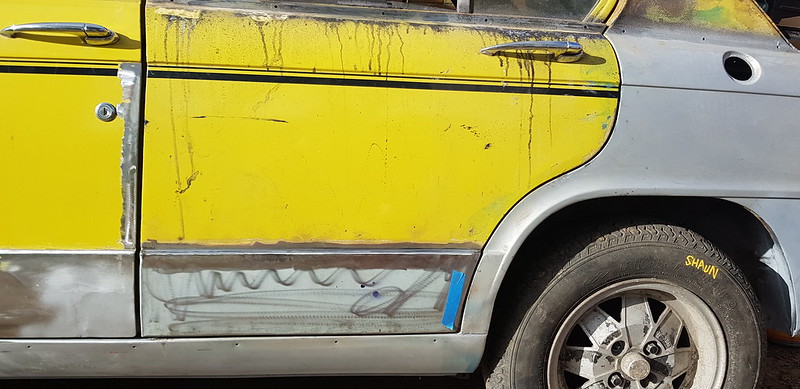
The front door needs to go backwards slightly

Image

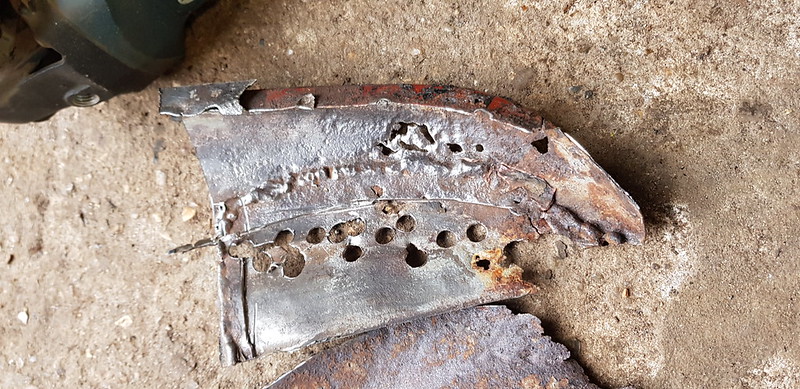
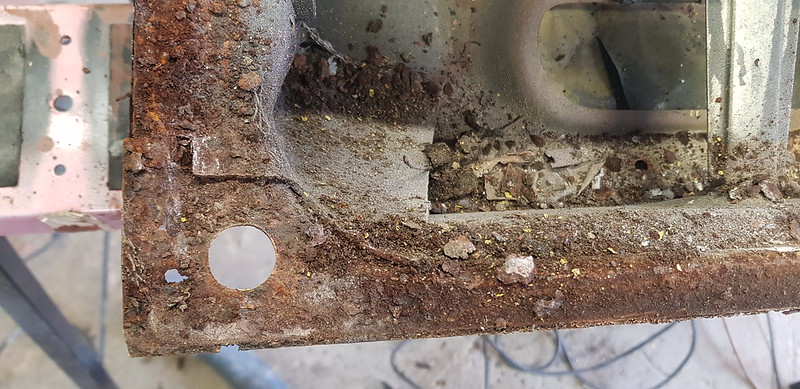
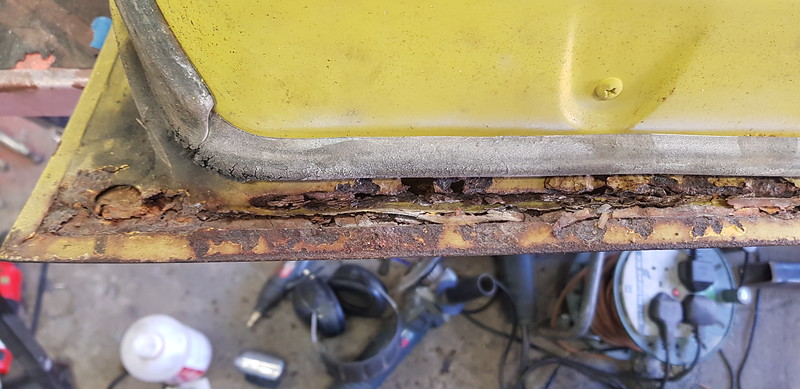
Unfortunately the offside rear door is pretty shot, the frame has suffered badly. Luckily I have access to a good complete door, or a door with a bad skin and good frame so I'll make a decision on Monday which way I am going to go.

Image

Image

Image

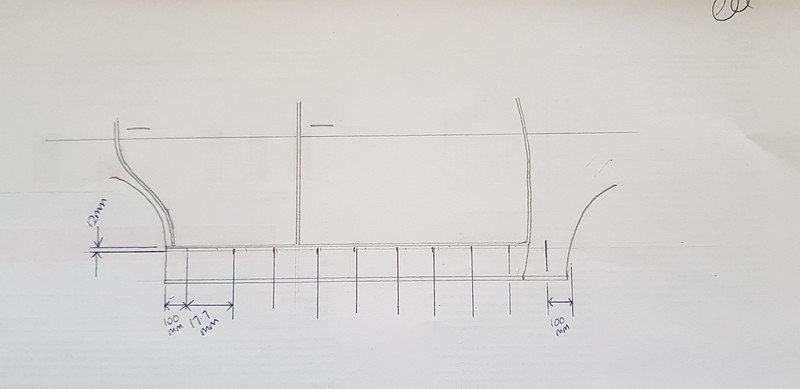
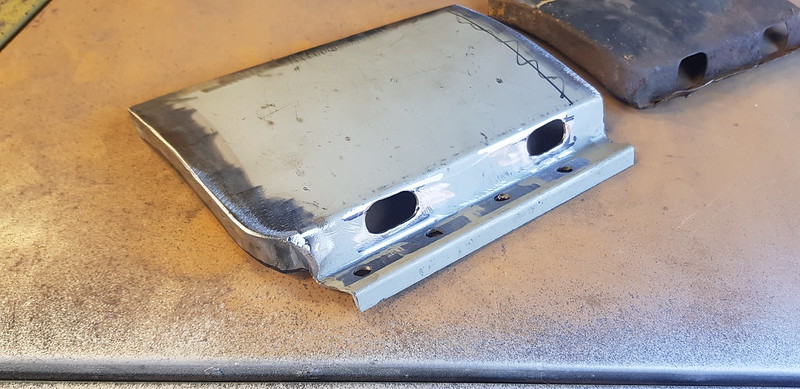
I found the bumper supports which I mocked up, Alun very kindly sent me a photo of an original, mine are very close they just need dialling in. I'll make another set as these are prototypes, but the valence holes are in the right place

Image

Image

Image

Image

Image

Image

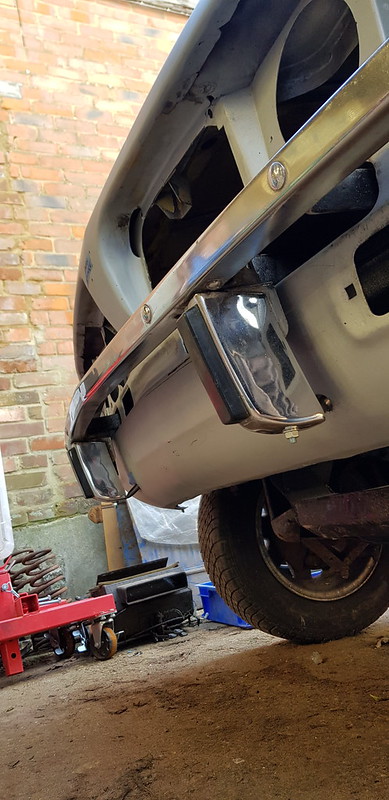
I also test fitted a rear bumper to check the rear end alignment, it looks great!

Image

The last jobs to do on Monday are:

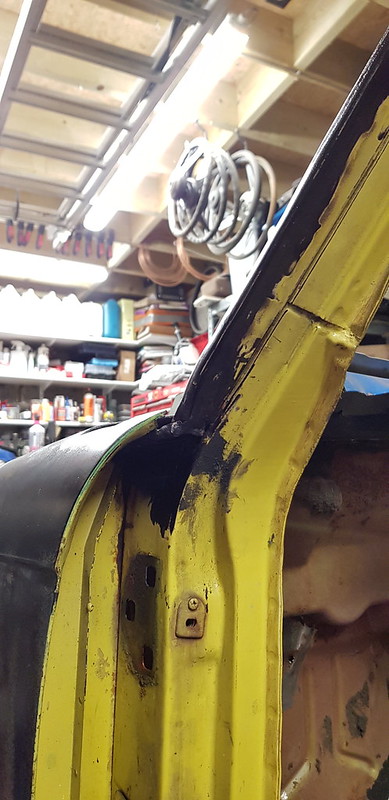
  • Repair OS Front door corner
  • Repair OS rear door
  • Gap the trailing edge of the bonnet

The weather here is supposed to be good on Wednesday so I will pull it out of the garage and go around it to ensure that everything is perfect ready for Shaun.

Author:  yorkshire_spam [ Sat Feb 01, 2020 7:43 pm ]
Post subject:  Re: VA138, the next chapter....

Fantastic work as ever James!

Author:  Awaiting Repair [ Sat Feb 01, 2020 8:06 pm ]
Post subject:  Re: VA138, the next chapter....

Loving your work James! Great stuff as per usual. When do you think you will be finished? Surely not too far off now?

Just out of interest, when finished, how many hours will you have spent on it?


Cheers
Keith

Author:  RSi [ Sat Feb 01, 2020 8:29 pm ]
Post subject:  Re: VA138, the next chapter....

This is like one of these TV programmes, "60 minute makeover" :lol:
I reckon you have a whole team hiding behind the car, that pop out and get to work when the camera's away :jack:

There's been a phenomenal amount of 'top notch' work done to this car in such a short period, really impressed =D>

Page 7 of 14 All times are UTC+01:00
Powered by phpBB® Forum Software © phpBB Limited
https://www.phpbb.com/