The Triumph Dolomite Club - Discussion Forum

The Number One Club for owners of Triumph's range of small saloons from the 1960s and 1970s.
It is currently Tue Apr 16, 2024 7:17 am

All times are UTC+01:00


Post new topic  Reply to topic  [ 75 posts ]  Go to page Previous 1 2 3 4 5
Author Message
PostPosted: Wed Apr 29, 2020 9:51 pm 
Offline
TDC Member
User avatar

Joined: Sun Oct 22, 2006 10:31 am
Posts: 121
Enjoy your trip to the Lake District, I think half the fun of older cars is taking the A and B roads and seeing the sights that are normally missed on the motorway.


Top
   
PostPosted: Wed Apr 29, 2020 11:24 pm 
Offline
TDC Shropshire Area Organiser

Joined: Sun Aug 21, 2011 5:12 pm
Posts: 7036
Location: Highley, Shropshire
Quote:
Thank you DOLOMITE 135 :D I have certainly done my best and hope that my parents would be pleased.

Re the front wing badges, I attempted to copy the original position but got it completely wrong. Oops. Mid 1990s photo showing the originan location. Will fix when I get around to it.

Image
There is no RIGHT place for the wing badges, they were stuck on by the selling dealer wherever the mechanic doing the PDI thought best! Though your original position ones are one of the more bizarre choices i've seen! More normal is a couple of inches forward of there and an inch up. BL was a relatively new thing then, so the badges were an afterthought.

My own taste says de-clutter and leave them off, as so many did back in the day after accident or rust repairs. But if you MUST keep them, the position I like best is 2" below the UPPER swage and 2" forward of the door.

Steve

_________________
'73 2 door Toledo with Vauxhall Carlton 2.0 8v engine (The Carledo)
'78 Sprint Auto with Vauxhall Omega 2.2 16v engine (The Dolomega)
'72 Triumph 1500FWD in Slate Grey, Now with RWD and Carledo powertrain!

Maverick Triumph, Servicing, Repairs, Electrical, Recomissioning, MOT prep, Trackerjack brake fitting service.
Apprentice served Triumph Specialist for 50 years. PM for more info or quotes.


Top
   
PostPosted: Thu Apr 30, 2020 12:21 am 
Offline
TDC Member
User avatar

Joined: Sun Oct 22, 2006 10:31 am
Posts: 121
Though I cannot comment on who attached the wing badges, the original position shown matches my own Toledo which still has its original drivers side badge, additionally it matches the photos of the Toledo in the press pack for the launch for the Toledo and the cars in the Brochures I have which show very little variation, so perhaps not so bizarre positioning.


Top
   
PostPosted: Sun May 03, 2020 8:51 am 
Offline
TDC Member

Joined: Fri Apr 13, 2018 11:38 pm
Posts: 120
Location: Berkshire
I'll place the badges back into as close to original position as I can.

One little project has been retrofitting a hazard warning light flasher, this is an early Toledo which left the factory without them. Although I could have drilled the dashboard and fitted the switch from a later Toledo it's been my aim to keep the car as original as possible and for any modifications to be easily reversible.

I've used a hazard warning switch with built in flasher unit which are widely available and plumbed it into the indicator stalk wiring via bullet connectors to avoid modifying the main loom.

I'll mount the switch under the dashboard where it can't be seen but can easily be found by touch.

On the indicator stalk wiring I cut the purple (permanent live), black (neutral), green/white, green/red (left and right side indicators). The dashboard lamps light up, which is nice.

Image

Image

Image

Video:
https://img.triumphtoledo.me.uk/ynrbx781ii.mp4
https://img.triumphtoledo.me.uk/iqnsu65mpj.mp4

_________________
Cheers,
Chris

1971 Triumph Toledo 2 door
1977 Triumph Stag
Toledo blog, Toledo & Dolomite part catalogues & repair manuals


Top
   
PostPosted: Sun May 03, 2020 9:03 am 
Offline
TDC Member

Joined: Fri Apr 13, 2018 11:38 pm
Posts: 120
Location: Berkshire
I've also been looking at the rear extension oil leak, I have a new gasket 106437 on order from Rimmers. I plan to reassemble with some Hylomar blue. It was about an hour of disassembly to get it off, not too fiddly.

Image

Image

Image

_________________
Cheers,
Chris

1971 Triumph Toledo 2 door
1977 Triumph Stag
Toledo blog, Toledo & Dolomite part catalogues & repair manuals


Top
   
PostPosted: Sun May 03, 2020 9:45 pm 
Offline
Future Club member hopefully!

Joined: Thu Nov 09, 2017 7:55 pm
Posts: 436
Location: Maidstone
Really lovely car Chris, well done you :

It must be a pleasure to be tinkering away on the car when it’s so clean under there!
Time to fix those few niggles that always come up after a rebuild, and then enjoy using it. :D


Top
   
PostPosted: Sun Sep 13, 2020 9:38 pm 
Offline
TDC Member

Joined: Fri Apr 13, 2018 11:38 pm
Posts: 120
Location: Berkshire
Thank you Bish and sorry for not replying before :)

Well the car was almost finished at the NEC Classic Motor Show last November, I had a break for a few months, then corona happened, and there's been little motivation to finally finish it off when all the shows have been cancelled. But I have been ticking my todo off slowly.

The only part of my Toledo which hadn't been fully rebuilt and refurbished until now was the steering rack. It was the one fitted to the car when it was laid up in 1982, I was hoping it'd be OK but turned out to have some play. So today I replaced it with a Triumph Dolomite Club refurb one, TD Fitchett intermediate coupling and Superflex mounts. Fast shipping from the club.

This was relatively straightforward but fairly time consuming as it take some time to figure out which direction to orient the rack so it can be eased out of the engine bay.

Image

New rack and exchange unit

Image

Image
Image
Image

Test drive

Image

And apparently Toledo front grilles make great cat beds.

Image

_________________
Cheers,
Chris

1971 Triumph Toledo 2 door
1977 Triumph Stag
Toledo blog, Toledo & Dolomite part catalogues & repair manuals


Top
   
PostPosted: Sun May 30, 2021 10:33 pm 
Offline
TDC Member

Joined: Fri Apr 13, 2018 11:38 pm
Posts: 120
Location: Berkshire
The last update was a long time ago so time for another.

The only thing that hadn't been touched on the car was the alternator, so I refurbished this, it ended up being cosmetic because the bearings and components were fine. There's a great video on a great channel by Geoffrey Croker of a Land Rover alternator refurb, which was almost the same as my Toledo's 16ACR: https://www.youtube.com/watch?v=M9fl53LGSVg

I painted the stator and pulley and zinc plated the remainder, before reassembly.

Image

Image

Image

Image

Image

Image

Image

Image

_________________
Cheers,
Chris

1971 Triumph Toledo 2 door
1977 Triumph Stag
Toledo blog, Toledo & Dolomite part catalogues & repair manuals


Last edited by 2door-toledo on Tue Jun 01, 2021 11:12 pm, edited 1 time in total.

Top
   
PostPosted: Sun May 30, 2021 10:46 pm 
Offline
TDC Member

Joined: Fri Apr 13, 2018 11:38 pm
Posts: 120
Location: Berkshire
I refurbished the original front number plate according to the instructions of James467 at https://forum.triumphdolomite.co.uk/vie ... hs#p265600

I removed the characters, used thinners to dissolve the original reflector, removed the aluminium surface corrosion by sanding with fine wet and dry, fitted new reflectors, then fitted the original characters with new starlock fittings.

The new reflective material came from ebay seller signmakingandsupplies and the 5mm starlock fasteners came from wendyd4010.

Image
Image
Image
Image
Image
Image
Image

_________________
Cheers,
Chris

1971 Triumph Toledo 2 door
1977 Triumph Stag
Toledo blog, Toledo & Dolomite part catalogues & repair manuals


Last edited by 2door-toledo on Thu Jul 22, 2021 8:59 pm, edited 2 times in total.

Top
   
PostPosted: Sun May 30, 2021 10:50 pm 
Offline
TDC Member

Joined: Fri Apr 13, 2018 11:38 pm
Posts: 120
Location: Berkshire
Apart from that, I've been working through a long todo list of items that weren't quite right.

* Replacing the utter junk Rimmer Bros Brake Engineering front wheel cylinders which leaked constantly with NOS Girling ones from eBay
* Learnt about front wheel geometry; sorted out the wheel toe and camber
* Fitted relays for the headlights. I found there was enough space in the steering nacelle for micro relays.
* Lots of other things

Today I completed 240 miles in the Toledo, the furthest it's been driven since at least the early 1980s when my parents last drove it. Lots of nice comments. Guy at Petrol station with a new Porsche Boxster "I thought I had the nice car" :lol: :lol: :lol:

I'm pleased to say that it's safe back in the garage, the only fault is a bit of a rattle from somewhere under the dashboard. The brakes are fine (possibly the greatest accolade for non-servo drums!), steering responsive, the gearbox is firm and positive, and the engine revs very well and sounds great. Did most of it at 55-60mph while running it in but had it up to 65mph for a little bit (GPS speed - speedo is a little optimistic)

Image


Image

_________________
Cheers,
Chris

1971 Triumph Toledo 2 door
1977 Triumph Stag
Toledo blog, Toledo & Dolomite part catalogues & repair manuals


Top
   
PostPosted: Fri Jun 25, 2021 11:15 pm 
Offline
TDC Member

Joined: Mon Apr 29, 2019 10:31 pm
Posts: 152
Location: Oxfordshire
Quote:
Did most of it at 55-60mph while running it in but had it up to 65mph for a little bit (GPS speed - speedo is a little optimistic)
Crikey, you must have been hanging for dear life at that sort of speed! :lol:

Love the car Chris, an inspiration and something to work towards with my Tolly which is nowhere near as well done as yours. A bit gutted the Oxfordshire Dolly Day was cancelled as I was thinking my car might have another 2 door friend to go with!

_________________
1973 2-door honeysuckle Triumph Toledo 1300 Thread here


Top
   
PostPosted: Sat Mar 30, 2024 8:52 pm 
Offline
TDC Member

Joined: Fri Apr 13, 2018 11:38 pm
Posts: 120
Location: Berkshire
I've not updated this in a few years but I've now completed around 3000 miles since restoration and have completed a few other jobs on the car since.

The webbing in the back of the seats was falling to pieces causing the seat cover to move around the 2 door tilt mechanism, so something had to be done. I demonstrated replacing them on the TDC stand at the 2023 Restoration Show

New Pirelli webbing is available from Woolies and it was a fairly straight forward job: https://www.woolies-trim.co.uk/c-332-pirelli-webbing

Image

Image

_________________
Cheers,
Chris

1971 Triumph Toledo 2 door
1977 Triumph Stag
Toledo blog, Toledo & Dolomite part catalogues & repair manuals


Last edited by 2door-toledo on Sat Mar 30, 2024 9:11 pm, edited 1 time in total.

Top
   
PostPosted: Sat Mar 30, 2024 8:58 pm 
Offline
TDC Member

Joined: Fri Apr 13, 2018 11:38 pm
Posts: 120
Location: Berkshire
I discovered that the modern pieces of rubber that I'd put on the door check straps had fallen to pieces and was not cushioning the door when fully open. I looked at the original door check straps and found that it was some layers of some kind of black fabric. I was hoping to reuse these but they were too brittle.

I need something strong, which will not fall apart from the force of the door and I therefore decided to use some of the leftover Pirelli webbing I'd used for the seats. I used the original circles of material as a template and cut some new circles which have gone on the checkstraps.

Image
Image

It's not very pretty but it'll be inside the doors and not visible.

_________________
Cheers,
Chris

1971 Triumph Toledo 2 door
1977 Triumph Stag
Toledo blog, Toledo & Dolomite part catalogues & repair manuals


Top
   
PostPosted: Sun Mar 31, 2024 12:25 am 
Offline
TDC Shropshire Area Organiser

Joined: Sun Aug 21, 2011 5:12 pm
Posts: 7036
Location: Highley, Shropshire
Try cloth reinforced exhaust strapping, it's very similar in makeup to the original stuff. And it's the right colour!

Steve

_________________
'73 2 door Toledo with Vauxhall Carlton 2.0 8v engine (The Carledo)
'78 Sprint Auto with Vauxhall Omega 2.2 16v engine (The Dolomega)
'72 Triumph 1500FWD in Slate Grey, Now with RWD and Carledo powertrain!

Maverick Triumph, Servicing, Repairs, Electrical, Recomissioning, MOT prep, Trackerjack brake fitting service.
Apprentice served Triumph Specialist for 50 years. PM for more info or quotes.


Top
   
PostPosted: Fri Apr 05, 2024 12:12 pm 
Offline
TDC Member

Joined: Fri Apr 13, 2018 11:38 pm
Posts: 120
Location: Berkshire
Thank you Steve for the suggestion, I'll try that if the webbing doesn't work out.

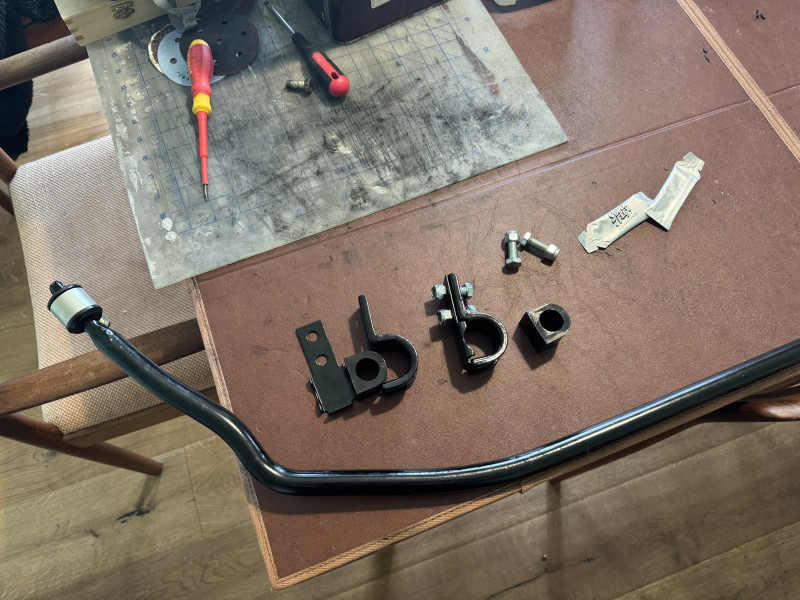
I also finally got around to implementing Steve's other suggestion of an anti-rollbar! I got the parts from Alun a year ago from one of his Dolomite Sprint projects, but only just got around to cleaning them up and painting them. I struggled to fit the anti-rollbar and consulted this forum for advice, the method that worked for me was:

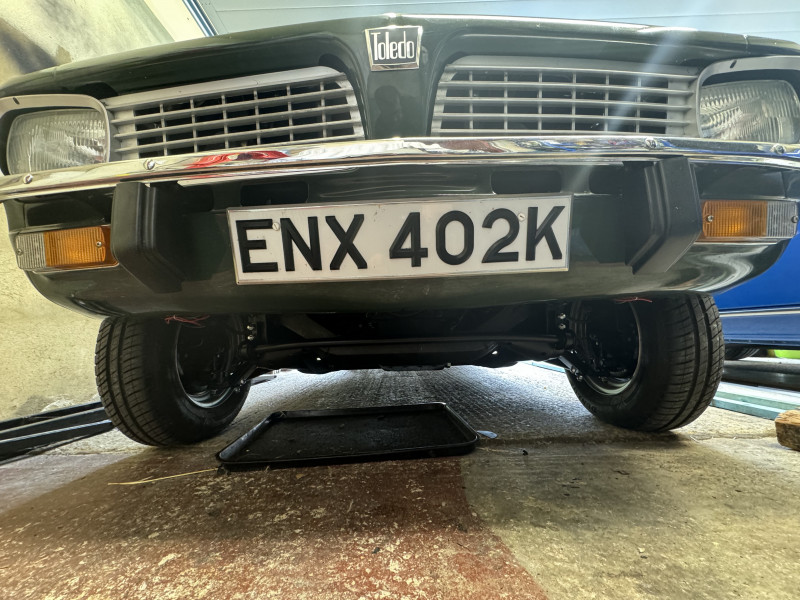
a) Lower the car onto its wheels so the suspension is at normal ride height
b) Install the drag strut mount onto one end and install into one of the drag struts. Loosely install the washer and nut so it can't pop out.
c) Install the other drag strut mount onto the other end and fiddle and swear a lot until the hole lines up so that you can install it into the other drag strut. Loosely install the washer and nut.
d) Fit the subframe bushes and subframe mounts. Cable tie the top hole of the subframe mounts together so that they can't pop apart
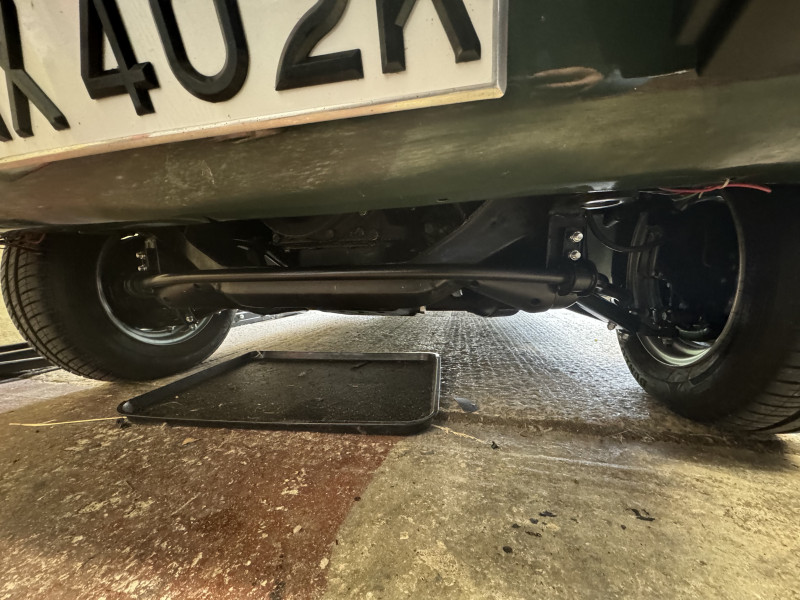
e) Push the anti roll bar up the subframe until the holes on the subframe mounts are aligned with the holes in the subframe
f) Spend an enormous amount of time and swear a lot more trying to get all of the holes aligned and bolts in - the top hole is cable tied, but get a bolt through the lower hole and stick a nut on it so it can't pop out. Then you can cut the cable tie and work on the top hole.

Over a 30 mile test drive of country roads and motorway it seems to have made it feel a lot less wallowy and overall much nicer to drive, not a bad thing in a slightly underpowered car in modern traffic. Although I have tried to keep this car as original as possible, I would consider this a safety improvement and therefore worthwhile.

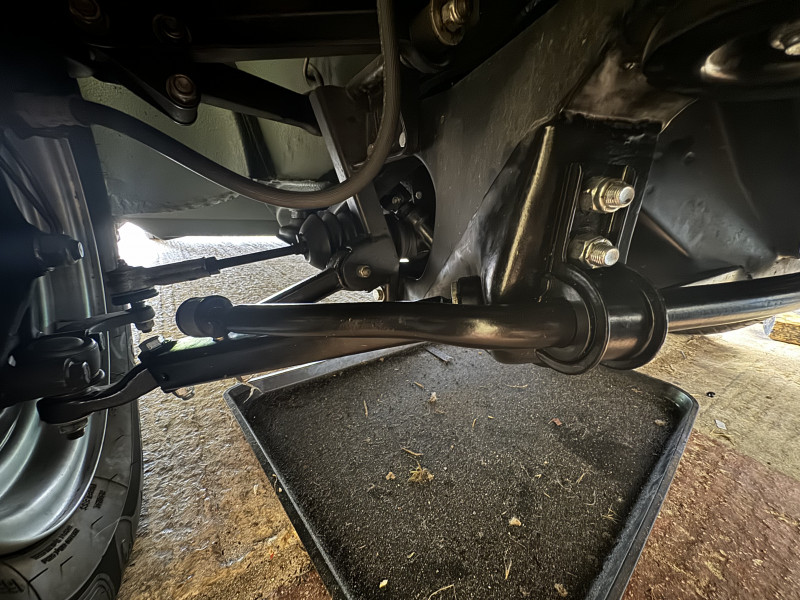
I also installed the later drag struts from the Sprint, as my early car had the early drag struts and recall kit fitted as part of the 1973 front suspension recall and this would have interfered with the ARB.

Image

Image

Image

Image

_________________
Cheers,
Chris

1971 Triumph Toledo 2 door
1977 Triumph Stag
Toledo blog, Toledo & Dolomite part catalogues & repair manuals


Top
   
Display posts from previous:  Sort by  
Post new topic  Reply to topic  [ 75 posts ]  Go to page Previous 1 2 3 4 5

All times are UTC+01:00


Who is online

Users browsing this forum: No registered users and 18 guests


You cannot post new topics in this forum
You cannot reply to topics in this forum
You cannot edit your posts in this forum
You cannot delete your posts in this forum
You cannot post attachments in this forum

Search for:
Jump to:  
Powered by phpBB® Forum Software © phpBB Limited