The Triumph Dolomite Club - Discussion Forum
http://forum.triumphdolomite.co.uk/

VA 276, Mimosa Sprint
http://forum.triumphdolomite.co.uk/viewtopic.php?t=36205
Page 3 of 5

Author:  James467 [ Mon Nov 09, 2020 4:09 pm ]
Post subject:  Re: VA 276, Mimosa Sprint

Thanks Tony! :D

I have a couple of bits to wrap up on the rear seam but I'll do them when I do the final sweep though.

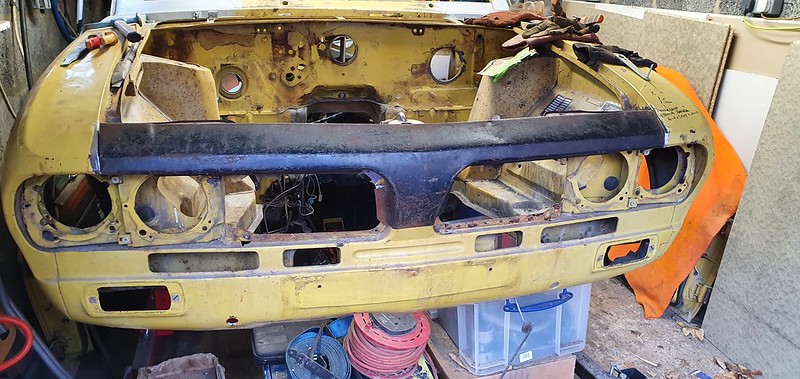
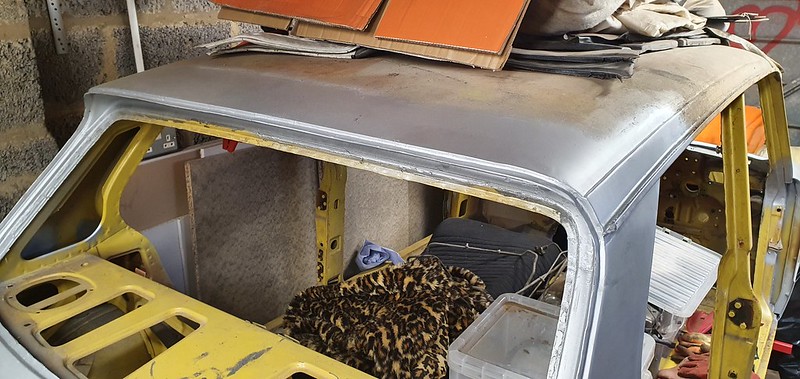
I believe a couple of people were about to tackle the A Post and windscreen surround repair so as it is next on the list of things to do I thought I would crack on with it.

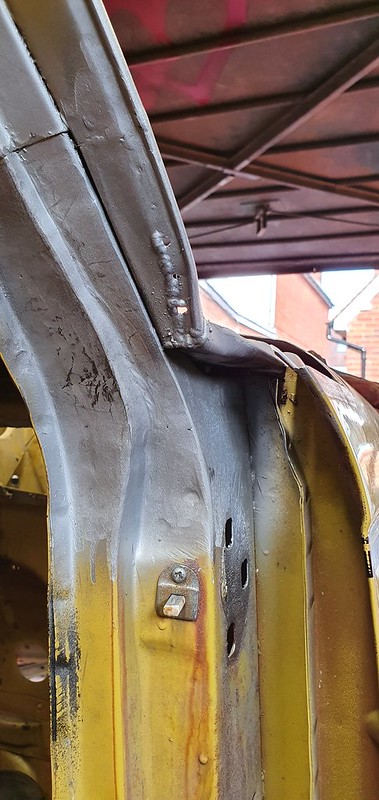
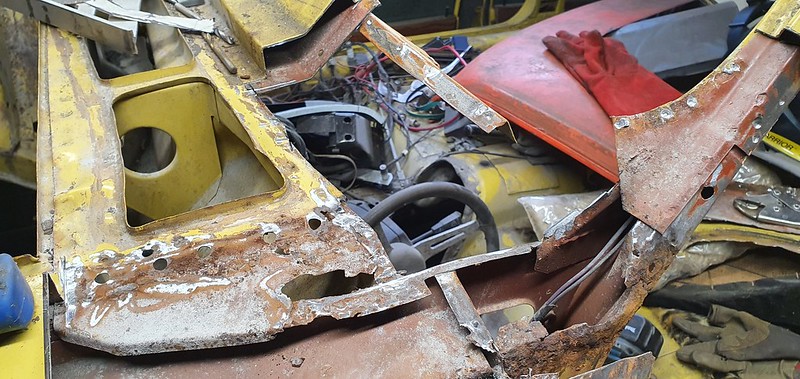
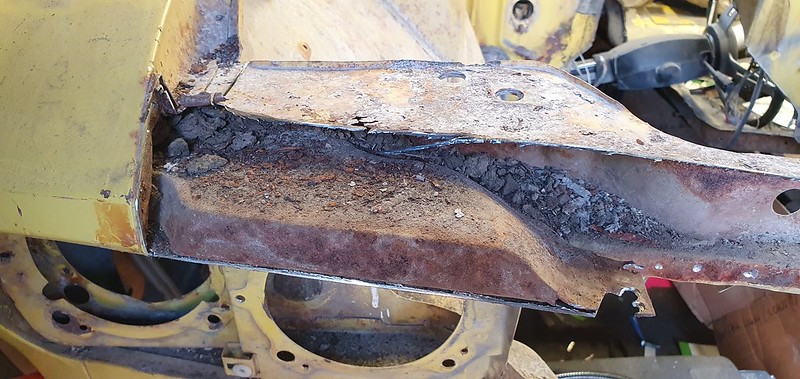
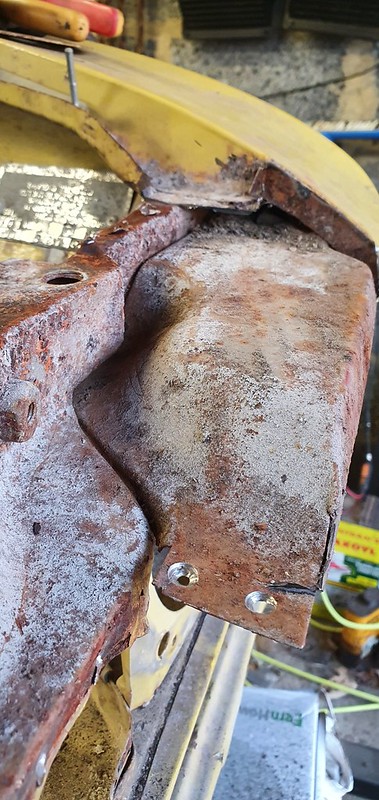
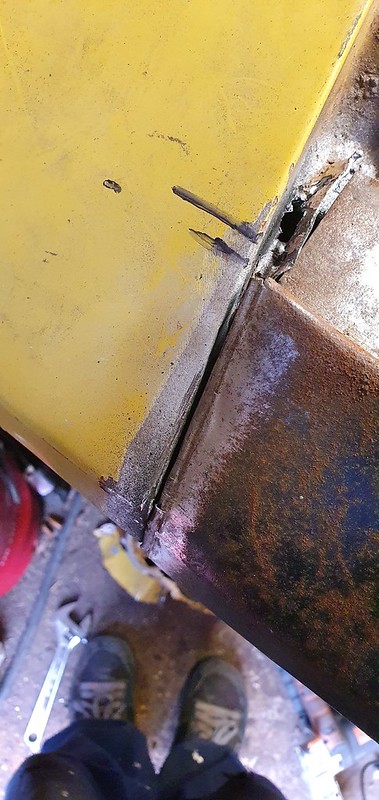
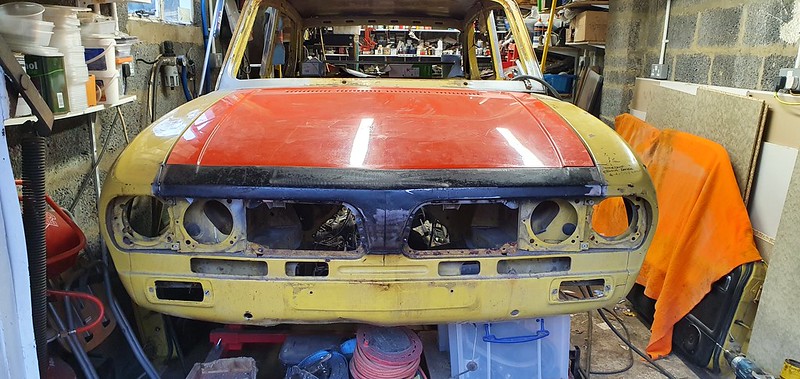
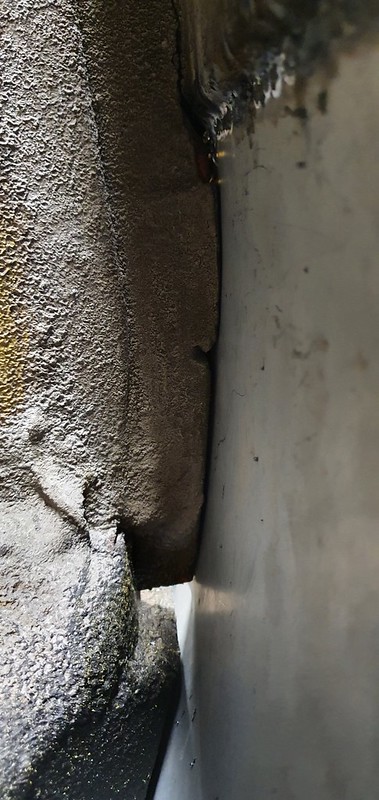
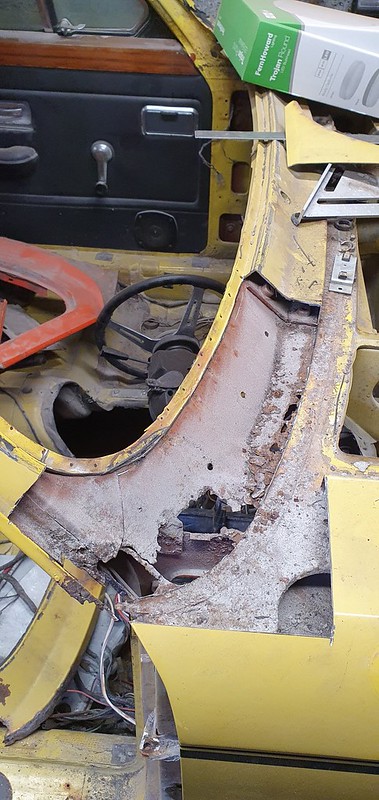
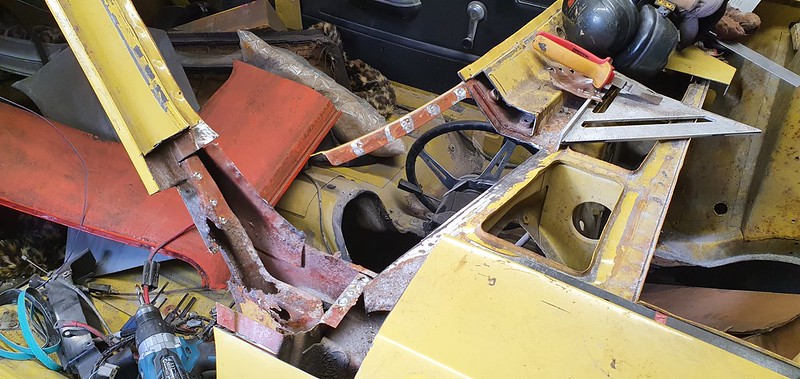
From the outside we have this, I have marked out where I want to cut. The usual, cut the top of the wing off first to expose the A pillar and bulkhead. The rust has got right into the A pillar as well unfortunately. From the inside under the dash, the bulkhead is as bad as they get, not too much of a problem though.

Image

Image

Image

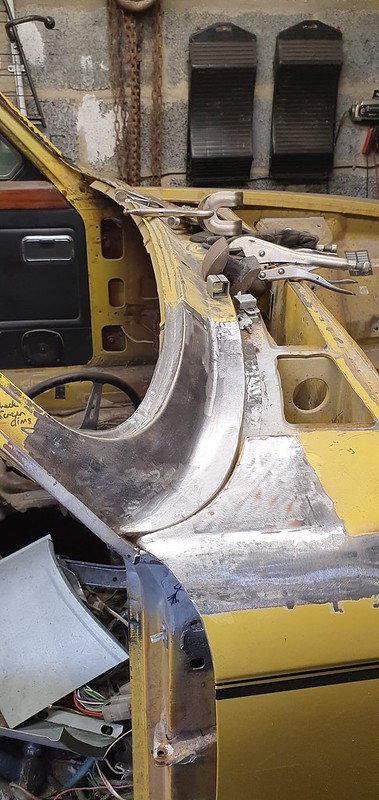
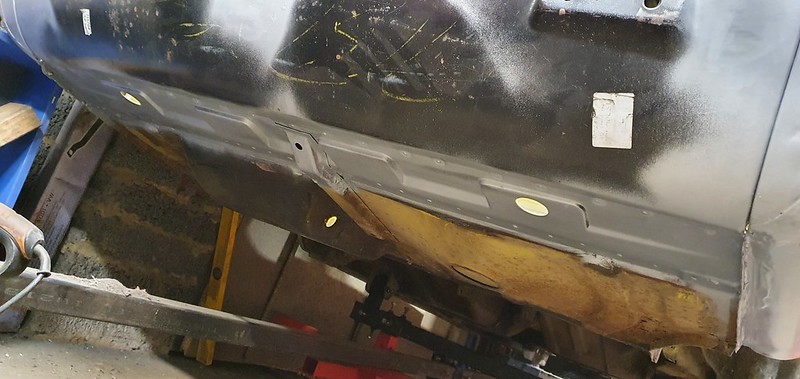
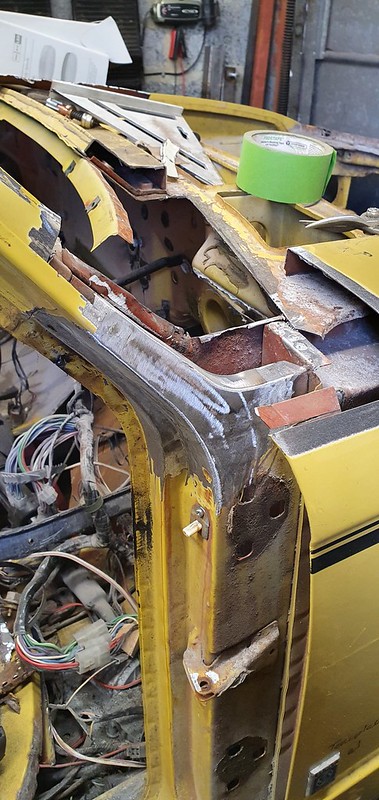
Taking off the top of the wing and the outer windscreen surround exposes the extent of the rust.

Image

It looks like a more complicated repair than it actually is. As with all rust repairs once you break them down into individual panels then it all seems much easier. It's easy for me to say, I have done a few of these already!

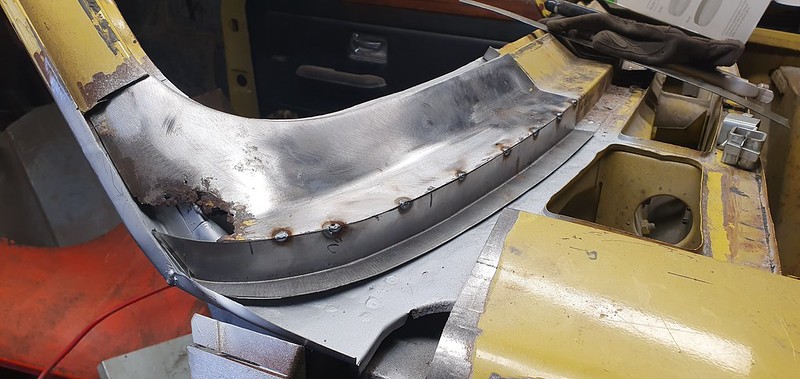
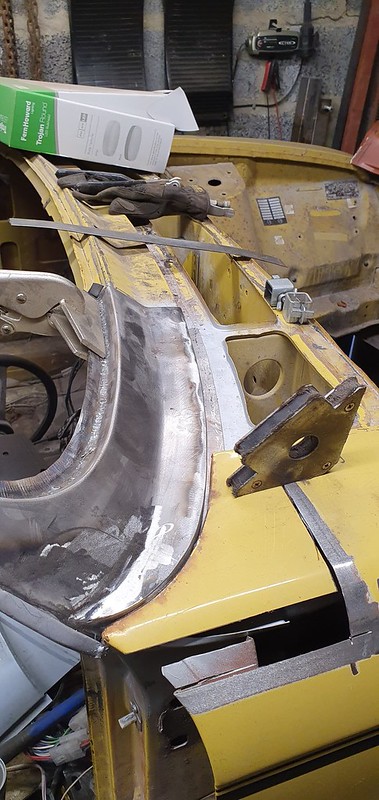
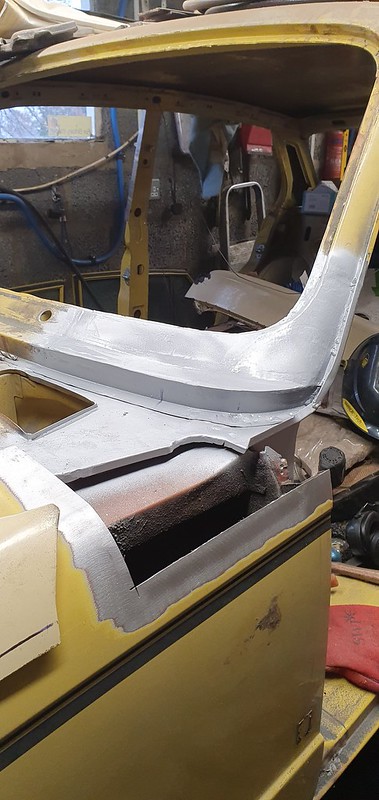
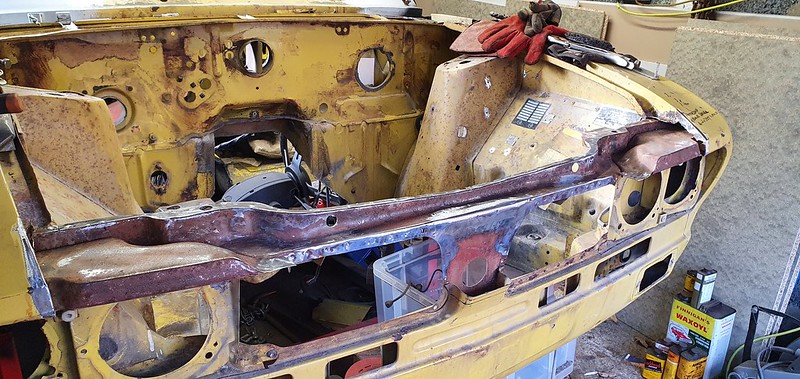
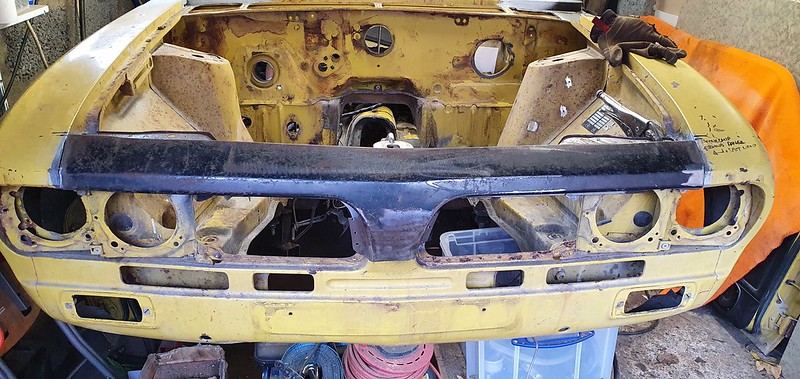
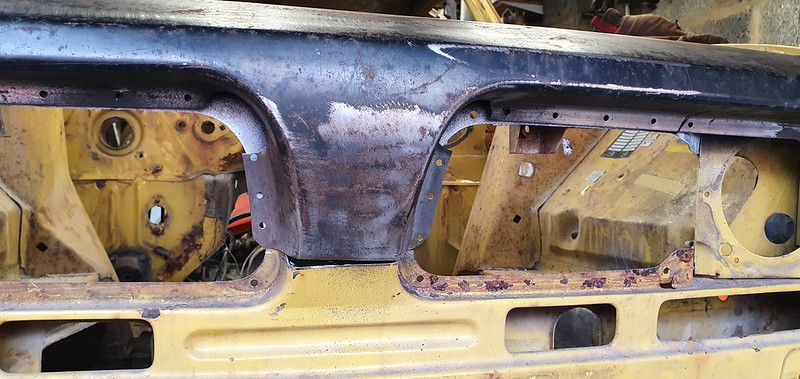
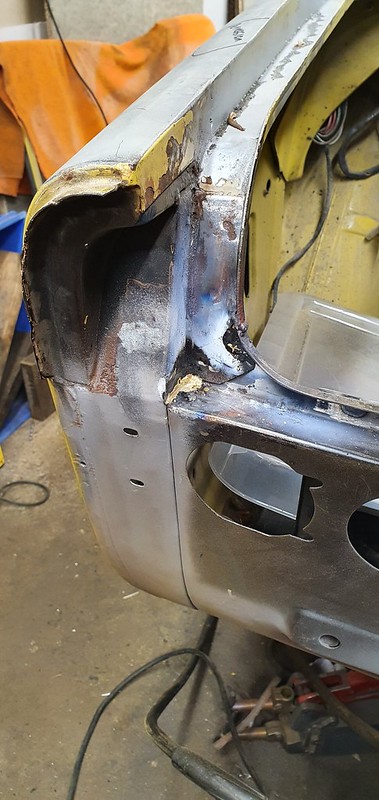
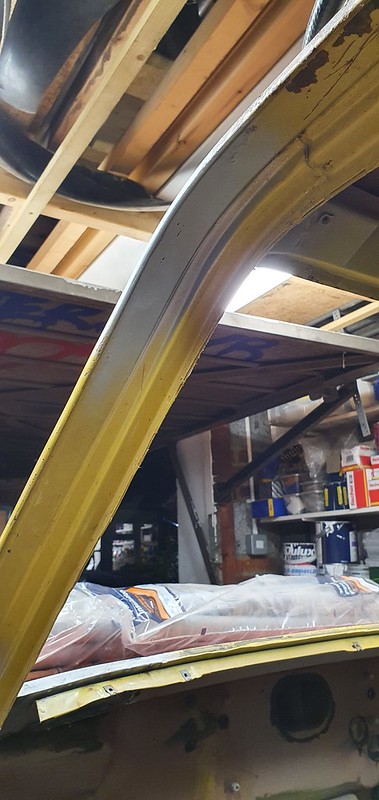
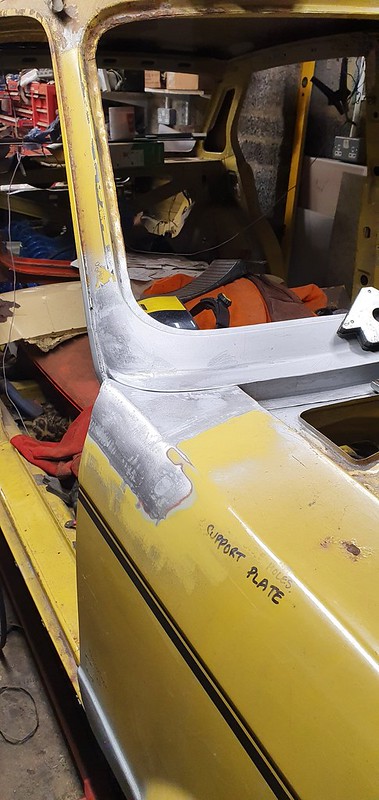
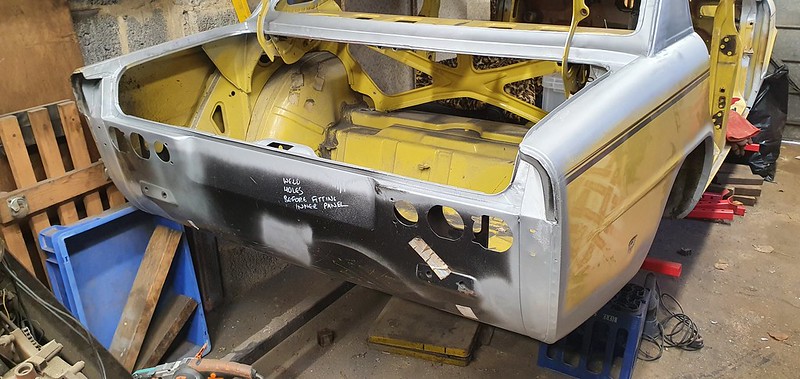
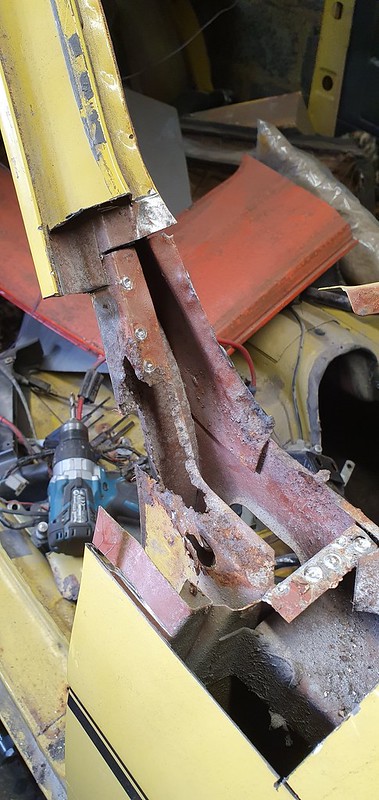
I have cut the top section of the bulkhead out and a small section of the A post. On early cars, the dash support is spot welded in, on later cars it is bolted in. Now they are out of the way it's easier to formulate a repair plan.

Image

I'll start with the A pillar repair everything else sits on top of this. After that I can put a new gutter section on, then the section of the A post I removed for access, then a bulkhead repair section, finally the outer panel, which looking at it would be easier to repair then remove the one from the scuttle that I have and finally the wing top.

Image

Image

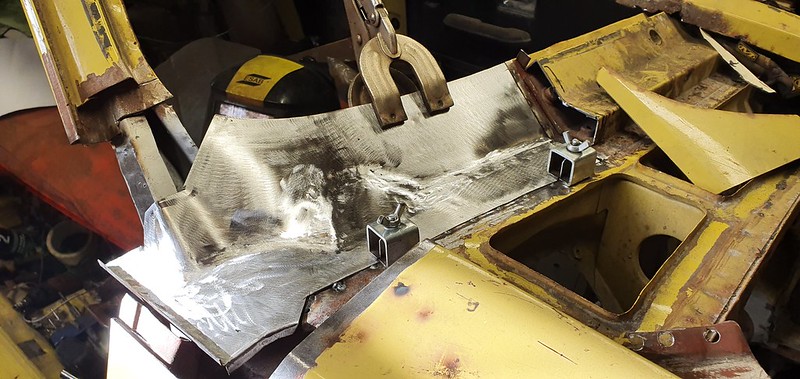
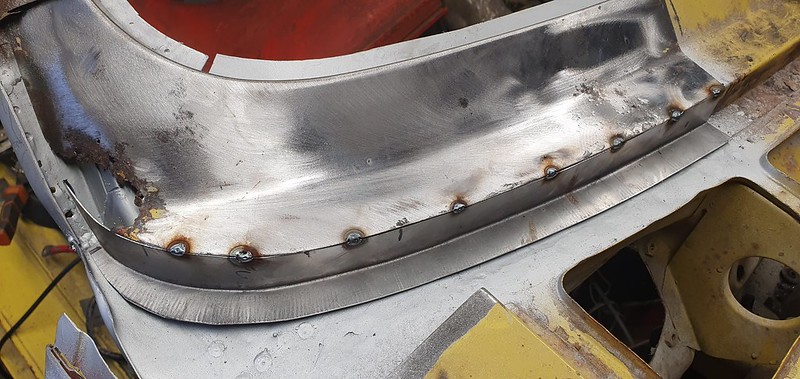
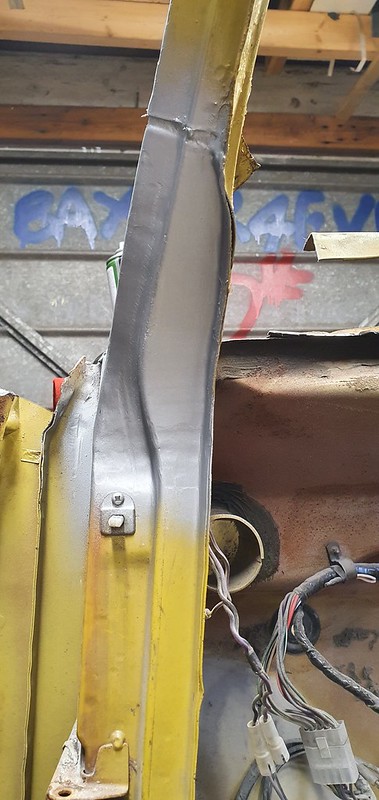
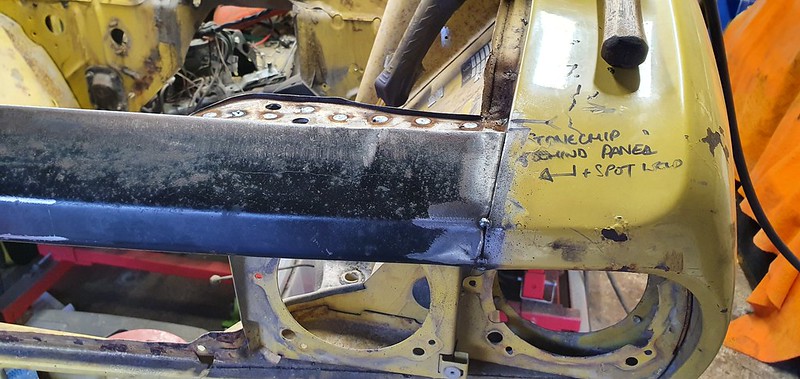
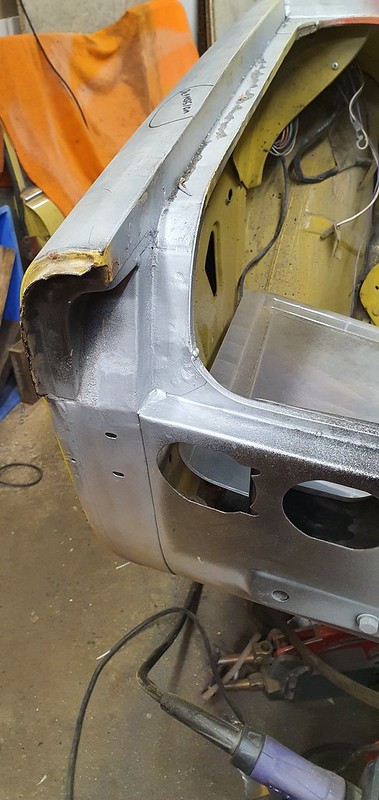
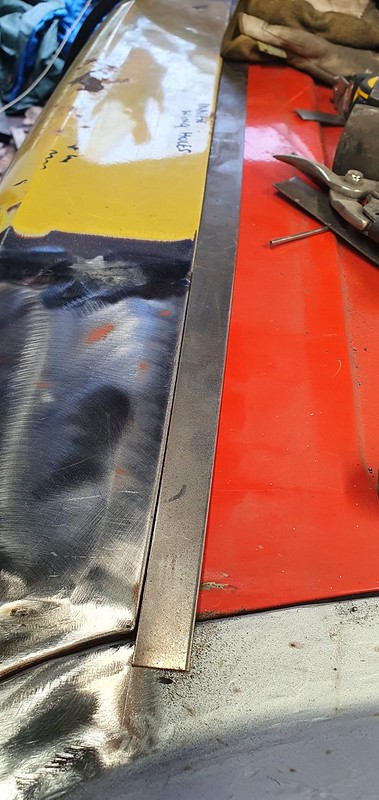
The a post repair is made in two sections then fitted to the car, apologies, I didn't take any photos of this. It's basically the back section and the side section, both welded together along the outer corner.

This section...

Image

This section...

Image

Image

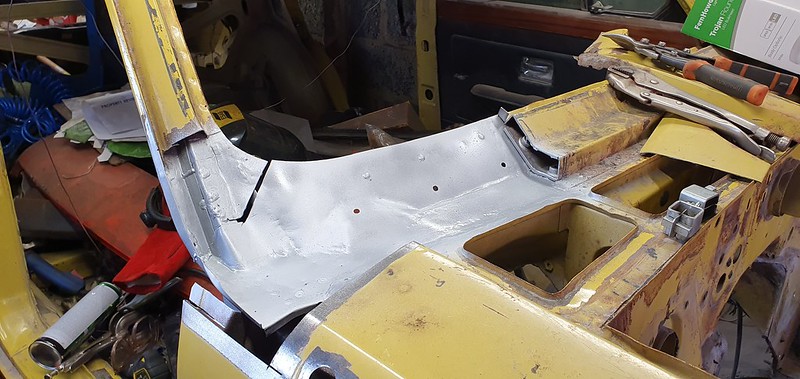
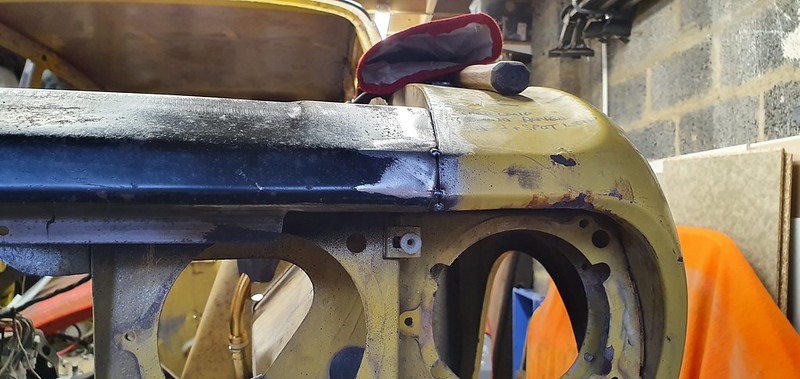
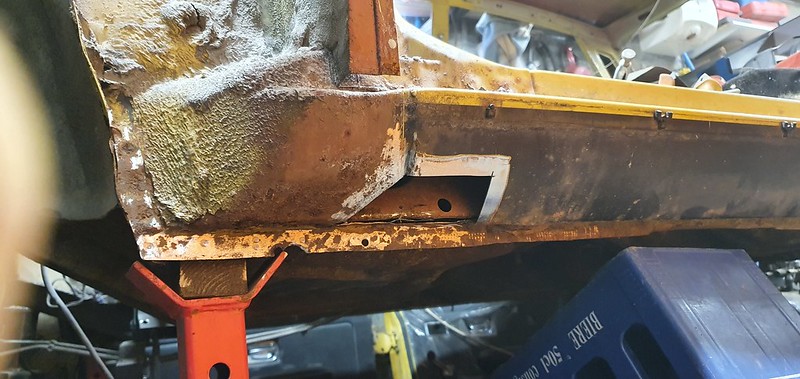
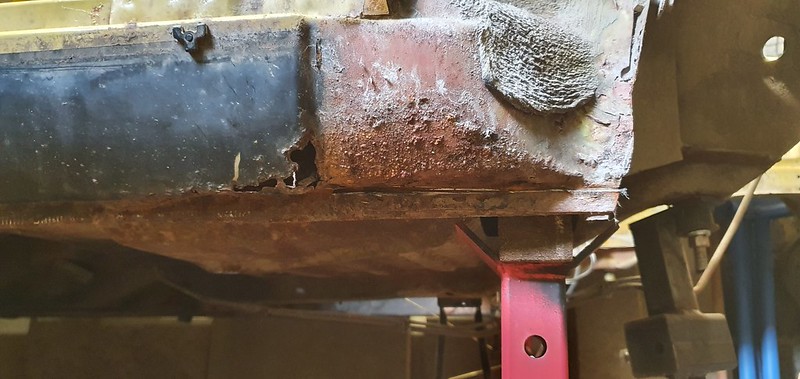
And after a coat of zinc primer... There are a couple of pinholes which will need to be removed (we don't want any water getting into the A post and top of the sill!)

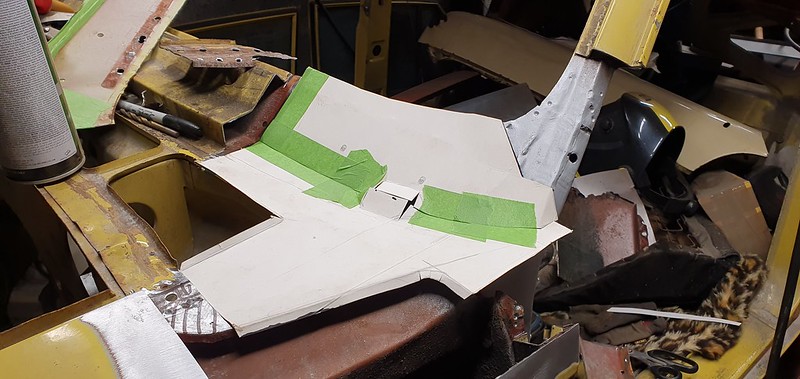
Next the gutter, I may have a go at making a gutter section. They are not complicated, just lots of folds so I need to think about the fold order, not sure yet!

Author:  James467 [ Mon Nov 16, 2020 2:13 pm ]
Post subject:  Re: VA 276, Mimosa Sprint

Unfortunately most of the inner bulkhead panel had disappeared so I had to take what I had left and make the rest with tape to form a template for a new one. Fortunately, I have a good one so I was able to accurately replicate the panel.

Image

After some work I came up with this...

Image

Image

Happy that it was going to work it could be tacked in.

Image

I could then make a gutter repair section and seam everything else in nicely

Image

The section I have details how the lower part of the gutter is bent in and connects to the bulkhead panel,

Image

Image

Very much a work in progress here but I have replicated the way that it was done at the factory.

Image

Image

On to the outer panel, I felt it was easier to repair the original panel rather than spend ages trying to cut off a repair section then tamper with it trying to make it fit. So out with the shrinker/stretcher!

Image

Image

After some repair sections I had this...

Image

Image

Image

Image

The only thing left to do was to weld that in and replace the wing tops.

Image

Image

Image

Image

On to the other side!

Author:  dollyman [ Mon Nov 16, 2020 6:20 pm ]
Post subject:  Re: VA 276, Mimosa Sprint

Incredible work as usual James 8) 8)

Tony.

Author:  lee16v [ Mon Nov 16, 2020 6:46 pm ]
Post subject:  Re: VA 276, Mimosa Sprint

looks stunning james ,without you agreeing to do the relevant repairs i would not have entertained such a project ,soon be in my hands lets hope i do your work justice,i am truly grateful buddy :eyes4u:

Author:  James467 [ Fri Nov 20, 2020 9:43 pm ]
Post subject:  Re: VA 276, Mimosa Sprint

Thanks all.

Like the bootlid to wing gap on the right hand side I am not happy with the gap where the wing meets the screen surround, the radius is correct, the wing isn't! It actually bummed me out a bit after a good days work but I checked against another couple of cars and it is correct, one has a gap but is tight where it meets the gutter, the other (actually a later car) is tight all the way round. I want it tight all the way round. I found another small rust home on the wing so I'll sort that at the same time when I finish all the little jobs.

The main thing was to crack on with the other side, yes, it really is as bad as it looks!

Image

Image

Image

Again, starting with the A pillar I cut out the rust and let in good new steel.

Image

Image

Note the door hinge plate, the outer skin has actually been crushed against the inner plate making a very useful locating flange for refitting the door!

Image

Image

On to the inner/upper bulkhead, again cut all of the rust out! Lots this time!

Image

Quality work here!

Image

I replaced a couple of the flanges ready for the repair section.

Image

Out with the card template!

Image

WIP with the repaired outer panel. The outer was done in the same way as the other side. More linishing is required to smooth the panel out, I put the grey primer on to show me where the low spots are and to highlight any pinholes. You can see the marks from the belt sander, I'll go over the panel with a 120 grit disc on the small air grinder and they will disappear.

Image

Test fitted with the replacement wing top.

Image

Needs a bit of fettling but I am happier this side with the fit around the windscreen.

Image

New gutter fitted and dressed.

Image

On to the front outer panel on Monday, the last of the 'big' jobs! Famous last words! :lol:

Author:  Tony Burd [ Sun Nov 22, 2020 6:25 pm ]
Post subject:  Re: VA 276, Mimosa Sprint

Proper job as usual James, nice one. Glad mine isn't that bad in the screen area :D

Author:  Awaiting Repair [ Mon Nov 23, 2020 1:01 pm ]
Post subject:  Re: VA 276, Mimosa Sprint

Brilliant work James! Keep the updates coming please!

Keith

Author:  James467 [ Thu Nov 26, 2020 6:54 pm ]
Post subject:  Re: VA 276, Mimosa Sprint

On to the front panel, easiest way to remove it was to cut it off then drill out the spot welds and pull off the seams.

Image

The top of the front inner valence was filled with mud!

Image

Image

Image

After all of the debris was cleared the inner panels were in remarkably good condition, only a small section of seam and a small patch was required.

Image

The car was supplied with a replacement front panel. I don't think it was original, either that or it was a late one, it needed some fettling to get it to fit.

First fit was ok...

Image

So with that I repaired any rust holes and prepped the panel.

Image

Image

Image

It received a going over with the wire brush or as i call it 'the wheel of death' on an angle grinder, followed by a coat of some Bilt Hamber rust killing solution then a coat of rich Zinc primer.

Image

The inside of the panel received the same treatment

Image

Then both panels received two coats of stonechip.

Image

Then I could get the panel on and lined up properly. I tend to start at the top with these, get the bonnet aligned then work down and it all falls into place.

Image

Image

I have had to adjust the seam on one of the sides to get the panel to sit central and square.

Image

It looks like it doesn't line up, that's because I haven't pulled the panel down yet!

Image

Image

I marked the center lines on both the panel and existing lower valence to ensure that they are perfectly central.

Image

This section is too long and needs to be removed

Image

Originally this join is spot welded on the inside, unfortunately it's impossible to replicate this when replacing the panel with the wings in situ. What I do is to tack the corners to hold the alignment, this allows me to fold the panel and dress it down over the front of the wings before spot welding. The tacks get ground off and some flexible adhesive sealer injected into the seam to hold it.

Image

Image

Final check that the bonnet is aligned!

Image

It is then spot and plug welded in

Image

Quite pleased with that

Image

The panel has some small dings from storage so I have removed the paint and pulled out the majority of them, the welds need linishing but I'll do that later.

Image

Image

Author:  James467 [ Sun Nov 29, 2020 4:17 pm ]
Post subject:  Re: VA 276, Mimosa Sprint

Final push now!

Oxygen arrived so I brazed the bootlid join, the photo makes it look awful but this is what the factory did.

Image

Image

Removed the rust from the trim holes on the c pillar,

Image

Removed the lower wing and repaired the front section of the sill, checked the rest for holes, all ok

Image

Repaired the inner wheelarch, fitted a new jacking point and fitted a club lower wing repair panel

Image

Image

Image

Image

Image

Image

Repaired the gutter

Image

Fitted a new wing top(not quite finished yet!)

Image

Image

Image

Image

Author:  mahony [ Sun Nov 29, 2020 6:18 pm ]
Post subject:  Re: VA 276, Mimosa Sprint

Fantastic work here James, coming along nicely :D :D

Author:  Awaiting Repair [ Mon Nov 30, 2020 11:24 am ]
Post subject:  Re: VA 276, Mimosa Sprint

Nearly there now! Keep up the good work!

Author:  xvivalve [ Mon Nov 30, 2020 1:04 pm ]
Post subject:  Re: VA 276, Mimosa Sprint

A little late with this advice, sorry, but before you let Lee paint it, do test a radiator grille fitment with that upper front panel...I suspect it is an aftermarket panel, in which case the plastic grille might protrude beyond the aperture as the flanges usually need a bit of a fettle before fitting...

Author:  dollyman [ Mon Nov 30, 2020 4:10 pm ]
Post subject:  Re: VA 276, Mimosa Sprint

truly remarkable job again James 8) 8)

Tony.

Author:  James467 [ Wed Dec 09, 2020 2:29 pm ]
Post subject:  Re: VA 276, Mimosa Sprint

Oh that front panel! I was in the process of getting the grilles to fit when I spoke to Lee and Alun. I just wasn't happy at all with the fit so after completing the nearside I just pulled off the old badly fitting panel and started again.

Whilst deciding what to do I dealt with the OS sill and lower wing. There wasn't a lot of rust at all, nothing that warranted a new sill, just a localized repair.

Image

Image

I stuck my camera probe down there and the rest of the sill is in good shape. After a quick repair and couple of coats of stonechip the new wing bottom was fitted.

Image

Image

Image

I then went along the sill seam and straightened it out where it was mounted to the dolly previously. The front of the wing repair looks funny, thats just the picture!

Image

Image

After this photo I tidied up the drain hole

Once the bottom was done I finessed the wing top gap

Image

Image

Then it was on to the front panel. I have a few that I have collected over the years, the reason I didnt use one previously was that the car was supplied with a panel. In hindsight I should have just done this is the first place as the replacement panel has less dings than the new one! What I managed to do was to retain the joint between the top of the panel and the inner valence joining the new panel just in front of the bonnet. This ensured that the bonnet gap was actually better. The nose joint lines up better as do the swage lines.

Image

Image

Image

Image

Image

Image

I am now happy with that, there are a few minor dings where the wings join, the photo makes it look worse than it is. I have brazed the wings to the front panel as the were originally spot welded at the factory.

Image

Image

Image

Time to finish the rear end. The rear panel is brazed here at the factory, as well as at the bottom of the rear screen, so this has been replicated.

Image

Image

The above was also where that huge rusty mess was, this has all been reconstructed.

I finished off the trailing edge of the roof, the whole seam here has been replaced. I am really happy with how the swage lines on the roof repair have lined up

Image

There was a small rust hole in the bottom of the rear wing, this has now been repaired.

Image

Tidied up the rear window surround

Image

Image

Tidied up all the work on the rear panel and in the boot

Image

Image

Image

Drilled some trim holes....

and there we have it....

Finished!! :jump4joy:

Author:  dollyman [ Wed Dec 09, 2020 2:37 pm ]
Post subject:  Re: VA 276, Mimosa Sprint

Weld done Jame's what a job. Have you another Dolly to have a go at? as i have really enjoyed reading this thread and watching a craftsman at work 8) 8) A real credit to you.

Tony.

Page 3 of 5 All times are UTC+01:00
Powered by phpBB® Forum Software © phpBB Limited
https://www.phpbb.com/