|
Hi Mike, There are a couple of weak points about these switches that are worth looking at, simply because of where they are mounted. Right down on the floor in all the dust and dirt that collects there.
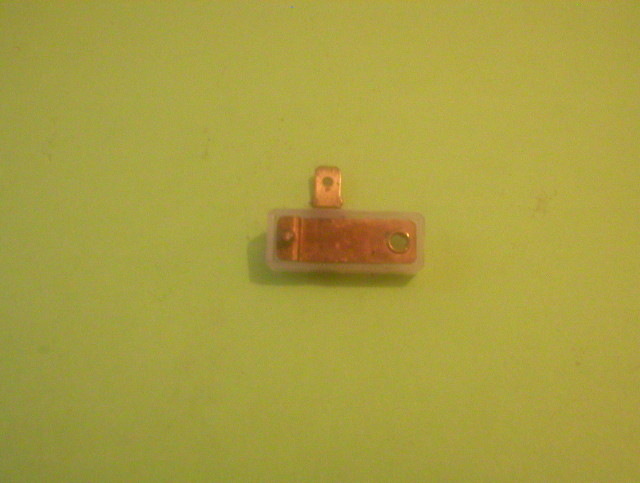
Have a look at the photo labelled "Front". The first thing to do is gently prise the movable copper strip with the operating cam upwards. I use a dental pick . Clean out the inside, and gently clean the contact areas with a fine file or similar, then wash out the inside with switch cleaner or similar. Clean off around the brass rivet on the copper contact . This can be soldered if you are careful. Again if you hold the copper contact firmly at the rivet end you can re-tension the copper springy bit outwards. Finally make sure the little operating cam is still intact, and clean it off.
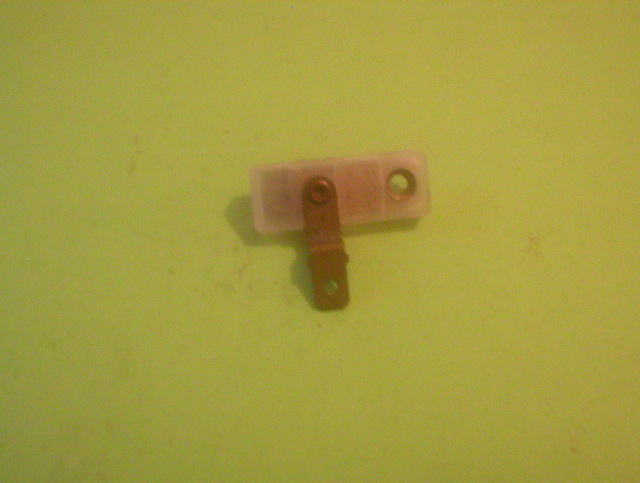
Then have a look at the photo labelled "Rear". Clean off the Lucar contact, then the area of the rivet where the attatchment screw fits. Note the screw must have a countersunk head and the contact area of both the earthing rivet and the fixing screw must be clean.
I've found that in the past this will cure it for another couple of years.
Do let us know how you get on.
Tony.
| Attachments: |
HB sw Front.jpg [ 66.95 KiB | Viewed 301 times ]
|
HB sw rear.jpg [ 82.92 KiB | Viewed 301 times ]
|
|