Quote:
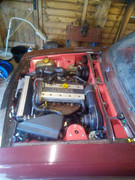
This looks like it could be the source of the leak.
Any advice on the best gasket to use and where to get it.
The manifold appears to be flat when inspecting with a straight edge. Hopefully I can get it to seal without skimming it. Plan B.
We seem to be traveling on the same path in the engine bay at the same time. I have finally done the 12-vane water pump "upgrade" on PFJ and completed the re-install of the intake manifold (and achieved total paranoia about coolant leaks in the process).
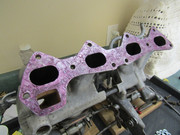
I used the usual intake manifold gasket from the Bros R. The new gasket is quite different than the old one I removed (which had exhibited zero coolant leakage at the coolant port, but had been enthusiastically silicone-sealed around the port, which resulted in that old gasket being torn by removal).
Here is a comparison of the new and old gaskets ===>

Since I had never done this job before, and wanted to anticipate what to expect from sealants and adhesives, I used a crude sealant test station, an old tin. Since PFJ is an early Sprint on which the intake manifold needs to be pressed down onto the connecting pipe already pre-positioned in the water pump cover, simultaneously with offering up the intake manifold to the head, my concern was having the gasket shift in the middle of this 3D fitting process that requires three hands simultaneously, so I wanted to know ahead of time what to expect from adhesive tack-times, sealant solidification times, etc. (Yes, incurable over-thinking.) Here is my old tin test station, with three "gasket" test samples (pieces of a beer box), red adhesive and gray silicone gasket maker ===>

After I had some idea of the times to get things tacky and the times to cure (admittedly probably not entirely accurate because these products require an anaerobic environment to cure, which my test tin did not provide), I felt confident for step 1, the application of the reddish Loctite Hi-Tack Adhesive to the manifold flange ===>
From my test station results, I knew that I had to wait at least 5 minutes before the red adhesive developed enough tackiness to hold the gasket in place on the manifold flange, but still remain pliable enough to do minor re-positioning. So for step 2, I then slapped the gasket onto the manifold, used all the old intake mounting bolts plus nuts and washers to tighten the gasket against the applied adhesive, plus cobbled together a clothes pin "compression device" to force the gasket against the adhesive around the famously under-designed, left-off virtual bolt area around the water port perimeter ===>

Also from test results, I knew that I had to wait about 30 minutes for the adhesive to semi-cure enough before the intake manifold (with nothing but the adhesive holding the gasket in place) could be offered up to the head without fear of shifting the gasket out of position. I had fabricated a single locating stud for the upper/rear-most bolt hole on the head. I ran a bead of Permatex Waterpump and Thermostat Housing RTV Silicone Gasket Maker (the gray stuff) around the perimeter of the water port opening on the head side of the gasket. For step 3, SWMBO was recruited to ensure that the upper/rear-most hole in the manifold remained always engaged upon this locating stud, as I simultaneously moved the intake manifold closer to the head surface, while rotating the front of the intake manifold downwards upon the connecting pipe protruding upwards from the water pump cover.
As the front of the intake manifold was positioned over the connecting pipe (which I could check by looking downwards into the open thermostat housing), and with my assistant in control of the rear of the intake manifold, at the front I needed only to rap gently/sharply on the thermostat housing with my rubber mallet for the intake manifold to swallow the top of the connecting pipe. All of this took about 25 seconds to accomplish (we had previously rehearsed this minuet). All this was required because this early Sprint does not have the later design change that simply allows one to jam the connecting pipe down through the thermostat housing AFTER the intake manifold is already safely mounted on the head! Then it was just a matter of starting a few of the intake manifold bolts, removing the rear locating stud, and starting the remainder of the 10 mounting bolts.
As "xvivalve" points out above, one needs to be judicious in the order in which the manifold mounting bolts are tightened, because of the lack of bolts around the crucial water port (my kingdom for an extra bolt!). That also had dawned upon me. It makes sense to first tighten up the bolts closest to the "insecure" water port area to maximize the clamping force around the water port, and then to work gradually towards the rear of the manifold. I torqued the bolts to 20 lb-ft. Returning to the bolts a hour later, I found the torque wrench applied a bit more tightening to each until 20 lb-ft was again registered. Another tightening sequence (front-to-rear) was required. Obviously the gasket was compressing with time and reducing the bolts' clamping effects. A third round yielded only one bolt requiring a retorquing (the lower bolt nearest the water port!). I am guessing that if I had just quit after the first measured round of torqueing, that would have not been enough clamping force (?).
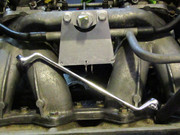
Another important point is good access to the bolt head for tightening. In a worst of all worlds case, the crucial bolt closest to the water port is difficult to get at due to the surrounding metal. I had noted that bolt head was chewed up far beyond any of the other bolt heads. Over the years, there must have been some struggles to get a wrench properly on that bolt. So some of the leak problems may have been caused simply by improper tightening of that one crucial bolt? I went out a bought a special off-set 1/2" wrench just for a proper connection to that bolt head while tightening (and that wrench proved infinitely useful for some of the other bolts) ===>
So far I have only had a chance to run a simple hydrostatic test of the cooling system - just filling the system to the tippy top with all air bled out of it, and leaving it sitting that way for three days (while I worked on something else). That test revealed no leaks or drips from any part of the above installation. Of course, when I finally get to cranking the new water pump to pressurize the cooling system, the Triumph Gods may burst out in laughter and cause leaks at each pore. So all the above may just be my load of codswallop. After all, this is the first time I have done this job....