Hello! apologies to eveyone for this late reply, My laptop had to be sent away for repair. A big thank you to everyone for the get wiell wishes, Iv got my cast off and should be walking in about a month! Id have much appreciated any help but as of last week the Toledo has had to be moved out of the home garage and put into storage whilst my brothers mini takes its place (gearbox and Diff trouble). When its back here though ill certainly let your good selves know if i need a hand!,
Hope you all have a great christmas and new year!
'Tina' 1971 Toledo Restoration
-
Purplebargeken
Re: 'Tina' 1971 Toledo Restoration
All the best for you speedy return to mobility. Are you in a Robocop boot?
Best wishes.
Ken
Best wishes.
Ken
-
andrew_27

- Guest contributor

- Posts: 238
- Joined: Mon Mar 22, 2010 11:25 am
- Location: Newcastle upon Tyne
Re: 'Tina' 1971 Toledo Restoration
Cheers Ken,
Iv just got 2 dressings on now (where they cut it open to put the metal pin in) and thats it, so not long now hopefully!
Iv just got 2 dressings on now (where they cut it open to put the metal pin in) and thats it, so not long now hopefully!

Re: 'Tina' 1971 Toledo Restoration
Lots of breaks at the same time here, so I know how you feel. I have another 6 weeks to go before I'm allowed to put weight on my foot. 
-
andrew_27
- Guest contributor
- Posts: 238
- Joined: Mon Mar 22, 2010 11:25 am
- Location: Newcastle upon Tyne
Re: 'Tina' 1971 Toledo Restoration
ouch, its frustrating isnt it? having the spare time but not being able to make use of it! hope the 6 weeks flys by though Dave!
-
andrew_27
- Guest contributor
- Posts: 238
- Joined: Mon Mar 22, 2010 11:25 am
- Location: Newcastle upon Tyne
Re: 'Tina' 1971 Toledo Restoration
I can now limp/hobble around the garage, so thats good enough for me to get stuck in again. The Mini's out of the way and Tina is back in the garage 
Last section of the boot done and i fitted the repaired tank for a trial fit and all seems good so far..


I put a can of petrol in the tank and charged the almost flat battery, the starter turned but that was about it (i also foolishy flooded it). But after a poke about it turned out there was a wire had been knocked off the coil and she fired up no problems then.
Next bit is to make a start underneath the boot which is solid but just a bit of a mess so im planning to strip it down and stone chip it.


I also wondered if anyone knows there i can get hold of a rubber filler neck seal? the original iv got is on its last legs.
Last section of the boot done and i fitted the repaired tank for a trial fit and all seems good so far..
I put a can of petrol in the tank and charged the almost flat battery, the starter turned but that was about it (i also foolishy flooded it). But after a poke about it turned out there was a wire had been knocked off the coil and she fired up no problems then.
Next bit is to make a start underneath the boot which is solid but just a bit of a mess so im planning to strip it down and stone chip it.
I also wondered if anyone knows there i can get hold of a rubber filler neck seal? the original iv got is on its last legs.
-
drpaul0209
- Guest contributor
- Posts: 190
- Joined: Sun Feb 21, 2010 6:45 pm
- Location: The North. Ish.
Re: 'Tina' 1971 Toledo Restoration
I couldn't find filler neck rubbers anywhere, so Rimmers recommended a Herald one. Fitted spot on! So go Herald if you can't find the real thing.
-
JPB
Re: 'Tina' 1971 Toledo Restoration
Now that's a good idea. Probably worth looking in at Sports Car Supplies in Swalwell for one of those, they tend to be loads cheaper than Rimmer Bros for little things like that. 
Good to see progress being made, hope you get it along to some local shows this coming summer.
Good to see progress being made, hope you get it along to some local shows this coming summer.
-
andrew_27
- Guest contributor
- Posts: 238
- Joined: Mon Mar 22, 2010 11:25 am
- Location: Newcastle upon Tyne
Re: 'Tina' 1971 Toledo Restoration
Cheers for that! Il have a look for a herald one. Been a while since i posted but all has been going well. underneath is just about sorted

Had to lop off the back end of the exhaust as it was rotten and in the way, but a new system will be put on before it goes on the road in any case

The valance is now in filler and so far im fairly happy with the shape, it just needs some tweaking!

Iv also got a new boot lid as the original was fairly rotten and since i had a spare it seemed more sensible to fit it rather than getting bogged down patching up the old one

Dont have any photos yet but the back bottoms of the wings and the rear arches are pretty bad and im working on welding new metal in which ill post on here asap!
Had to lop off the back end of the exhaust as it was rotten and in the way, but a new system will be put on before it goes on the road in any case
The valance is now in filler and so far im fairly happy with the shape, it just needs some tweaking!
Iv also got a new boot lid as the original was fairly rotten and since i had a spare it seemed more sensible to fit it rather than getting bogged down patching up the old one
Dont have any photos yet but the back bottoms of the wings and the rear arches are pretty bad and im working on welding new metal in which ill post on here asap!
-
DoloWIGHTY
Re: 'Tina' 1971 Toledo Restoration
Lovely job. Great to see filler being used for what it was designed for for a change.
-
pandaselecta
Re: 'Tina' 1971 Toledo Restoration
Andrew, i found the new old stock exhaust system if you want it 
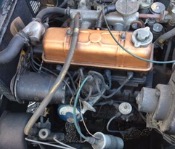
If you pop down you can have a look over the new project........

(so big, only the bonnet fits into the picture )
If you pop down you can have a look over the new project........
(so big, only the bonnet fits into the picture
-
JPB
Re: 'Tina' 1971 Toledo Restoration
I've seen the Holden, the thing's ENORMOUS! Oh how I laughed when Pandaselecta told me what it does to the gallon.
-
andrew_27
- Guest contributor
- Posts: 238
- Joined: Mon Mar 22, 2010 11:25 am
- Location: Newcastle upon Tyne
Re: 'Tina' 1971 Toledo Restoration
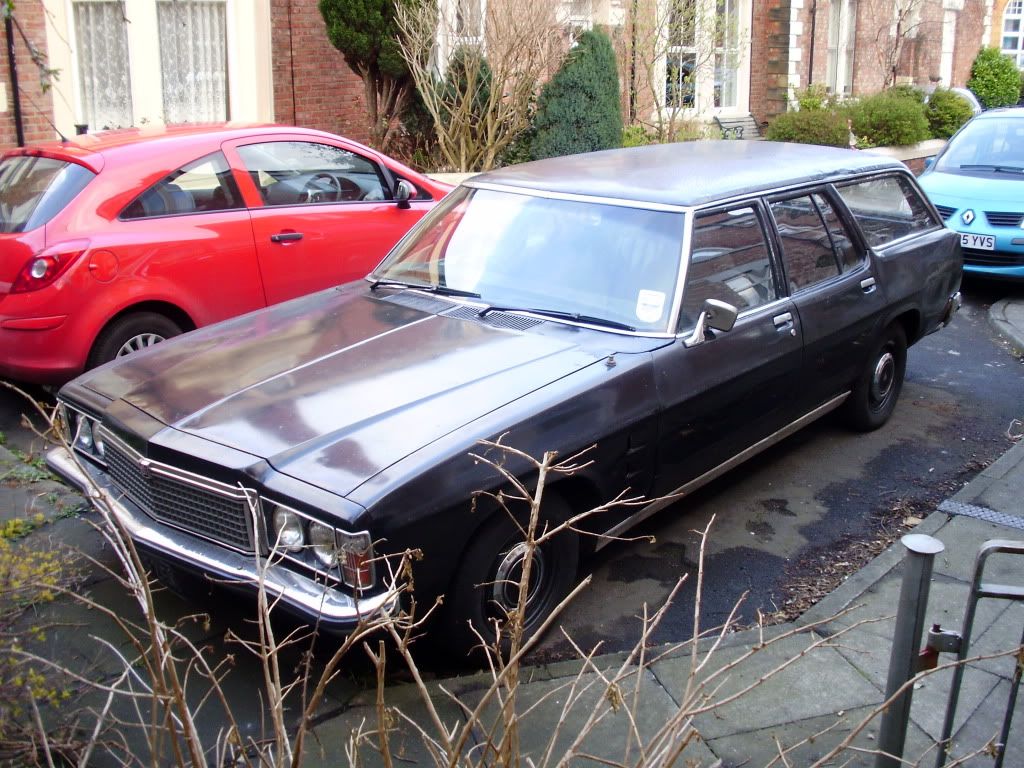
Cheers! I saw that at the metrocentre on wednesday, didnt know it was yours though, its huge!
I took a few photos whilst i was down there..
http://www.flickr.com/photos/24470603@N05/
I took a few photos whilst i was down there..
http://www.flickr.com/photos/24470603@N05/
-
JPB
Re: 'Tina' 1971 Toledo Restoration
Next meet is May the 11th, come and say hello then perhaps? 
I can't have been far from the car when you took the photo.
In case anyone's wondering; the oil on the floor is from the modern, 4x4 thing that was parked there before I arrived, my motor isn't leaky. Filthy perhaps, as I'd travelled straight there from a long trip South and didn't have time to drive the 60 miles up home & back for a wash (the car, not me), but deffo no leaks nowadays. 
I can't have been far from the car when you took the photo.
-
andrew_27
- Guest contributor
- Posts: 238
- Joined: Mon Mar 22, 2010 11:25 am
- Location: Newcastle upon Tyne
Re: 'Tina' 1971 Toledo Restoration
May 11th? ill have to remember that
I finally got round to gathering my photos of whats been happening over the past few weeks..
Most of the back wing bottom and outer and innder wheelarch had to come out. It had been repaired in the past but the new metal had just been welded over the rotten parts.

This slightly knackered the work id done inside the boot but that can easily be sorted out and a mistake to learn from!

bottom end closed up..

the outer edge had to come off all the way along as it was too pitted, it had also been stuck together on the innner side with filler and silver paper ...some real craftsmanship!
Here it is looking a little bit better and almost fully welded up

Doing the inner sections was harder as im not used to welding upside down but its good practice if nothing else

here it is welded up and sealed over..

The filling process begins..

I dismantled the rear bumper whilst i was waiting for the filler to dry at one point to find that both corner sections had been filled on the inside with some sort of resin (looks like its from a petrol tank repair kit or something similar) the passengers side one is rotten all the way through so ill need to get hold of another one from somewhere but the other one seems fine!

I finally got round to gathering my photos of whats been happening over the past few weeks..
Most of the back wing bottom and outer and innder wheelarch had to come out. It had been repaired in the past but the new metal had just been welded over the rotten parts.
This slightly knackered the work id done inside the boot but that can easily be sorted out and a mistake to learn from!
bottom end closed up..
the outer edge had to come off all the way along as it was too pitted, it had also been stuck together on the innner side with filler and silver paper
Here it is looking a little bit better and almost fully welded up
Doing the inner sections was harder as im not used to welding upside down but its good practice if nothing else
here it is welded up and sealed over..
The filling process begins..
I dismantled the rear bumper whilst i was waiting for the filler to dry at one point to find that both corner sections had been filled on the inside with some sort of resin (looks like its from a petrol tank repair kit or something similar) the passengers side one is rotten all the way through so ill need to get hold of another one from somewhere but the other one seems fine!