tinweevil wrote:Well my memory fails me again, I'd forgotten just how much of a bugger these drain points are to find. This, hopefully, will help. The photos below are all from a 1980 car, I checked Mrs Weevils 1973 1500TC and all the holes are present. Starting from the passenger side on a right hand drive car;
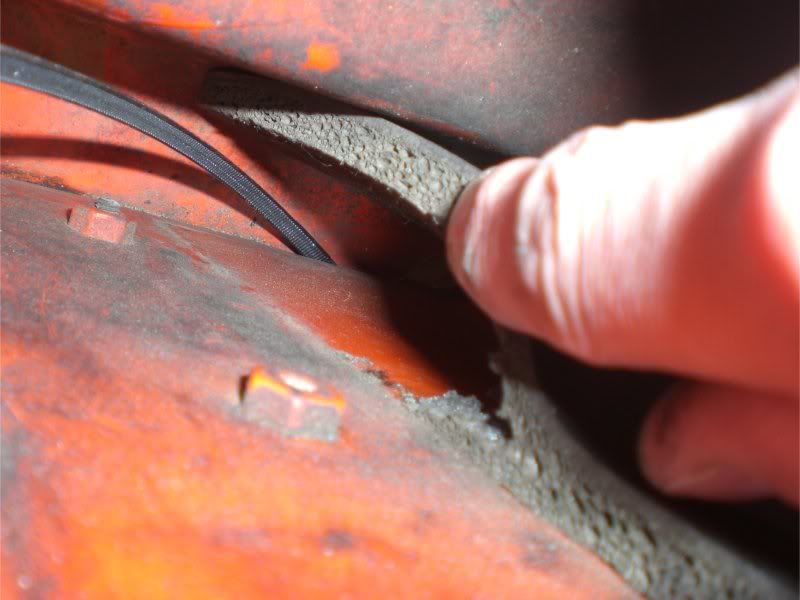
No 1 is obscured both in the engine bay and in the scuttle by sound proofing. The pad in the scuttle should be glued at the top only so you can pull the bottom away from the metal and root about. This is peering down into the scuttle right into the corner, the engine bay is below the picture and the passenger compartment above. The two captive nuts in the picture are for the washer bottle bracket. It's not a round hole, it's a slot which is why a flat cable tie like this one is ideal for clearing them. I've turned up the corner of the engine bay bulkhead pad so that the drain is less obscured. I can't get a good picture of that but see no 6.
 No 2
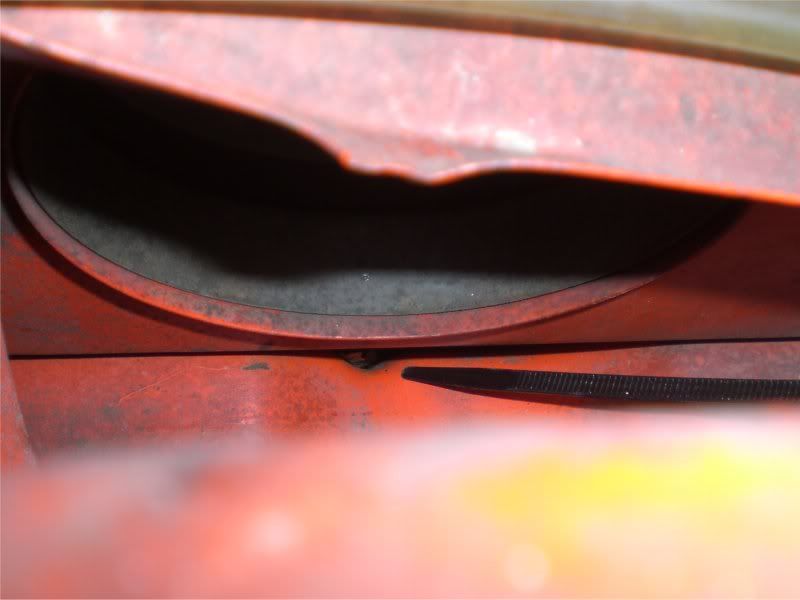
No 2 is easier to spot. The dirty great hole in this pic is the inlet to the heater blower, just below is the little drain hole with a cable tie pointing at it, bigger than I remembered. Engine bay is above the picture. There's some bits of leaves in there so it's vacuum time again for me. There's no chance of a shot from inside the engine bay for this one, it's behind the blower motor.
 No 3
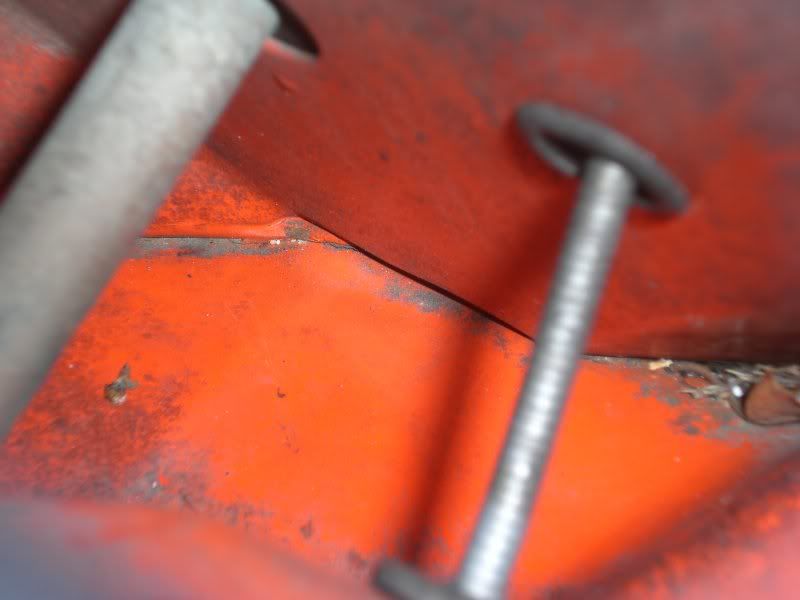
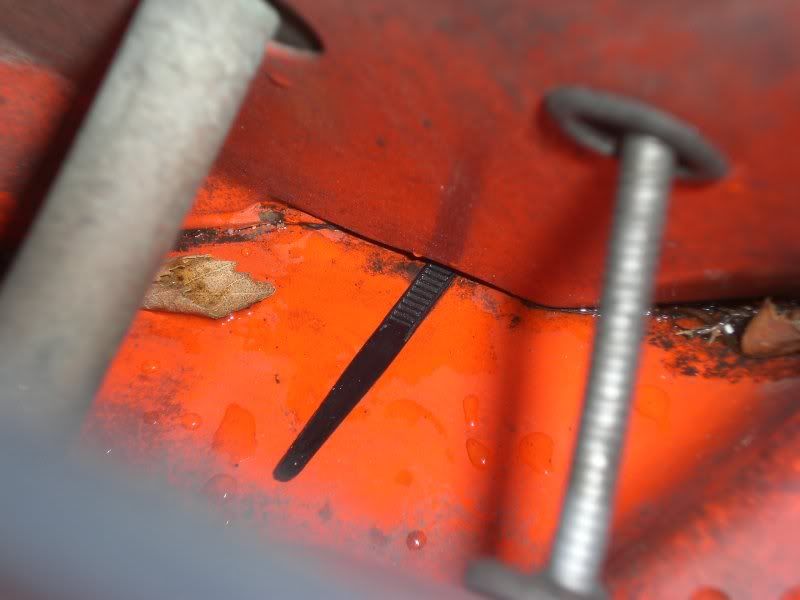
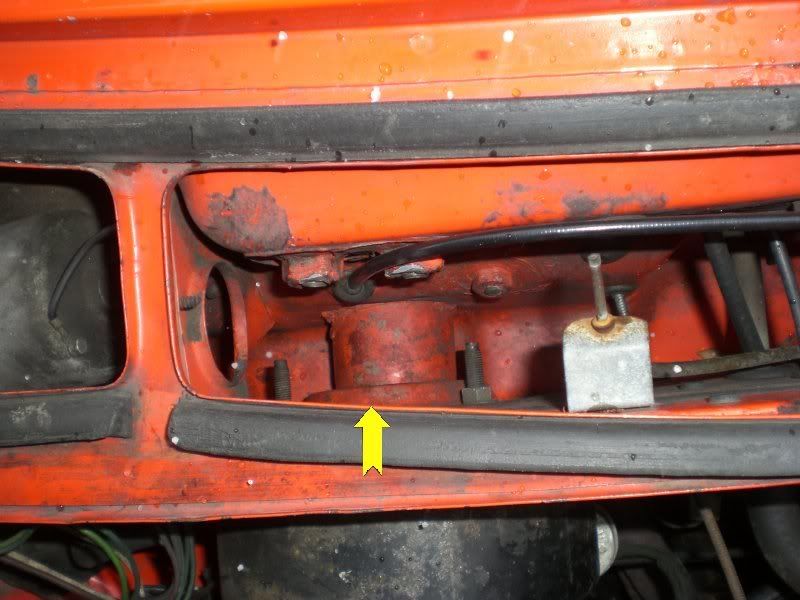
No 3 can't be seen form either side, how useful. Here's a general pic with a cable tie pointing the way:
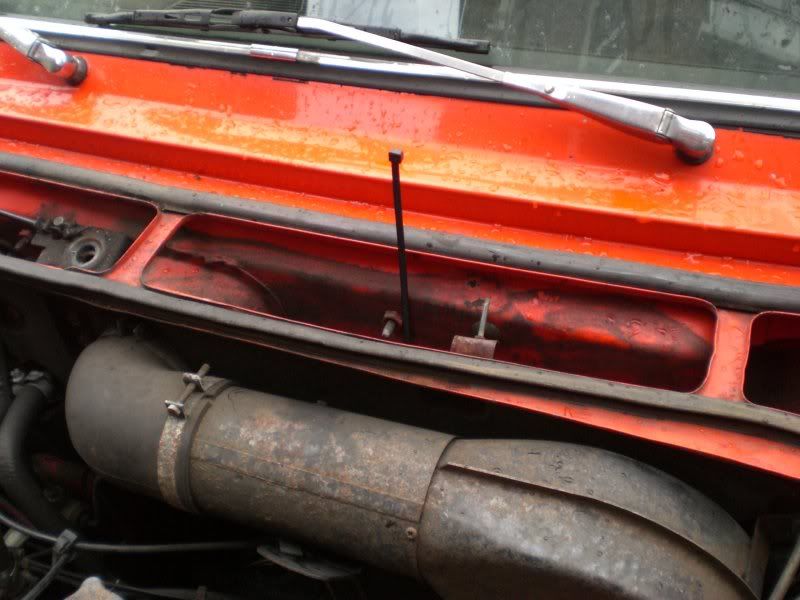
Looking towards the front of the car (engine bay above in the next picture) you will see this obvious hole a bit more than an inch in diameter. That is not the drain but on later shells the drain is directly below it, again pointed out by a handy cable tie. The hole is useful though, you can stick a finger through it to push the engine bay soundproofing away from the bulkhead. On late cars the drain is almost an inch wide and centred directly below the hole whereas on early shells it's only 1/3 inch wide and below the right edge of the hole, roughly where the lump of dirt is.
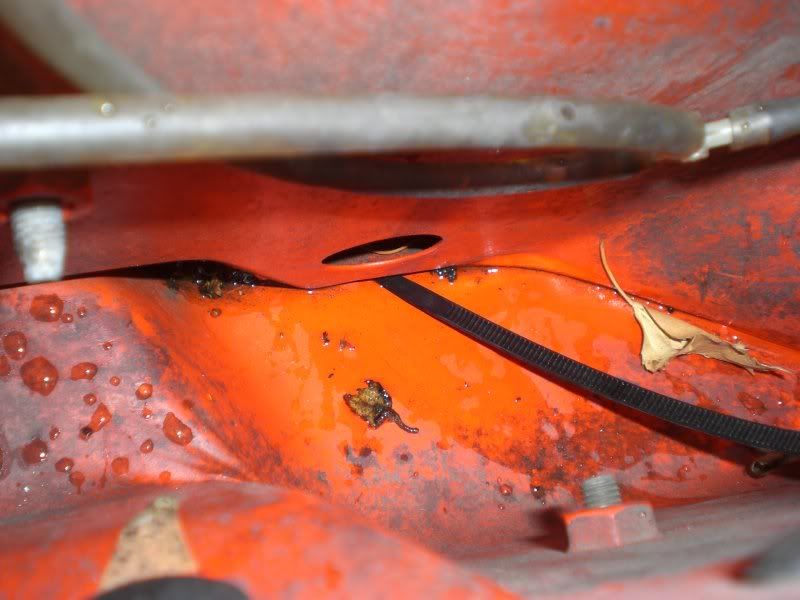
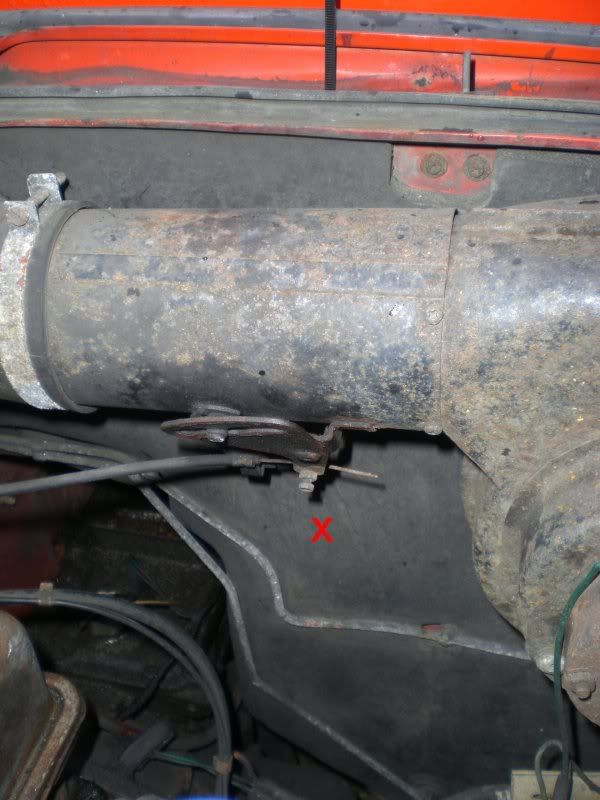
The next bit is easy in an OHV and an utter pig in a slant as the engine is in the way. X roughly marks spot for where the drain is. From that point down you need to make sure the soundproofing is loose from the bulkhead. This is the plastic ruler job I was on about earlier. If ever I get to restore this car then while the soundproofing is off I'll remove an inch wide strip of the foam layer from the drain down which will leave a nice invisible void behind the solid layer.
 No 4
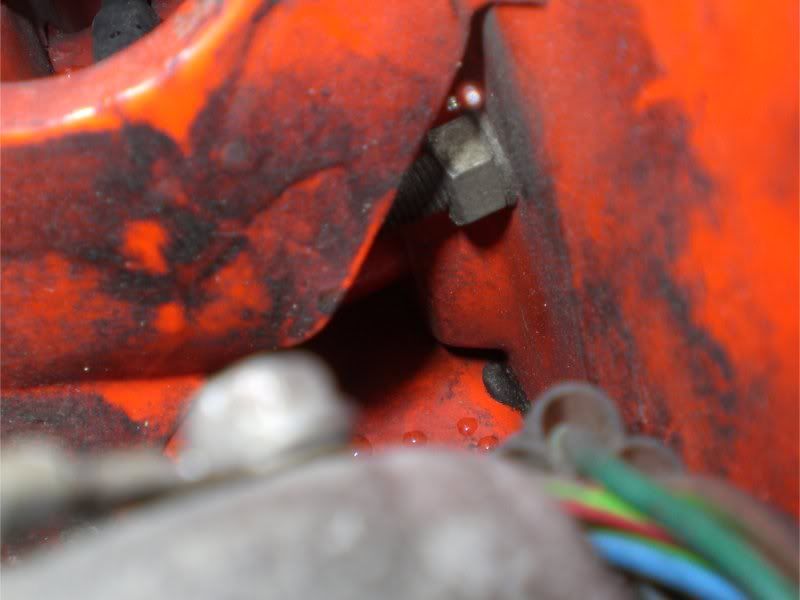
No 4 is easy. Fairly wide on a late shell and centred smack between the pipes. On an early shell the drain is half as wide and just like no 3 slightly closer to the centre of the car, almost behind the right hand pipe.

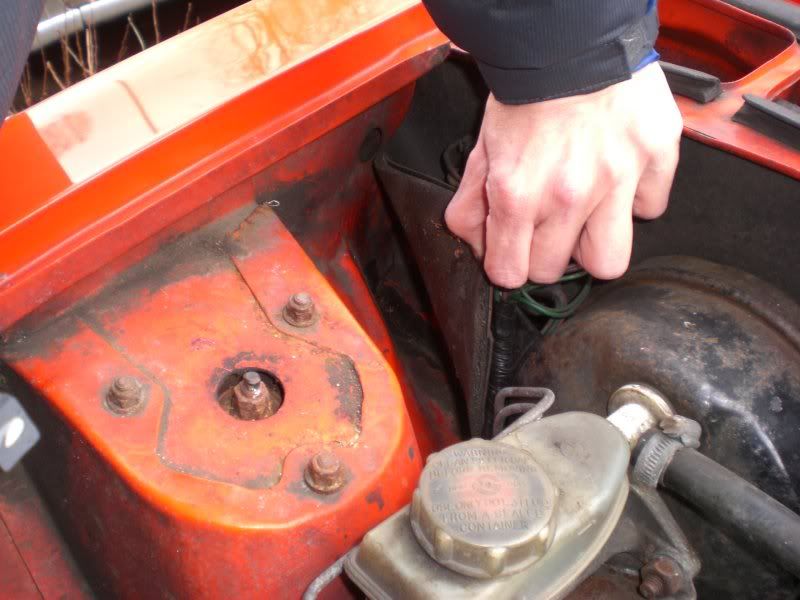
Although you'd not know it looking in the scuttle without......
... a you-know-what to show you the way. Engine bay above, heater pipe on the left and choke cable on the right.
 No 5
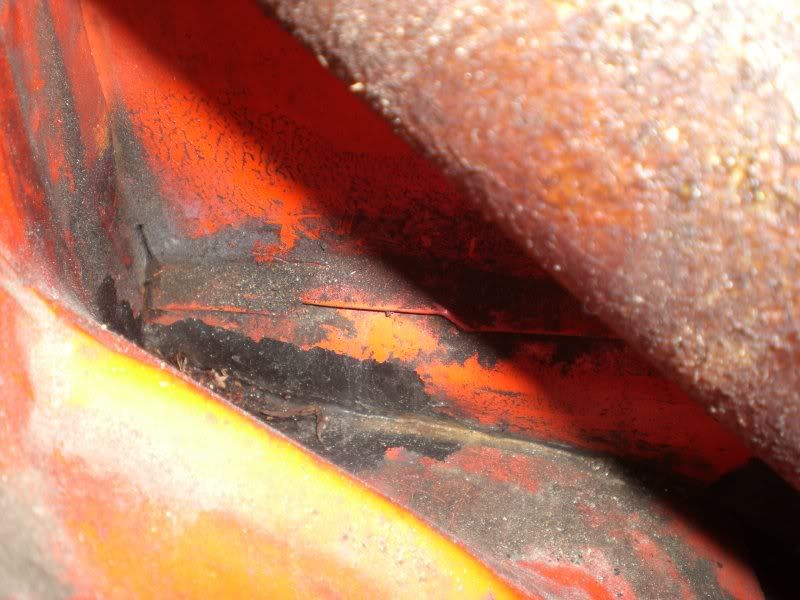
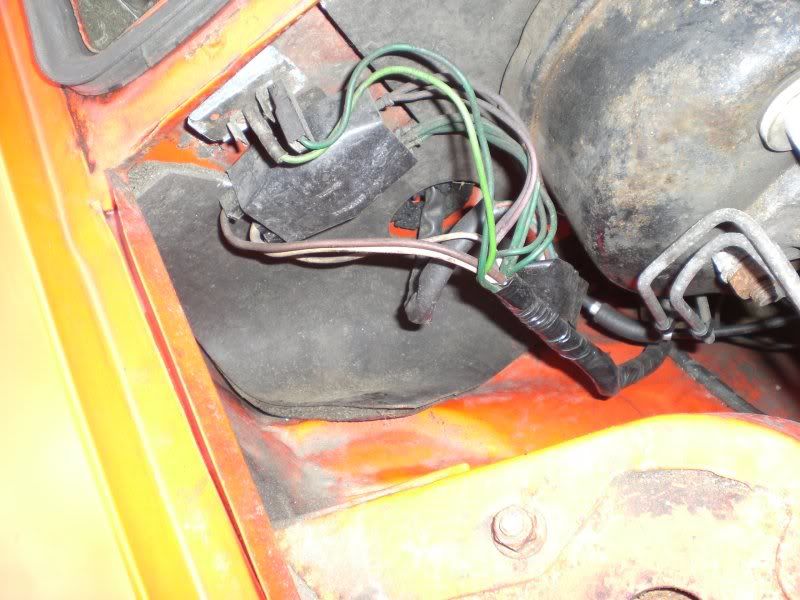
No 5 is just impossible. Looking down into the scuttle it's underneath the tube behind the brake servo roughly where the arrow is pointing.
See that gusset on the left in the above photo? Poke and peer through the gap below it and you'll catch a glimpse maybe. This is the one that you'll doubt is even there but I assure you it is. The drain is lost in the gloom in this photo but it shows you the gap to look through. Engine bay on the right, wiper motor at the bottom. Absolutely no chance of seeing it from the engine bay, the servo is in the way.
 No 6
No 6 cannot be seen from above, its totally hidden by the wiper motor. But if you peel back the sound proofing in this area:
You'll see this. You can poke and prod upwards through the slot to clear it.
I don't push the corner of the sound proofing back down as I said with no 1, it sits like this which keeps things clear.
So there you have it, no excuses for scuttle rot now. Stash a cable tie or two in your toolbox (with your ubiquitous lucozade bottle

). And Gentlemen, start your vacuums.
Tinweevil