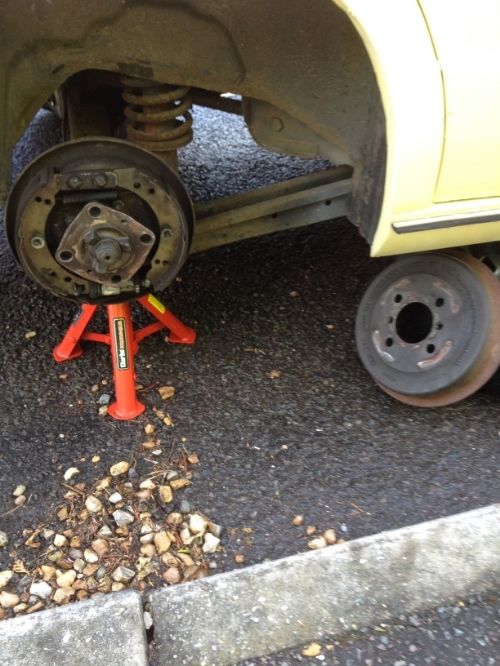
Chock the front wheels, get the back on axle stands, handbrake off.
Undo the two drum retaining screws, remove the brake drum (use nudges from a hammer if necessary).
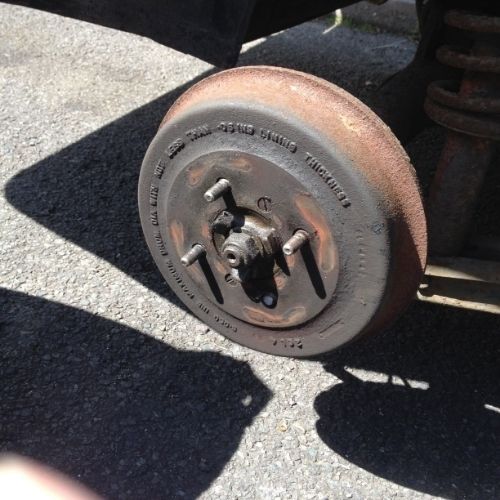
Whack the sheared stud with a good quality punch from the road side, the stud should drop through. There's just enough clearance on an 1850 to do this without removing the backplate.
Fit a new stud - warning - ENSURE the new stud is fully pulled through. I fitted 4 new studs to a hub and got lucky, I heard a rattling before the wheel came off
Hopefully some experts can give a bit more advice.
Go for the standard length studs. When you pop the new stud through it will be very loose until it starts to "bite" into the hub. If using steel wheel nuts with a taper on the wheel side, turn the nut around so the flat face of the nut is facing the hub. If you add a few washers before the nut it will allow the stud to pull through fully. The hub will of course try to turn when tightening the nut to pull the stud through so carefully hold the hub still by using a bar of some sort to counter act the turning.
When you have pulled the stud as far as you can see it needs to go, reassemble the drum and wheel etc and TORQUE the wheel nuts up to factory spec. The new stud should be about there at this point BUT give it a road test and re check the torque when you come back in case its settled a bit.
Hope that all makes sense.
Just a quick update, with your great help on here, I've managed to get the drum apart and knock the old studs out, took me all of 5 minutes! Amazing what one can achieve when they have axle stands and a hammer!
Now its just a waiting game until the Rimmerbros courier arrives with my new studs and nuts.
I just want to say thank you again for you lot helping me, I know I ask pretty simple questions on here but I'll only ask once!
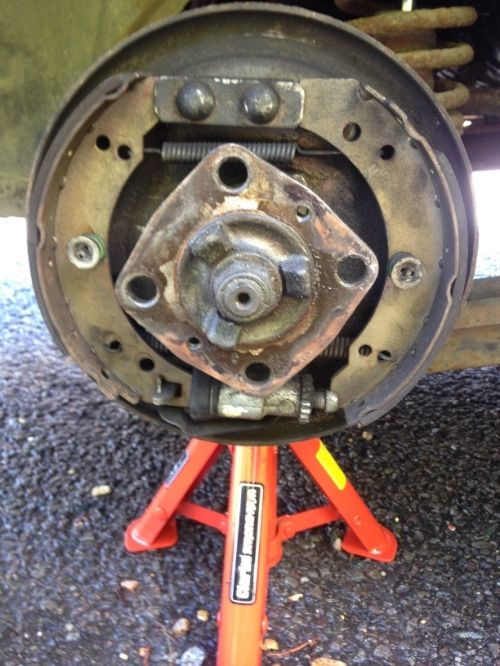
I notice you have a slightly asymmetric wear pattern on the shoes. The one on the left is wearing quicker and more at the bottom
than the one on the right, possible barbecue your wheel cylinder is not sliding as freely on the backplate as it should.
If you do take the shoes off to sort this be sure not to loose the little shim in the hole that the handbrake lever pokes through.
Useful reference pic for others fitting rear brake shoes...
Jonners
Note from Admin: sadly Jon passed away in February 2018 but his humour and wealth of knowledge will be fondly remembered by all. RIP Jonners.
Just to add to Jonner's post, the shoes should 'slide' left and right with a hit from the palm of your hand, shouldn't take too much effort. If they don't, it's time to do some cleaning, once reasonably clean on all the slidy touchy bits (I hope you like the technical terms) I copper greased the lot, been great since.
Caveat: I'm no expert, others may have better/different advice, I would use their advice before mine!
Hide mallet....block of wood, big screwdriver handle...
Anyhoo....the trick for a nice slidey cylinder is indeed a dab of copper ease and getting the clips
the right way round, so the pips in them line up. The curvey clip goes under the flat one towards the backplate
and acts like a pair of skis...so it should slide easilly. Then you need a good condition boot to keep it all clean.
Loads are fitted wrong...
Jonners
Note from Admin: sadly Jon passed away in February 2018 but his humour and wealth of knowledge will be fondly remembered by all. RIP Jonners.
The only thing I would add is that the Haynes Manual gives the tightening torque for the 3/8 in wheel nuts as just 38 to 45 ft.lbs. for the 3/8 in studs.
The 7/16 in later Sprint studs are quoted as 70 ft.lbs.
Tony.
I was interested to read the comments about being able to move the rear brake cylinder in the back plate as I have wondered how much effort should be needed to move it. When I check my brakes prior to an MoT I always check that the cylinders will move but I have found that it does take a mallet to move them which has surprised me. It may just be that my hands are soft but perhaps I need to see if I can free them up a bit more.
I have also found that with a high mileage the drums get a ridge left on the outer edge as the shoes wear the rest away. To make it easier to get the drums on and off I have carefully ground the ridge away. It certain has made drum removal and replacement a lot easier.
When I get a car, one of the first jobs is usually to strip the rear brakes, wire brush in a drill and clean up th backplates, sometimes abrasive paper or even a flapwheel....
Flick over with etch primer (after a good wash down) and thin coat of paint. Then coppergrease all sliding surfaces, being careful to not overdo it. Manual adjusters strip, clean, reassemble with copperslip. Auto adjusters, no idea (yet!) but similar expected. Everything should move freely. Then once back together, set the shoe adjustment, then the handbrake cable. Very rare to have any issues then, even on herald/spits. Notable exception was on the toledo, it appeasr to have had new hold down springs, made of paperclips by the look of it. Caused shoes to move away from backplate. using 40 year old parts cured that issue.