Thanks James. Yes that does make sense, but it was more around the left hand side of the patch where it meets the wheelarch that I was curious. Do you weld the patch to the wheelarch outer?
Also, with the outer cill panel, is it spot or seam welded along the top edge? (just below the bottom of the doors)
All very interesting stuff! I will send you some pictures of my project Sprint cills when I start digging....gulp..
it is this one btw:
https://forum.triumphdolomite.co.uk/vie ... =9&t=34768
VA138, the next chapter....
-
Matt Cotton
- TDC Oxfordshire Area Organiser
- Posts: 494
- Joined: Sun Oct 08, 2006 4:32 pm
Re: VA138, the next chapter....
Matt Cotton
TDC Oxfordshire Area Organiser.
TDC/TSSC group meeting - 3rd Tuesday of the month
1980 1500HL - OPD
1976 Sprint - SWU
TDC Oxfordshire Area Organiser.
TDC/TSSC group meeting - 3rd Tuesday of the month
1980 1500HL - OPD
1976 Sprint - SWU

Re: VA138, the next chapter....
Moving on to the OS sill now, the car has been turned around to give me some space to work on it. I also mounted it up higher on the dollies so it's easier to get under with a welding shield on!
First job was to remove the paint from the wings, much the same as with the opposite side, so it was out with the evil paint stripper!

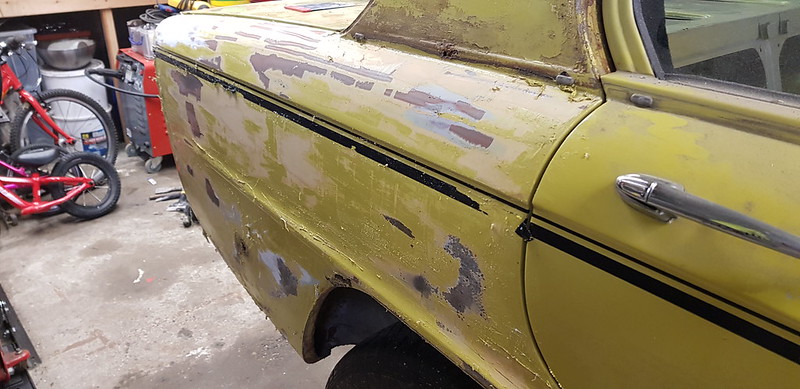

The front wings showed signs of bad prep when they were last sprayed, rust under the paint.

That was easily cleaned off with the strip disc.

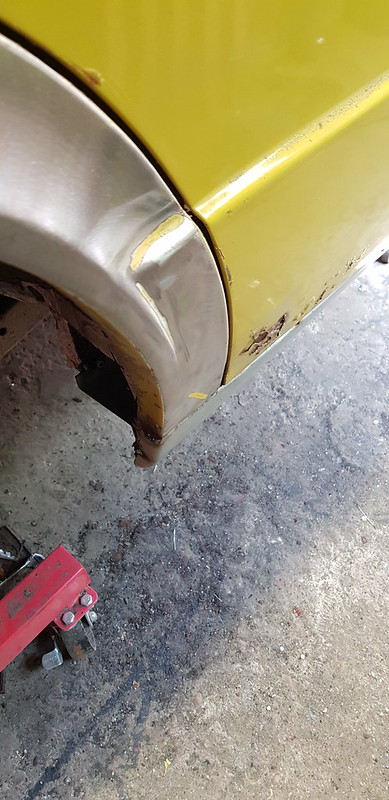
The rear wing needs a small wheelarch repair, it had a bit of filler in it hiding a dent, I can pull that out, plus a bad repair which will need re-doing.


With that done it was on to the sill.
On the face of things the drivers side didn't look quite as bad as the passengers side. The jacking points had been repaired in the past, unfortunately not too well plus there was some signs of corrosion in the front sections.

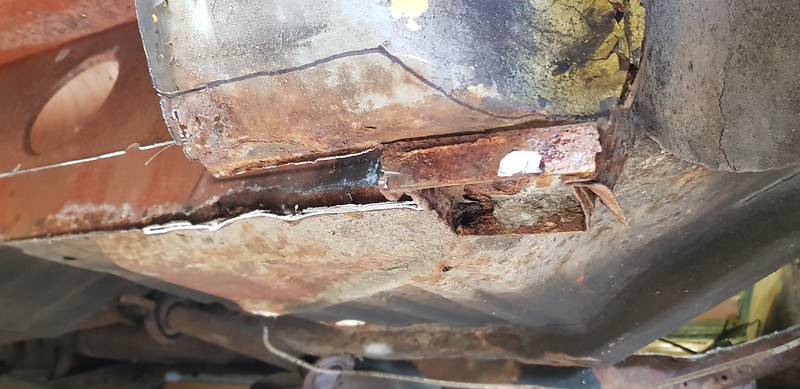


Out with the flap disc for a good clean up!


Fitting was much the same as the other side so I wont go into too much detail, basically test fit.

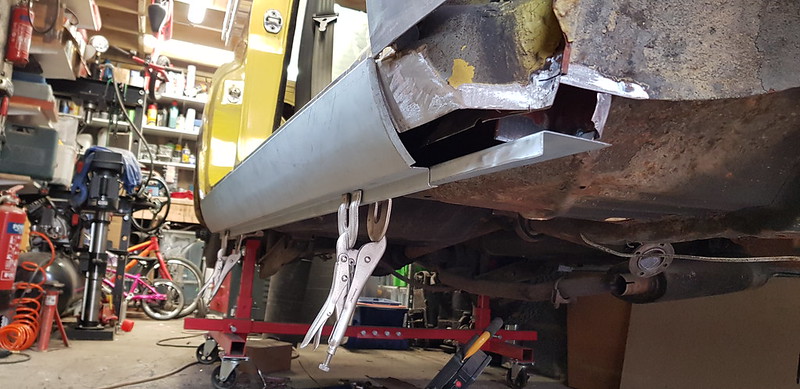

Fit the doors, check alignment etc... then tack on


I did have to pull the outer back off and re-align it which shows the importance of tacking it in place. The rear section has a slight curve which I needed to put in to ensure that the rear door fitted correctly...


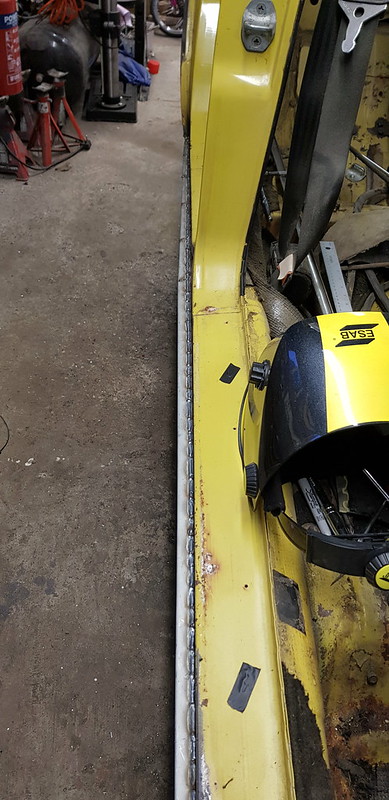
Once I was happy with the alignment, the top was properly tacked in place ready for seam welding, and the bottom section plug welded on.


All that is left to do is to close off the jacking points and inner wheelarches, fit the jacking point pads then seam weld everything on.
First job was to remove the paint from the wings, much the same as with the opposite side, so it was out with the evil paint stripper!
The front wings showed signs of bad prep when they were last sprayed, rust under the paint.
That was easily cleaned off with the strip disc.
The rear wing needs a small wheelarch repair, it had a bit of filler in it hiding a dent, I can pull that out, plus a bad repair which will need re-doing.
With that done it was on to the sill.
On the face of things the drivers side didn't look quite as bad as the passengers side. The jacking points had been repaired in the past, unfortunately not too well plus there was some signs of corrosion in the front sections.
Out with the flap disc for a good clean up!
Fitting was much the same as the other side so I wont go into too much detail, basically test fit.
Fit the doors, check alignment etc... then tack on
I did have to pull the outer back off and re-align it which shows the importance of tacking it in place. The rear section has a slight curve which I needed to put in to ensure that the rear door fitted correctly...
Once I was happy with the alignment, the top was properly tacked in place ready for seam welding, and the bottom section plug welded on.
All that is left to do is to close off the jacking points and inner wheelarches, fit the jacking point pads then seam weld everything on.
Re: VA138, the next chapter....
The sill has now been fully seam welded into position,


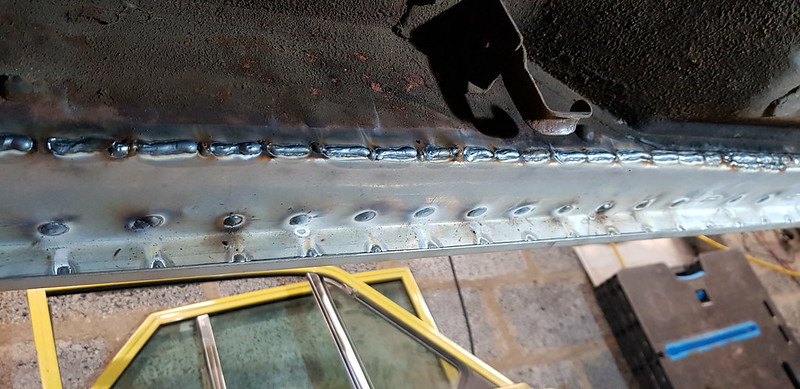
So I could move onto the jacking point pads. The old ones were never going to be used again so new ones have been fabricated.

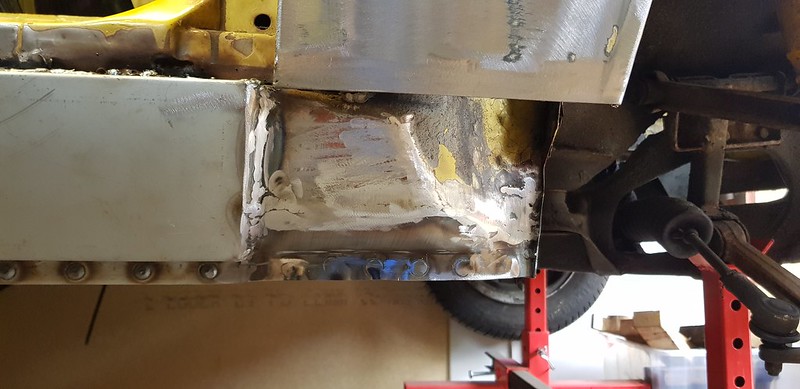
I could then get on with closing in the front jacking point and inner wing.


I will need to do some work aligning the join between the old and new sills, they should line up with the door. I'll do this later on when I put the bottom of the wings back on.

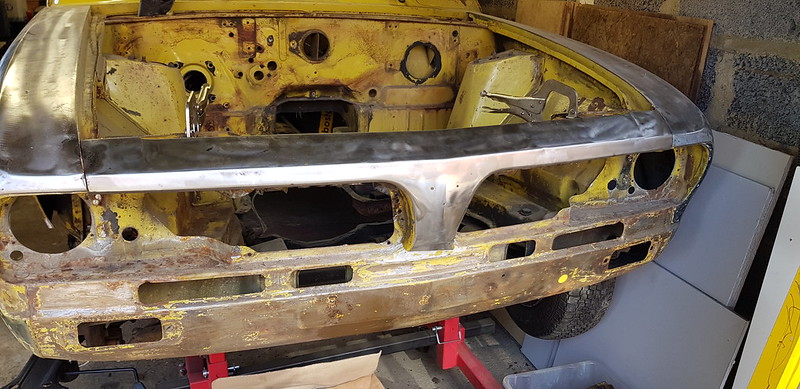
I have done the rear but forgot to take photos, will do some ready for the next post! In the meantime it is on to the front end. I cut the old rusty outer panel off to reveal a really nice rust free inner valence (phew!!)


Out came the spare front end that I have!


More to come, just waiting for some pictures to upload!
So I could move onto the jacking point pads. The old ones were never going to be used again so new ones have been fabricated.
I could then get on with closing in the front jacking point and inner wing.
I will need to do some work aligning the join between the old and new sills, they should line up with the door. I'll do this later on when I put the bottom of the wings back on.
I have done the rear but forgot to take photos, will do some ready for the next post! In the meantime it is on to the front end. I cut the old rusty outer panel off to reveal a really nice rust free inner valence (phew!!)
Out came the spare front end that I have!
More to come, just waiting for some pictures to upload!
Re: VA138, the next chapter....
Now the photos have finally uploaded I can continue!
I have carefully removed the donor outer valence, which came away easier than expected actually.


The first quick trial fit on the car looked good...


As to be expected there is a small amount of fettling to do. I have cleaned the inner valence up ready for final fit and just set to ensuring that the outer panel fitted perfectly. The nose needs some adjustment where the previous join was made then filled with filler, I'll make this joint line up correctly before welding. The panel is centre (I have measured it!)

The last thing to do before removing the panel and prepping everything for welding was to check the bonnet fitted correctly and the shut lines were correct.


I'm very happy with the fitment so it can be cleaned up, the seams dressed and zinc painted then it can be finally welded on.
I have carefully removed the donor outer valence, which came away easier than expected actually.
The first quick trial fit on the car looked good...
As to be expected there is a small amount of fettling to do. I have cleaned the inner valence up ready for final fit and just set to ensuring that the outer panel fitted perfectly. The nose needs some adjustment where the previous join was made then filled with filler, I'll make this joint line up correctly before welding. The panel is centre (I have measured it!)
The last thing to do before removing the panel and prepping everything for welding was to check the bonnet fitted correctly and the shut lines were correct.
I'm very happy with the fitment so it can be cleaned up, the seams dressed and zinc painted then it can be finally welded on.
-
Matt Cotton
- TDC Oxfordshire Area Organiser
- Posts: 494
- Joined: Sun Oct 08, 2006 4:32 pm
Re: VA138, the next chapter....
Superb as ever James.
You mention at the end about zinc painting before welding... I presume this is a 'weld through' zinc primer?
How do you find this, as when I have been welding the bits on my car, I find the areas I have used it don't weld as well as the clean metal. What product do you use?
Regards
MC
You mention at the end about zinc painting before welding... I presume this is a 'weld through' zinc primer?
How do you find this, as when I have been welding the bits on my car, I find the areas I have used it don't weld as well as the clean metal. What product do you use?
Regards
MC
Matt Cotton
TDC Oxfordshire Area Organiser.
TDC/TSSC group meeting - 3rd Tuesday of the month
1980 1500HL - OPD
1976 Sprint - SWU
TDC Oxfordshire Area Organiser.
TDC/TSSC group meeting - 3rd Tuesday of the month
1980 1500HL - OPD
1976 Sprint - SWU
Re: VA138, the next chapter....
Yes, that's it, the UPOL stuff. I find that it welds fine, as soon as you arc up it tends to just burn off.Matt Cotton wrote: ↑Tue May 28, 2019 10:39 am Superb as ever James.
You mention at the end about zinc painting before welding... I presume this is a 'weld through' zinc primer?
How do you find this, as when I have been welding the bits on my car, I find the areas I have used it don't weld as well as the clean metal. What product do you use?
Regards
MC
Re: VA138, the next chapter....
I am happy with the fitment of the valence so the ends were repaired and a really thick coating of Dynax was applied to the inside of the panel. It was then tacked in place with some tigerseal applied where the panel joins the wings.


The reason I have gone so mad with the dynax is that when I plug weld the panel in it will get hot, the dynax will then get runny and creep into all of the welded seams like so...

This panel wont rust again!!
I am ok with the top, however I am not happy with the nose section join. It was welded up and filled with filler in the past and the lines were all out. Also, I think the replacement panel was not made correct and square as you will see.


I removed all of the old filler to reveal some welding repairs

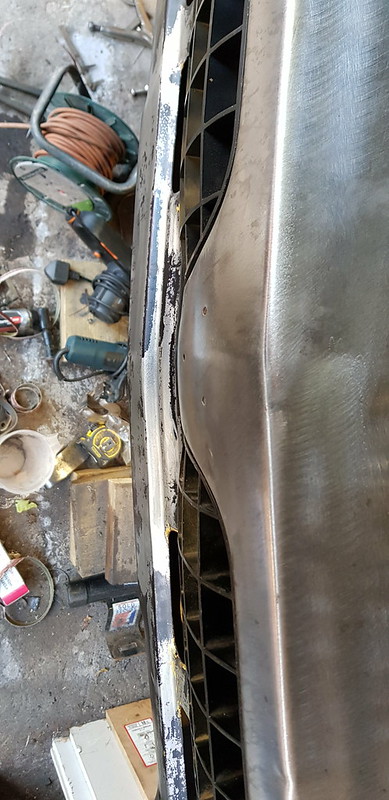
The only way to get the gaps correct between the grille and nose was to cut a slot and adjust...


The metal here is extremely thin and ideally Id like to TIG weld it but I don't have a TIG welder yet so the MIG on the lowest setting worked fine...

but flatted back it was fine

Now this gap is perfect.
The panel sits centre on the car, I know that because I have measured it, however the nose is off slightly so I had to cut a slot to extend it slightly.


All welded up and the panel is now nice and square and the gaps are correct.


This is as far as I can go here before something arrives to help me finish the job!
The reason I have gone so mad with the dynax is that when I plug weld the panel in it will get hot, the dynax will then get runny and creep into all of the welded seams like so...
This panel wont rust again!!
I am ok with the top, however I am not happy with the nose section join. It was welded up and filled with filler in the past and the lines were all out. Also, I think the replacement panel was not made correct and square as you will see.
I removed all of the old filler to reveal some welding repairs
The only way to get the gaps correct between the grille and nose was to cut a slot and adjust...
The metal here is extremely thin and ideally Id like to TIG weld it but I don't have a TIG welder yet so the MIG on the lowest setting worked fine...
but flatted back it was fine
Now this gap is perfect.
The panel sits centre on the car, I know that because I have measured it, however the nose is off slightly so I had to cut a slot to extend it slightly.
All welded up and the panel is now nice and square and the gaps are correct.
This is as far as I can go here before something arrives to help me finish the job!
Re: VA138, the next chapter....
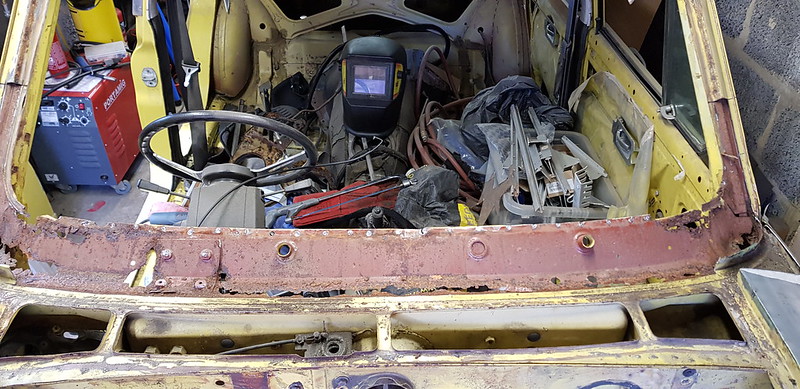
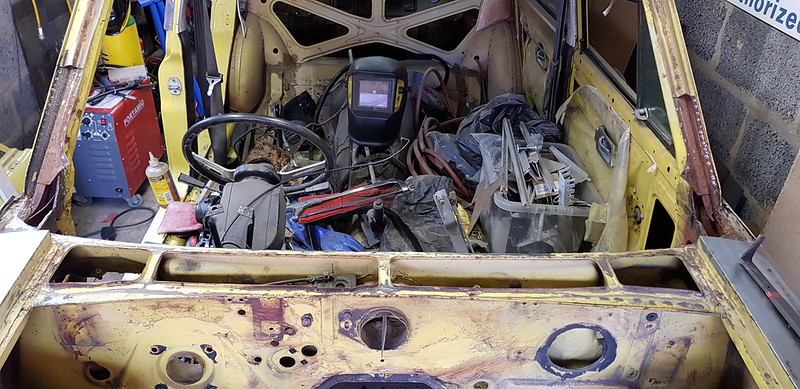
As I cant finish the front end it is on to the last major bit of rust repair, the bulkhead!
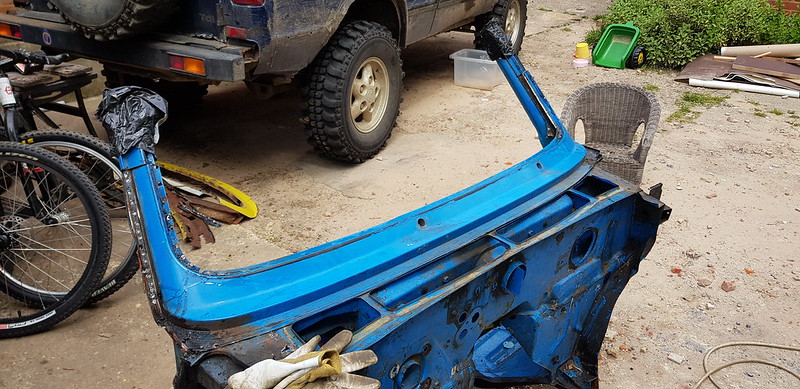
Luckily I have one to use!

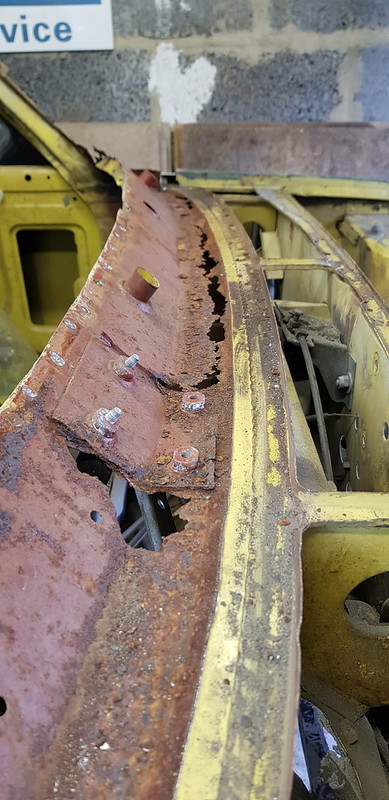
It doesnt look bad from the outside but there is a lot of rust there.

Off with the outer panel...


and off with the inner section...


The new section doesn't require the outer and inner panels to be separated, I can simply let in a section.

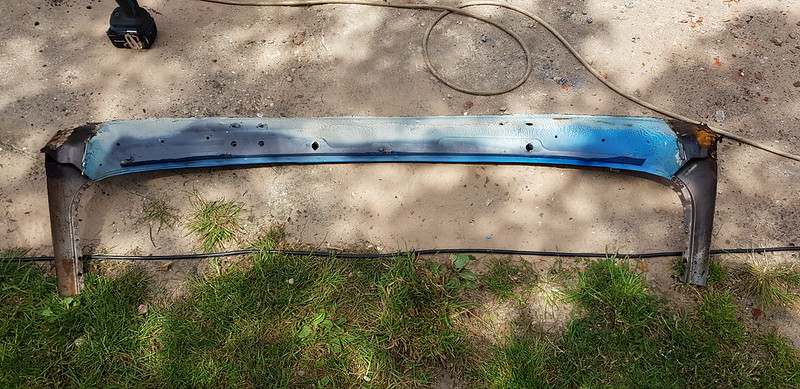
There are some repairs needed on the new section plus some on the A pillars on the car, I'll do these later. In the meantime I just want to test fit the panel.


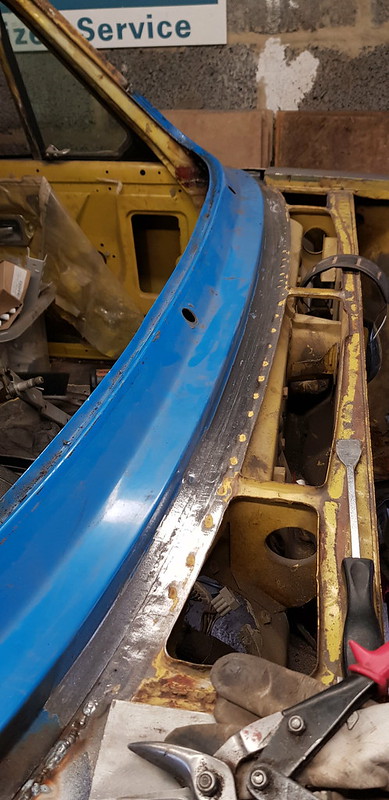
After some fettling it now fits fine, the gap is square and distance between the roof and bottom of the screen is the same as the old panel.


The join on the leading edge of the repair section has not been adjusted so everything will sit slightly high and forward, however the gaps look OK, albeit a bit large for my liking. I'll get everything tacked in place then I'll have another look at the panel gaps here.


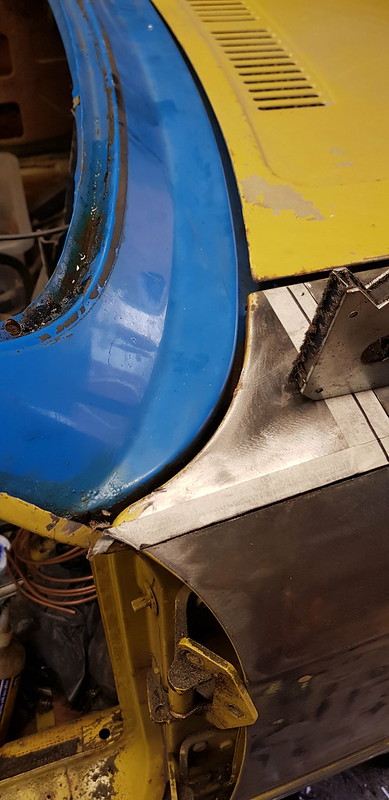


Just need to dress everything, clean up and repair the panels then tack the repair in. I'll then check that the windscreen fits correctly
Luckily I have one to use!
It doesnt look bad from the outside but there is a lot of rust there.
Off with the outer panel...
and off with the inner section...
The new section doesn't require the outer and inner panels to be separated, I can simply let in a section.
There are some repairs needed on the new section plus some on the A pillars on the car, I'll do these later. In the meantime I just want to test fit the panel.
After some fettling it now fits fine, the gap is square and distance between the roof and bottom of the screen is the same as the old panel.
The join on the leading edge of the repair section has not been adjusted so everything will sit slightly high and forward, however the gaps look OK, albeit a bit large for my liking. I'll get everything tacked in place then I'll have another look at the panel gaps here.
Just need to dress everything, clean up and repair the panels then tack the repair in. I'll then check that the windscreen fits correctly
-
dollyman
- TDC Cheshire Area Organiser
- Posts: 1410
- Joined: Wed May 17, 2017 6:28 pm
- Location: NANTWICH.
Re: VA138, the next chapter....
Great work as usual i James dont know how you have the patience
Tony.
Tony.
NOW A CLUB MEMBER 2017057 
Re: VA138, the next chapter....
Er... Ok so where was I! 
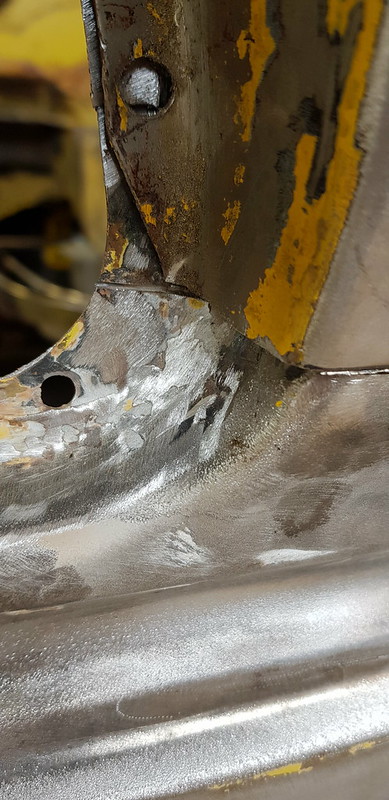
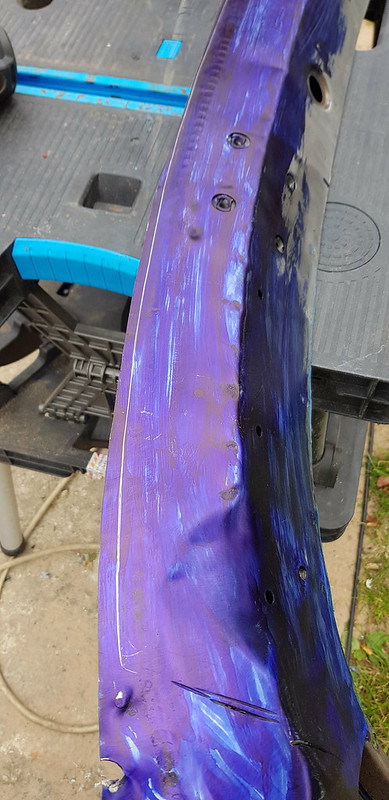
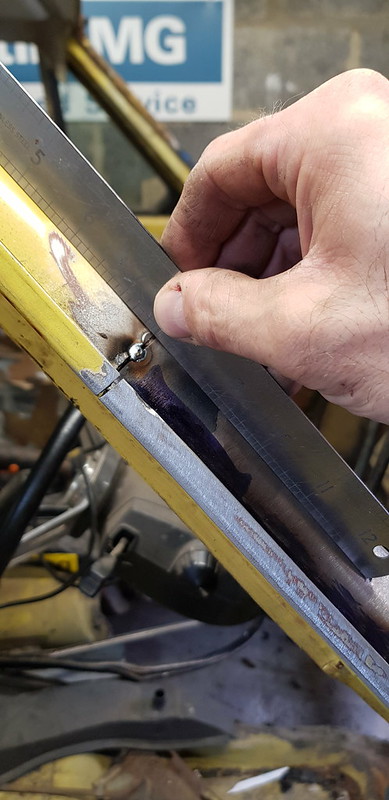
A lot has happened since my last post so this may be a bit picture heavy, I'll split it into a few posts I think starting with finishing the windscreen surround.
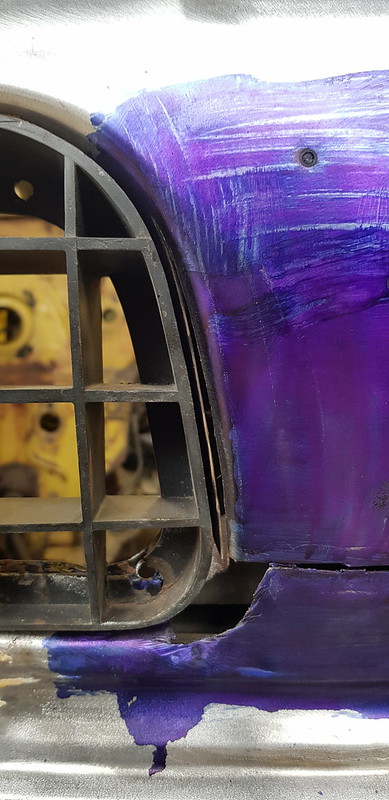
I stripped all of the paint off and cleaned up the steel to allow a good weld, the blue is an engineers spray, this enables me to accurately mark the panel for final cutting.


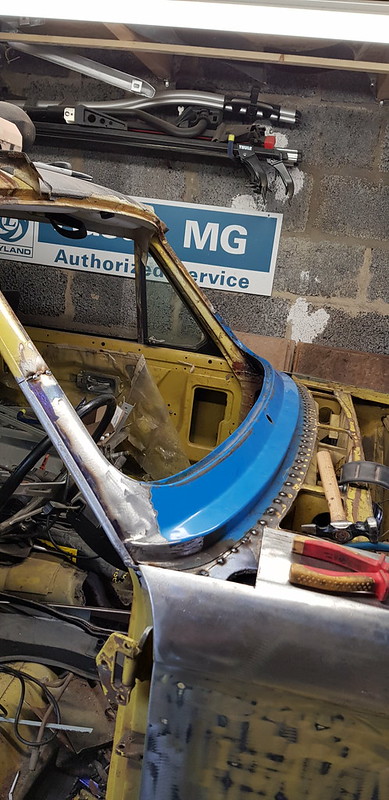
The A pillar outer skinm had the seam removed and paint stripped.

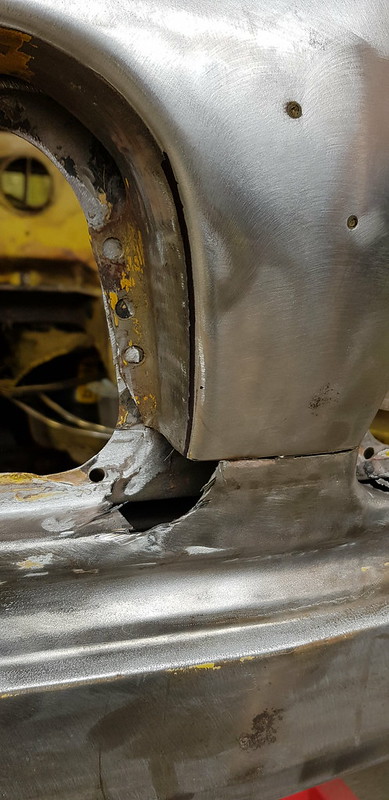
The front seam was then trimmed and the assembly offered up again for fit.
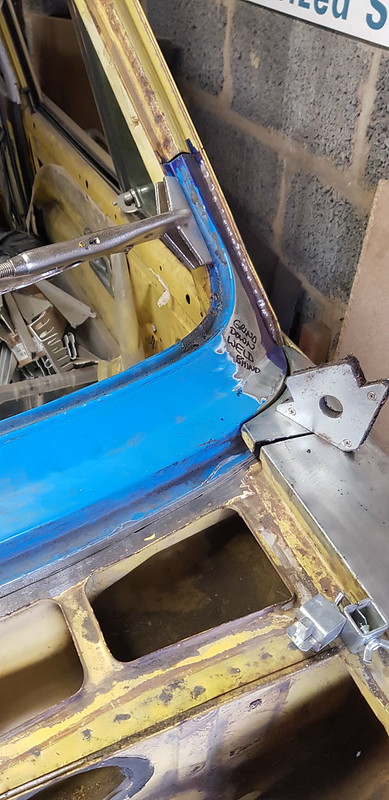


A new gutter seam was then tacked onto the a pillars


Happy with the fit the whole assembly was tack welded into position


The front end was then seam welded and the welds linished flat.


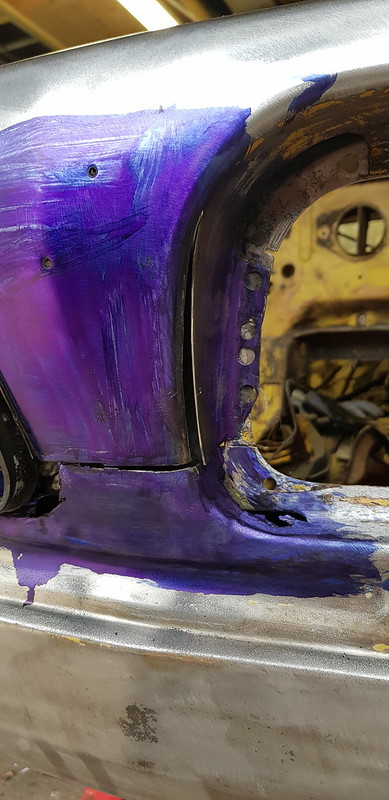
The A pillars are attached, not finished yet though.
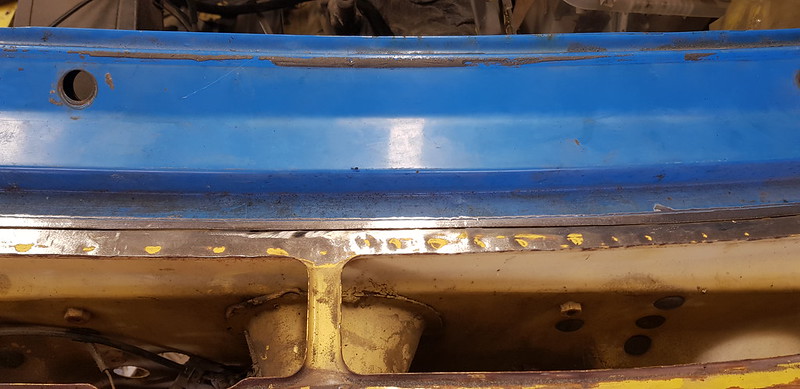
The other thing I did is to add in the bumper under-rider support bracket holes as at some point a later front valence had been fitted, it was just a simple case of taking the measurements from ERO!


Don't worry theres a lot more to come!
A lot has happened since my last post so this may be a bit picture heavy, I'll split it into a few posts I think starting with finishing the windscreen surround.
I stripped all of the paint off and cleaned up the steel to allow a good weld, the blue is an engineers spray, this enables me to accurately mark the panel for final cutting.
The A pillar outer skinm had the seam removed and paint stripped.
The front seam was then trimmed and the assembly offered up again for fit.
A new gutter seam was then tacked onto the a pillars
Happy with the fit the whole assembly was tack welded into position
The front end was then seam welded and the welds linished flat.
The A pillars are attached, not finished yet though.
The other thing I did is to add in the bumper under-rider support bracket holes as at some point a later front valence had been fitted, it was just a simple case of taking the measurements from ERO!
Don't worry theres a lot more to come!
Re: VA138, the next chapter....
Moving back on to the front end now
As the front valence was replaced with a later item the headlamp supports were the later type, not correct for the car, so as I have a set of earlier ones in my stash I was able to fabricate a new set.


and with that it was on with the headlamp supports!


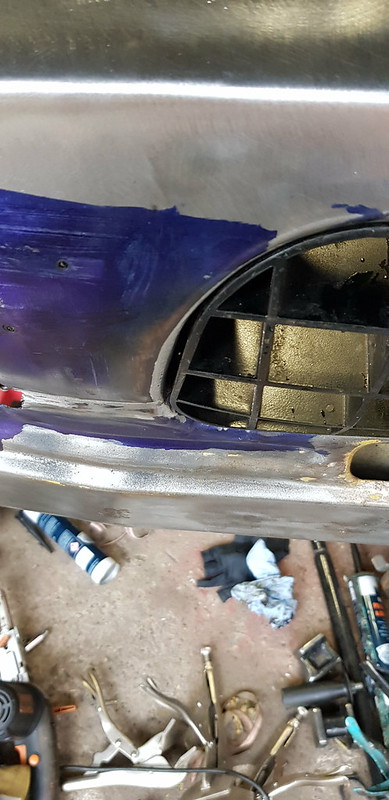
I then moved on to finishing off the nose. It looks rather brutal and nasty but the grilles now fit correctly.


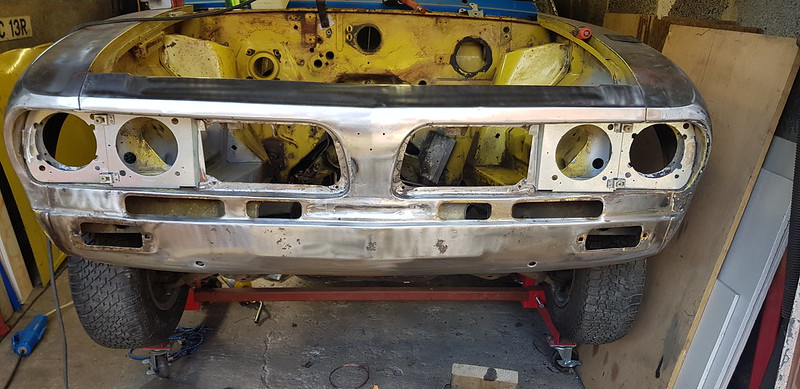


Comparing this to my other valence the grilles fit perfectly!

As the front valence was replaced with a later item the headlamp supports were the later type, not correct for the car, so as I have a set of earlier ones in my stash I was able to fabricate a new set.
and with that it was on with the headlamp supports!
I then moved on to finishing off the nose. It looks rather brutal and nasty but the grilles now fit correctly.
Comparing this to my other valence the grilles fit perfectly!

Re: VA138, the next chapter....
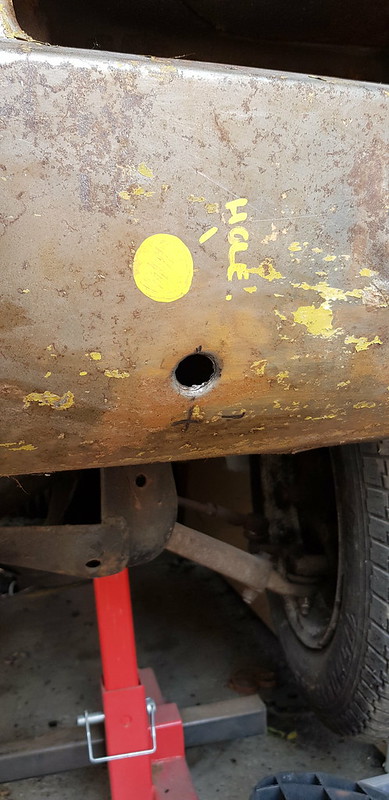
Nice work as usual James, can you share those measurements for the front valance as I think I need to do the same on my early one. How did you roll the hole edges inwards?
Modified Dolomite Sprint MSO 662P VA485 1973 Mimosa Sprint


Re: VA138, the next chapter....
No problem Tony, I'll get the measurements for you.
I made a tool to do the flange. A pipe, tube and bolt arrangement. I'll dig it out.
I made a tool to do the flange. A pipe, tube and bolt arrangement. I'll dig it out.
Re: VA138, the next chapter....
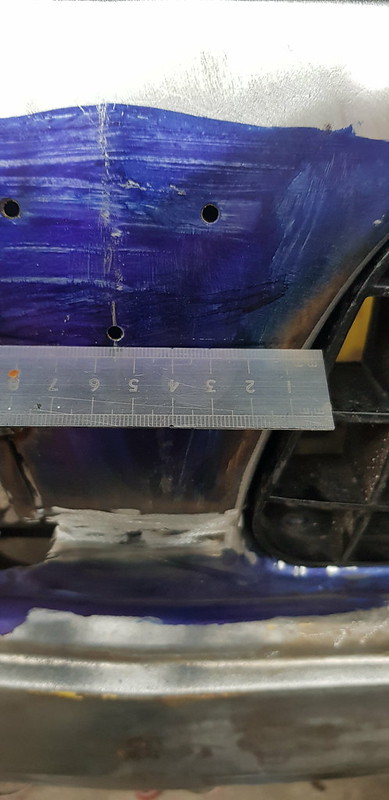
Sorry Tony, I keep forgetting to get those measurements for you. From the seam between the wing and the valence the hole sits 12" in, then 3 3/4" up from the lower edge (on a Sprint).
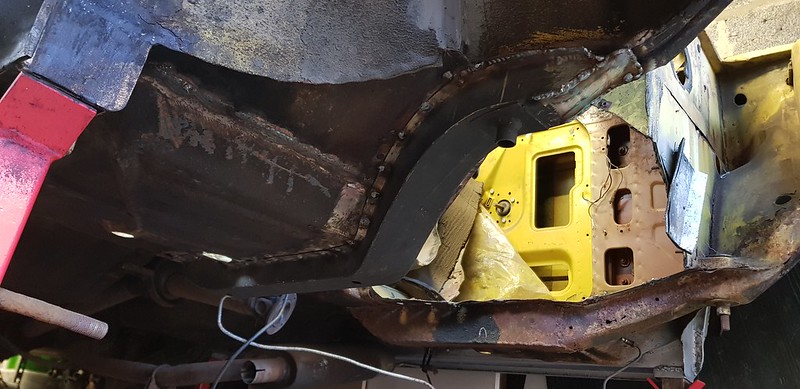
So on to the floors and chassis legs, the floor pans looked ok, but on further inspection they were very pitted and pinholed. The NS floor was damaged as a result of a previus repair done to the chassis leg. So it was off with the old and on with a new set from the club.
Not difficult, just uncomfortable when you're laying on your back! The best way to do it is to remove as much of the underseal amd paint as you can so that you can see the spot welds, which can then be drilled out. The subframe bolt tube can then be removed by using a 25mm hole saw which leaves enough hole to fit the new one in, I cut the subrame off the old one for ease. There is no point in me going in to how to remove them as Robert uses the same method as me and he already did a great write up on how to do it here:
https://forum.triumphdolomite.co.uk/vie ... 66#p325407
So its off with the old which was a good thing as you can't see it from the outside but it was about to go...


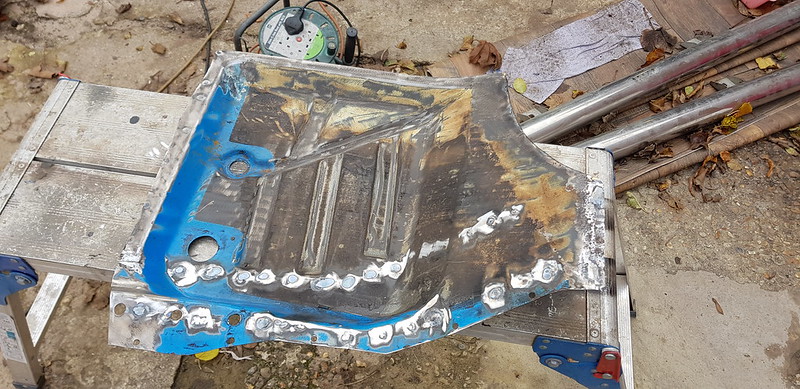
and on with the new, or well test fitting the new one!


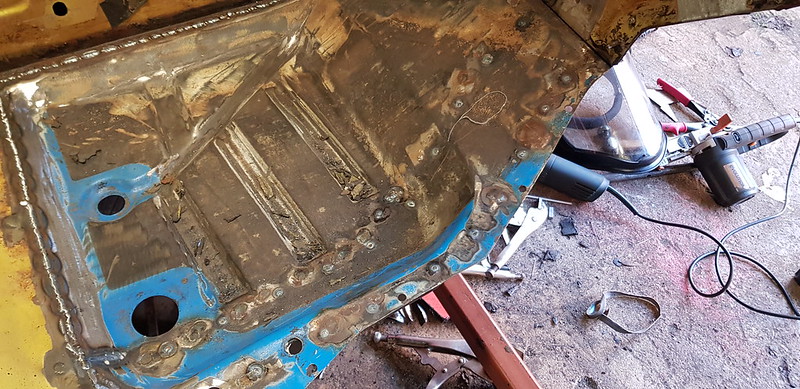
 20191009_115151 by james_shephard_uk, on Flickr
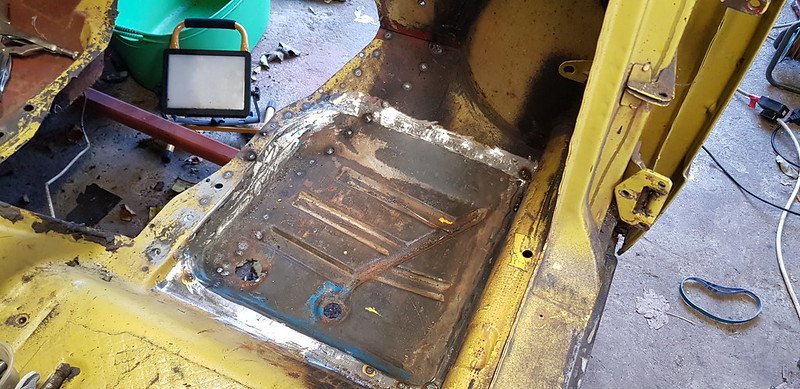
You can see where moisture had been sitting around the endge of the sound deadening causing rust and pitting, at the top it had broken through.


I had the one I cut off of Richards old car so thought it would be better to graft it in.


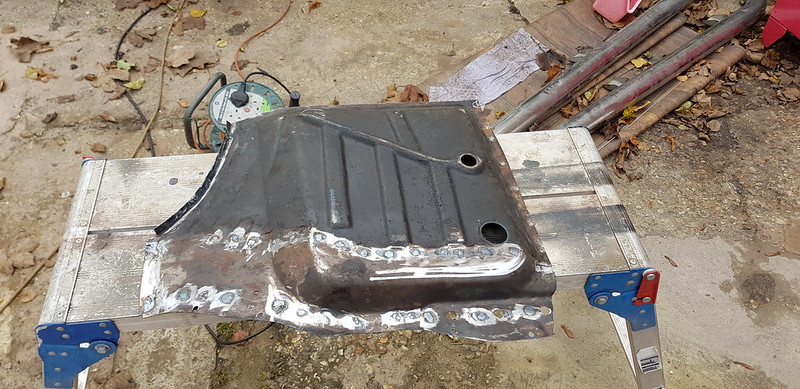
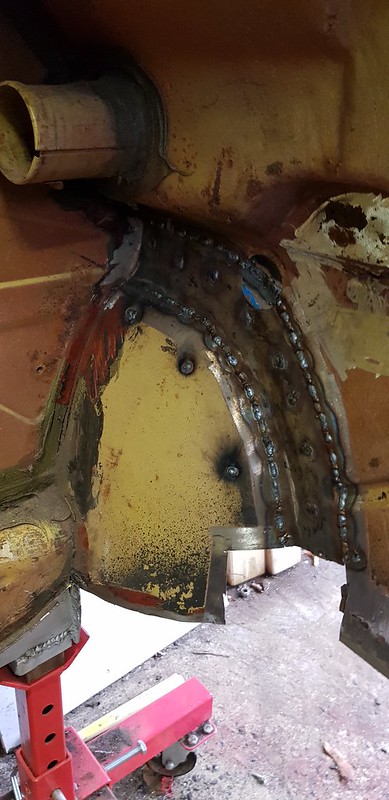
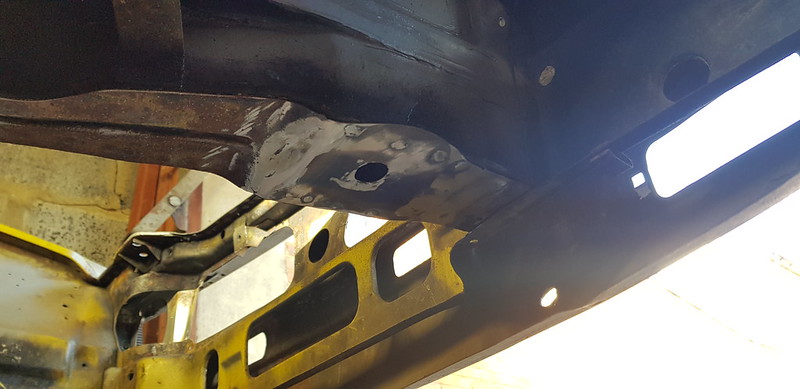
The it was a simple case of refitting the chassis leg, ensuring that the subframe mounting hole was in the correct position and then plug welding the new chassis leg in place. As per the factory it has been seam welded around the front and subframe bolt tube.

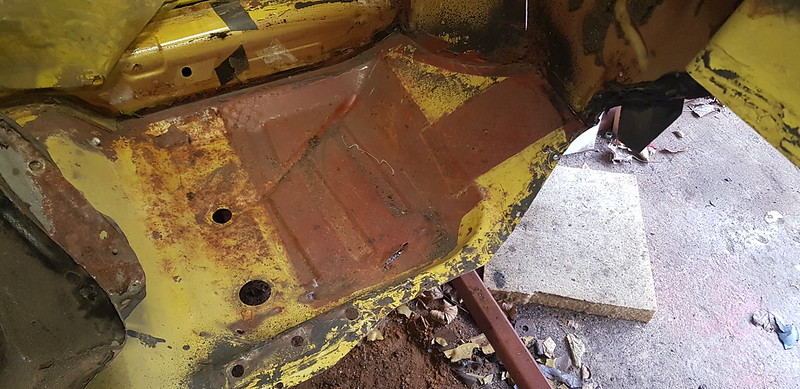
I will dress these welds later. The other side wasn't so easy, at first glance the floor looked ok.

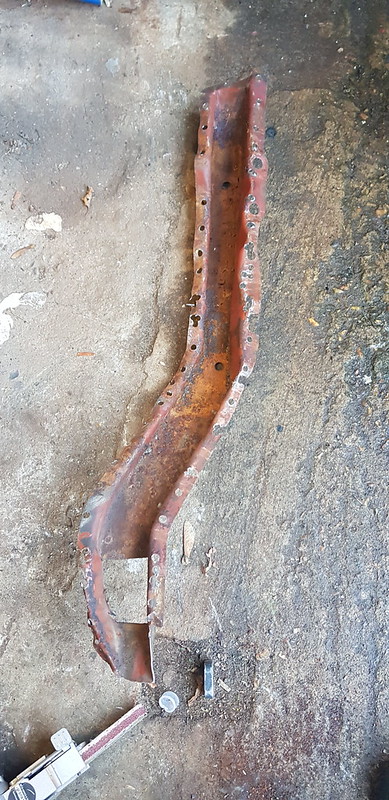
But after cutting off the three times previously welded chassis leg it was apparent that this side would need to be replaced as well.
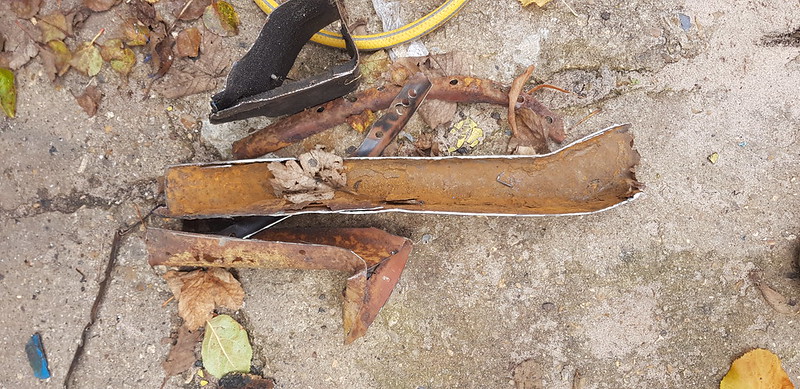


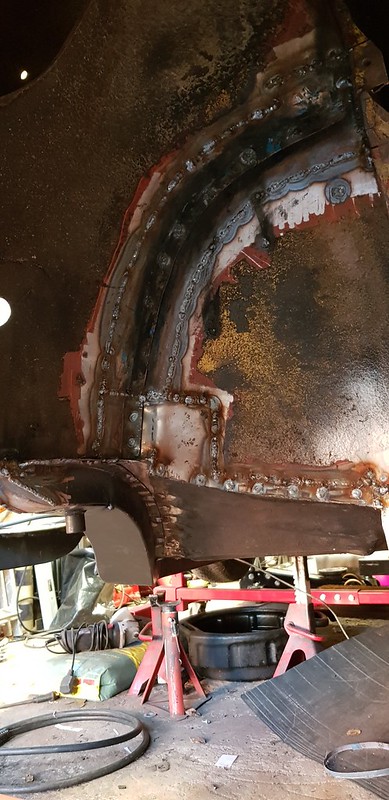
This is where things got interesting, to do this properly I needed to repair the bulkhead properly as well, so again it was out with the angle grinder on Richards old bulkhead!


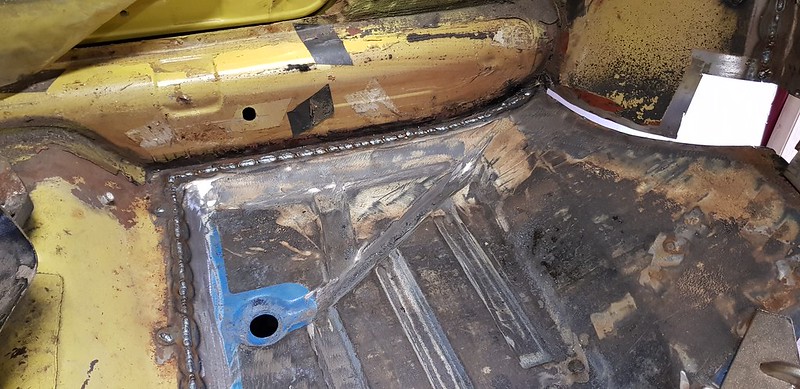
A new seam and some minor repairs later....

and I was ready to fit the new chassis leg in the same way as the other side...

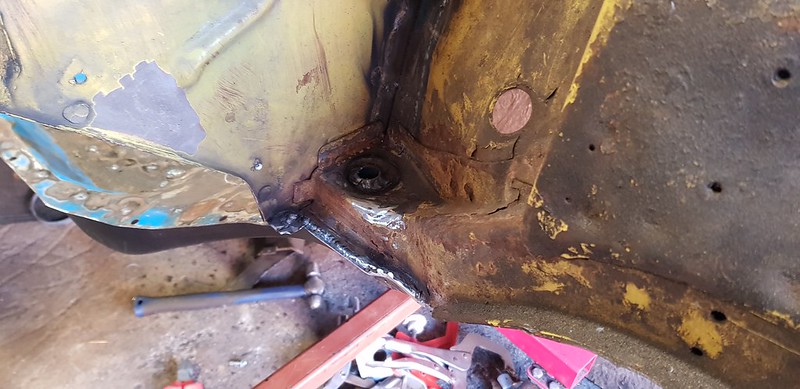

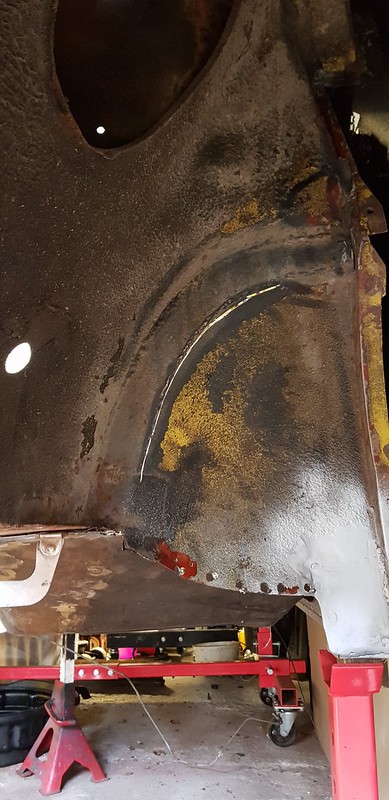
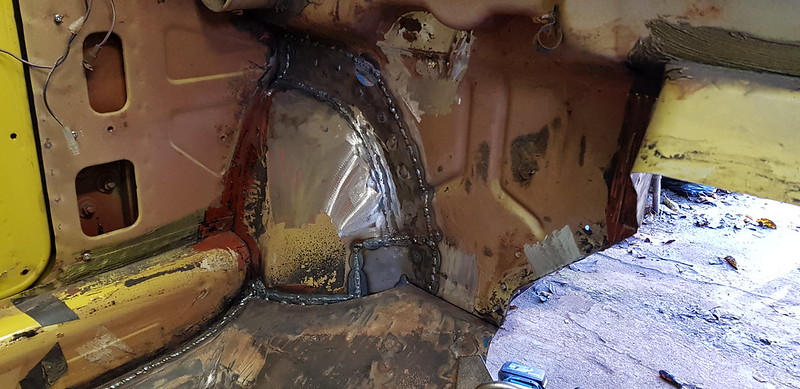
At the same time I found that the front OS subframe mount needed repairing

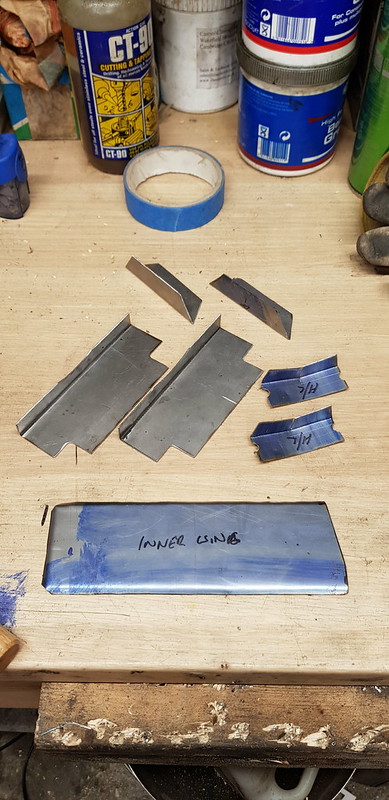
I had one cut off an old car to use as a template for repair patches...


So it was a simple job of cut the old rust out and weld in a new section followed by plug welding a new reinforcer followed by the bolt tube which was checked for alignment. They are now aligned better than the factory!


This marks the end of all of the major welding jobs, all that is left is to go over the car and finalise all of the little jobs and dress the welds. Unfortunately it is this that takes time!
So on to the floors and chassis legs, the floor pans looked ok, but on further inspection they were very pitted and pinholed. The NS floor was damaged as a result of a previus repair done to the chassis leg. So it was off with the old and on with a new set from the club.
Not difficult, just uncomfortable when you're laying on your back! The best way to do it is to remove as much of the underseal amd paint as you can so that you can see the spot welds, which can then be drilled out. The subframe bolt tube can then be removed by using a 25mm hole saw which leaves enough hole to fit the new one in, I cut the subrame off the old one for ease. There is no point in me going in to how to remove them as Robert uses the same method as me and he already did a great write up on how to do it here:
https://forum.triumphdolomite.co.uk/vie ... 66#p325407
So its off with the old which was a good thing as you can't see it from the outside but it was about to go...
and on with the new, or well test fitting the new one!
20191009_115151 by james_shephard_uk, on FlickrYou can see where moisture had been sitting around the endge of the sound deadening causing rust and pitting, at the top it had broken through.
I had the one I cut off of Richards old car so thought it would be better to graft it in.
The it was a simple case of refitting the chassis leg, ensuring that the subframe mounting hole was in the correct position and then plug welding the new chassis leg in place. As per the factory it has been seam welded around the front and subframe bolt tube.
I will dress these welds later. The other side wasn't so easy, at first glance the floor looked ok.
But after cutting off the three times previously welded chassis leg it was apparent that this side would need to be replaced as well.
This is where things got interesting, to do this properly I needed to repair the bulkhead properly as well, so again it was out with the angle grinder on Richards old bulkhead!
A new seam and some minor repairs later....
and I was ready to fit the new chassis leg in the same way as the other side...
At the same time I found that the front OS subframe mount needed repairing
I had one cut off an old car to use as a template for repair patches...
So it was a simple job of cut the old rust out and weld in a new section followed by plug welding a new reinforcer followed by the bolt tube which was checked for alignment. They are now aligned better than the factory!
This marks the end of all of the major welding jobs, all that is left is to go over the car and finalise all of the little jobs and dress the welds. Unfortunately it is this that takes time!