Its been quite a productive period over Christmas and into the New Year, although I did take a break for a while to paint the hallway and landing at home!
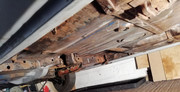
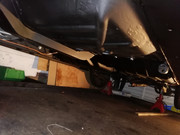
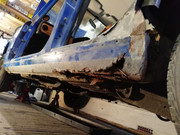
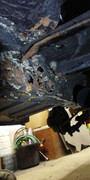
With all the welding complete underneath and the underseal removed completely, any localised rust was treated with EM121 rust converter followed by a coat of Epoxy Mastic paint. I applied this with a roller, so didn't take too long at all.
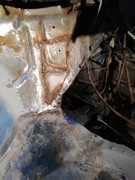
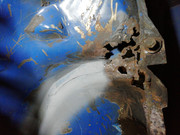
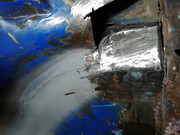
In general the underside was/is very good, just a couple of small holes in the corners of the floor where the sound deadening pads are applied - I managed to fill these carefully with weld.
I then applied 2 coats of Dinitrol in aerosol to the underside. A nice finish has been obtained and I am glad I took the time to get rid of the old underseal.
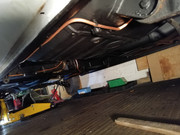
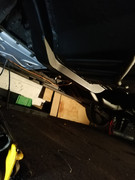
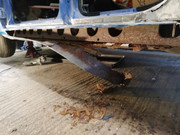
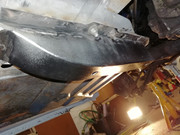
Prior to all the painting, I had removed the old fuel lines. These were well protected with previous applications of underseal, but some areas, particularly over the back axle were very pitted. I decided to make up new using 8mm microbore copper pipe.
This, along with new fuel clips from Bresco was quite straightforward using the old pipes as a pattern. The only area I stuggled a little was where it loops over the propshaft, I had a couple of attempts. It is reasonably tidy, but getting the tight radius' with soft copper was not as easy as I thought. All fuel hose was replaced with R9 fuel hose for ethanol resistance.
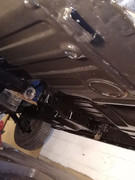
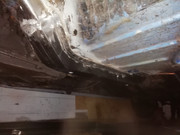
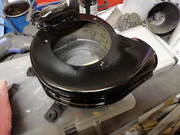
While underneath I decided to drain the auto gearbox oil. I was amazed how clean it was inside with the sump off. A new gasket and a coat of paint to the sump and refitted...being careful not to overtighten the bolts.
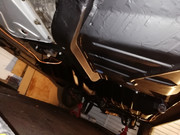
I refitted the gearbox crossmember which I had previously painted up - all fitted up well.
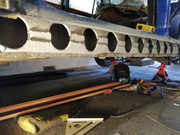
To facilitate the painting, I removed the propshaft. This revealed a very worn centre bearing carrier and also a suspect UJ. I decided to take it up to Dave Mac Propshafts in Coventry for a refurb and balance etc.. as I write I am awating their assessment.
The exhaust is a Rimmers stainless steel, so that is good. After I removed the exhaust prior to all this activity, I cleaned it up using some Harpic Power Max toilet cleaner! It came up really well. Refitting with new clamps and rubbers where required went ok, although the exhaust downpipe bolts are quite difficult to get to.
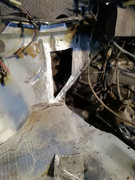
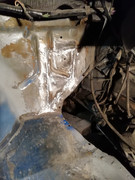
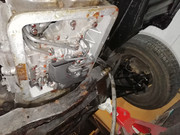
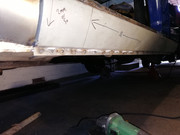
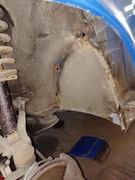
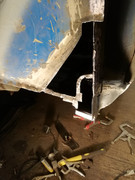
An interesting 'inspection panel' cut into the bulkhead to facilitate access to the downpipe bolts wasn't really any help... I removed the wodge of filler holding it in place and managed to salvage most of it to weld back in place. The patch was Epoxy primed, seam sealed, primed and then painted - just black on the inside and blue from the engine bay.
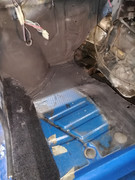
With all that complete, I was then able to refit the previously cleaned and painted fuel tank into my repaired boot floor. I did spray some Bilt Hamber clear wax on the bottom of the tank and surrounding area for added protection.
A gallon of fuel this Thursday evening and I was ready to fire up the car...it has been idle since March when I purchased it (although turned over regularly).
I syphoned through the fuel using a very handy syringe and primed up the pump - cleaning out the filter while at it. After a few attempts she fired up well. I had to nip up the downpipe again, but hopefully all is well.
I will fully service the car in due course and replace all fluids before she hits the road.
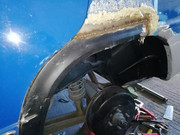
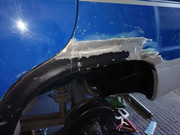
Next jobs include headlamp panel replacement, lower front wings and welding on the offside rear wheelarch repair panel - currently just held on with self tappers, but all prepared for the mig welder. My mobile welder is also booked in for a day in Feb, so may get him to tackle around the windscreen... still plenty to do, but I feel there is a light at the end of the tunnel now!
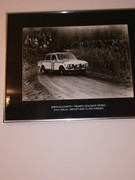
My wife is delighted with this lovely picture I bought from Facebook Marketplace over Christmas....now in our living room but alas I think it may end up in the garage!
Till next time....
MC