It has been quite a while since my last update, in fact it was March!
Things have been very busy over the last few months: purchase and renovation of a property, completing a large dissertation for a masters, uncertainly over job security, weddings and other family and friend commitments all taking priority over my restoration. Despite all this I have continued to make reasonable progress though and the car is definitely starting to look more like a car.
Hopefully you’re sitting down so I will begin.
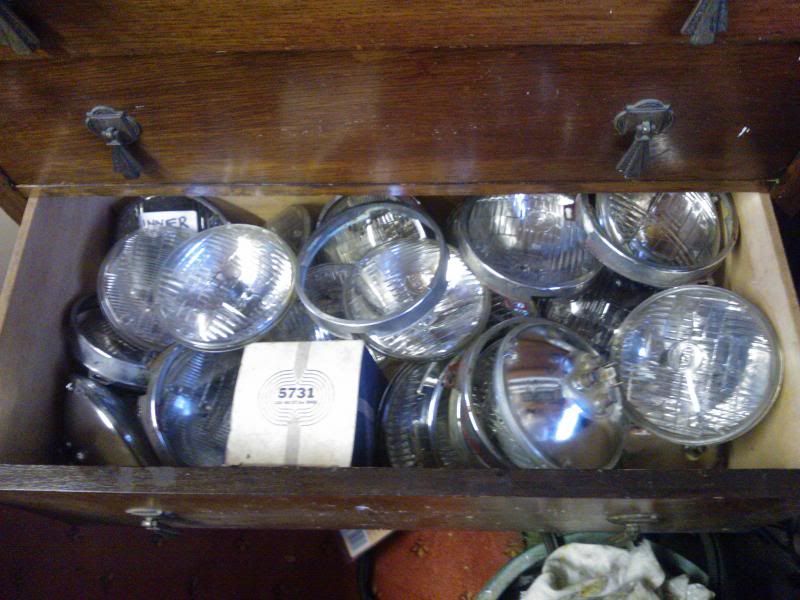
I was for a while thinking about re-manufacturing some outer headlamp seal mounting rings made up but luckily I managed to find 3 new ones and was able to re-use my only decent used one. I had them all re-plated before fixing them into place using the seals I had made up and also some plastic expansion rivets.
I’d previously had all the NOS headlamp mounting rings and bowls powder coated. Fixing these onto the front panel required some patience and ingenuity. They should of course be riveted. Actually getting a rivet gun in there is quite difficult so I instead opted for some stainless machine screws and nyloc nuts on the inner ones and use of a U clip and self-tapping screws on the outers. Though not original it’s actually a good solution, the outers on my donor car were held in using this technique and it makes them easy to remove and clean if required in the future.
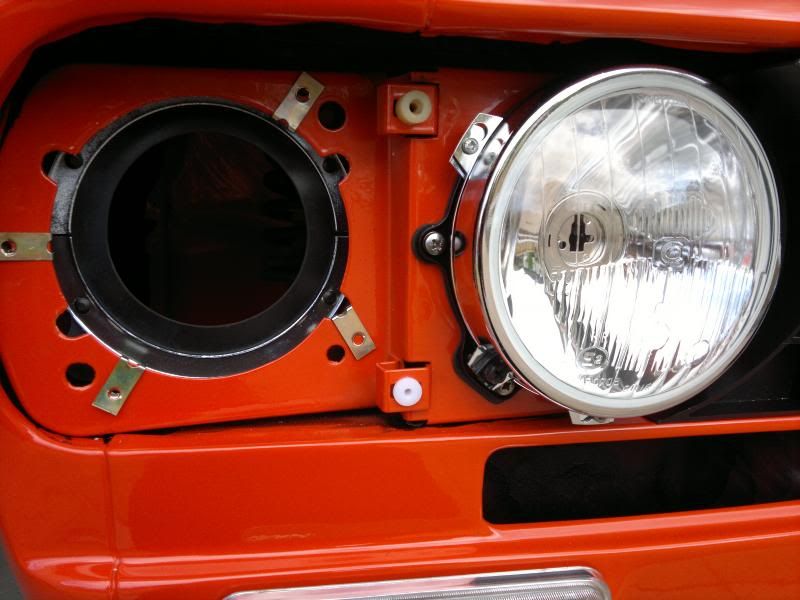
Headlights have also been mounted. I was determined to keep the car original right up to the point when I realised that sealed beams are so hard to find, particularly 3 pin ones. A visit to Bealieu auto jumble and a good look around made me decide to swap for halogens. I found two types, Autopal and Valeo/Cibie. I opted for the Valeo ones in the end as they had a better curve to the front and seemed to be manufactured to a much higher quality. I’m pleased with the look which does look very original and will help future proof the car to a degree. I had the new wiring loom modified by adding relays to the headlamps so the move to halogen was a sensible one really.
With the headlamps fitted I also fitted the grille panels. These I fixed on with black plastic number plate screws and nuts. Not entirely easy to reach when the radiator gets fixed in but actually quite possible if you’ve got small fingers like me! To complete the look I trial fitted some old headlamp bezels I had lying around, they make it look more like a car though they are quite mis-shapen so I’ll have to look out for some better ones to use permanently.
You’ll probably recall I had my chrome sent off to be re-plated. This took quite a long time and after some time in the ‘holding area’ (the living room) these are now on the car. Both front and rear mounting brackets have been powder coated, the spacers re-plated and new bumper bolts, nuts etc fitted. Actually fitting the bumpers proved to be quite a long process, particularly the rear one. The front one was delayed for a while as I had originally sourced two of the same handed mounting bracket. It took me a little while to source the correct one but thankfully Mick Dolphin had one and it arrived pretty quickly. I had it powder coated to match the other one, again causing a delay as it’s not really worth be getting just one item done so I saved it up to go with some other parts. I’m happy with the fit though and the finish is superb. I have not yet fitted the under riders as these required re-chroming and are currently off being worked on.

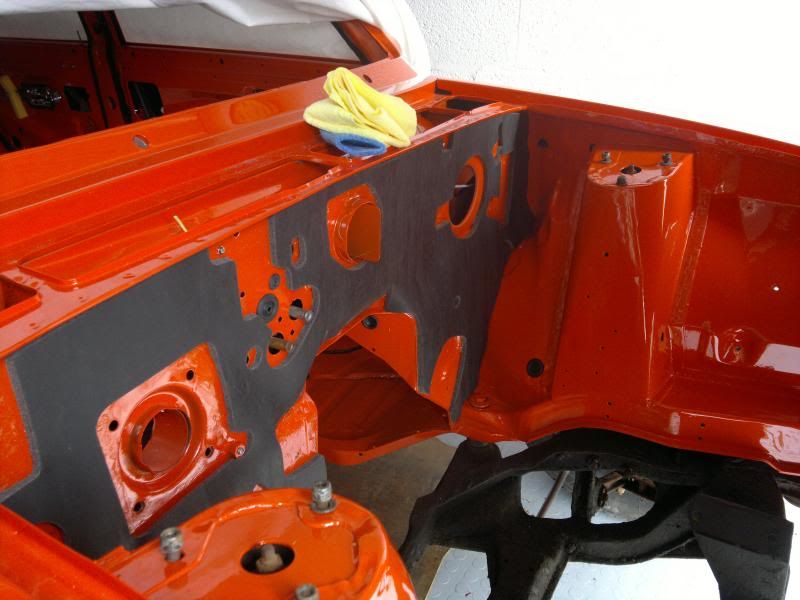
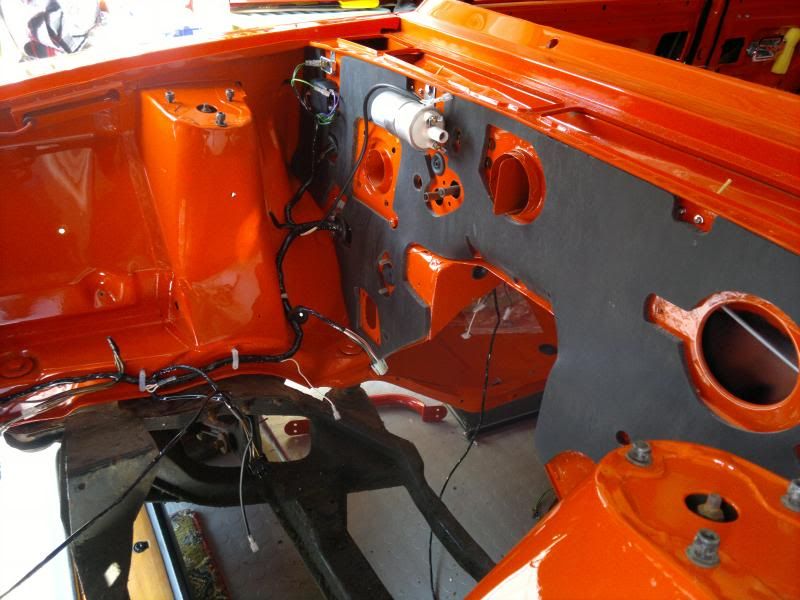
The winter weather seemed to last for ages and the low temperatures really hampered by efforts to use some contact adhesive to fix the bulkhead pad into the car. Basically the glue does not work especially well at low temperatures as the solvent cannot evaporate sufficiently. I had of course had a remanufactured pad made up but the interim winter period saw me source a new old stock original one. I paid a handsome amount for it but I thought it worth it to keep it original as much as I can.
Fitting the pad proved to be rather a nervous moment. They are quite heavy and awkward to handle even with the help of an assistant. I resorted to climbing into the engine bay in an attempt to get it lining up as best as I could. The result is satisfactory, not perfect but not really any worse than factory original. It’s a job I really don’t want to have to do again if I can help it. The glue was very sticky and really once stuck does not like to come off again.
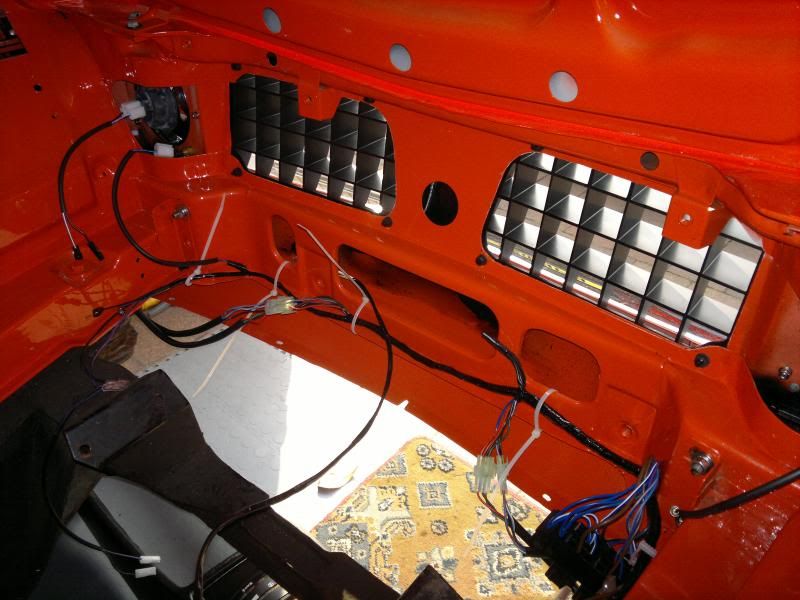
Fitting the pad has allowed me to sort out a few other jobs. I’ve fitting the forward section of the wiring loom, fixing to the turret/chassis leg bit was OK as I had some replacement plastic clips but I have not yet found a satisfactory clip for the front valance. I thought I had found some but they are a little too small. In the meantime it’s held in with some tie wraps to secure it roughly in the right position and I can secure it properly when I find the right clips. This will allow me to fix the rest of the pieces together and commence testing of the loom to see if it works as it should.
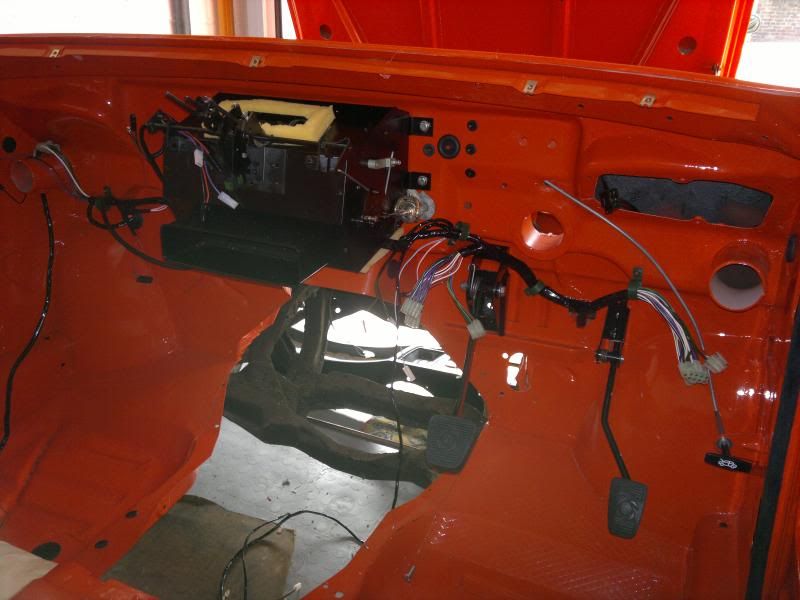
Inside the car I’ve used original metal clips sourced second hand and laid fixed this into place ready to work out what wire does what! As you can see the accelerator pedal and clutch pedal have been refitted. Both of these have been blasted and powder coated, a new rubber has been fitted to the brake pedal, the accelerator one is a good used one. The clutch pedal was most troublesome having hit me in the head during rubber removal resulting in a trip to hospital. At least now it is mounted it can't hurt me! The brake pedal has been removed from the donor and is currently at the powder coaters. Heater box has been installed, this is actually a new one picked up from a Rimmers sale a few years ago, they want crazy money for them now.
You can't see in the pics but in the doors have had the strengtheners fitted and they also have the window regulators fitted too, albeit loosely as they may need to come out to fit the glass.
Amidst all this I had a call from Chapman and Cliffe to let me know that my wood set was ready to be picked up which I had left them back in March. It’s not far to go so I went over to pick it up. I gave each piece a look over before we wrapped them all up again. I’m afraid that I have not un-wrapped them since so you’ll have to wait and see what they look like. Each piece was re-veneered with American Walnut and then re-lacquered to leave a satin finish. I am extremely pleased with the results. The pieces will stay stored for a little while before I build up the dashboard. I’ll probably have to store the dash for a while as it makes sense to fit the windscreen first and that means fitting the vinyl roof.
From the front of the car to the back! I’ve also fitted the fuel tank. The tank was a NOS Ebay bargain which I bought a few years ago for just £25. It was supplied c/w Austin Rover stickers and a thin coating of black paint. I decided that it needed smartening up so I took it to a place just next door to Chapman and Cliffe nr Crewe.
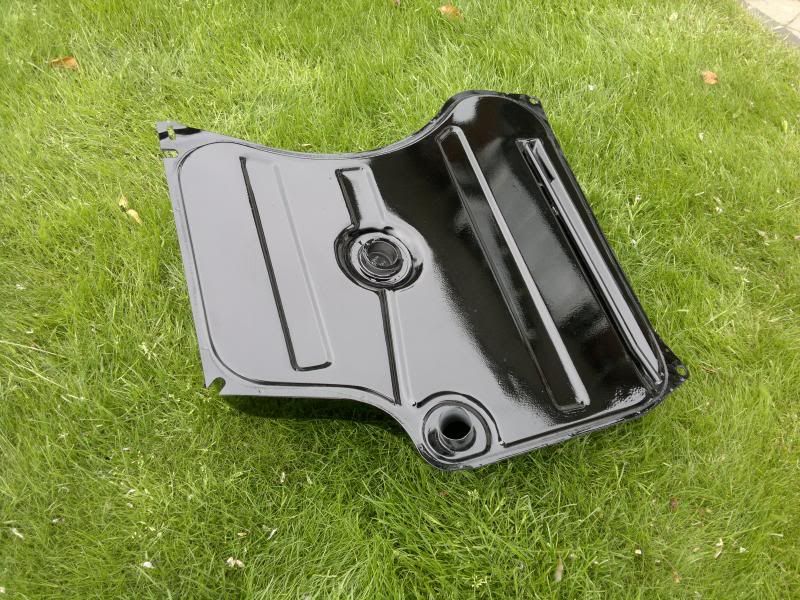
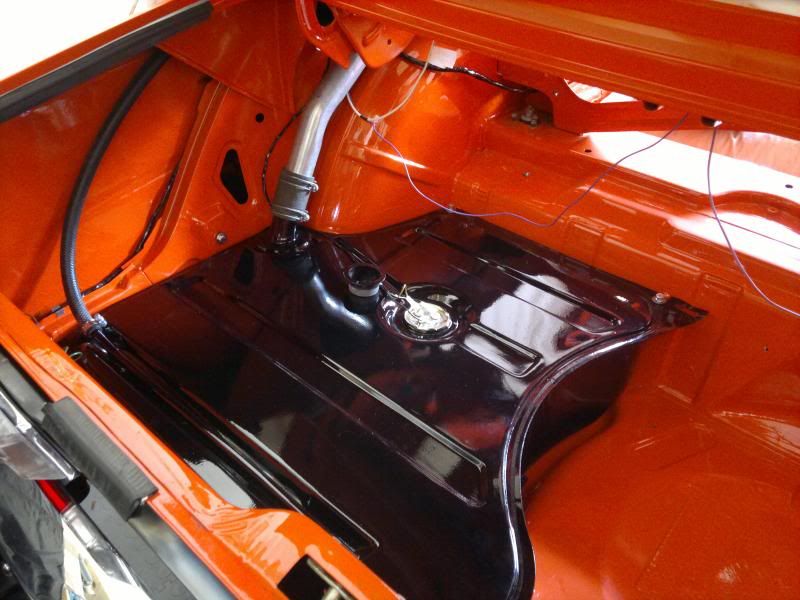
They rubbed it down, primed it and then treated it to a coat of gloss two-pack paint. Though it won’t really be seen it does look nice and looks quite at home in the boot. The filler neck, breathers and sender have also been fitted. Fitting the tank removes another item from the living room and thus more wife points gained.
A few other jobs have also been undertaken to renovate items like heater blower motors, washer bottle brackets etc. The heater blower fan and and housing have been stripped down and have been painted in chassis black and are awaiting re-assembly. The washer bottle bracket was going to go on this week. I'd purchased a good used one a few years ago but on closer inspection I was not happy with the finish so as I had a few bits to take to the powder coaters I dismantled the bracket and it should be back next week.
Finally it’s worth remembering that I do have a donor car and a lot of parts have now been removed from it. All the front and rear door glass and internals have been removed and I am just about to commence fitting that which looks like a job for a day when I am feeling patient! The dashboard has also been removed and I will use the original carcass and instruments together with my new woodwork. The shell is looking quite sorry for itself now, more botched repairs and rust seems to be found every time I remove parts. It does make me feel the re-shell was the only viable way forward.
The next big job on the old shell will be to remove the running gear. So far this has remained in the car due to lack of storage space. I have recently ordered a shed which means I can now look at removing the engine, gearbox and axle ready for inspection and refurbishment.
Hopefully it won't be 3 months till the next update, enjoy!