Page 2 of 7
Re: New Gilbert
Posted: Sat Feb 22, 2014 10:55 am
by tinweevil
Bodgetastic for sure. I don't have a 1300FWD parts book but I would expect it to be something similar to this.
The subframe is different to ours though so it can't be the same.
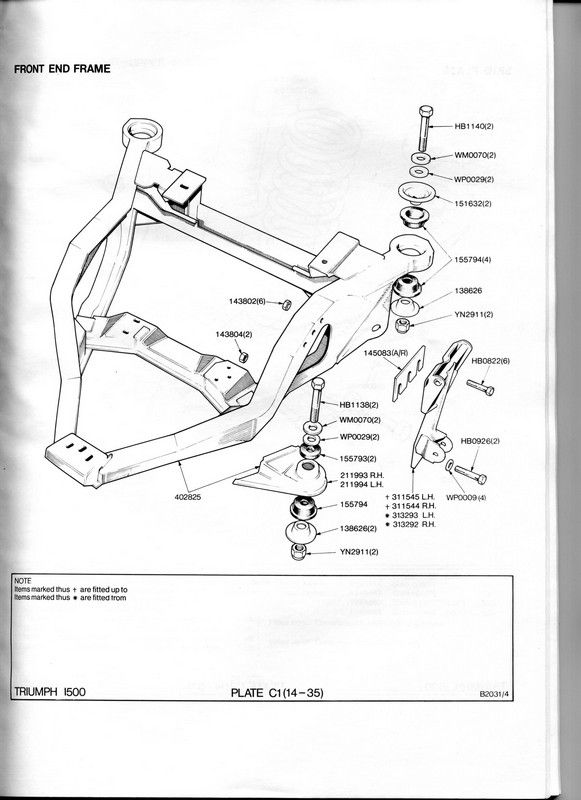
Actually, I've a Heritage DVD here somewhere, that should have the right book on it....
Re: New Gilbert
Posted: Sat Feb 22, 2014 8:55 pm
by epcot_pete
Thanks tinweevil, I knew it was not right! They did well though being able to bend a piece of all-thread at 90 degrees without cracking, must get original fitted though.
Stripping down front hubs today, the brake disc fell apart and showed only about 1/3 of original casting holding it together. The rest must have been cracked as it is well rusted and dangerous. I did think about the possibility of skimming but definitely new discs needed.
Spent past two days stripping down all suspension and steering parts from sub-frame and using twisted wire brush have cleaned all parts of loose rust and washed them in petrol to remove 48 years of oil & dirt. Will clean them again tomorrow and use jenolite before zinc painting them and then paint them black over the next few weeks. Dirty old job but will be worth it.
Re: New Gilbert
Posted: Sun Feb 23, 2014 10:55 am
by DoloWIGHTY
^^^^

That's amazing, never seen anything like that before.
Re: New Gilbert
Posted: Tue Feb 25, 2014 11:11 am
by jeffclane
The finish you have achieved on the underside looks really good! Did you use a spray gun to apply that enamel paint? Something to repeat on mine I reckon!
Re: New Gilbert
Posted: Tue Feb 25, 2014 6:04 pm
by Howard81
That front disc is shocking!
Re: New Gilbert
Posted: Tue Feb 25, 2014 9:18 pm
by epcot_pete
Hi Jeff, I brush painted the underside and really chuffed with the finish. It took 3 coats but has smoothed over the number of welded joints and rust pitted original metal. Have attached another photo.
Appreciate all the comments posted.
Pete
Re: New Gilbert
Posted: Mon Mar 03, 2014 10:46 pm
by epcot_pete
Have now turned the car around in the garage so I can access the front end. Spent 2 whole dirty days scrapping and angle grinder brushing years of crap, mastic and underseal from the wheel arches, inner and out, engine bay, front end in and out, footwell and under dash area. It is now obvious that GiLberT has been repaired many times before as patches are abound, the disappointing thing is that after repair they have just covered the area with mastic and underseal to make it look nice. But all it did was to seal in the rust and it continued to rot so now I have lots of welding to do! At least by the time I have finished, the body will not need attention for many many years. So for the next few weeks I will be cutting the rust out, treating the area and then welding the areas as strong as I can make them. Paint with Zinc and top coat, then plaster the box sections and inner areas with waxoyl, will post more piccy's then.
Re: New Gilbert
Posted: Tue Mar 04, 2014 8:57 am
by DoloWIGHTY
Wow that looks tough but rewarding work, well done.
Yeah.......
Posted: Tue Mar 04, 2014 9:39 am
by sprint95m
You are doing a proper job there.
What are the sills, especially the inners like? These rot from inside out, so the outers may seem solid......
and you have had water entering the sill structure

You did repair the jacking points, hopefully the rot was just restricted to the ends.
epcot_pete wrote:then plaster the box sections and inner areas with waxoyl
In my experience Waxoyl is awkward to spray into box sections.
I tried the Bilt Hamber aerosol and found it works well. To improve access to the sills I drilled holes through the steps, these being then
covered by the tread plates.
Ian.
Re: New Gilbert
Posted: Tue Mar 04, 2014 9:28 pm
by epcot_pete
To be honest, I was going to cut a couple of 1" wide slots about 3" long and spaced about 12" apart under the kick plates, front and back, as I can get good access to (1) see in detail extent of damage, (2) vacuum crap out to see properly using small bore pipe duck taped to wife's hoover!, (3) good access to spray waxyol. I did this to my MGB GT with good results. There has been a lot of water ingress into all box sections which I will have to deal with, this includes the sills and under windowscreen where it is like a pepper pot when shinning a light through it! Not sure at this stage about jacking points on front. I reinforced the ends of the subframe at the rear to make them the rear jacking points, will have to do something like this on the front.
I liked the standard of all the cars on the TDC stand at Stoneleigh last Sunday, hope I can get my 1300 fwd to same condition.
Thanks all for comments
Re: New Gilbert
Posted: Sun Mar 23, 2014 9:51 pm
by epcot_pete
Work on Gilbert has been put on hold for a bit due to building a new conservatory base. The conservatory will be delivered early April, so will have a few days before then to catch up. Managed to do quite a bit over the weekend and have attached some photo's. The whole front has been patched up over the years either through front end bump or rust, so have decided to line the inner bulkhead with as much zintec steel as possible and patch up under wing areas. Then when finished with lead and chassis paint, to drill into cavity and inject with waxoyl, this should then last the life of the car. The passenger side is finished, just tidying up of welds to do. The drivers side needs plates making for top of suspension strut and lower box section, then onto inner wings!!! The sills are not too clever so have bought new outer ones and door bottoms so lots still to do....
Re: New Gilbert
Posted: Mon Mar 24, 2014 6:32 pm
by 1300_2door
Hi Pete,
I have to say you're doing a smashing job there, these cars always seem to go in the same places but i must admit I've never seen a trailing arm fail like that ( and some of us try quite hard to break things

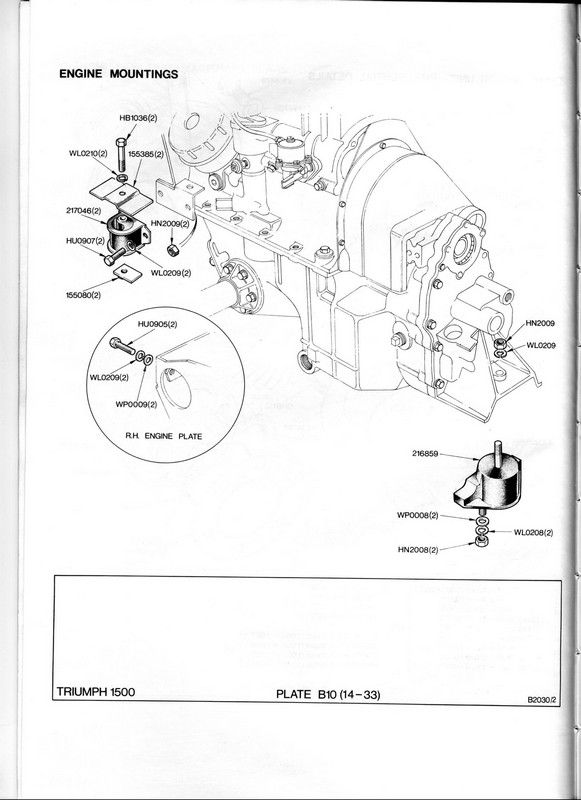
) I do believe rimmers may have new rh trailing arms in stock, but i doubt they'll be cheep. Also Tinweevil has led you astray with the rear engine mount, the diagram he posted is for a 1500fwd which is slightly different, the 1300 one is shown below.
Gordon
Re: New Gilbert
Posted: Mon Mar 24, 2014 7:40 pm
by epcot_pete
Many Thanks for photo, Gordon. That certainly helps. The trailing arm was totally my fault. I wanted to take out all bolts on the car and de-rust so in future any repairs would be simple...... The bolt was really seized in and I did consider to leave it as I could still take off the other side plate to get to the shock. I did have the trailing arm supported, or as I thought when I gave it one last hit with large hammer........ We learn something every day often by mistakes - must use smaller hammer next time!
I think my repair should be good enough to support the shock as on the other end of the shock there is only a 5/16 nut and locknut holding the shock through the bulkhead, fingers crossed.
Take Care
Pete
Re: New Gilbert
Posted: Fri Nov 28, 2014 11:27 pm
by epcot_pete
With summer over, I am actively continuing to restore the 1300fwd. I have completed the inner wings and have strengthened the O/S under wing area. The more I remove ages of crap, the more hole appear so it seems the complete body is like a colander! By the time I have welded plates into place, I will have virtually clad the whole area - still it will be nice and strong. I have removed the outer sill and will have to repair the centre section before refitting outer sill - I have posted a question reference rust protection before welding on the forum. Currently I am replacing the O/S front floor panel and strengthening the areas around this. As I say the whole body is riddled with rust holes so I can see myself virtually covering all areas with strengthening plates.
Re: New Gilbert
Posted: Tue Dec 09, 2014 8:13 pm
by epcot_pete
Have managed to repair drivers side floor. It had a hole in it and had been forced down towards the road, so I forced it back up flat and a new sheet floor was pop riveted to hold it in place. new sections were welded in all rotten areas around footwell, not pretty welding but strong. I will now weld the inner sill underneath and also plate the foot well from underneath so sandwiching the exiting floor. This should strengthen this side of the car for the rest of its life and the fitting of the outer sill will finish off it off a treat.