Like Jonners who has claimed, quite rightly I suspect, to have done practically all jobs on these cars, I too can claim to have carried out these specific tasks which are causing you a bit of frustration.
The gearbox bung. I would be very wary about using a standard socket on the bung for unless it is a four or an eight sided socket then at best the socket if it is a six or twelve sided socket will only grab on one of the four corners of the bung. And if it slips you will finish up burring the bung corner and so make it more difficult to remove in the future. The correct socket can be bought for not a great deal of money, I found mine on eBay in the USA. It’s called a female pipe bung socket and looks like this.
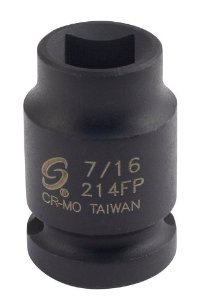
- 20131224 Sunex 214fp pipe plug socket.jpg (7.71 KiB) Viewed 424 times
Works a treat on, in my case, both the sump and diff bungs too.
The wiring to the overdrive switch.
Jonners mentioned in his second post how you thread the wiring for the switch “in from the bottom”. When I did this job I had the gearlever off on the bench and I passed a draw wire up from the hole on the side of the gearlever, on my car this is covered by the gaiter which sits on the plastic tray, and then very carefully taped one wire and its connector ahead of the second wire and its connector and then gently pulled the draw wire up from the bottom until I had the two switch connectors sitting out the top.
I was able to reuse the existing little spade connectors but I removed mine from their respective wires, worked a bit of heat shrink tubing down each wire first, resoldered the wire to each connector, borrowed a hair dryer and shrank the heat shrink around both the soldered joint and over the wire itself, in order to provide a bit more support for the wire and connector.
I have found that there is a trick to getting both the switch cover (the switch cap or whatever the correct name for it is) and the connectors to the switch sitting correctly. If I have to remove the switch then I unclip the switch cover by working a flat blade of some sort under its edge and working right round the switch cover until it just pops off.
When it comes to putting the switch and switch cover back on the gearlever knob I reach down to where the wires enter the bottom of the gearlever and work them up the gearlever so that you can fit the spade terminals into the switch, then you gently pull the two wires down together and in doing so it will pull the switch cover down onto the gearlever knob. When the cover is ready to push into place on the gearlever knob, then push it down and gently ease the wires below down the gearlever a fraction as well and the wires, connectors and switch cover should all sit very nicely within the recess in the knob.
I also mount the gearlever knob so that it sits near the top of the gearlever itself, I screw the round slotted nut which sits down in the gearlever down until it sits flush with the top of the gearlever and then bring the chromed nut which sits under the knob up to tighten everything.
It will hopefully allow plenty of space for the switch, and the two spade connectors sitting below it to sit within the knob without crushing the wires, connectors and switch.
Best of luck
Robert