Page 2 of 4
Re: Dolomite Nismo
Posted: Thu May 14, 2020 12:04 pm
by James467
Uh oh, you'd better get the shell over here Richard!

Re: Dolomite Nismo
Posted: Thu May 14, 2020 1:20 pm
by new to this
Richard
Before i upgraded my front hubs to Stag ones , i had those hub spacers fitted on my sprint but i found i couldnt set them up properly even using all the shims supplied
Dave
Re: Dolomite Nismo
Posted: Thu May 14, 2020 2:59 pm
by geeksteve
RichardHyde wrote: ↑Wed May 13, 2020 2:04 pm
I bought 2 sets of mounts and cut the studs off one set, allowing me to get the engine in exactly the right place before drilling the hole in the subframe and then swapping to the other set with the studs.
That's genius. Should see the 'slotted holes' I have on my engine-swapped car as a result of doing it the hard way. Best mate still hasn't let me forget about them..
Looks like a fun project!
Steve
Re: Dolomite Nismo
Posted: Thu May 14, 2020 3:55 pm
by SprintV8
new to this wrote: ↑Thu May 14, 2020 1:20 pm
Richard
Before i upgraded my front hubs to Stag ones , i had those hub spacers fitted on my sprint but i found i couldnt set them up properly even using all the shims supplied
Dave
Are you using Sprint or Stag stub axle pins.
Re: Dolomite Nismo
Posted: Thu May 14, 2020 4:18 pm
by new to this
SprintV8 wrote: ↑Thu May 14, 2020 3:55 pm
new to this wrote: ↑Thu May 14, 2020 1:20 pm
Richard
Before i upgraded my front hubs to Stag ones , i had those hub spacers fitted on my sprint but i found i couldnt set them up properly even using all the shims supplied
Dave
Are you using Sprint or Stag stub axle pins.
Phil
The guy i bought mine from he made them , think he got the size wrong , i know he does them for the Stag was well , mine were for Dolomite and Dolomite stub axle ,ive not fitted any to the Stag setup on my Dolomite maybe in the future
Dave[ /color]
Re: Dolomite Nismo
Posted: Thu May 14, 2020 5:03 pm
by SprintV8
The pins are different lengths between the two.
The Stag pins are longer.
I’m not sure if the wheel bearings are the same as I Just swapped it all over.
So possibly have got the wrong size.
Re: Dolomite Nismo
Posted: Thu May 14, 2020 5:43 pm
by new to this
SprintV8 wrote: ↑Thu May 14, 2020 5:03 pm
The pins are different lengths between the two.
The Stag pins are longer.
I’m not sure if the wheel bearings are the same as I Just swapped it all over.
So possibly have got the wrong size.
Phil
No when i did the hub bearing spacer mod on the sprint every thing was standard,even bought new wheel bearings timkin , thats why i think the hub spacers were machine wrong,at the time they didnt do the spacer kit for the dolomite , he made them for me
Dave
Re: Dolomite Nismo
Posted: Sat Jun 06, 2020 5:37 pm
by James467
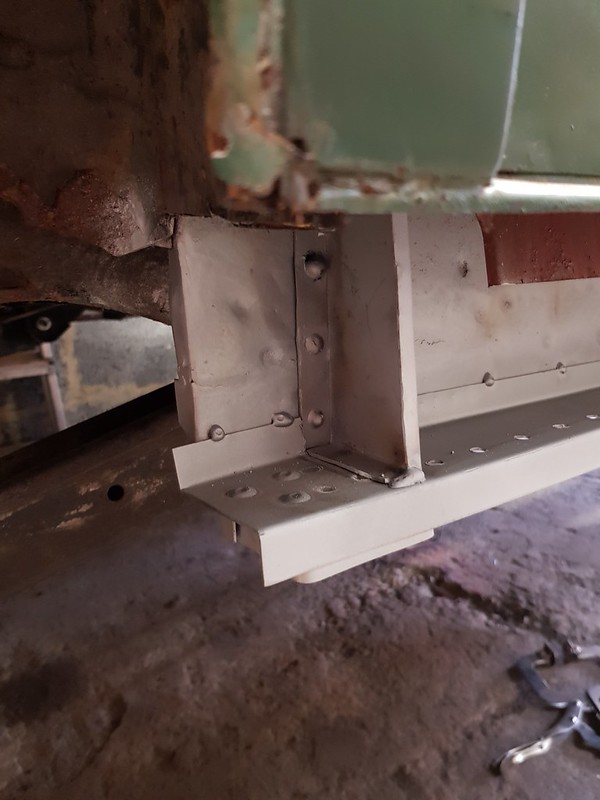
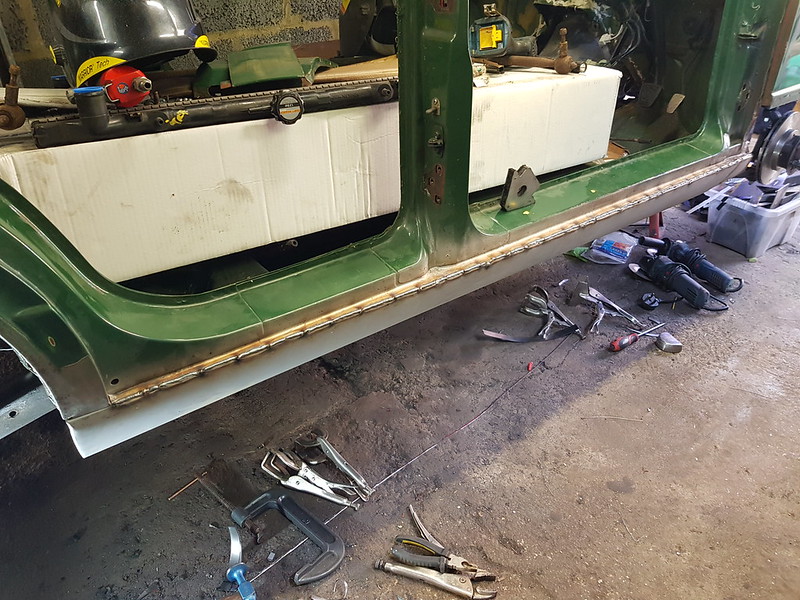
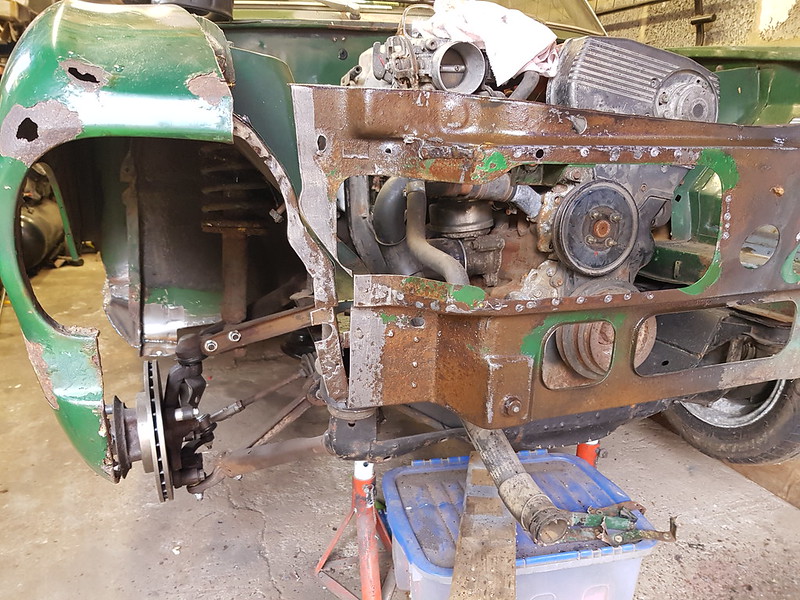
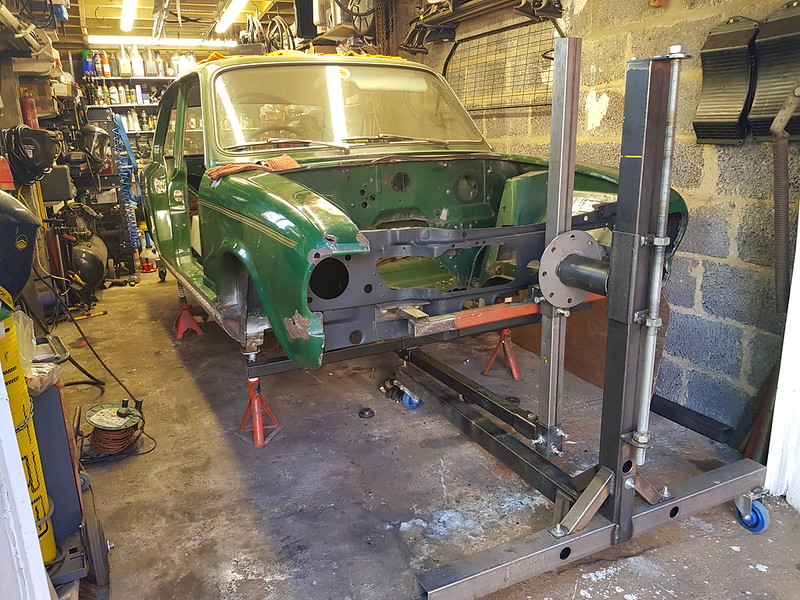
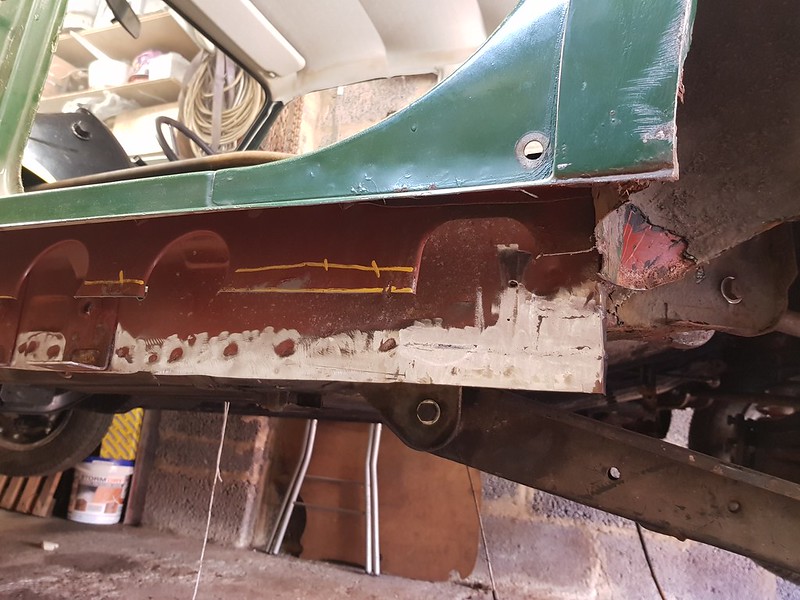
So the car is now with me for some bodywork, cleaning, modifications, exhaust!
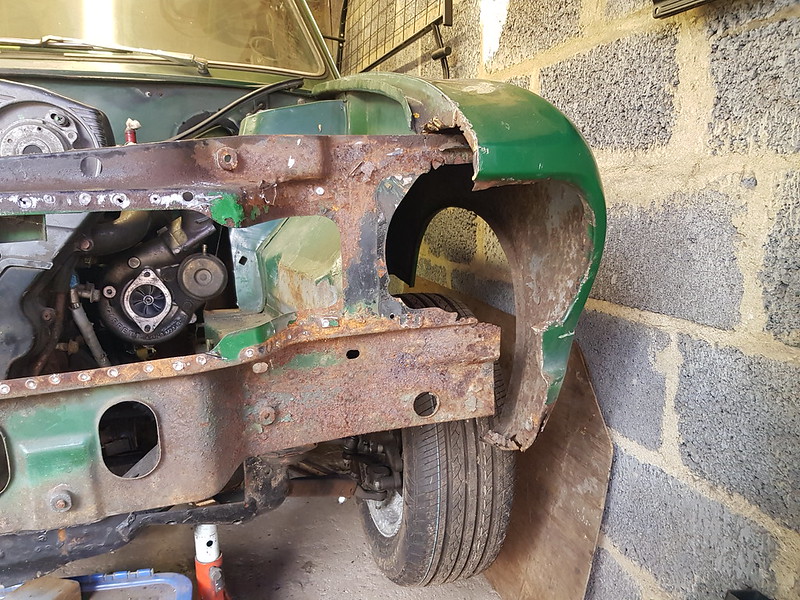
The shell is great, just needs a few rust repairs, sills boot floor, front panel, wing repairs. Nothing major, then a few modifications for Richard.
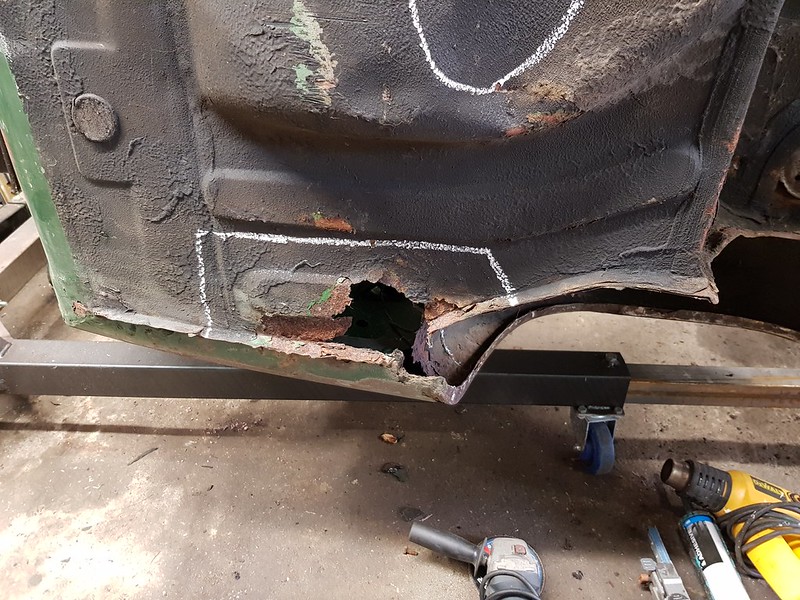
On the face of it the sills looked ok, especially the passenger side, but after cutting them off the extend of the rot could be seen.


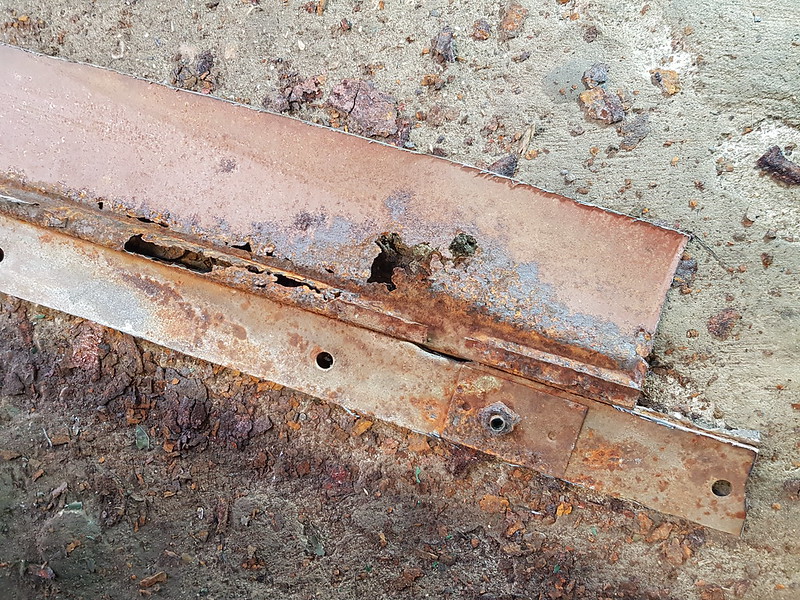
I was hoping that the front end of the sill would be ok but I'm not that lucky!!

I just used my usual process for dealing with sills, strip everything off and start at the back working out and reconstructing. The only difference is that I had to remove a section of the tread plate upper outer to do a proper repair on the inner reinforcer.


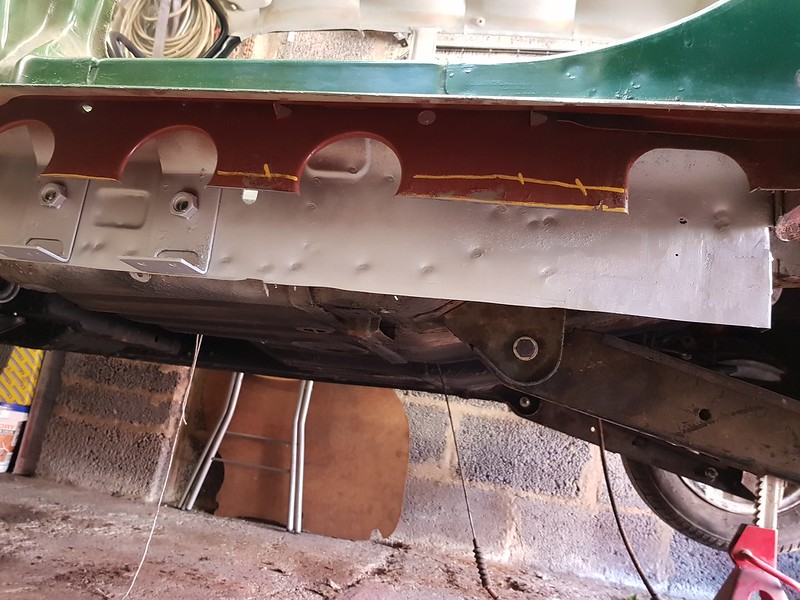
New jacking points

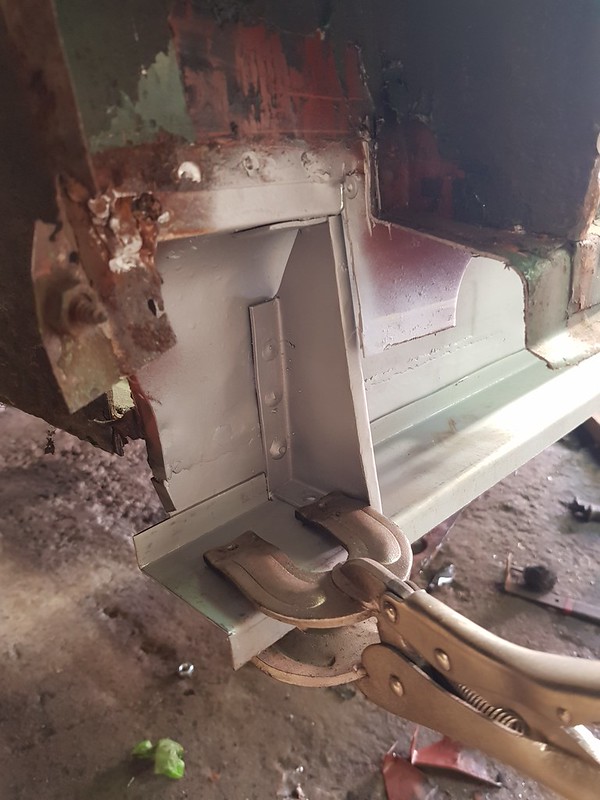
New reinforcer


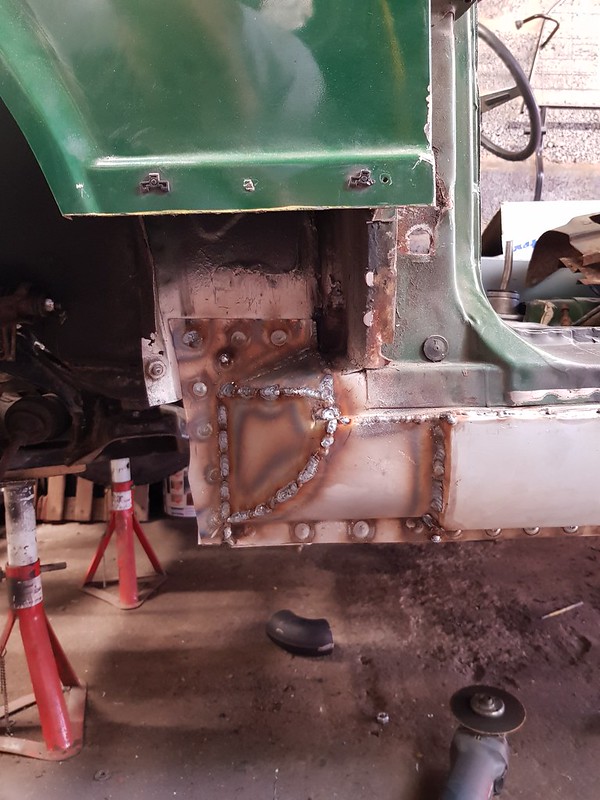
Outer welded back on

Club sill fitted


New front sill made

Linished, rust protected and seam sealed


Front and rears repaired


Done, on to the other side.
Re: Dolomite Nismo
Posted: Sat Jun 06, 2020 8:46 pm
by new to this
James
Youve done a few sills now  is it common for the sill step to rust through , both mine have rusted just in front of the rear doors
when you replace the inner sill at the bottom are the club inner sills have a right angle bend, or are you putting that in, the middle part of the sill why do you fit a right angle to them and not weld straight to the bottom edge
thanks Dave
Re: Dolomite Nismo
Posted: Thu Jun 11, 2020 11:25 am
by James467
new to this wrote: ↑Sat Jun 06, 2020 8:46 pm
James
Youve done a few sills now is it common for the sill step to rust through , both mine have rusted just in front of the rear doors
when you replace the inner sill at the bottom are the club inner sills have a right angle bend, or are you putting that in, the middle part of the sill why do you fit a right angle to them and not weld straight to the bottom edge
thanks Dave
Sorry Dave, I wasn't ignoring you, just forgot you replied!
is it common for the sill step to rust through , both mine have rusted just in front of the rear doors
I havent seen many but the other side of Nina had done the same on the inside of the bottom curvey bit.
when you replace the inner sill at the bottom are the club inner sills have a right angle bend, or are you putting that in, the middle part of the sill why do you fit a right angle to them and not weld straight to the bottom edge
Julian asked me pretty much the same question, does this help?
https://forum.triumphdolomite.co.uk/vie ... 45#p329649
Re: Dolomite Nismo
Posted: Thu Jun 11, 2020 6:36 pm
by James467
Re: Dolomite Nismo
Posted: Sat Jun 20, 2020 7:48 pm
by James467
Re: Dolomite Nismo
Posted: Sat Jun 20, 2020 10:01 pm
by Matt Cotton
Great stuff James.. that new toy of yours is really helping you here.
Do you use 0.6 or 0.8mm welding wire out of interest?
Kind Regards
MC
Re: Dolomite Nismo
Posted: Sat Jun 20, 2020 11:14 pm
by new to this
James
nice work be ,interested in how you repair the rear arches mines gone it the same places also boot floor as well gone
when you fit the club sills cant see from your pictures , do you cut the bottom edge where it folds back on its self
Dave
Re: Dolomite Nismo
Posted: Mon Jun 22, 2020 6:38 pm
by James467
Matt Cotton wrote:
Great stuff James.. that new toy of yours is really helping you here.
Do you use 0.6 or 0.8mm welding wire out of interest?
Kind Regards
MC
0.8mm Matt, 0.6 just isnt worth bothering with!
new to this wrote:
James
nice work be ,interested in how you repair the rear arches mines gone it the same places also boot floor as well gone
when you fit the club sills cant see from your pictures , do you cut the bottom edge where it folds back on its self
Dave
Which edge is that Dave? At the top? No, I have used a bead roller to create an edge, lap jointed it to the top then ground back the welds to create an invisible seam.