Many thanks for the advice Mad Mart. it's always an AOL thing - the album was set up quickly last night.
let's try again-
http://aolpictures.aol.co.uk/galleries/ ... xQp5Fd3Ig=
and the verdict on the rot is...
where do I start?

... Quite a bad example for that location. Entirely repairable. One of the more complex repairs in terms of stripdown required but easy in that it is not a visible area. If thats all you've got then you've got it easy, I'll bet you find more tho. Have a look at Colins thread in the main forum, he's done this area.
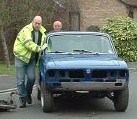
1978 Pageant Sprint - the rustomite, 1972 Spitfire IV - sprintfire project, 1968 Valencia GT6 II - little Blue, 1980 Vermillion 1500HL - resting. 1974 Sienna 1500TC, Mrs Weevils big brown.
-
Fen-yak
Thanks for the advice tinweevil.
I'll go and have a look at Colin's thread.
I think the reason that is so bad is due to the fact that I was driving through foot and mouth disinfectant points every day for a couple of months in 2001.
It was only at a later date that I found out that the 'disinfectant' was main component diluted CITRIC ACID!!!!!
Ho hum.
Nick
-
Fen-yak
The bad example in part was down 'rust testing' with a screwdriver
as for more rust on the car, it's most of the usual spots but not too bad on the whole
-bottom of doors
- the boot lid
- bit of bubbling under one of the vinyl thingies ('scuse tech jargon - I'll pick it up!)
- and a bit by the rear roof vent
apart from that nothing major that I can see.
I've taken the carpets up and the floor pan is sound front and back.

The bit with the hole is the "inner wing box section" and the club do a kit to make up a new one.
As for the rest of it, door bottoms are available, if it's the seam along the bottom of the back of the bootlid a rub down and hammerite will keep it at bay until you find a good one in the right colour, The vinyl bits can be lifted off with extreme care to investigate and treat behind.
The bit by the roof vent is a bit of a pain to sort out if the grot is "push the screwdriver right through" bad as it's a complicated bit to replace, but I have got a good second hand section that was given to me a year ago by a club member if you are handy with a MIG.
-
2F45T4U
-
David6214
- Guest contributor

- Posts: 5154
- Joined: Tue Oct 03, 2006 10:57 pm
- Location: South Coast
- Contact:
SprintV8 made up plates for mine and did it in an afternoon no problem, was a very tidy job as well.......ALU47S where are you now?
The club section has to be the easier route, but we couldn't wait for one, kind of like autonet7 in that respect!
Definately repairable......I have seem some of adams better welding....he'd be a good palce to start if he is willing
The club section has to be the easier route, but we couldn't wait for one, kind of like autonet7 in that respect!
Definately repairable......I have seem some of adams better welding....he'd be a good palce to start if he is willing
Previous owner of 42 Dolomite shaped vehicles, 14 Sprints, 12 1850s, 8 1500s, 3 V8s, 3 Toledos and 2 SEs
-
Fen-yak
Thanks for all the advice and promises of help.
I might well take you up on that offer Adam (will gladly cover expenses, fuel costs, tea and food if you do help out)
I'm guessing (again) that there's a bit of stripping out of parts first!
Where about is Colin's thread on the inner wing box section. Is this a structural piece?
I think I read that the club sections need to be made up by someone first - is that right?
So many questions....
-
Fen-yak
that's the sort of thing I was going to ask next Adam!
I'm good at taking things apart (I trained as a technical illustrator).
The sub frame is the bit that bolts/mounts onto the box section...?
What's involved in the sub frame being dropped and by dropped do you mean removing?
Looks like I gotta clean out the garage a bit.
There's also a small 'inspection pit' in there! OK, you have to sit on a milk crate , but it's a pit none the less. It was great when I had to remove (if I remember rightly) the starter motor, tighten up the exhaust manifold, etc.
Nick
-
2F45T4U
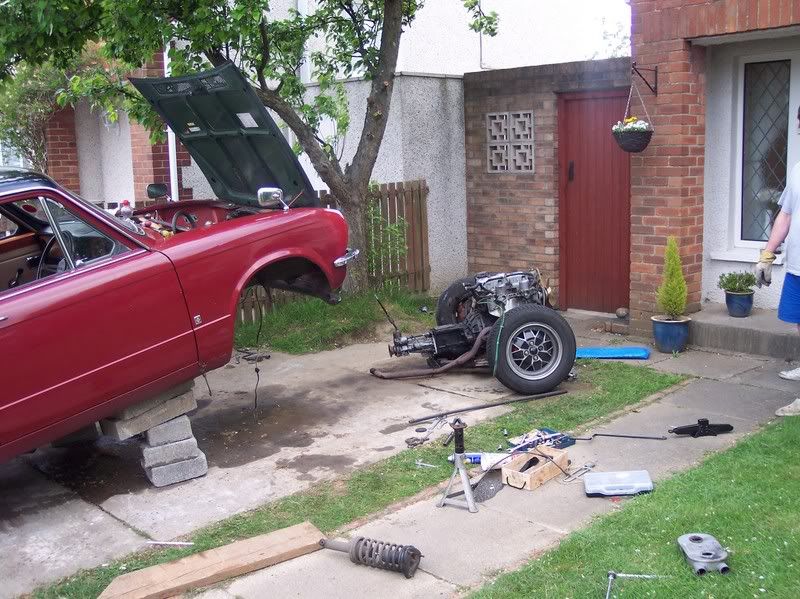
Jack up, block the body up, un bolt the sub frame, the steering column pinch bolt, take the rad out first btw, un do all wires and pipes attatched to the engine, prop shaft, take off gear lever, speedo cable and if I havn't forgotten anything you simpy lower the sub frame with engine and box out the car
-
Fen-yak
It's not a big job unless the subframe bolts have siezed to the tubes that run through the box section, at which point it starts to become annoying. If you can get some penetrating oil (wd40, plusgas or others) onto them now and repeat the application a few times before you take them off it will make it a whole lot easier.
if you can have a sturdy scaffolding plank to hand as well as a pair of axle stands it's a much better way to support the car than breeze blocks.
if you can have a sturdy scaffolding plank to hand as well as a pair of axle stands it's a much better way to support the car than breeze blocks.