Page 11 of 55
Re: RUK - Project Recommission 1850 Auto
Posted: Sun Apr 09, 2017 6:06 pm
by GTS290N
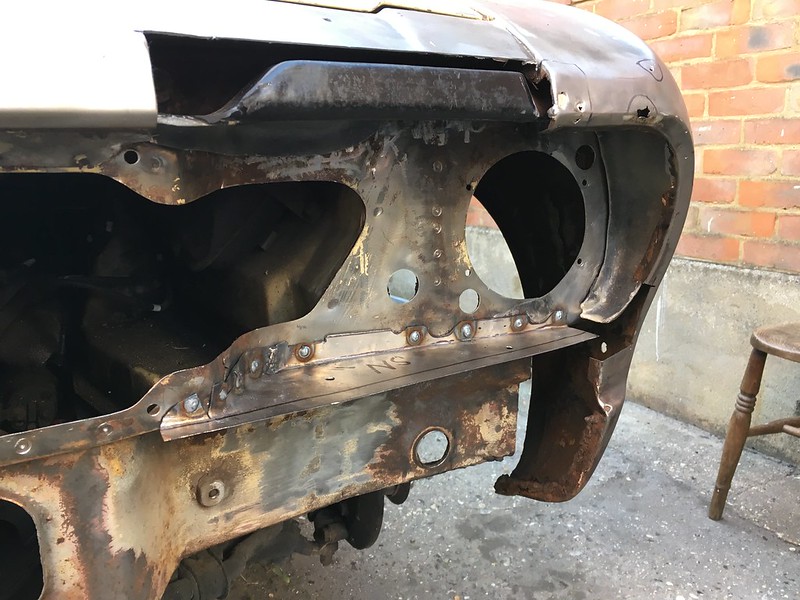
James, how did you attach the club eyebrows?
Thanks in advance.
Re: RUK - Project Recommission 1850 Auto
Posted: Sun Apr 09, 2017 6:39 pm
by James467
I haven't attached them permanently yet, I plan to use some tigerseal and self tappers.
Had to make a new filler piece below the headlamps, drilled some drain holes in it as water does seem to collect here.
Re: RUK - Project Recommission 1850 Auto
Posted: Sun Apr 09, 2017 7:17 pm
by SprintMWU773V
I think i'd be very happy with that as a weekend's work.
Re: RUK - Project Recommission 1850 Auto
Posted: Sun Apr 09, 2017 7:22 pm
by James467
I wanted to do the filler piece on the other side and adjust the repair panel as it sits about 1cm too far back. Not sure why as everything else lines up, I'll have to investigate. The kids came home early so that kind of screwed things up.
Re: RUK - Project Recommission 1850 Auto
Posted: Sun Apr 09, 2017 9:30 pm
by Matt Cotton
Lovely work James and really interesting to see.
What tools did you use to shape the repair panels? For example, cutting out the semi-circle for the headlight panel and the small deviations in the horizontal repair section? It all looks so accurate that I'm guessing not Gilbow shears!
Re: RUK - Project Recommission 1850 Auto
Posted: Sun Apr 09, 2017 10:03 pm
by Carledo
Not to denigrate James' skills, but there is not much there that cannot be achieved with aviation snips, a vice, a decent hammer, a joddler and some good old fashioned Cardboard Aided Design! (I use Weetabix boxes myself)
As with anything else, practice makes perfect! And as Dolomite owners, we get to have lots of practice!

My aviation snips will cut a piece of 1mm steel in a circle the size of a 2p piece.
Steve
Re: RUK - Project Recommission 1850 Auto
Posted: Sun Apr 09, 2017 10:10 pm
by James467
God damn it Steve I was about to big myself up as the worlds best fabricator!

Actually Matt, Steve's right. I just used aviation snips, a Clarke hammer and dolly kit, vice, joddler, angle grinder etc.., just normal kit really.
Plus a jigsaw and some wood to make some formers.
Re: RUK - Project Recommission 1850 Auto
Posted: Sun Apr 09, 2017 10:11 pm
by James467
Like everything else on this car I've really enjoyed doing this.
Re: RUK - Project Recommission 1850 Auto
Posted: Sun Apr 09, 2017 10:22 pm
by Carledo
I'm sorry to disappoint you James, but the worlds best fabricator lives in Shropshire........... And works on Project Binky!
That guy makes the pair of us look like amateurs!
Steve
Re: RUK - Project Recommission 1850 Auto
Posted: Sun Apr 09, 2017 11:08 pm
by James467
Carledo wrote:I'm sorry to disappoint you James, but the worlds best fabricator lives in Shropshire........... And works on Project Binky!
That guy makes the pair of us look like amateurs!
Steve
You're right, Nik Blackhurst is Zeus! No actually he may be God himself, fabricating the universe from tea, biscuits and parts from an old mini!
Re: RUK - Project Recommission 1972 'Dolomite' Auto
Posted: Sun Apr 23, 2017 7:59 pm
by James467
Back from France and back to work! The ferry landed at 6am yesterday so the only thing I managed to do was bleed the brakes.
Mmmm fresh purple silicone fluid!!
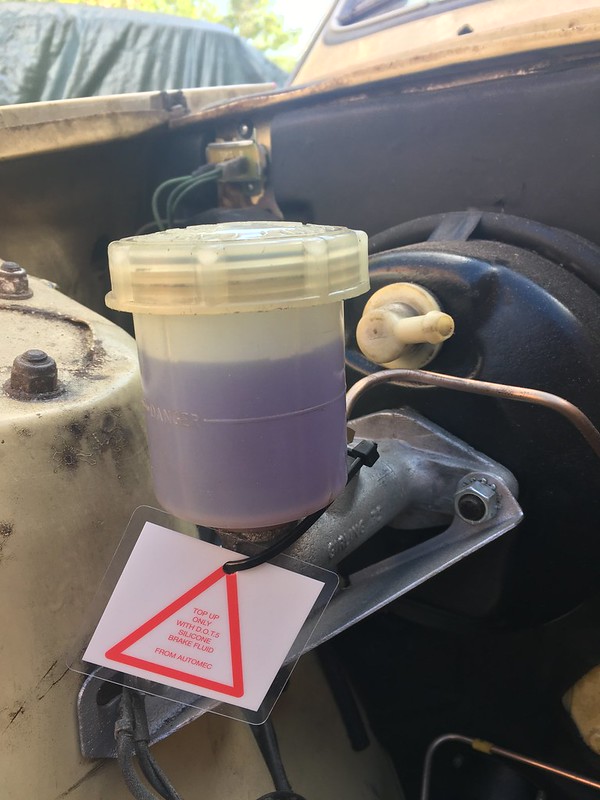
Oh and we have brakes!!!
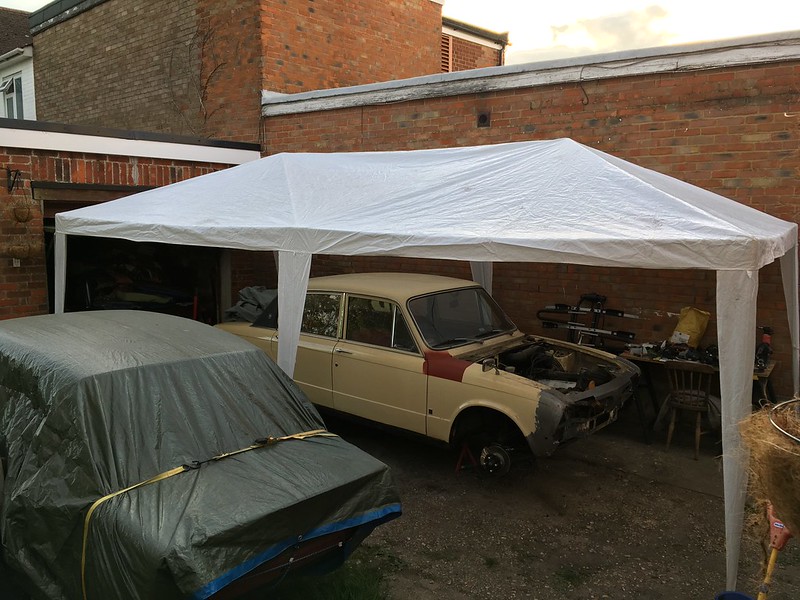
The British weather being as it is and the fact that time is now getting tight I decided to erect the party tent! Yes, it looks cheap, yes it was £50 on eBay but it's suffered five years of abuse and still functions as a portable garage perfectly!
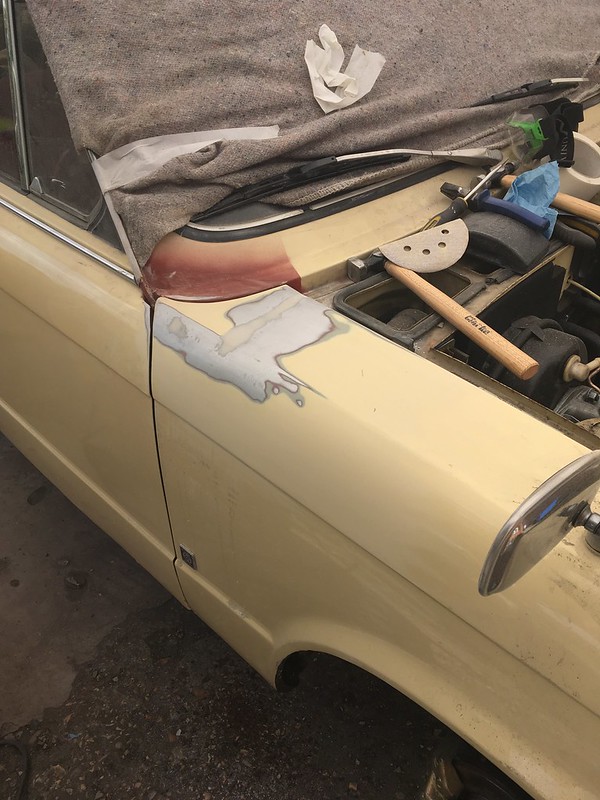
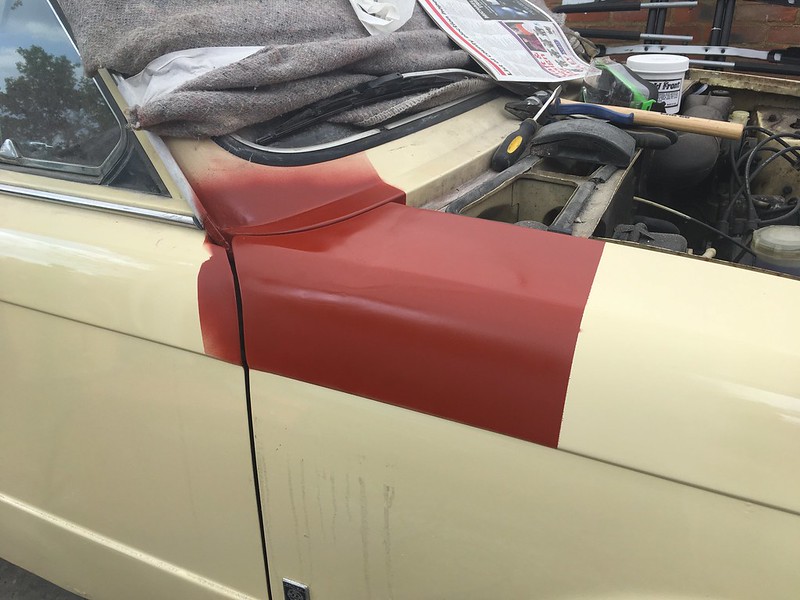
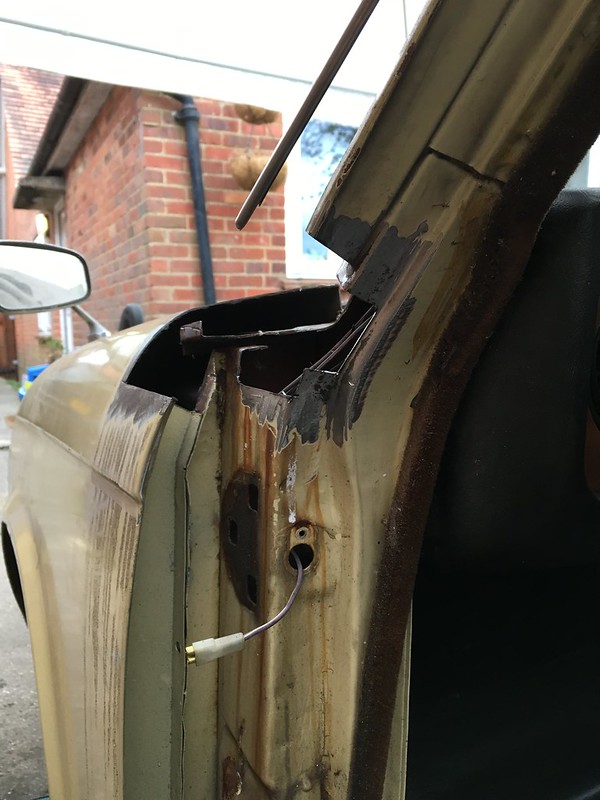
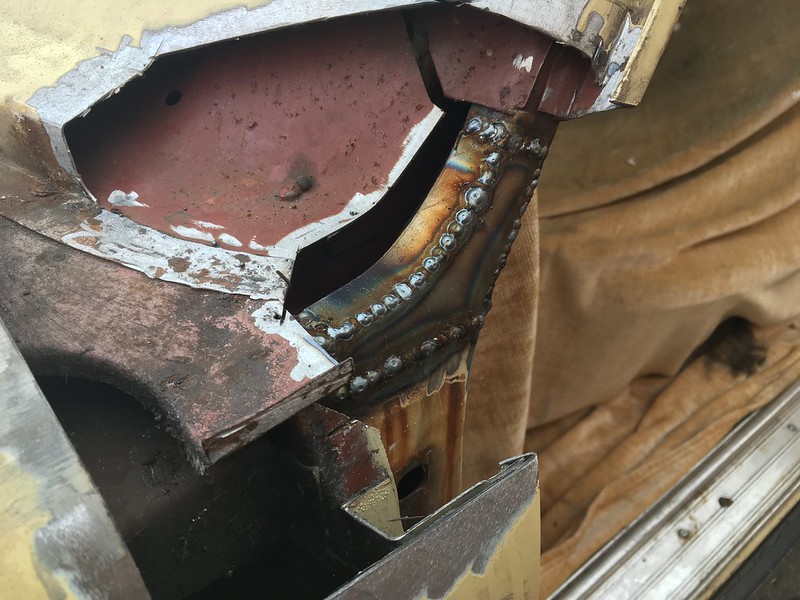
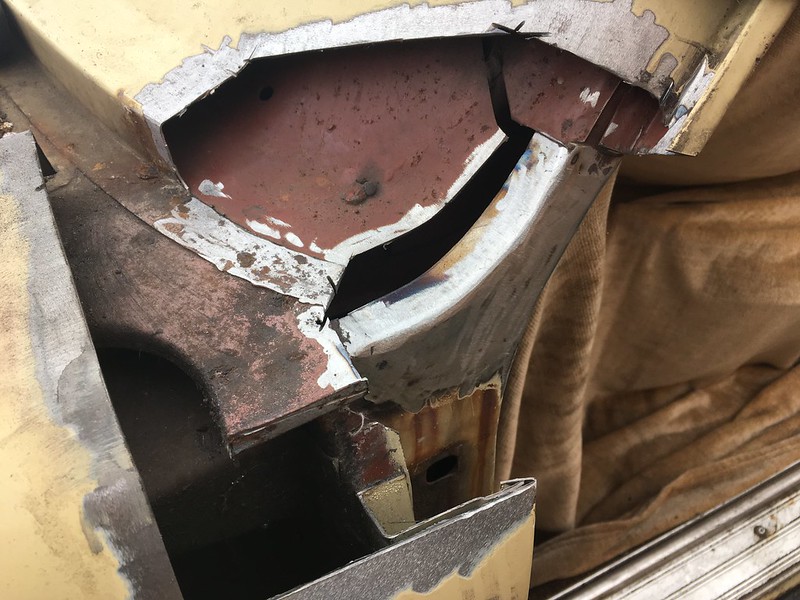
Today I have been able to quickly have a look at the OS A pillar. If you remember, this is what it looked like. not too bad but it needed plating.
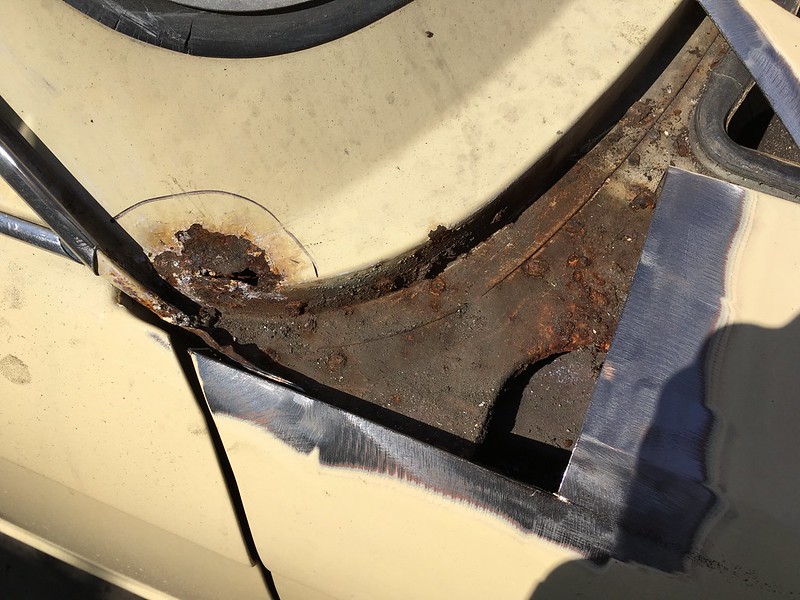
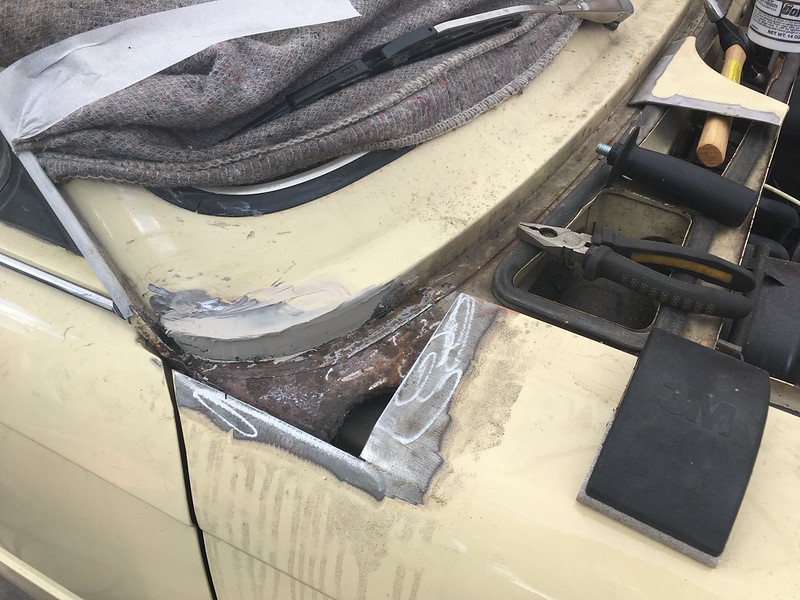
Cut out the rust and welded in a repair piece
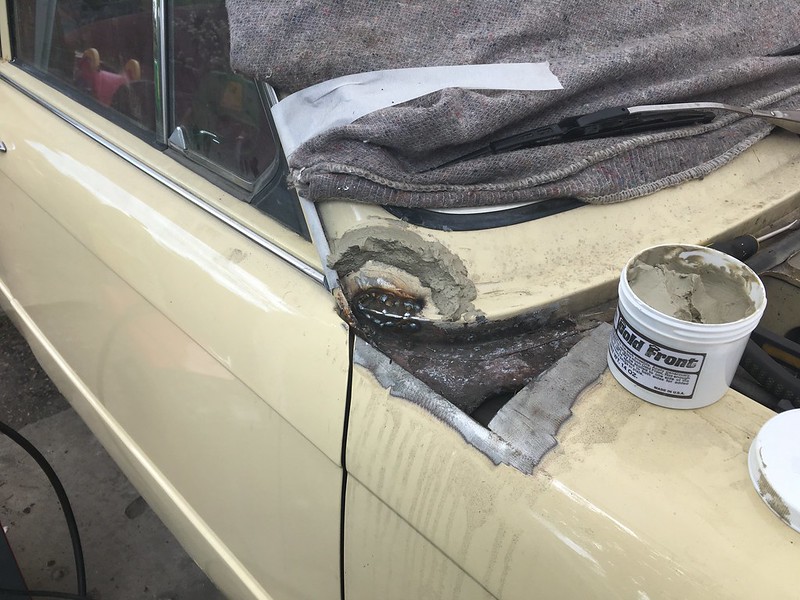
I'm using Cold Front to take the heat away from the screen simply because I don't want to remove it. Strictly speaking I don't need it this side but I will need it the other side.
A bit of filler here and there and a coat of red oxide....
Weld on the wing...
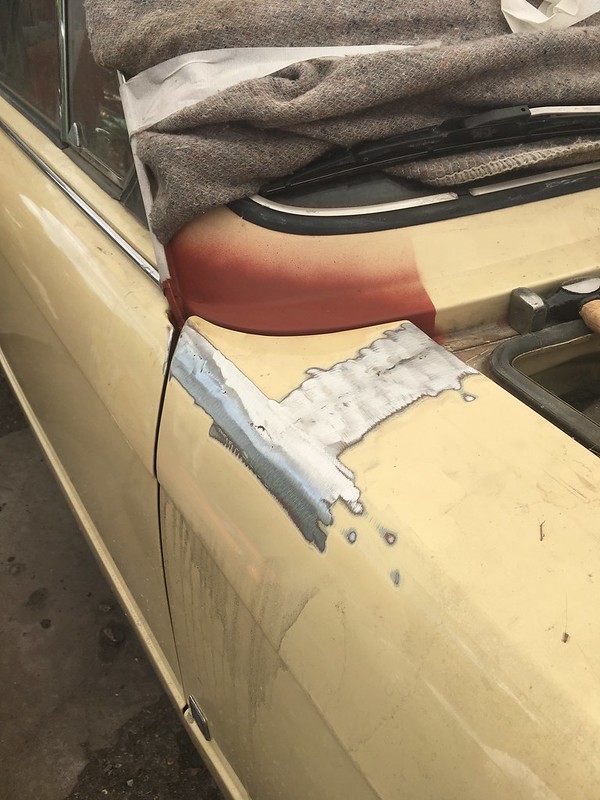
Hmmmmm I may have used too much filler!
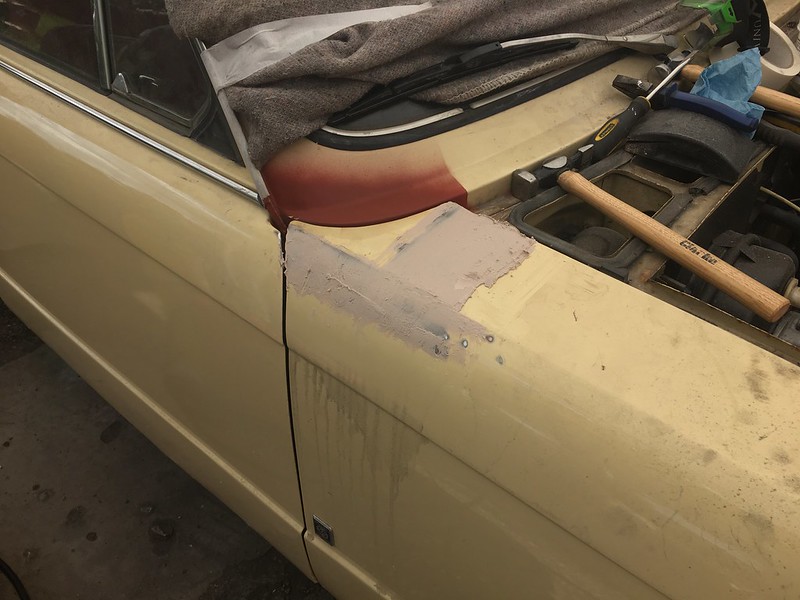
Sand back
Primer and oh yes I really am leaving like that...for now!

It needs finishing properly for a final top coat but it will go through the MOT fine.
On to the other side...
Re: RUK - Project Recommission 1972 'Dolomite' Auto
Posted: Mon Apr 24, 2017 2:11 pm
by James467
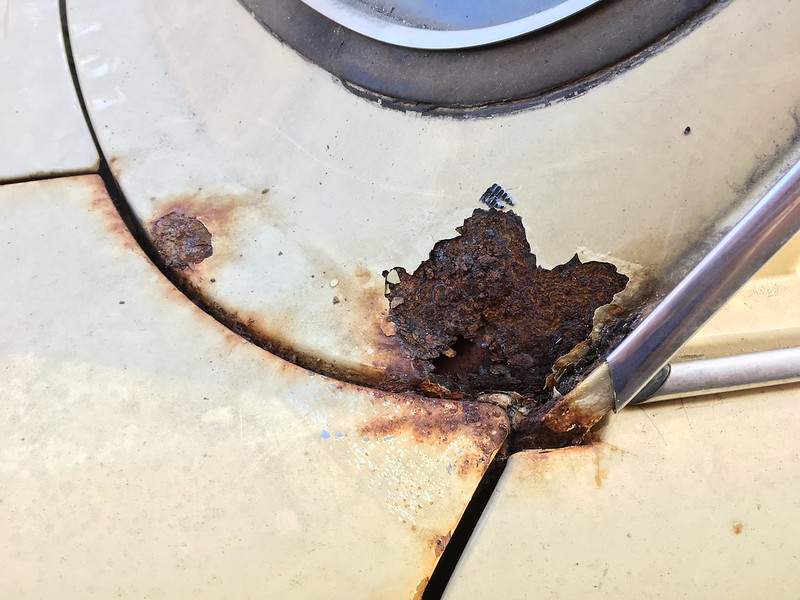
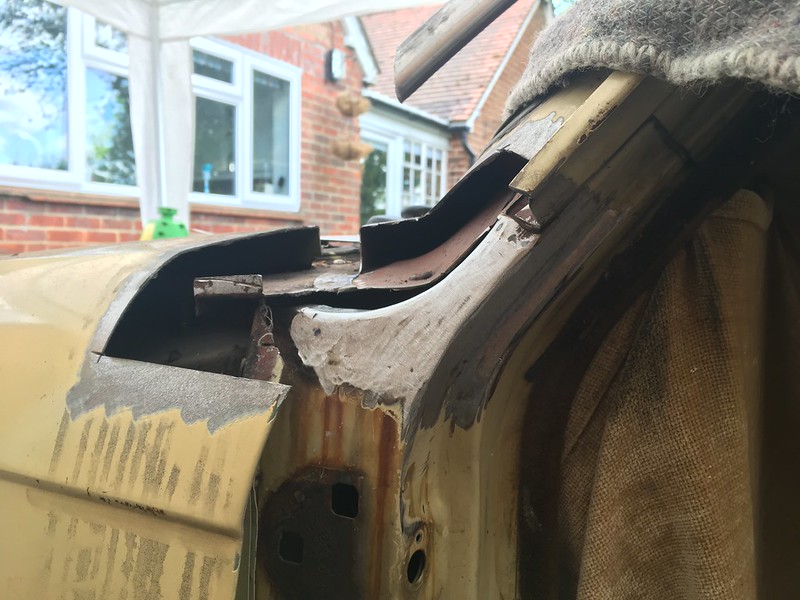
On to the other side...
This is what it looked like, there wasnt a hole before Steve poked his finger through!
Cut the top of the ing off for access
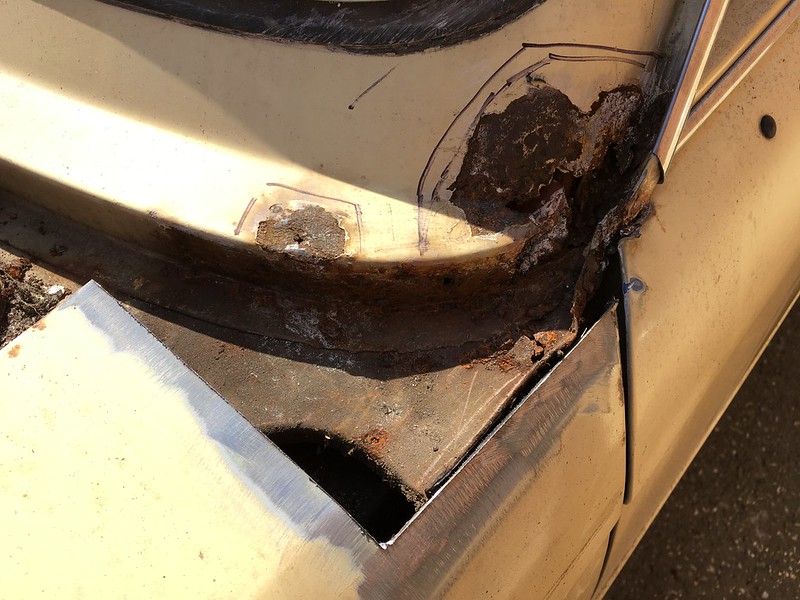
The started cutting out the rust...
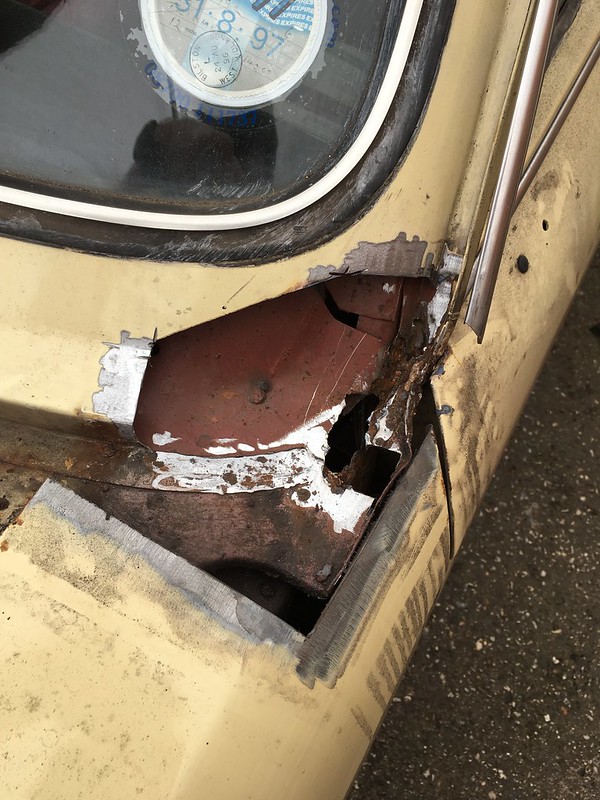

Ended up removing the door and cutting out quite a bit of metal.
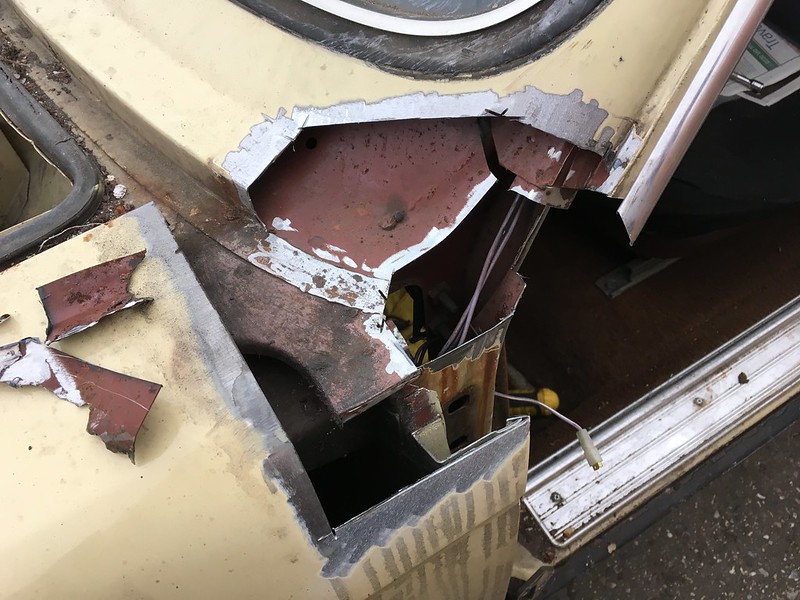
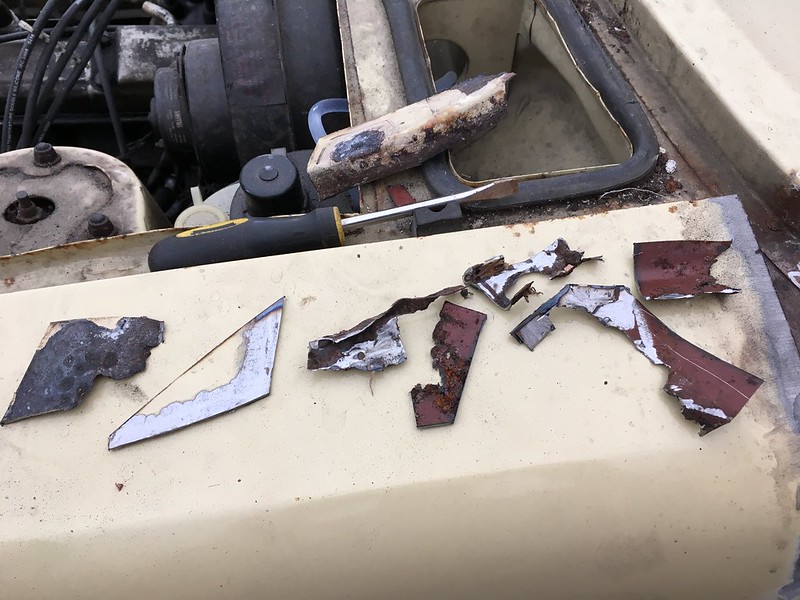
At least off the rusty metal is gone, it should be pretty easy to fab the repair sections and tack them back in.
Re: RUK - Project Recommission 1972 'Dolomite' Auto
Posted: Tue Apr 25, 2017 9:07 am
by Carledo
I don't think my finger did all that!
Steve
Re: RUK - Project Recommission 1972 'Dolomite' Auto
Posted: Tue Apr 25, 2017 12:01 pm
by James467
Carledo wrote:I don't think my finger did all that!
Steve
It opened the floodgates!
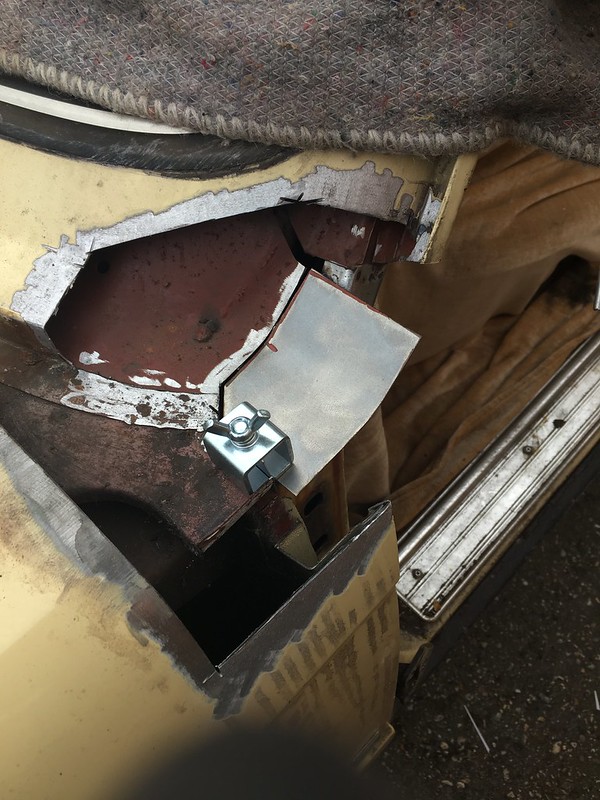
Boxed in the inner A pillar...

Ground back the welds...
Just trying to fab this section and figure out how it goes together plus it all has to line up with the outer skin so it's a tad complicated.
I need to make a new bit of gutter, it looks like the gutter joins to the top of it, water is then directed down the gutter and channelled down the inner wing and out of the holes at the base of the wing. Door needs to go back on to do this I think.
Re: RUK - Project Recommission 1972 'Dolomite' Auto
Posted: Tue Apr 25, 2017 8:44 pm
by new to this
nice work there
dave