Page 12 of 13
Re: My 13 year project...
Posted: Sun Oct 13, 2013 9:43 pm
by Tony Burd
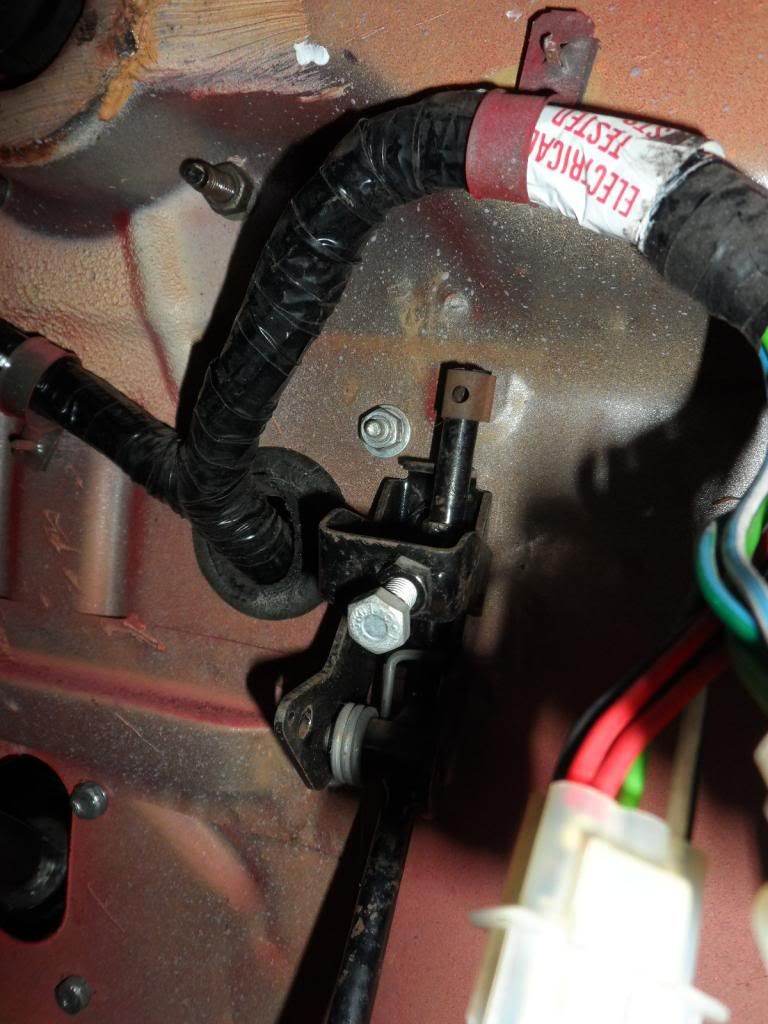
I noticed that you have fitted the bulkhead strengthener, it looks as if early cars didn't have this fitted as there should be a third nut & bolt in the top hole which adds strength to the assembly, you could drill a hole & fit the bolt, up to you.
Tony
Re: My 13 year project...
Posted: Mon Oct 14, 2013 9:43 am
by Carledo
Tony, the bulkhead strengthener for the throttle pedal is a part made for AUTOMATIC cars only. But it turns out to be useful on manuals too which are also seeing cracks form in old age so Alun (xvivalve) has had some remanufactured! PM him for details!
Steve
Silly me, you already have one!
Re: My 13 year project...
Posted: Mon Oct 14, 2013 10:57 am
by Tony Burd
Cheers Steve, I didn't know that, is the throttle pedal under more stress because of the kick down cable maybe?
Re: My 13 year project...
Posted: Mon Oct 14, 2013 9:06 pm
by Carledo
Tony Burd wrote:Cheers Steve, I didn't know that, is the throttle pedal under more stress because of the kick down cable maybe?
I think thats why it was done, typical BL kneejerk bodge to cover up a design flaw! What they should have done was reinforce the shell in manufacture, but I guess this cheapskate add on was quicker and cheaper.
When you think about it, the cars that are cracking their bulkheads now have well exceeded their design lifespan so you can't blame BL too much!
Steve
Note to self, Fit the bracket that you've had for more than a year to the Carledo, BEFORE the bulkhead cracks!
Re: My 13 year project...
Posted: Tue Oct 15, 2013 2:35 pm
by Jon Tilson
Mine cracked well within its design lifetime....
Has had a rivited on mod for more than half its life now...I blame a rather stiff cable in its earlier life that I replaced too late obviously...
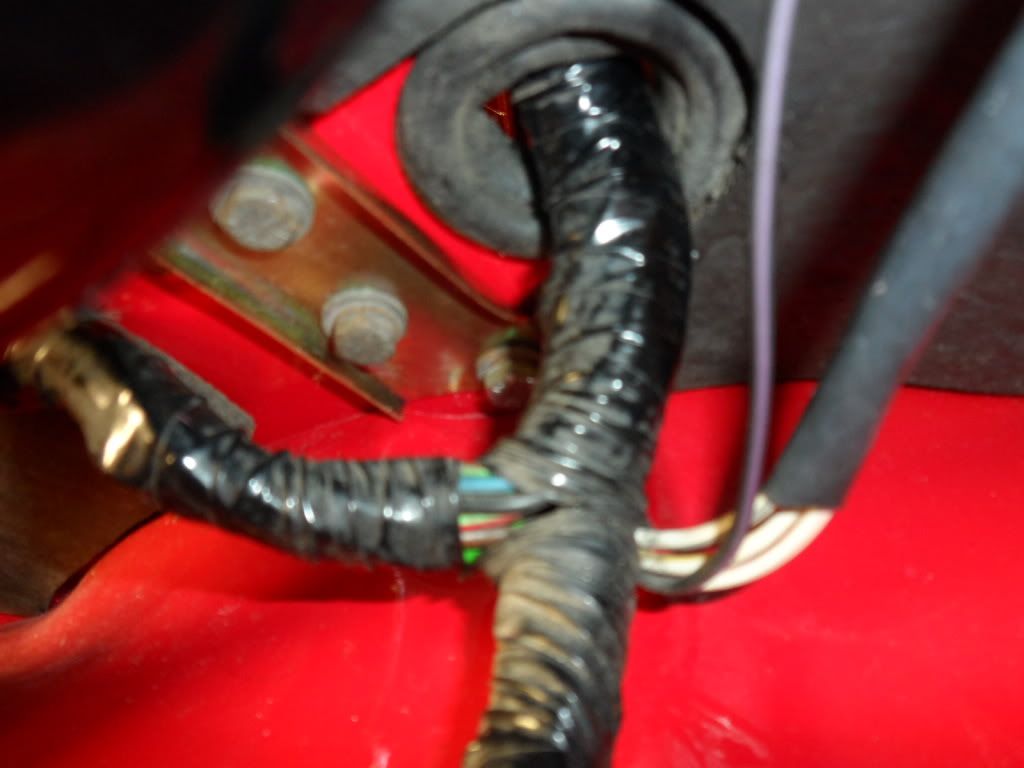
It cracked from where the grommet goes through and the symptoms were lost power as the bulkhead was flexing rather than opening the throttle.
Jonners
Re: My 13 year project...
Posted: Sat Oct 26, 2013 3:16 pm
by DoloWIGHTY
Bumper fitted!!

Re: My 13 year project...
Posted: Sat Oct 26, 2013 11:30 pm
by Edin Dundee
Wow! Fitted with Colgate!
Re: My 13 year project...
Posted: Sat Feb 22, 2014 5:26 pm
by DoloWIGHTY
Just a brief update re my car "Happy".
Nothing to really report, has been running well, the recent stormy wet weather did proved (to me) that Triumph really did get the windscreen wiper sweep wrong on our cars, leaving that unswept area to the top right really becomes tedious as it really quiet an important area to be able to see through, yet it remains full of "splat" and road dirt.
I have had a overflowing rear carb for a few months now, not bad, just damp on the top of the lid, but enough to concern me in that I didn't want it there and occasionally a whiff of petrol into the cabin of the car was annoying. I fitted a brand new float, valve and seating, checked the tightness of the pivot pin but still it persisted, tried various washers under the seat, this either made the car run out of puff (as the float was too low) or had little effect.
So, bit the bullet and bought one of these ball bearing valves from eBay:

I must admit I had my misgivings but tried to remain open minded. have to say I have now completed around 75 miles since fitting it and not a single drop of petrol has found it's way onto the lid - result!

The other biggest result I've had is fitting that gaiter around the gear leaver (see further back in my section), not only has it made the car quieter it's made the heater more efficient and for the first time in my ownership I can say that it really is a nice snug warm place to be inside this car now.
That's all for now. Next on the list is an oil change, new jets and needles for the carbs and the fitting of a pair of the clubs alloy carb mounts.

Re: My 13 year project...
Posted: Sat Mar 08, 2014 4:59 pm
by DoloWIGHTY
Still no overflowing from that carb
.
Misfire I reported has vanished, running beautifully.
Did something this morning which has been bugging me since I took ownership of the car all those years ago. The bezel on the speedo has had it black paint flaking off, it also has "bits" floating around behind the glass and I oddly I have never had a trip set, this being a '75 car it is the one that sits under the dashboard. The bracket was there but nothing on the back of the speedo except a hole.
So I swapped the "gubbins" over along with putting a nice new secondhand bezel on.
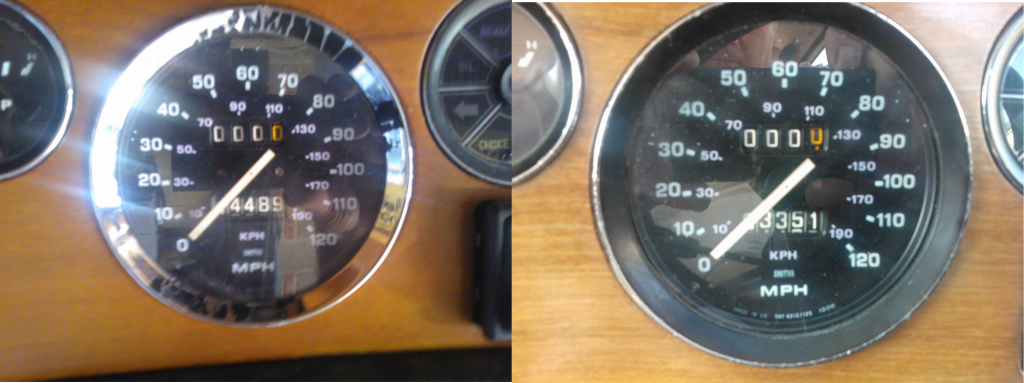
There, that's better I am sure you will agree...AND I now have a trip set! Life is good

Re: My 13 year project...
Posted: Sat Mar 08, 2014 6:32 pm
by Jon Tilson
I have some bezels in need of attention too...
Cant decide if they look better all black like on the early ones which mine is, but doesnt need doing, or just have them all shiny.
Shiny doesnt look right but of you redo the paint how do you get that liittle shiny bit on the outside edge. Masking will be a right PITA.
Jonners
Re: My 13 year project...
Posted: Sun Mar 09, 2014 9:40 am
by DoloWIGHTY
Jon Tilson wrote:
Shiny doesnt look right but of you redo the paint how do you get that liittle shiny bit on the outside edge. Masking will be a right PITA.
Jonners
That is a very good question and one I pondered when I was putting this back together. Of course you can use the bezel from a spare rev counter which is the same diameter as the speedo one.
Re: My 13 year project...
Posted: Sun Mar 09, 2014 10:11 am
by geeksteve
Jon Tilson wrote:
Shiny doesnt look right but of you redo the paint how do you get that liittle shiny bit on the outside edge. Masking will be a right PITA.
I wonder if you could paint the whole thing then use a very flat surface with cloth on to polish some of it off?
S
Re: My 13 year project...
Posted: Mon Mar 10, 2014 10:23 pm
by TKLR
geeksteve wrote:Jon Tilson wrote:
Shiny doesnt look right but of you redo the paint how do you get that liittle shiny bit on the outside edge. Masking will be a right PITA.
I wonder if you could paint the whole thing then use a very flat surface with cloth on to polish some of it off?
S
What about an overlay or mask that just sits on the very front face then spray the rest? remove mask (made of card or something perhaps) then hey presto, black inner and chrome outer edge?
Re: My 13 year project...
Posted: Mon Mar 10, 2014 10:27 pm
by TKLR
TKLR wrote:geeksteve wrote:Jon Tilson wrote:
Shiny doesnt look right but of you redo the paint how do you get that liittle shiny bit on the outside edge. Masking will be a right PITA.
I wonder if you could paint the whole thing then use a very flat surface with cloth on to polish some of it off?
S
What about an overlay or mask that just sits on the very front face then spray the rest? remove mask (made of card or something perhaps) then hey presto, black inner and chrome outer edge?
or a decent screen printers company could do it for u? Maybe we could get this done as a club spares refurb exchange programme thing?
Re: My 13 year project...
Posted: Sat May 03, 2014 4:24 pm
by DoloWIGHTY
Time for an update
.
Remember that ball bearing needle valve "guaranteed to stop overflowing carburettors" up there ^^^? Well today it started overloading again! Not a great deal but definitely overflowing. So there, just a waste of money that it turned out to be (as I suspected from the start).

However, here is something constructive:
Since I have owned the car the "crash roll" on the front of the parcel shelf has been worn through where fingers have been knob twiddling the radio over the years (myself included). I always kidded myself that this was part of the history of the car, but of course it just looked damn scruffy:

So after looking into trying to get a piece of matching vinyl I was lucky enough to be given a Toledo parcel shelf with a really decent crash roll (as no radio had ever been fitted to the car.
I carefully removed it and cleaned off the adhesive from the back, found that it was a good 2 inches shorter, the vinyl itself shrinks once removed from the backing foam it turns out, heating it gently with a heat gun restored the missing 2 inches but as soon as it was cold it would shrink back again.
Today I glued it with contact adhesive to the one in the car (after removing the radio). Carefully inching it on whilst heating it from the hot air gun soon had it in place. But bugger it
I dripped a blob of Evo Stick onto the passenger seat - does anyone know what removes it?
So all done;

Could I get the last screw into the bracket that holds the radio/8 track combo in place? After dropping the screw what seemed like a thousand times I asked my wife if she could try with her dainty little slender fingers and she had it in with a minute!!


