RUK - Project Recommission 1972 'Dolomite' Auto

Restoring your car? Tell us about it here!
Message
Author
Carledo
TDC Shropshire Area Organiser
Posts: 7242
Joined: Sun Aug 21, 2011 5:12 pm
Location: Highley, Shropshire

Re: RUK - Project Recommission 1972 'Dolomite' Auto

#196 Post by Carledo »

SprintMWU773V wrote:It's interesting that you've used seam sealer, they didn't bother from the factory I don't think. No wonder they rusted!

Looks great BTW.
The factory used seam sealer only on joints which would allow water into the passenger and boot areas if not sealed! And often didn't even do that very well!

Since we don't have formal bean counters (other than SWMBO or significant other) and ARE concerned with longevity, we can do better than the factory. It behooves all of us to think laterally and improve our cars wherever possible. I've said it before, but our cars (and NEARLY all others) were not built the BEST way, merely the cheapest!

Steve
'73 2 door Toledo with Vauxhall Carlton 2.0 8v engine (The Carledo)
'78 Sprint Auto with Vauxhall Omega 2.2 16v engine (The Dolomega)
'72 Triumph 1500FWD in Slate Grey, Now with RWD and Carledo powertrain!

Maverick Triumph, Servicing, Repairs, Electrical, Recomissioning, MOT prep, Trackerjack brake fitting service.
Apprentice served Triumph Specialist for 50 years. PM for more info or quotes.
User avatar
James467
TDC Sprint Registrar
Posts: 1938
Joined: Wed Jul 04, 2007 12:27 pm
Location: Hampshire

Re: RUK - Project Recommission 1972 'Dolomite' Auto

#197 Post by James467 »

Wise words there Steve! 8)

Windy today, so windy that I thought the marquee was going to blow away!!

Using the repair panel that Alun supplied me with I have been able to repair the front wing.

Cut way the rot on the front and to enable me to get exactly the same cut lines I offered up the repair panel to the wing and clamped it off.

Image

Then simply cut through both wings.

Image

Image

Hey presto we have the perfect cut line and everything lines up!

Image

Clean everything up ready for welding, this includes removing all of the old underseal.

Image

I then used intergrips to hold the repair piece on to the original wing. At this stage I had to install the eyebrow otherwise it's really difficult to get it in properly.

Image

Tack weld and remove intergrips

Image

Make sure everything lines up, at this point I did the upper valence repair as well.

Image

Image

Image

Then very carefully seam everything together

Image

Grind back welds

Image

Image

Seam seal and fit eyebrow properly

Image

Coat with some red oxide!

Image

Done, ready for the headlamp panels!! I test fitted the bumper to make sure it all lined up correctly.

Image

I just have some leftover bits to do on the sills, grinding back welds and seam sealing before fitting the wing bottoms. The headlamp panels need fitting and the windscreen surround needs some filling and sealing before the wing top can be refitted then everything can be painted.
User avatar
James467
TDC Sprint Registrar
Posts: 1938
Joined: Wed Jul 04, 2007 12:27 pm
Location: Hampshire

Re: RUK - Project Recommission 1972 'Dolomite' Auto

#198 Post by James467 »

I just want to say a huge thanks to Alun (xvivalve) for helping me out with all the repair panels and to Bruce (Triumph1300) for keeping me motivated! :D
User avatar
Triumph1300
TDC Member
Posts: 1500
Joined: Wed Sep 27, 2006 10:59 am
Location: Coventry

Re: RUK - Project Recommission 1972 'Dolomite' Auto

#199 Post by Triumph1300 »

You're the one doing the hard work James, as always, superb job there.

I look forward to seeing this revival in the metal (nearly said flesh!)
BWJ
1966 Triumph 1300 Royal Blue
1966 Triumph 2000 Blue
1965 Triumph 2000 black and rust
1967 BSA B40wd green
2018 Jaguar E pace 2018
NOBODY expects the Canley Inquisition!
User avatar
James467
TDC Sprint Registrar
Posts: 1938
Joined: Wed Jul 04, 2007 12:27 pm
Location: Hampshire

Re: RUK - Project Recommission 1972 'Dolomite' Auto

#200 Post by James467 »

Basically this weekends job was to get everything finished and painted.

Started by fitting the club headlamp panels.

Image

Image

I had to make some new supports as the old ones were completely shot

Image

The outer sections have had a tab welded to them then they have been screwed into the GRP club eyebrows.

Image

I then got some high build primer on the front end, I think it was Aussie primer, the can only worked upside down!! :lol:

Image

That was flatted back and stonechip applied to the lower valence.

Image

Image

I then painted the sills and undersealed all of my work under the car

Image

Once I had done that I was able to fab some new sill bottoms, the club does these but I didnt have time to get any.

Image

Image

I then got everything in two coats of red primer.

Image

Gave that 2 hours (as per the cans instructions) before applying three coats of honeysuckle top coat.

Image

Image

Not bad for a rattle can

Image

Image

Peeled off the masking and we are done!

Image

Once the paint had dried I can cut in the front wings with some 2000 wet and dry then polish it all up. It's presentable for a rattle can job to get it through an MOT, I will get the car resprayed properly but in the meantime I am just going to enjoy her.

Image

We very carefully fitted the bumper to stop any errant children running into the front of the car!

Image
User avatar
Tony Burd
TDC Member
Posts: 1248
Joined: Mon Jun 11, 2012 4:36 pm
Location: Andover Hants

Re: RUK - Project Recommission 1972 'Dolomite' Auto

#201 Post by Tony Burd »

Looks fantastic James you must be well chuffed.
Modified Dolomite Sprint MSO 662P VA485 1973 Mimosa Sprint
ImageImageImage
Image
User avatar
James467
TDC Sprint Registrar
Posts: 1938
Joined: Wed Jul 04, 2007 12:27 pm
Location: Hampshire

Re: RUK - Project Recommission 1972 'Dolomite' Auto

#202 Post by James467 »

Thanks Tony, I am!

I just wish I'd bought more rattle cans so I could do the whole of both wings!!
new to this
TDC Member
Posts: 1793
Joined: Mon Dec 12, 2016 9:53 pm
Location: Harrow Middlesex

Re: RUK - Project Recommission 1972 'Dolomite' Auto

#203 Post by new to this »

James

Nice work,cant believe how quick you work :D :D im still plodding along :D :D
Those metal clamp you use look good,where do you get them from,i use magnetic
You must be pleased

Dave
User avatar
Triumph1300
TDC Member
Posts: 1500
Joined: Wed Sep 27, 2006 10:59 am
Location: Coventry

Re: RUK - Project Recommission 1972 'Dolomite' Auto

#204 Post by Triumph1300 »

Looking very good James, must be giving you a great feeling of satisfaction.
BWJ
1966 Triumph 1300 Royal Blue
1966 Triumph 2000 Blue
1965 Triumph 2000 black and rust
1967 BSA B40wd green
2018 Jaguar E pace 2018
NOBODY expects the Canley Inquisition!
User avatar
James467
TDC Sprint Registrar
Posts: 1938
Joined: Wed Jul 04, 2007 12:27 pm
Location: Hampshire

Re: RUK - Project Recommission 1972 'Dolomite' Auto

#205 Post by James467 »

Chuffed to bits!! Even my wife is impressed! :D

Dave, these are the metal clamps, they're called intergrips. They are superb, I highly recommend them!

http://www.frost.co.uk/auto-bodywork-we ... lamps.html
User avatar
James467
TDC Sprint Registrar
Posts: 1938
Joined: Wed Jul 04, 2007 12:27 pm
Location: Hampshire

Re: RUK - Project Recommission 1972 'Dolomite' Auto

#206 Post by James467 »

Just ordering some tyres.

Toyo Nano Energy
Dunlop Street Response
Conti Eco Contact

Hmmmmm?
Carledo
TDC Shropshire Area Organiser
Posts: 7242
Joined: Sun Aug 21, 2011 5:12 pm
Location: Highley, Shropshire

Re: RUK - Project Recommission 1972 'Dolomite' Auto

#207 Post by Carledo »

Personally I wouldn't use Dunlop if you paid me, I still remember the infamous SP4! I don't know enough about Conti to comment, so my vote goes to Toyo (aided by the Proxes I have on the Carledo which handle well and seem to be lasting reasonably too)

Steve

PS, great work as always, but I was surprised you welded the headlamp panels in when some tapper type fixings would have let you remove the entire units easily to clean behind them and stop the rot getting a hold again. Much easier for painting properly too!
'73 2 door Toledo with Vauxhall Carlton 2.0 8v engine (The Carledo)
'78 Sprint Auto with Vauxhall Omega 2.2 16v engine (The Dolomega)
'72 Triumph 1500FWD in Slate Grey, Now with RWD and Carledo powertrain!

Maverick Triumph, Servicing, Repairs, Electrical, Recomissioning, MOT prep, Trackerjack brake fitting service.
Apprentice served Triumph Specialist for 50 years. PM for more info or quotes.
User avatar
geeksteve
TDC Member
Posts: 713
Joined: Mon Nov 07, 2011 9:57 am
Location: Dorset
Contact:

Re: RUK - Project Recommission 1972 'Dolomite' Auto

#208 Post by geeksteve »

Envious of how good that paint job looks (especially if it was rattle cans)!
User avatar
James467
TDC Sprint Registrar
Posts: 1938
Joined: Wed Jul 04, 2007 12:27 pm
Location: Hampshire

Re: RUK - Project Recommission 1972 'Dolomite' Auto

#209 Post by James467 »

Steve you're not going to be pleased with me, I went for the Dunlops. But you can have the first 'I told you so' when I complain about them! :D
PS, great work as always, but I was surprised you welded the headlamp panels in when some tapper type fixings would have let you remove the entire units easily to clean behind them and stop the rot getting a hold again. Much easier for painting properly too!
Thanks, to be honest I was just concentrating on getting them back on the car and it didn't even cross my mind to do that, they're pretty easy to remove so maybe I'll get another set and do that at a later date.
Envious of how good that paint job looks (especially if it was rattle cans)!
Thanks, yep it was using rattle cans, not the Halfords variety though, decent quality ones from Automotive Paint Supplies in Aldershot. They have that fan nozzle on them.
User avatar
James467
TDC Sprint Registrar
Posts: 1938
Joined: Wed Jul 04, 2007 12:27 pm
Location: Hampshire

Re: RUK - Project Recommission 1972 'Dolomite' Auto

#210 Post by James467 »

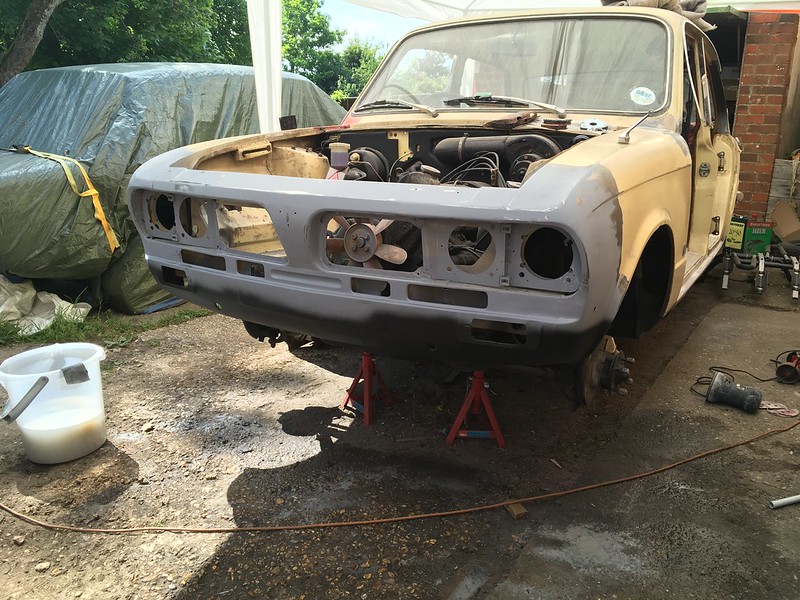
Things have come a long way in the last couple of days.

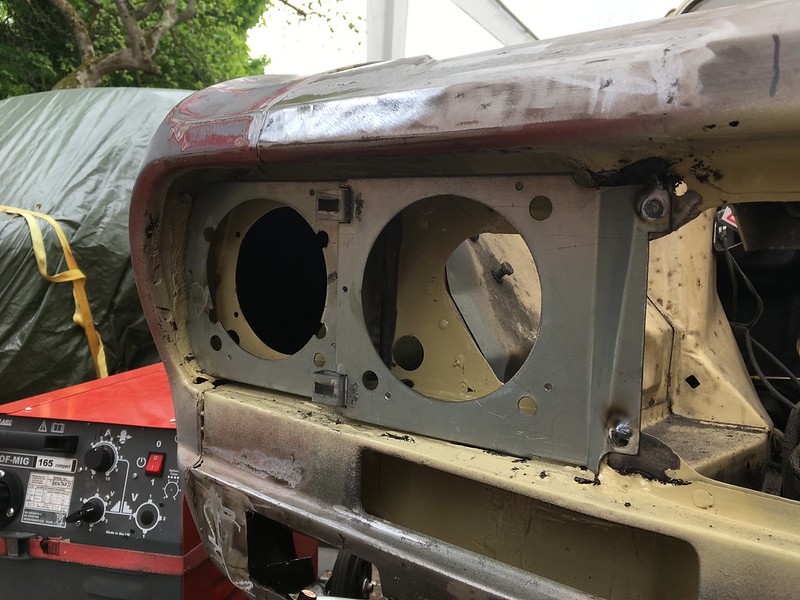
I reassembled the front end starting with the good old headlamp bowl seals.

What you are seeing here are some prototype seal retaining plates being tested, the seal is just cut from 2mm sheet rubber.

Image

Image

I blocked off the adjuster holes as I'm using plastic bowls.

Image

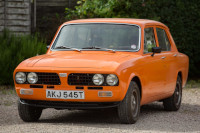
Headlamps fitted, sealed beams for now. Halogen conversion is on the cards later on.

Image

Trims fitted as well.

Image

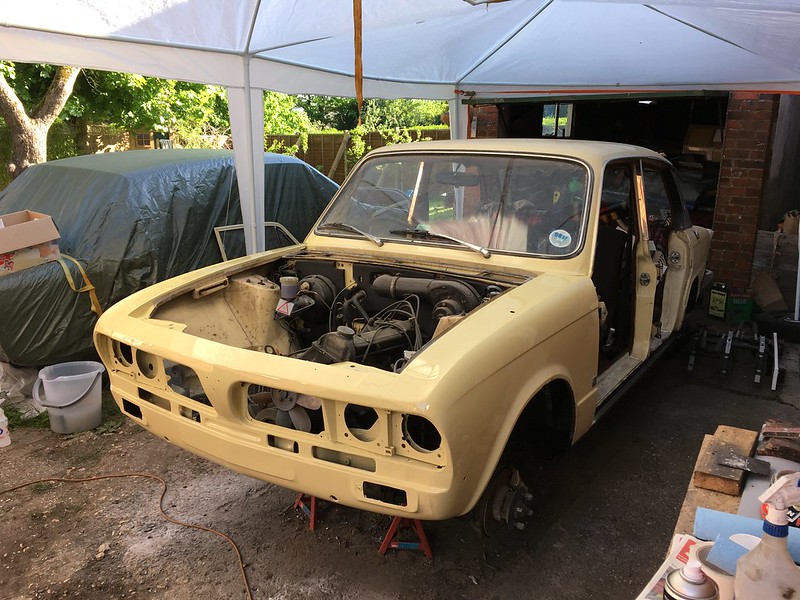
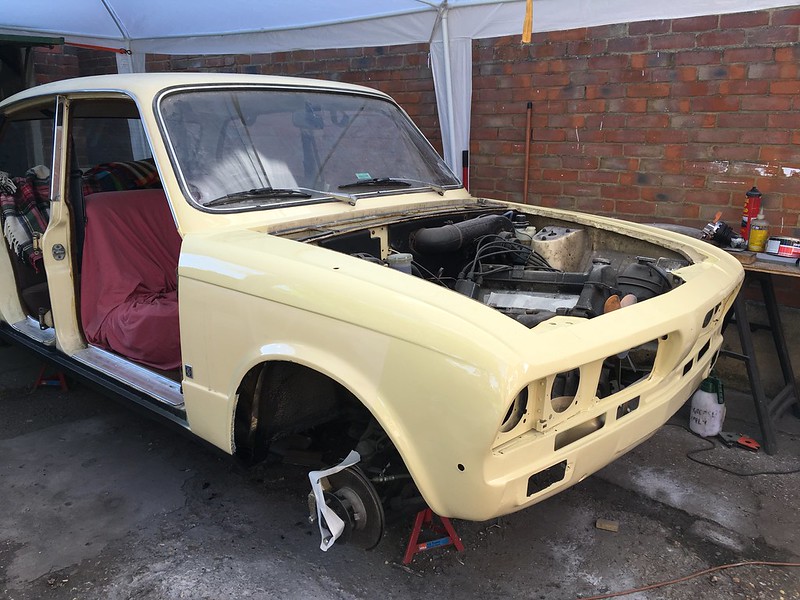
Fitted the grille, indicator and sidelights plus the number plate and badges to complete the front end then got on with wiring up everything. As you would expect with a 40 year old car the wiring wasnt playing ball. I remember Mark using the dip the ends in jewellery cleaner to clean them trick so I tried that and everything sprang into life!

Image

Once the electrics were all conneceted back up and working I reassembled the rad and reinstalled.

Image

Oh and the wing mirrors!

Image

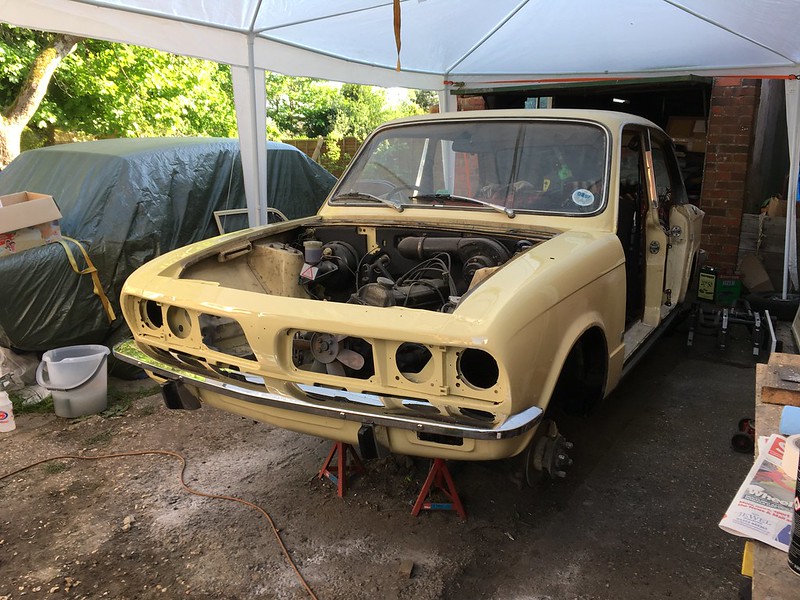
Fitted a replacement rear bumper. Have spoken to a chromer and the old one is saveable, so I'll have both bumpers rechromed at a later date, probably when I have the car sprayed.

Image

Gave the wheels a coat of hammerite to tart them up a bit!

Image

Before having a nice new set of Dunlop StreetResponses fitted this morning.

Image

Image

Today I finished off reassembling the engine with the view of getting her started. Carbs went back on, new rad hoses fitted etc...

Image

Started to fill the cooling system then... disaster! Coolant was pouring out of the join between the inlet manifold and head. Turns out the gasket supplied by Rimmers was to thick and the o ring wasn't sealing properly.

Image

Pretty easy to see the difference between a Rimmers one and a NOS one.

Image

NOS Set on and everything sealed fine with no leaks, new stat fitted.

Image

Well apart from a slight weep from the water pump, I'll keep an eye on that.

Image

Looking good and ready to go

Image

As you'd expect once the float chambers had filled she started on the button. I hadn't touched anything so why wouldn't she! :wink:

I followed the workshop manuals guide to filling the colling system and it seemed to work fine for me, up to temp and everything was fine. I checked the levels when cold and they were fine.

Image

Image

After that I just went around the car and buttoned up all of the loose ends, replacing a couple of blown bulbs, installing the new heater cable, fitting the bumper properly etc...

All that's left to do now is to fit the doors properly, the bonnet and bleed the brakes before a tuneup and align the headlamps.

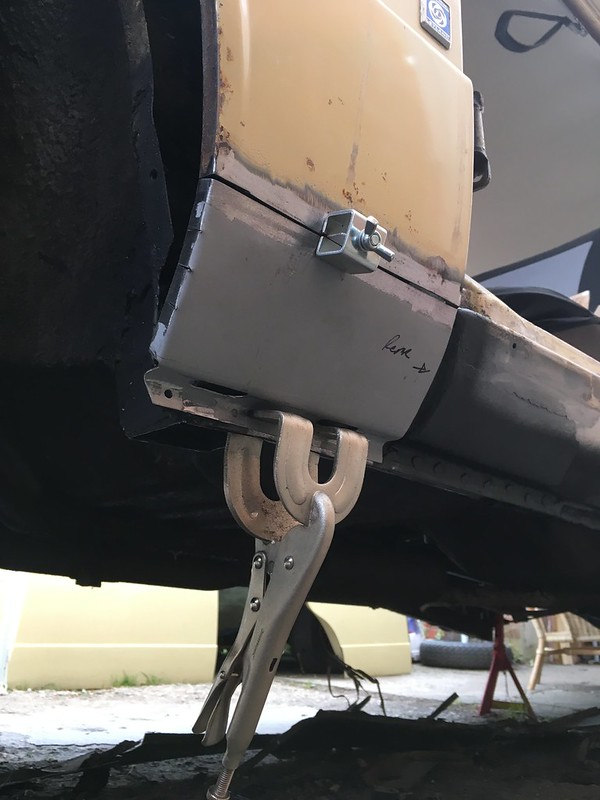
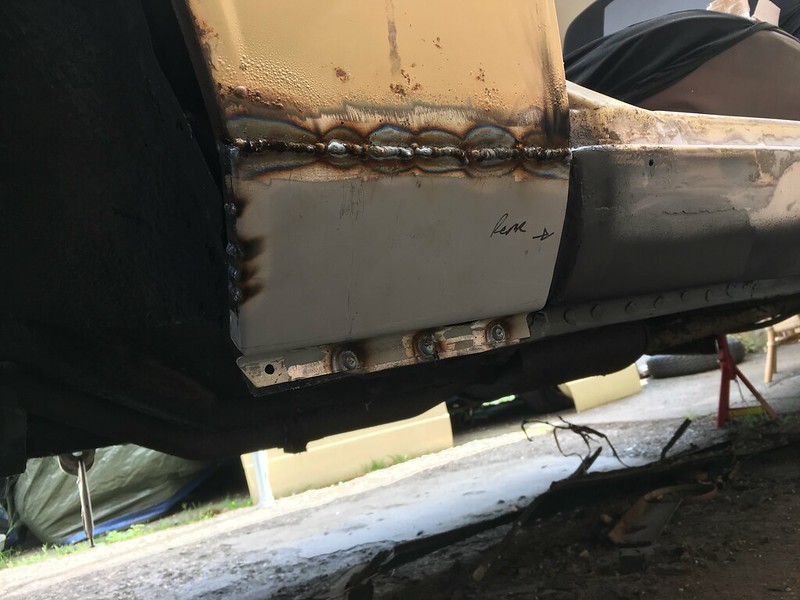
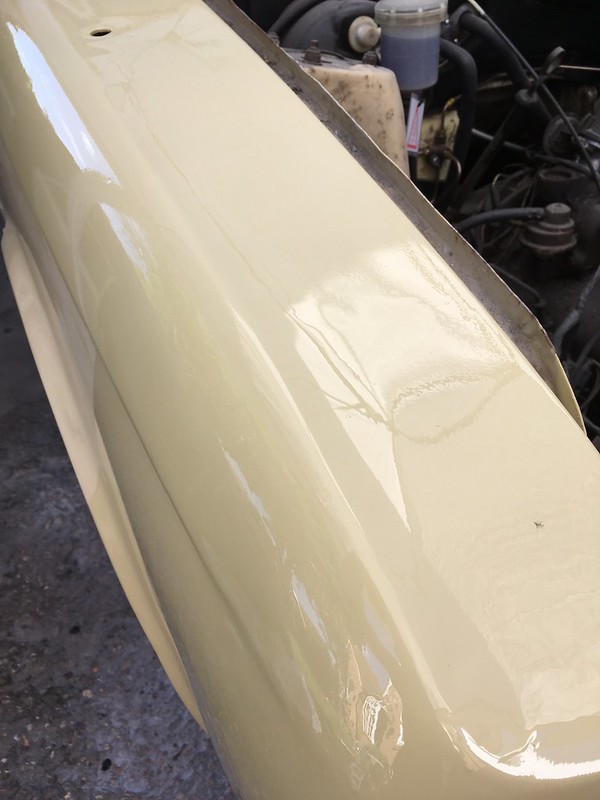
That's until I noticed this can of worms....

Image

I poked it with a screwdriver and it doesn't seem rusty, it's coated in oil! :lol:

I have a bush in the workshop so I should be able to replace that tomorrow.

Does anyone have any tips on an initial headlamp alignment I suspect they'll be out due to new bowls being fitted.
Post Reply