Page 17 of 64
Re: Newbie, I know, the car deserved better.
Posted: Sun Nov 22, 2015 8:24 am
by Mahesh
Thanks to Steve (Carledo) I had a replacement for my worn out impeller, and couldn't resist giving it a clean,
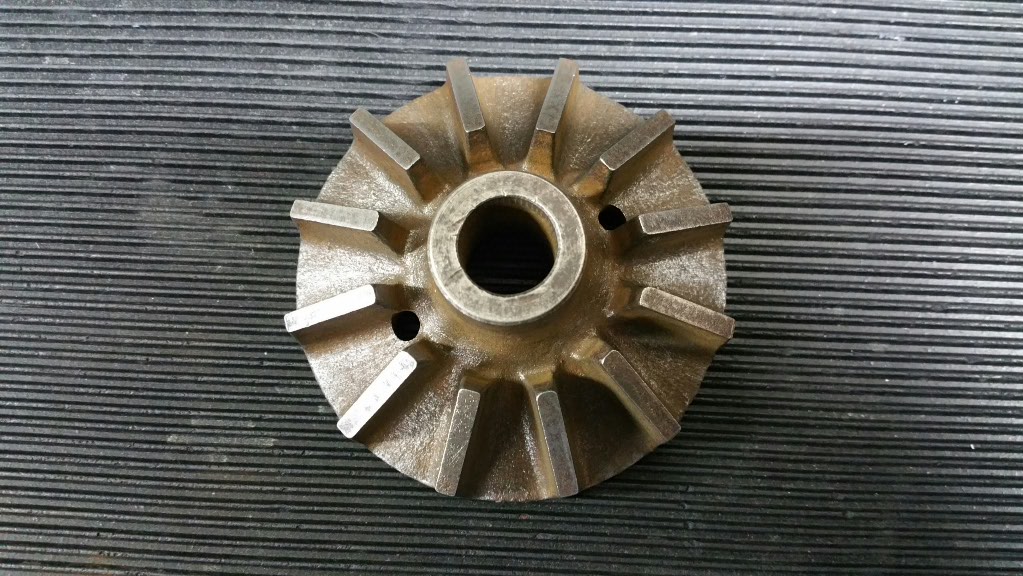
- 2015-11-21 20.11.02.jpg (179.56 KiB) Viewed 859 times
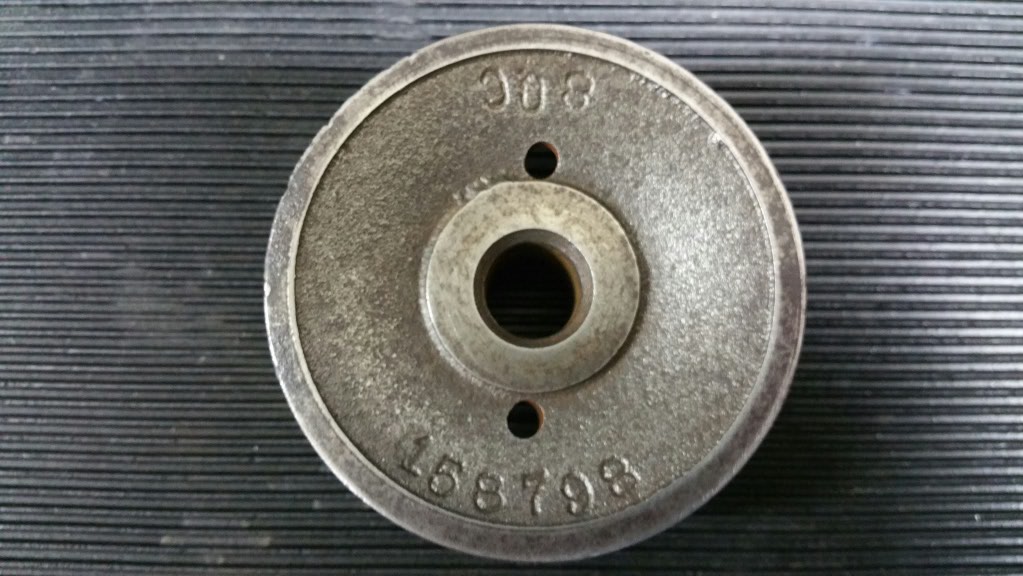
- 2015-11-21 20.11.17.jpg (118.66 KiB) Viewed 859 times
Re: Newbie, I know, the car deserved better.
Posted: Sun Nov 22, 2015 8:40 am
by Mahesh
Anyways, back to this morning, with trembling hands I checked to gap from the brass cage to block all round, and couldn't insert the feeler gague anywhere, so happy with that.
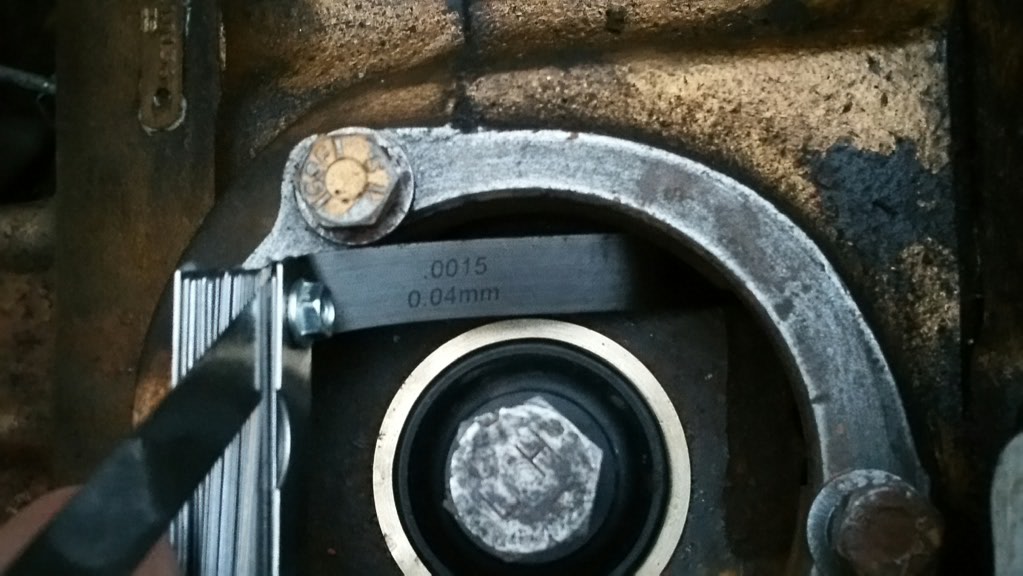
- 2015-11-22 07.55.41.jpg (101.38 KiB) Viewed 859 times
Then put the impeller in, pushed nearly all in by hand, as the car was freezing and the impeller had been indoors.
Was going to put the nut on and tighten down, the decided on wood and a hammer to softly tap down to shaft level.

- 2015-11-22 07.56.31.jpg (117.01 KiB) Viewed 859 times
Then put some copper grease into the shaft threads and tighten the bolt down. The impeller is firm, no play other than a few mm from the shaft.

- 2015-11-22 08.20.03.jpg (136.68 KiB) Viewed 859 times
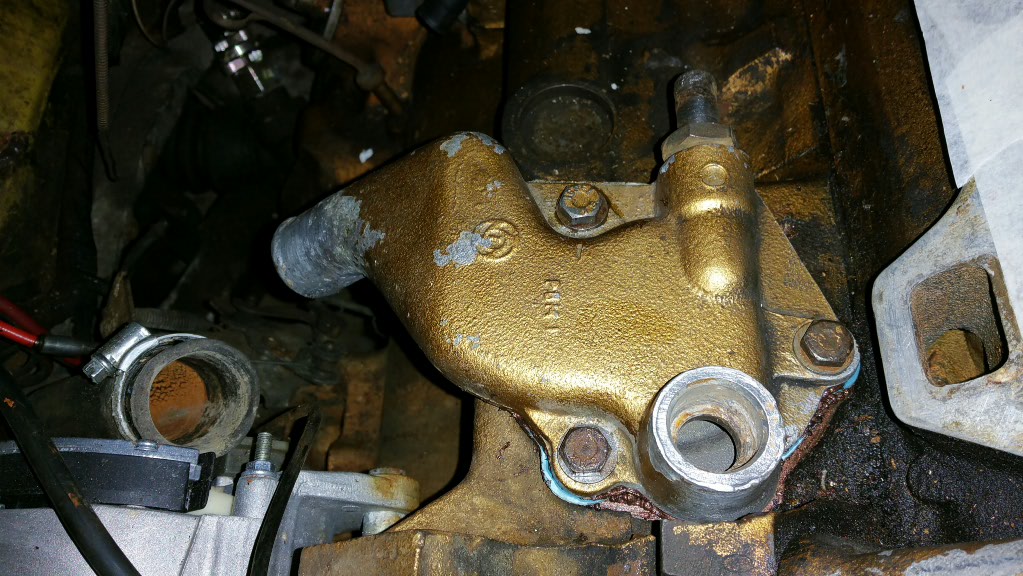
Finally, put the cover on and finger tightened the bolts, max feeler gague to go in was,
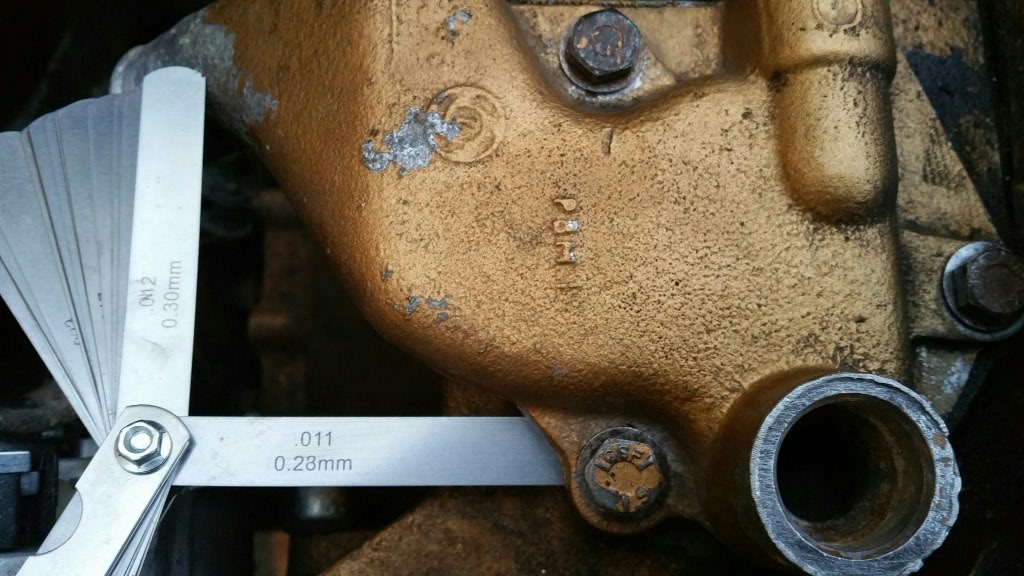
- 2015-11-22 08.20.36.jpg (131.59 KiB) Viewed 859 times
I put a smear of copperease on the top of the pump gradually increasing, till it hit the cover, looks like 2mm clearance?
I got four gaskets with my kit, the thinner ones are less than the gague, one is the same and the thickest (most likely) is the next one.
But it's too cold, has to be later.
Re: Newbie, I know, the car deserved better.
Posted: Sun Nov 22, 2015 8:57 am
by PollyB
These photos are good enough for a DollyHandbook. Better than a Haynes.
Re: Newbie, I know, the car deserved better.
Posted: Sun Nov 22, 2015 2:19 pm
by Karlos
Mahesh wrote:
I took a better picture of the seal, have a look Karlos, it had me stumped initially, my old was like two pieces of plastic with a sandwiched spring.
Now the pump and seal are in the block it looks good, I can see the graphite part of the top of the seal.
Re: Newbie, I know, the car deserved better.
Posted: Sun Nov 22, 2015 4:54 pm
by Mahesh
Put the pump cover on, smeared some copper grease sat the gasket in place and finger tightened all three bolts, then one by one brought them up to 10 lbs on the torque gague, followed by 20lbs gradually increasing each.
- 2015-11-22 16.52.04.jpg (175.21 KiB) Viewed 825 times
I'm confident there shouldbe no leaks, only find out at the end.
Re: Newbie, I know, the car deserved better.
Posted: Sun Nov 22, 2015 5:33 pm
by Jon Tilson
NOOOOOO!!!!! what did my wiki page say about using impact to force the impellor down?
I seriously hope the graphite ring has not cracked on you I really do.....They really are very brittle - like a pencil lead!
The whole point of my wiki post was to use the bolt to pull the impellor down on the shaft after the pump was located in the block.
Other than that more nice pics and the underside of the impellor did look pretty smooth.
For peace of mind I would take the impellor off again myself and be sure the graphite seal is good or you could find yourself with a sump
full of mayonaise. Ive been there which is why I wrote the article....
Sorry to seem negative. I'd hate this to go wrong after such a long saga...
Jonners
Re: Newbie, I know, the car deserved better.
Posted: Sun Nov 22, 2015 7:03 pm
by Mahesh
Thanks Jon,
I'll double check in the morning, it'll only take a minute or so to take the cover and impeller off to have a look.
Should be fine, very light taps through soft wood, but better to be on the safe side, especially as it's all still open.
Re: Newbie, I know, the car deserved better.
Posted: Sun Nov 22, 2015 7:25 pm
by tony g
How will you now grab the impeller now its in the block?
Tony
Re: Newbie, I know, the car deserved better.
Posted: Sun Nov 22, 2015 8:11 pm
by Mahesh
No problems Tony,
I'll take a loop of packaging strap twist it to make an infinity ring, and slip that under the impeller on both sides, the centre I'll pass a piece of wood and then lift. (Forklift available if need be

)
If muscle is insufficient, the wood can be used as a lever allowing the other hand to look after the impeller.
Just have to do carefully to make sure the impeller does not go flying, impellers are really bad at landing in one piece.
The pics in the morning will make more sense.
Re: Newbie, I know, the car deserved better.
Posted: Sun Nov 22, 2015 9:10 pm
by Jon Tilson
I hate to be annoying but I suspect that the whole pump may well come out with the impellor...
Don't be discouraged if thats the case. Just support the impellor across some vice jaws and drift the pump spindle out
with a suitable drift like a quarter drive socket extension.
You won't thank me if the seal is then okay - but better safe than sorry and a sump full of mayo really is the most depressing
thing imaginable after doing this job and thinking its all good...

You will thank me if the seal is cracked!
I hope the seal is okay - then you wont need a new one and it will be straightforward fitting it all back again.
Jonners
Re: Newbie, I know, the car deserved better.
Posted: Sun Nov 22, 2015 9:25 pm
by Mahesh
I enjoy these moments, you get to test if all the cleaning of the shaft will help in removal in the future.
The brass cage is in pretty tight, as is the bearing to the cage, and I have an idea or two as to how the impeller can be removed without pulling up the shaft, have to check in the morning.
Re: Newbie, I know, the car deserved better.
Posted: Sun Nov 22, 2015 10:46 pm
by tony g
Might be time for the hot air gun after all

Tony
Re: Newbie, I know, the car deserved better.
Posted: Mon Nov 23, 2015 8:07 am
by Mahesh
Got the packaging strap ready, opened the three cover bolts, cover came off smooth as silk.
Put the packaging strap under the impeller, twisted and same for the other side.
As I undone the impeller nut, the whole assembly complete with brass cage came out, what a touch, priceless.

- 2015-11-23 07.51.03.jpg (129.84 KiB) Viewed 763 times
Took the assembly indoors, gripped the flat of the shaft at the bottom in a vice, and undone the top nut, (clockwise) and left in about a third.
Suspended impeller over vice and rubber mallet ed the loose nut (gently) till the impeller was free.
Graphite seal is intact
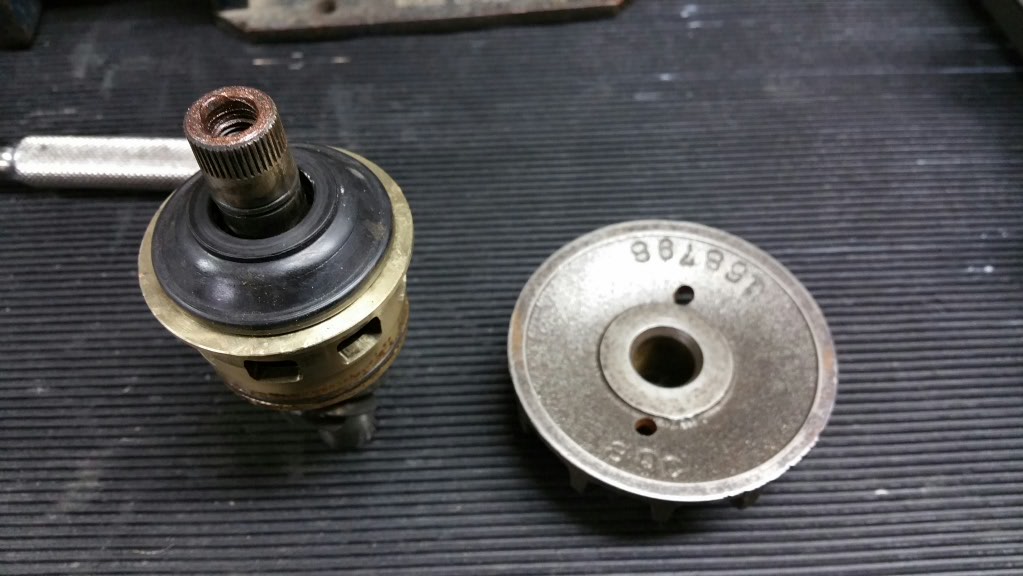
- 2015-11-23 07.51.21.jpg (96.64 KiB) Viewed 763 times
Inserted assy back into the car minus the seal and impeller, softly tapped the brass cage back, Checked cage to sump with feeler gague,
inserted graphite seal, pushed on impeller, and tightened down top nut and washer.
Cover torque tightened, all done.
Re: Newbie, I know, the car deserved better.
Posted: Mon Nov 23, 2015 10:37 am
by Jon Tilson
Result....
Peace of mind and no new bits needed.
How many gaskets did you need? I think the last few I've done have been one thick and one medium. Clearance is
important because if there isnt enough, you load the jackshaft skew gear and it wears pretty quickly. In the worst
case I had we had to replace the jackshaft and pump, which wasnt cheap.
So like you say...fat smear of copaslip atop bolt, gaskets in - nip up, remove cover and make sure no copaslip on
cover boss. You can also do something similar with a bit of bluetack or "plastigauge" if you can find any, but that's
a bit overkill....
Good work...
20% bluecol solution and some de-scaled water (tightwad tip: I used freezer defrost melted ice last time! but the local work air con unit or a dehumidifier does the job or you can buy de-ionised water if you are flush) and you will be away....
Jonners
Re: Newbie, I know, the car deserved better.
Posted: Mon Nov 23, 2015 12:48 pm
by Toledo Man
I think he will need a bit more than 20% antifreeze Jonners. When I filled the cooling system on the 1850, I used ⅓ antifreeze which is just over 30%. I know 50% is too much even with the temperatures dropping below freezing.
You got lucky with the graphite seal Mahesh. Phew!