Mark
When you have adjusted the ride height to your desired height - just nip those locknuts together dont over tighten them or you will never get them undo.
Paul
Operation Orange - 1980 Sprint restoration
-
Flyfisherman

- Guest contributor

- Posts: 980
- Joined: Sat Sep 04, 2010 10:42 am

-
SprintMWU773V

- TDC Staffs Area Organiser
- Posts: 5429
- Joined: Wed Oct 18, 2006 2:08 pm
- Location: The Old Asylum
Re: Operation Orange - 1980 Sprint restoration
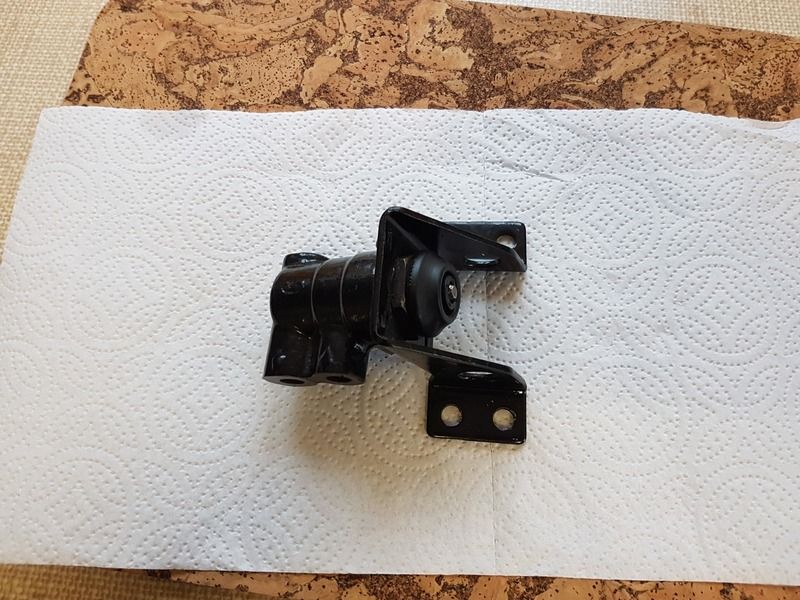
Just a little update following discussions on the Dolomite Related page to do with bushes for your Load Sensing Valve.
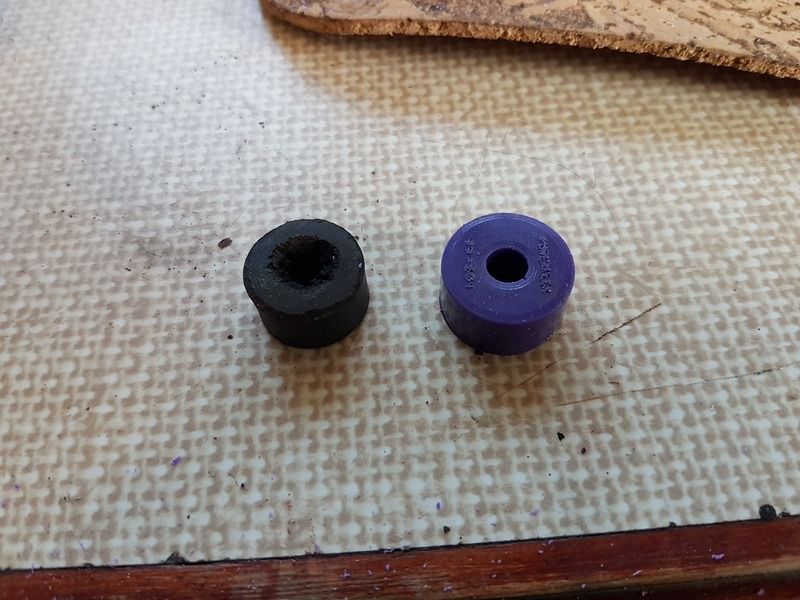
The little arm which operates the valve has 2 rubber bushes in it which if yours are like mine are past their best. You cannot buy the bushes new so I needed to improvise. I purchased some 'Universal Washers' from Powerflex, part number PF99-201. As you can see they are very similar in size to the original rubber ones.
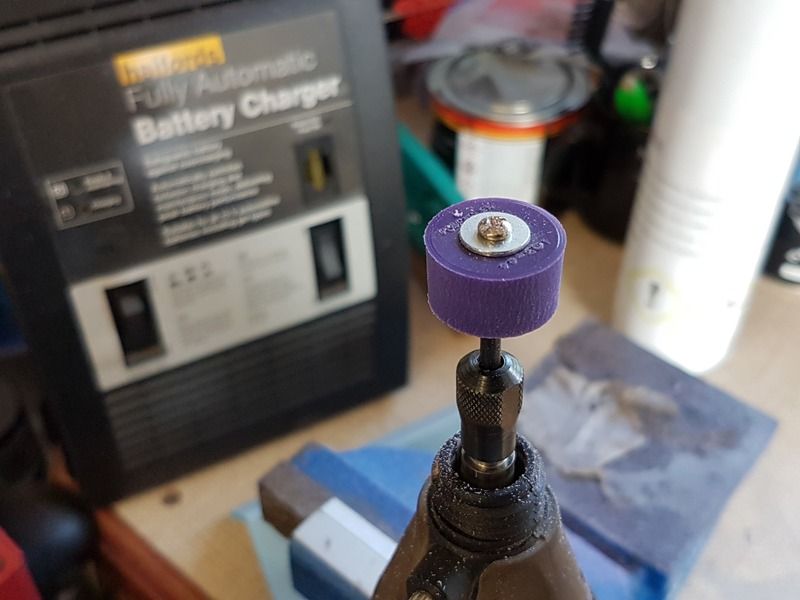
However they were slightly too big so I attached one to the drum sander mandrel of my Dremel and mounted it in the vice.
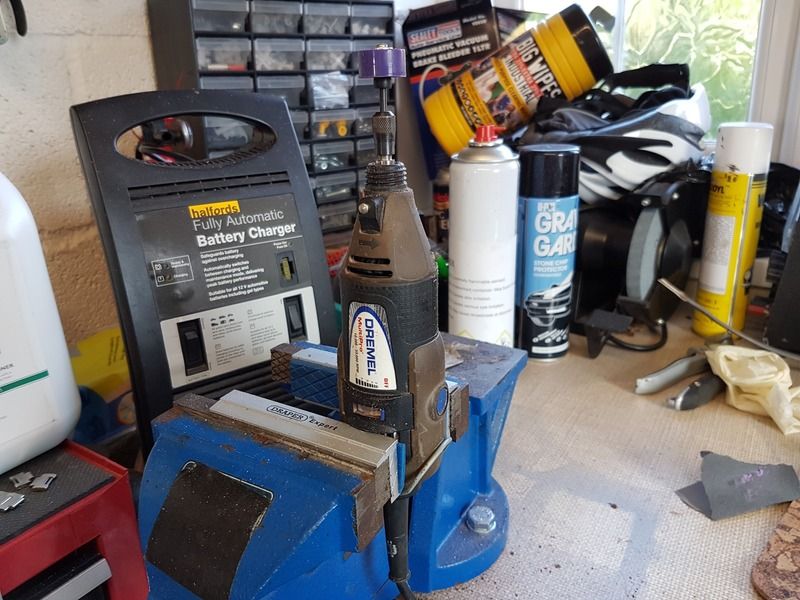
Then using a sharp chisel I used the Dremel like a lathe and skimmed off about 1.5mm of material, sufficient to make it possible to fit, whilst still being quite tight and secure.
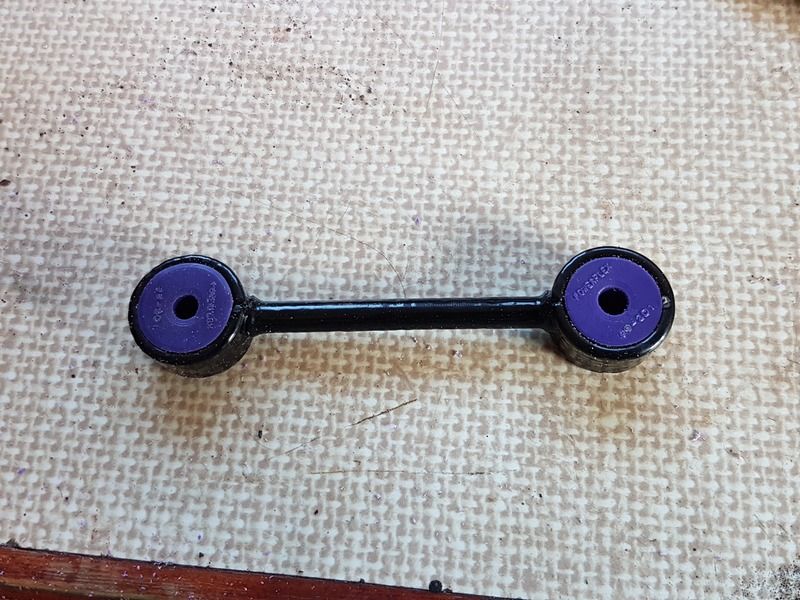
As you can see they fit OK, cost was just under £10 via Amazon.

Last edited by SprintMWU773V on Wed Jul 26, 2017 2:25 pm, edited 1 time in total.
Mark
1961 Chevrolet Corvair Greenbrier Sportswagon
1980 Dolomite Sprint project using brand new shell
2009 Mazda MX5 2.0 Sport
2018 Infiniti Q30
1961 Chevrolet Corvair Greenbrier Sportswagon
1980 Dolomite Sprint project using brand new shell
2009 Mazda MX5 2.0 Sport
2018 Infiniti Q30
-
Jon Tilson
- Guest contributor
- Posts: 11179
- Joined: Tue Oct 03, 2006 9:45 pm
- Location: Middlesex
Re: Operation Orange - 1980 Sprint restoration
Another very sweet idea....
Nice.
Jonners
Nice.
Jonners
Note from Admin: sadly Jon passed away in February 2018 but his humour and wealth of knowledge will be fondly remembered by all. RIP Jonners.
-
SprintMWU773V
- TDC Staffs Area Organiser
- Posts: 5429
- Joined: Wed Oct 18, 2006 2:08 pm
- Location: The Old Asylum
Re: Operation Orange - 1980 Sprint restoration
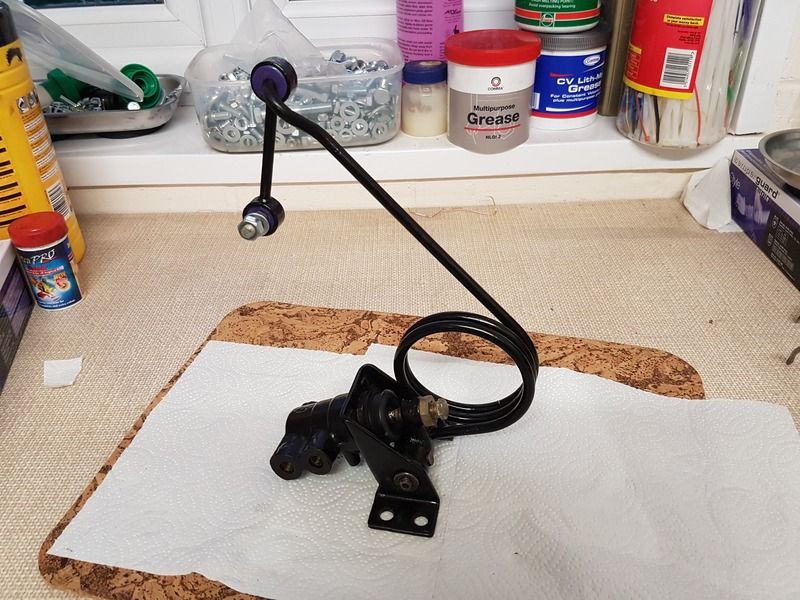
My seal kit arrived today so decided to spend this evening stripping my load sensing valve.
I had previously temporarily attached it to the car so whipped it off for a proper strip down. I actually bought it on Ebay several years ago as one that had been 'refurbished' but unsure whether that just meant it had been painted I stripped it down and gave it an inspection.
Clearly it has been apart before and it had been cleaned, though I don't think the seals had been replaced.
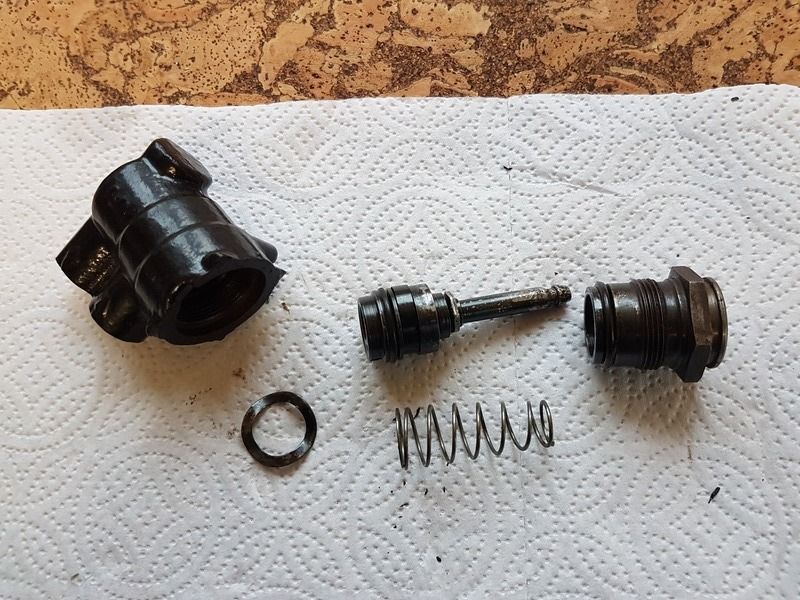
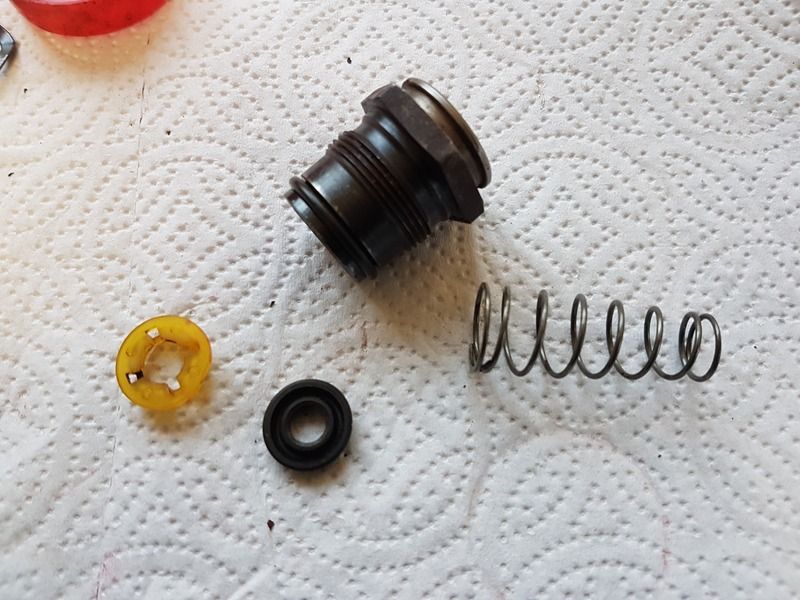
I carefully removed the old seal and O rings and replaced them before re-assembling using a little rubber grease.
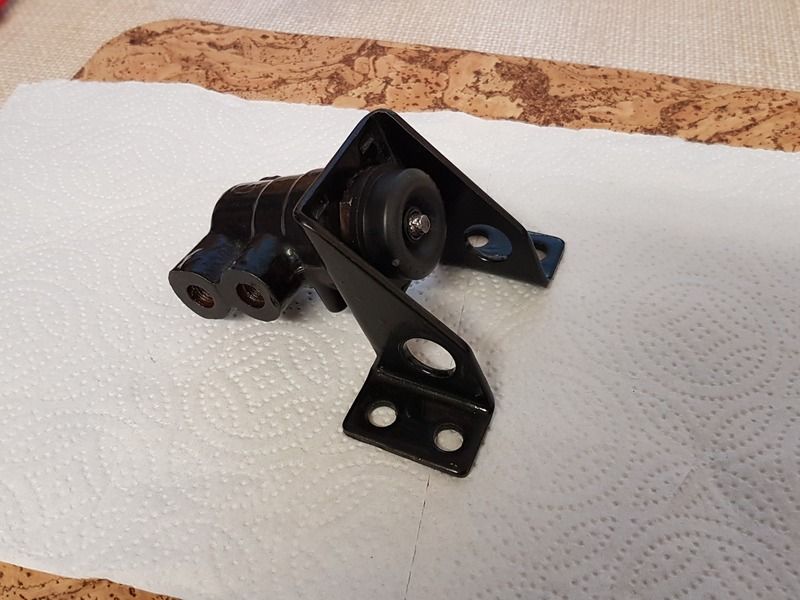
The unit was not supplied with the arm, pivot and coil thing so I used the ones from another valve. I'd already refurbished those so I joined the two together to make one new valve assembly. Not an especially difficult job to do but it all looks nice and clean, it's got new seals and O rings so it just needs to go back on the car now, that'll be a job for tomorrow.
I had previously temporarily attached it to the car so whipped it off for a proper strip down. I actually bought it on Ebay several years ago as one that had been 'refurbished' but unsure whether that just meant it had been painted I stripped it down and gave it an inspection.

Clearly it has been apart before and it had been cleaned, though I don't think the seals had been replaced.


I carefully removed the old seal and O rings and replaced them before re-assembling using a little rubber grease.

The unit was not supplied with the arm, pivot and coil thing so I used the ones from another valve. I'd already refurbished those so I joined the two together to make one new valve assembly. Not an especially difficult job to do but it all looks nice and clean, it's got new seals and O rings so it just needs to go back on the car now, that'll be a job for tomorrow.

Last edited by SprintMWU773V on Wed Jul 26, 2017 2:26 pm, edited 1 time in total.
Mark
1961 Chevrolet Corvair Greenbrier Sportswagon
1980 Dolomite Sprint project using brand new shell
2009 Mazda MX5 2.0 Sport
2018 Infiniti Q30
1961 Chevrolet Corvair Greenbrier Sportswagon
1980 Dolomite Sprint project using brand new shell
2009 Mazda MX5 2.0 Sport
2018 Infiniti Q30
-
SprintMWU773V
- TDC Staffs Area Organiser
- Posts: 5429
- Joined: Wed Oct 18, 2006 2:08 pm
- Location: The Old Asylum
Re: Operation Orange - 1980 Sprint restoration
Now I've fitted the handbrake cables and various other bits and bobs my attention has returned to the engine. A good couple of years ago I started work on the bottom end but before I get onto finishing that I decided to start looking at the head.
Whilst I would prefer to finish the bottom end before starting the top I'm concious that time will tick away and before you know it it'll be September and the top end will still be wrapped up. I work for a classic car & race team with extensive machining facilities and I'm hoping to get my head into the very long queue rather than leave it for ages. I therefore figured now was the time to start taking it apart.
The head was as it was when it came off the engine back in 2013 so it was pretty filthy but nice and oily so as to protect it.
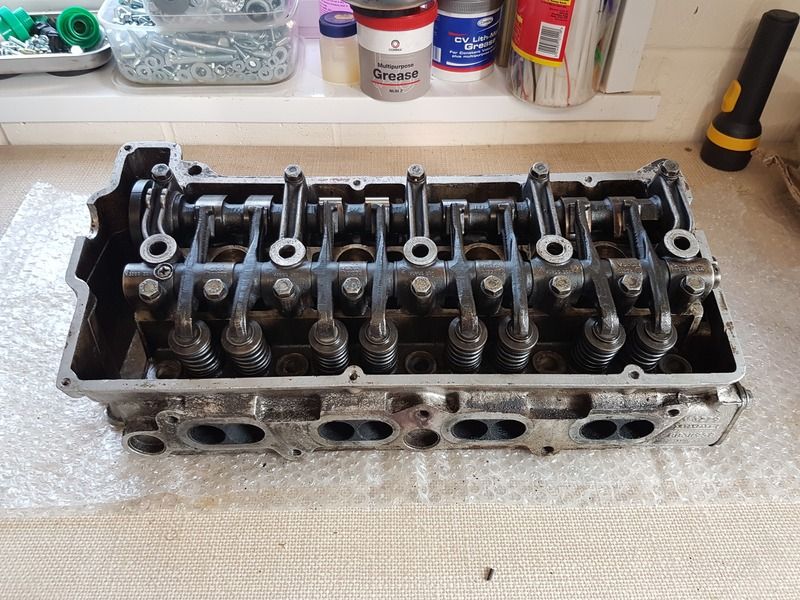
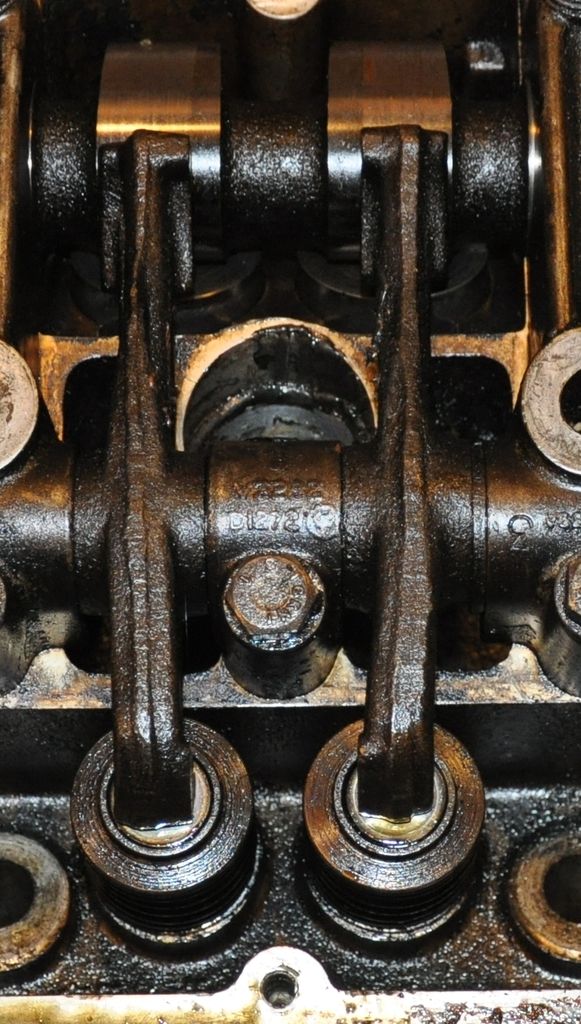
First job as to remove the rockers and cam, these were easy to undo and remove.
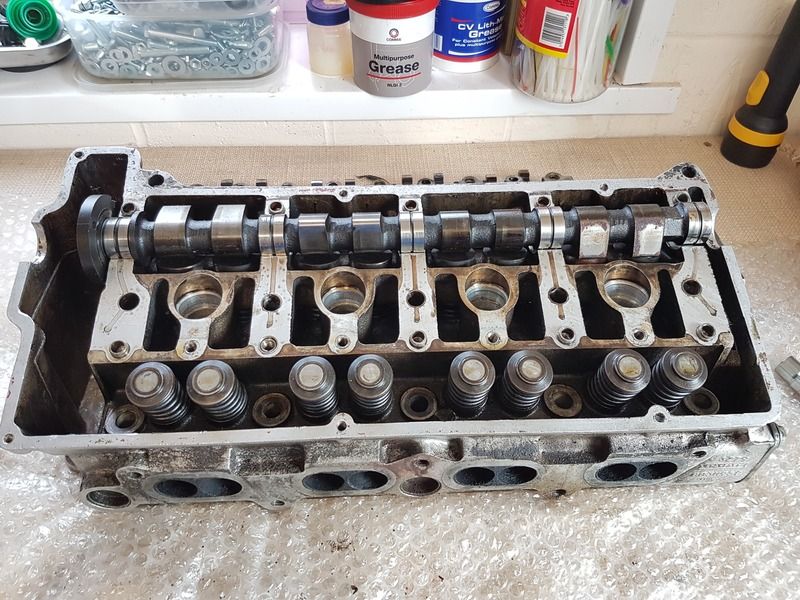
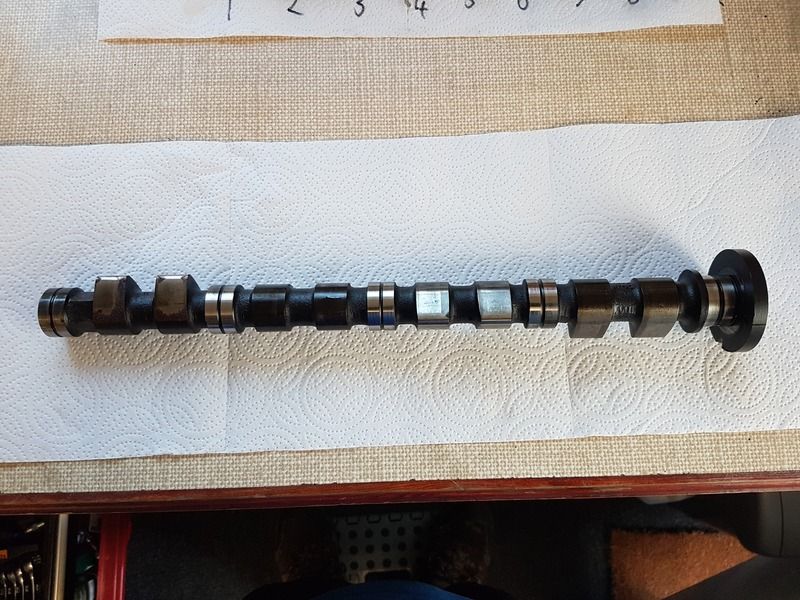
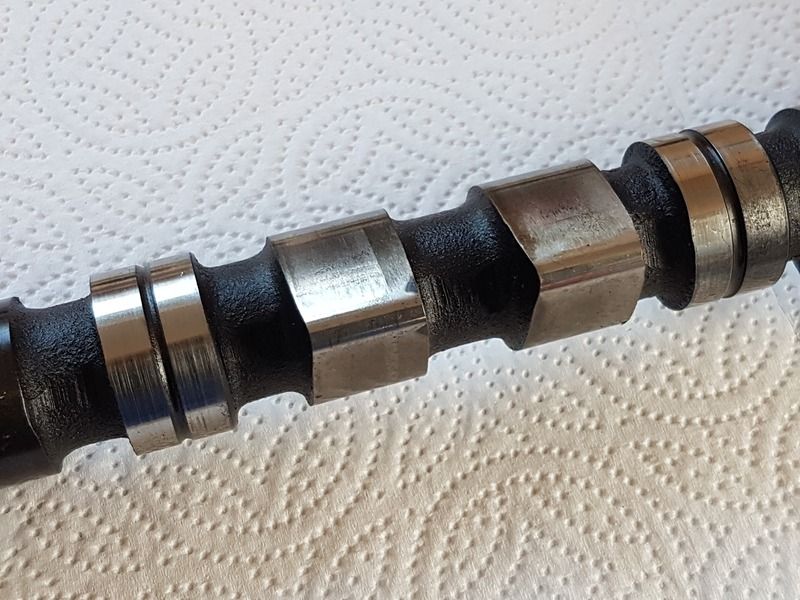
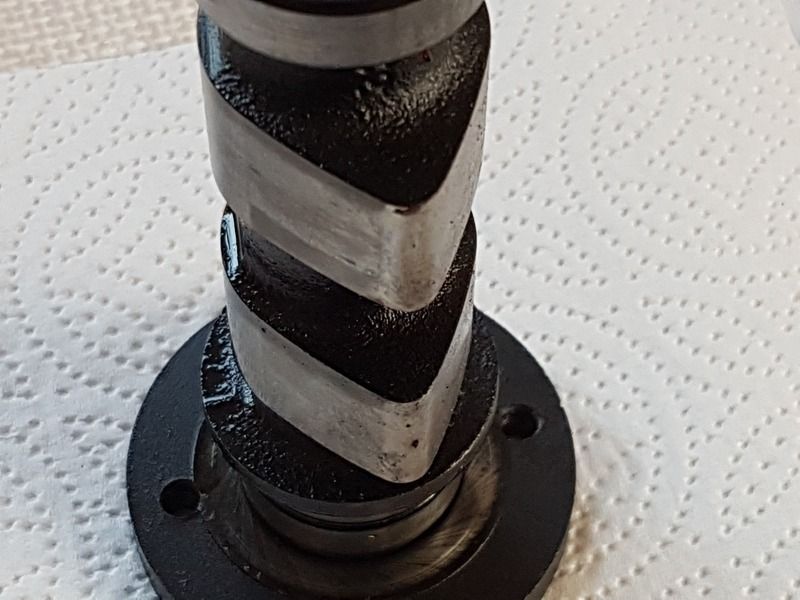
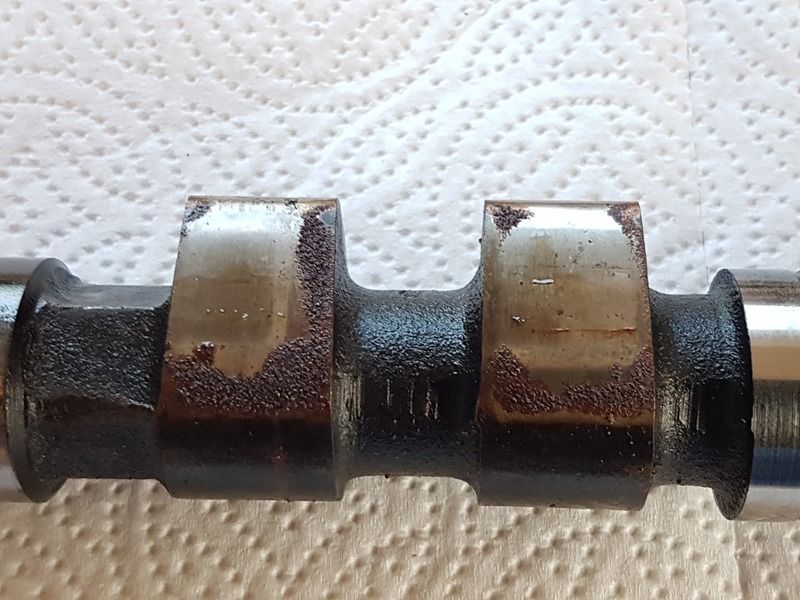
You can see some wear to the camshaft and what looks like some kind of oily muck. Only these lobes seem to be affected like this.
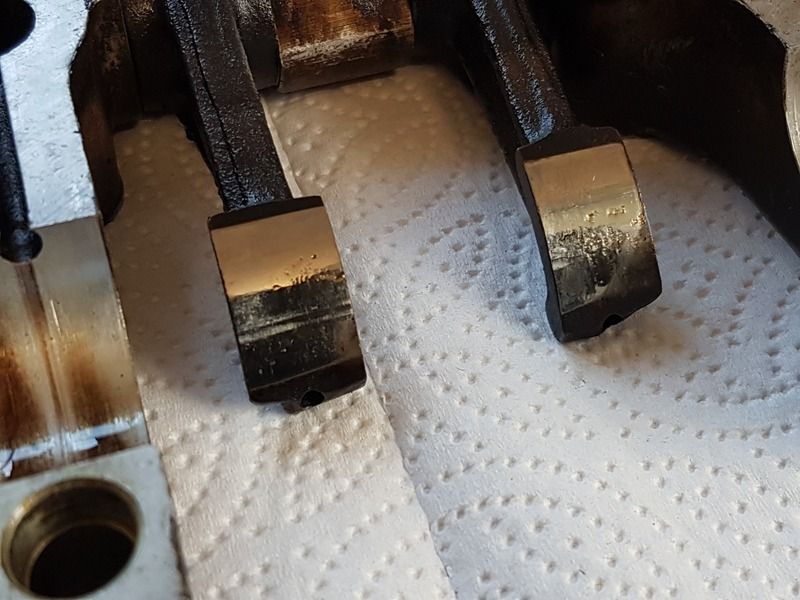
The rockers seem pretty good with no pitting on the tips nor any significant wear marks to be concerned about.
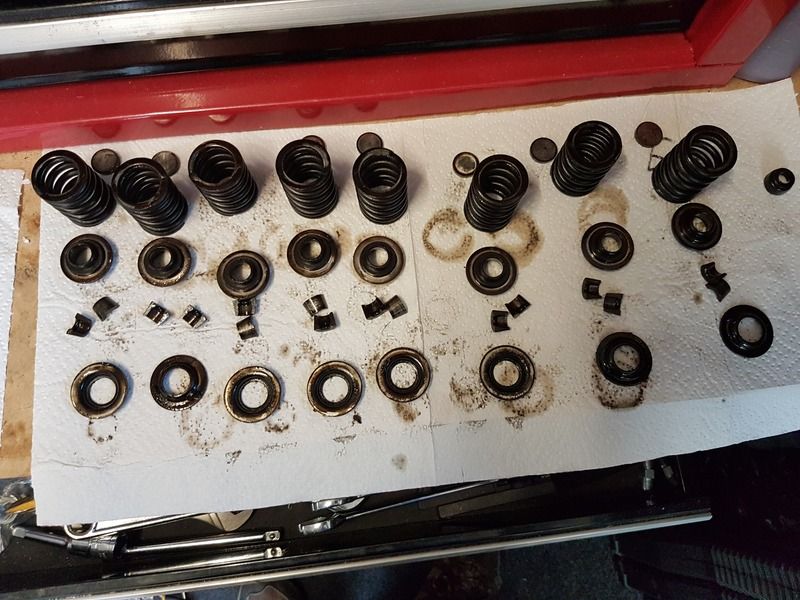
Next up, remove the valves. I have to say I cheated and knocked the collets off with a socket and hammer, it's quick and easy.
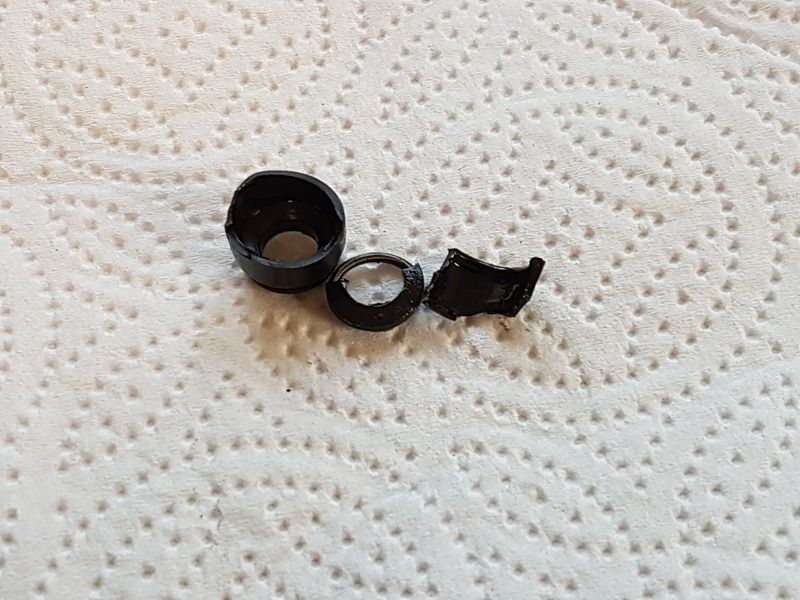
The valve stem oil seals on the exhaust side were very hard and broke up very easily.
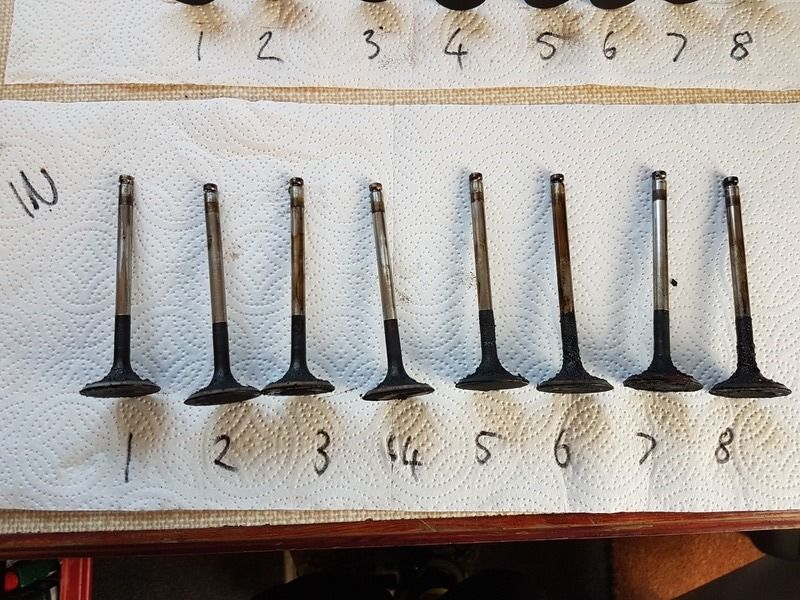
I've kept everything together in an order, though most bits will be replaced.
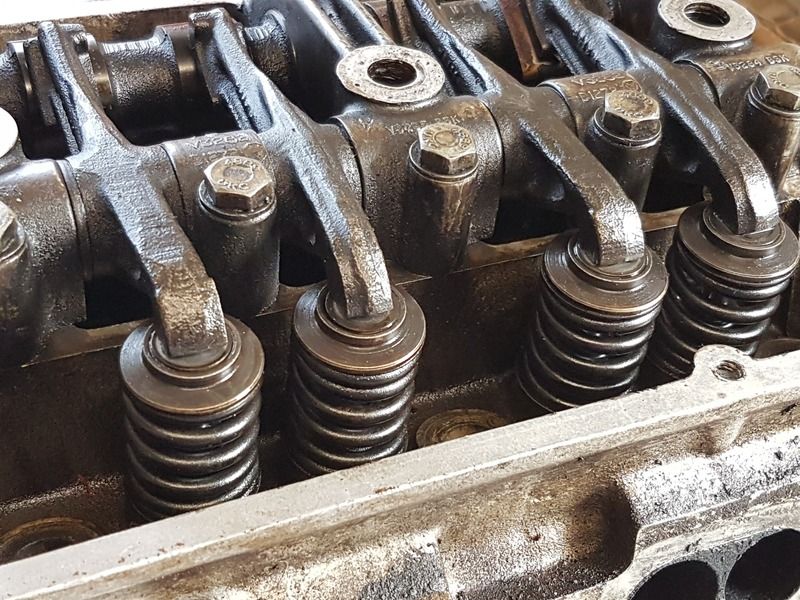
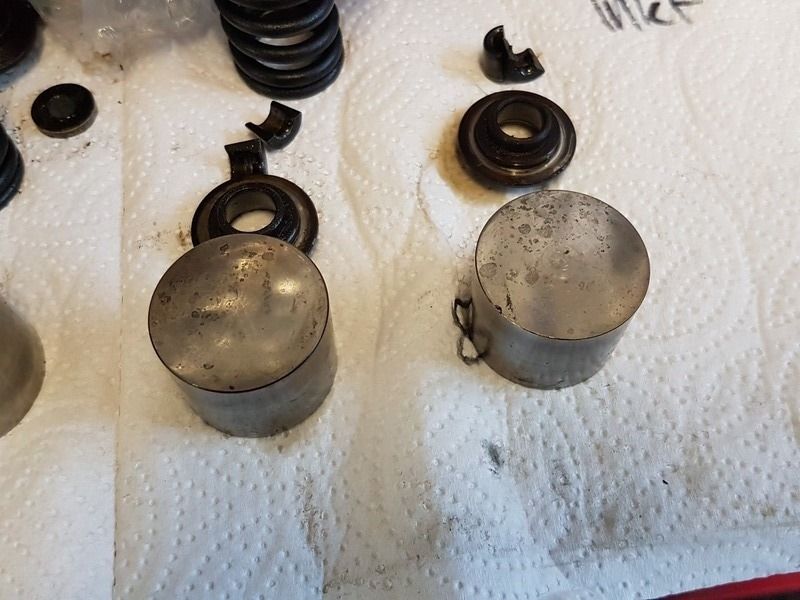
Cam followers have some wear but don't look too bad, though they do have some mottling to them
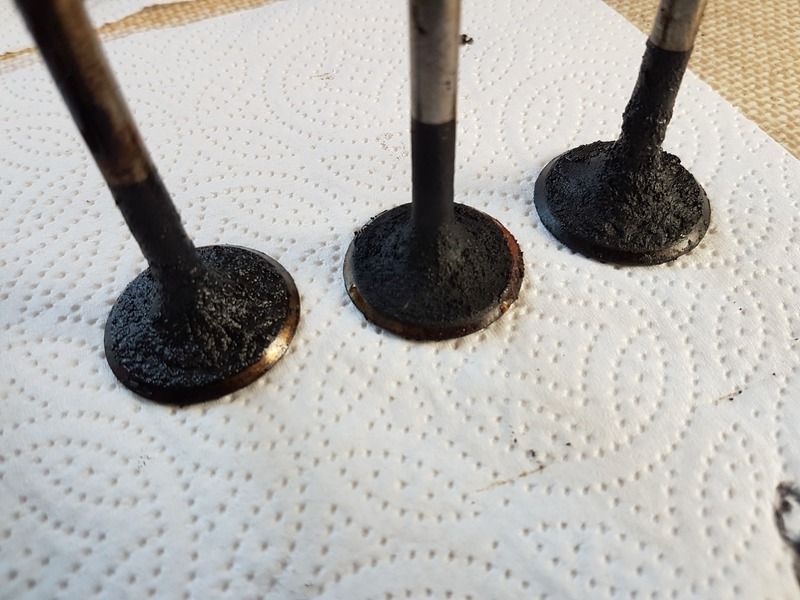
Valves are best described as filthy, here's the exhaust ones

And then the inlet
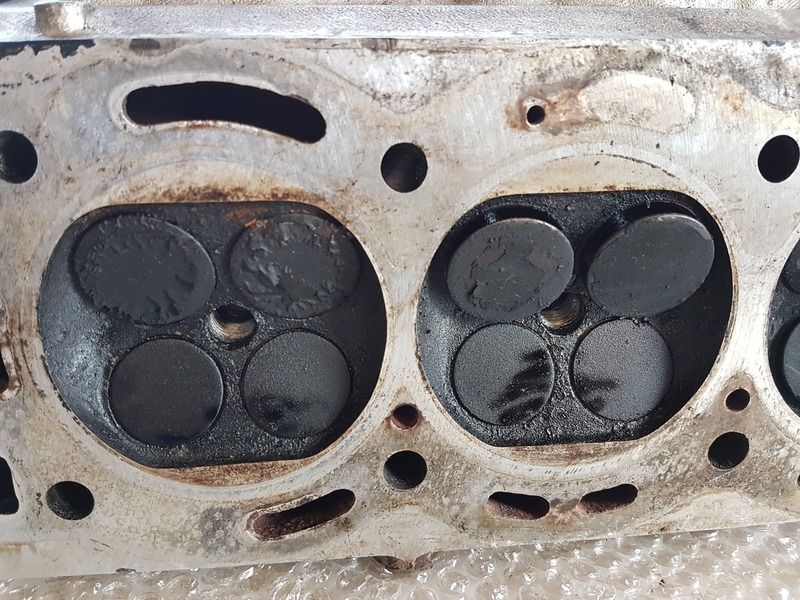
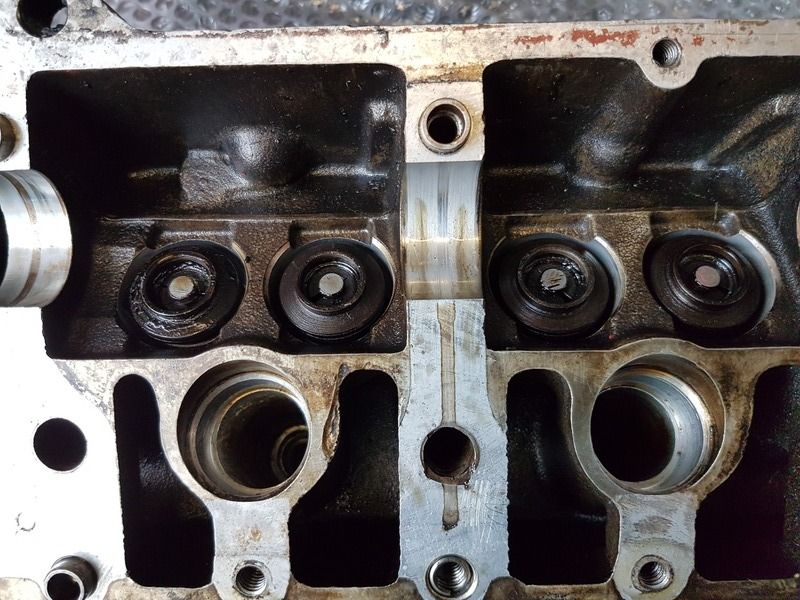
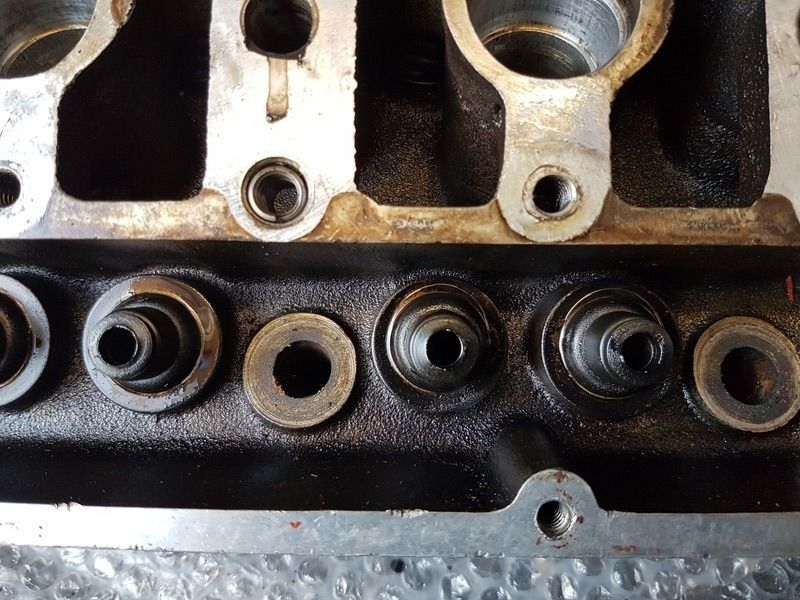
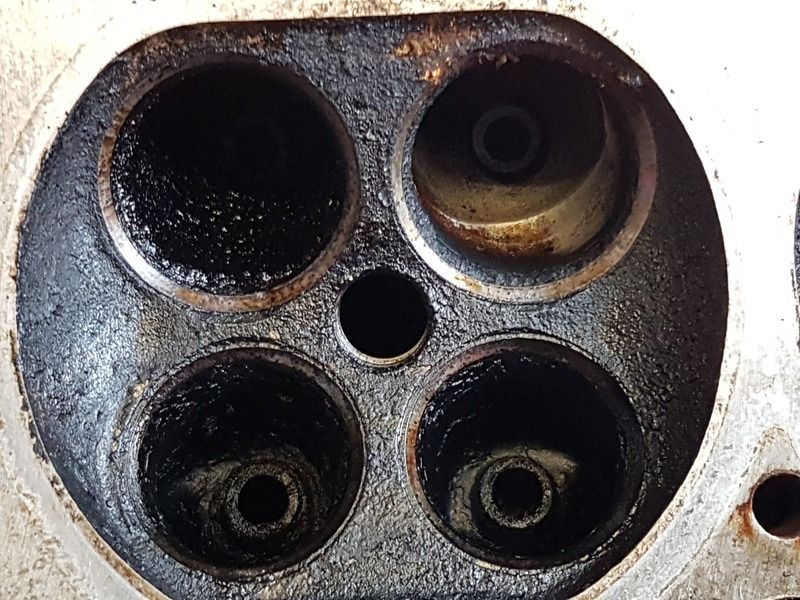
So that's everything off the head, here's some close ups of the bare head. Valve seats look good, nothing to be concerned about there I don't think. As you can see some ports are really gummed up.
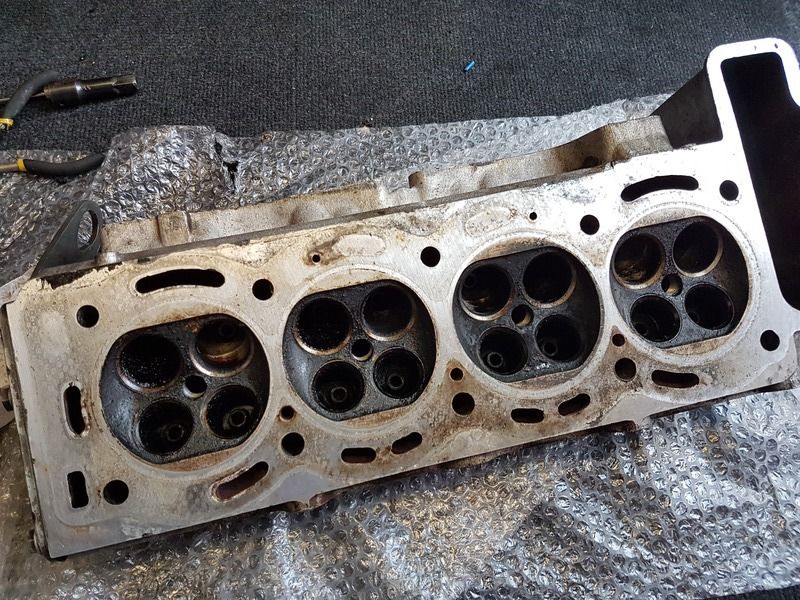
The next job will be to get the head cleaned and the valve guides checked. I did some wiggling of the valve stems and on the whole they didn't feel too bad but one or two did seem to have some play in them but I'll only know for sure when they are measured properly. If I need new guides then i'll also need to recut the seats, maybe even fit new ones but that will follow once I know more.
Whilst I would prefer to finish the bottom end before starting the top I'm concious that time will tick away and before you know it it'll be September and the top end will still be wrapped up. I work for a classic car & race team with extensive machining facilities and I'm hoping to get my head into the very long queue rather than leave it for ages. I therefore figured now was the time to start taking it apart.
The head was as it was when it came off the engine back in 2013 so it was pretty filthy but nice and oily so as to protect it.


First job as to remove the rockers and cam, these were easy to undo and remove.


You can see some wear to the camshaft and what looks like some kind of oily muck. Only these lobes seem to be affected like this.

The rockers seem pretty good with no pitting on the tips nor any significant wear marks to be concerned about.


Next up, remove the valves. I have to say I cheated and knocked the collets off with a socket and hammer, it's quick and easy.


The valve stem oil seals on the exhaust side were very hard and broke up very easily.

I've kept everything together in an order, though most bits will be replaced.

Cam followers have some wear but don't look too bad, though they do have some mottling to them

Valves are best described as filthy, here's the exhaust ones

And then the inlet


So that's everything off the head, here's some close ups of the bare head. Valve seats look good, nothing to be concerned about there I don't think. As you can see some ports are really gummed up.


The next job will be to get the head cleaned and the valve guides checked. I did some wiggling of the valve stems and on the whole they didn't feel too bad but one or two did seem to have some play in them but I'll only know for sure when they are measured properly. If I need new guides then i'll also need to recut the seats, maybe even fit new ones but that will follow once I know more.
Last edited by SprintMWU773V on Wed Jul 26, 2017 2:27 pm, edited 1 time in total.
Mark
1961 Chevrolet Corvair Greenbrier Sportswagon
1980 Dolomite Sprint project using brand new shell
2009 Mazda MX5 2.0 Sport
2018 Infiniti Q30
1961 Chevrolet Corvair Greenbrier Sportswagon
1980 Dolomite Sprint project using brand new shell
2009 Mazda MX5 2.0 Sport
2018 Infiniti Q30
-
SprintMWU773V
- TDC Staffs Area Organiser
- Posts: 5429
- Joined: Wed Oct 18, 2006 2:08 pm
- Location: The Old Asylum
Re: Operation Orange - 1980 Sprint restoration
Took the head into work to show the boss. His conclusion is the exhaust valve guides are OK but the inlets are a little marginal. Otherwise he thought the condition was good. I think if I'm going to do the job properly then it's worth changing the inlet guides but leave the exhaust ones alone.
Sadly we're far too busy to do the work here so will have to find someone else to do it! He suggested I try Peter Burgess who we use for some work we outsource so will make contact and see what he says. I know he's highly regarded in MG circles in particular, though whether he wants to work with a Triumph part I don't know.
Sadly we're far too busy to do the work here so will have to find someone else to do it! He suggested I try Peter Burgess who we use for some work we outsource so will make contact and see what he says. I know he's highly regarded in MG circles in particular, though whether he wants to work with a Triumph part I don't know.
Mark
1961 Chevrolet Corvair Greenbrier Sportswagon
1980 Dolomite Sprint project using brand new shell
2009 Mazda MX5 2.0 Sport
2018 Infiniti Q30
1961 Chevrolet Corvair Greenbrier Sportswagon
1980 Dolomite Sprint project using brand new shell
2009 Mazda MX5 2.0 Sport
2018 Infiniti Q30
-
new to this
- TDC Member
- Posts: 1792
- Joined: Mon Dec 12, 2016 9:53 pm
- Location: Harrow Middlesex
Re: Operation Orange - 1980 Sprint restoration
I know its all down to price,but seeing what you have done to the car so far,if it was me id get both inlet and exhaust guides changed,then its fit and forget 
Dave
Dave
Last edited by new to this on Fri Jun 02, 2017 10:05 pm, edited 1 time in total.
Re: Operation Orange - 1980 Sprint restoration
+1. Or at least chat with the prospective contractor and get their take on it, which you are probably planning on doing anyway.new to this wrote: ↑Fri Jun 02, 2017 6:53 pm I know its all down to price,but seeing what you have done to the car so far,ifit was me id get both inlet and exhaust guides changed,then its fit and forget
Dave
-
Jon Tilson
- Guest contributor
- Posts: 11179
- Joined: Tue Oct 03, 2006 9:45 pm
- Location: Middlesex
Re: Operation Orange - 1980 Sprint restoration
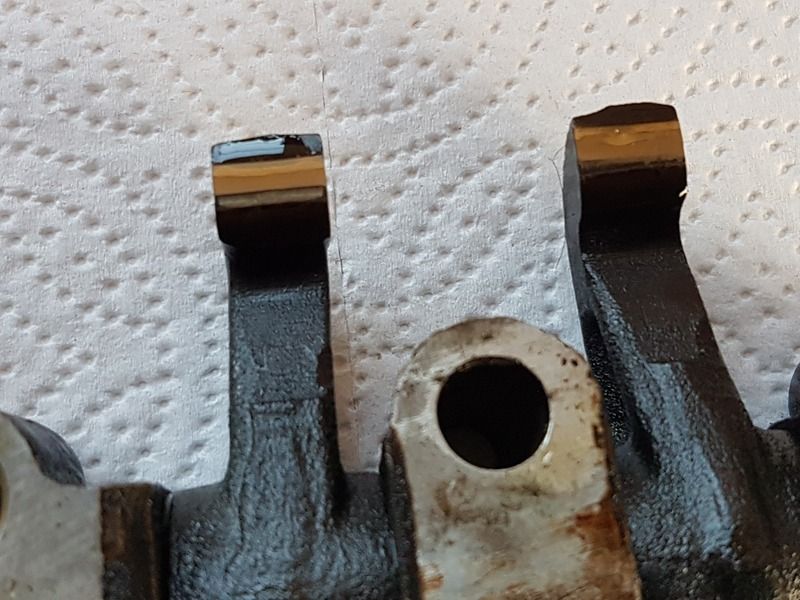
Sorry to rain on your parade but have a closer look at the cam end of your rocker fingers. Looks like the cam has worn through the hardening on one of them in the pic. They do work hard. You can still get new ones for half of then as they are common to 2600's but I'd have a word with Alun if the law of sod says its the wrong ones that are worn.
you can use the valve stem seals from a SAAB 9-3 if needed too....
Also dont loose the collets. Easilly done. I have a few still to find on my garage floor and they mustn't be confused with the very similar but slightly different and more common 8V ones...
Jonners
you can use the valve stem seals from a SAAB 9-3 if needed too....
Also dont loose the collets. Easilly done. I have a few still to find on my garage floor and they mustn't be confused with the very similar but slightly different and more common 8V ones...
Jonners
Note from Admin: sadly Jon passed away in February 2018 but his humour and wealth of knowledge will be fondly remembered by all. RIP Jonners.
-
SprintMWU773V
- TDC Staffs Area Organiser
- Posts: 5429
- Joined: Wed Oct 18, 2006 2:08 pm
- Location: The Old Asylum
Re: Operation Orange - 1980 Sprint restoration
The arms need a proper clean, they don't photograph well. It looks like there's some pitting on the fingers but actually they are pretty clean, what you see is actually muck rather than pitting. I'd always banked on needing some new ones and fortunately I have 2 sets in stock, good used ones. I'll clean these up though and see how they compare.
Mark
1961 Chevrolet Corvair Greenbrier Sportswagon
1980 Dolomite Sprint project using brand new shell
2009 Mazda MX5 2.0 Sport
2018 Infiniti Q30
1961 Chevrolet Corvair Greenbrier Sportswagon
1980 Dolomite Sprint project using brand new shell
2009 Mazda MX5 2.0 Sport
2018 Infiniti Q30

Re: Operation Orange - 1980 Sprint restoration
Peter Burgess did some work on an 1850 head for me several years ago. Did a fine job. He is usually busy though.SprintMWU773V wrote: ↑Fri Jun 02, 2017 4:40 pm He suggested I try Peter Burgess who we use for some work we outsource so will make contact and see what he says. I know he's highly regarded in MG circles in particular, though whether he wants to work with a Triumph part I don't know.
-
Carledo
- TDC Shropshire Area Organiser
- Posts: 7242
- Joined: Sun Aug 21, 2011 5:12 pm
- Location: Highley, Shropshire
Re: Operation Orange - 1980 Sprint restoration
The best ones always are!red&black wrote: ↑Sun Jun 04, 2017 11:23 pmPeter Burgess did some work on an 1850 head for me several years ago. Did a fine job. He is usually busy though.SprintMWU773V wrote: ↑Fri Jun 02, 2017 4:40 pm He suggested I try Peter Burgess who we use for some work we outsource so will make contact and see what he says. I know he's highly regarded in MG circles in particular, though whether he wants to work with a Triumph part I don't know.
Steve
'73 2 door Toledo with Vauxhall Carlton 2.0 8v engine (The Carledo)
'78 Sprint Auto with Vauxhall Omega 2.2 16v engine (The Dolomega)
'72 Triumph 1500FWD in Slate Grey, Now with RWD and Carledo powertrain!
Maverick Triumph, Servicing, Repairs, Electrical, Recomissioning, MOT prep, Trackerjack brake fitting service.
Apprentice served Triumph Specialist for 50 years. PM for more info or quotes.
-
SprintMWU773V
- TDC Staffs Area Organiser
- Posts: 5429
- Joined: Wed Oct 18, 2006 2:08 pm
- Location: The Old Asylum
Re: Operation Orange - 1980 Sprint restoration
Aren't the 8 rockers all the same?Jon Tilson wrote: ↑Sat Jun 03, 2017 11:35 pm Sorry to rain on your parade but have a closer look at the cam end of your rocker fingers. Looks like the cam has worn through the hardening on one of them in the pic. They do work hard. You can still get new ones for half of then as they are common to 2600's but I'd have a word with Alun if the law of sod says its the wrong ones that are worn.
you can use the valve stem seals from a SAAB 9-3 if needed too....
Also dont loose the collets. Easilly done. I have a few still to find on my garage floor and they mustn't be confused with the very similar but slightly different and more common 8V ones...
Jonners
Mark
1961 Chevrolet Corvair Greenbrier Sportswagon
1980 Dolomite Sprint project using brand new shell
2009 Mazda MX5 2.0 Sport
2018 Infiniti Q30
1961 Chevrolet Corvair Greenbrier Sportswagon
1980 Dolomite Sprint project using brand new shell
2009 Mazda MX5 2.0 Sport
2018 Infiniti Q30

Re: Operation Orange - 1980 Sprint restoration
1978 Pageant Sprint - the rustomite, 1972 Spitfire IV - sprintfire project, 1968 Valencia GT6 II - little Blue, 1980 Vermillion 1500HL - resting. 1974 Sienna 1500TC, Mrs Weevils big brown.
-
lazeruspete

- Guest contributor
- Posts: 822
- Joined: Sun Oct 21, 2012 11:15 pm
Re: Operation Orange - 1980 Sprint restoration
I wonder if making them different was genuine design to try and bunch all the valves up or it was just Triumph being Triumph. to have the lobe runners running offset on the lobes doesn't seem like a great idea.
1980 Dolomite Sprint Track Day Car....KLJ 895W. now redtopiffied 
viewtopic.php?f=19&t=23031
Volkswagen Golf MK3 Gti....R301UUJ. RIP 22-5-13
Volkswagen Golf MK4 TDGTI 150 MM53VNT Sold 7-8-17
BMW 320d Coupe M-Sport YL08 XBZ with factory fitted Performance Pack - Sold 22/05/21
BMW 330d Touring M-Sport WN63 XPY - best daily ever
Proud TDC Member!
viewtopic.php?f=19&t=23031
Volkswagen Golf MK3 Gti....R301UUJ. RIP 22-5-13
Volkswagen Golf MK4 TDGTI 150 MM53VNT Sold 7-8-17
BMW 320d Coupe M-Sport YL08 XBZ with factory fitted Performance Pack - Sold 22/05/21
BMW 330d Touring M-Sport WN63 XPY - best daily ever
Proud TDC Member!