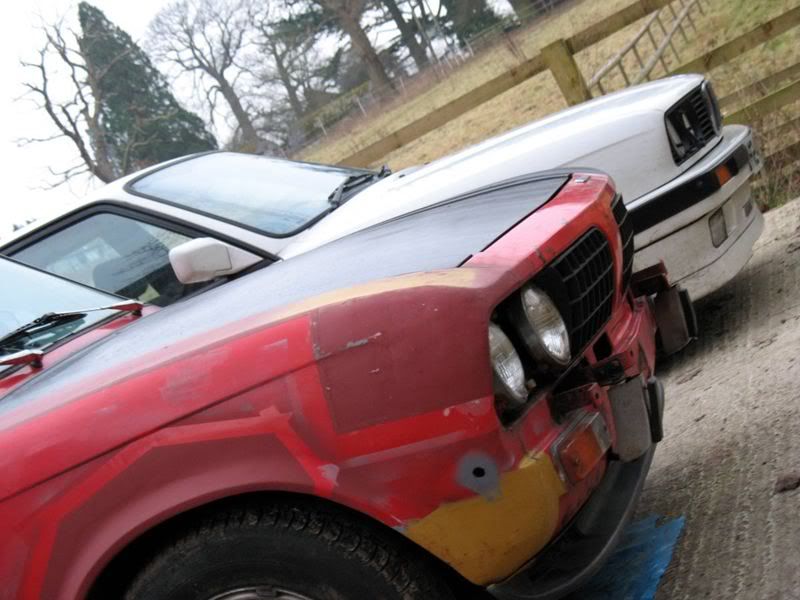
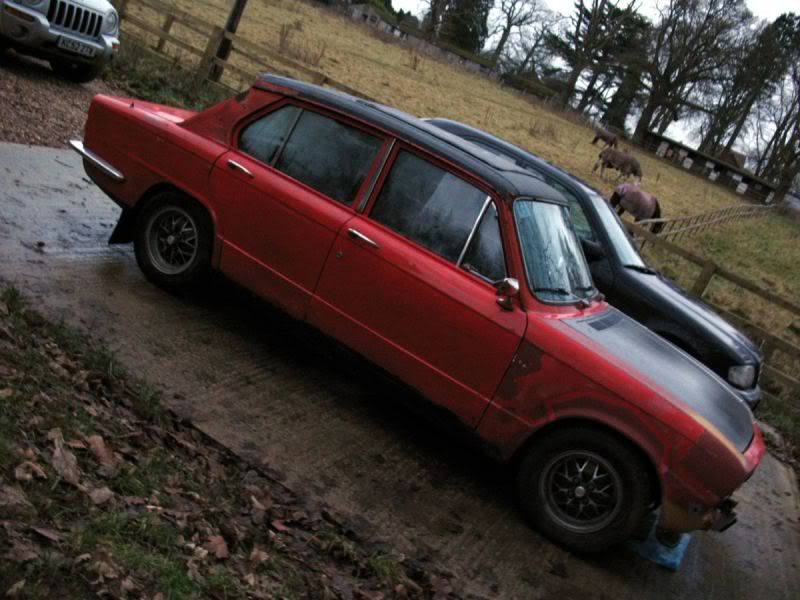
Sprint headgasket - Now VXG project thread (pic heavy)

For everything to do with Dolomites, Toledos, FWD cars and Dolomite-based kitcars.
Message
Author
newguy

Re: Sprint headgasket replacement - and questions....(Pic heavy)

#31 Post by newguy »

Jon Tilson wrote:Just the hot coolant boiling on the hot head

Jonners

Would i be able to see where it has been dripping?
Jon Tilson
Guest contributor
Guest contributor
Posts: 11179
Joined: Tue Oct 03, 2006 9:45 pm
Location: Middlesex

Re: Sprint headgasket replacement - and questions....(Pic heavy)

#32 Post by Jon Tilson »

On a SU manifold you can just see between the water pump cover and the manifold. It either runs down from the manifold gasket and then back along the block to head junction or it comes up or down out of the bypass hose. Not sure about your webber effort.

Have it all off...new haskest and O rings, good sealant, clean mating surfaces in pump cover and bypass tube etc and try again. You may have a result. Dont pressurise it beyond 13psi either...that bottle of yours may be a bit too high...

Jonners
Note from Admin: sadly Jon passed away in February 2018 but his humour and wealth of knowledge will be fondly remembered by all. RIP Jonners.
newguy

Re: Sprint headgasket replacement - and questions....(Pic heavy)

#33 Post by newguy »

Thanks Jon i will get onto this over the weekend.
Hoping for a good result
newguy

Re: Sprint headgasket replacement - and questions....(Pic heavy)

#34 Post by newguy »

I tightned the Manifold Bolts which were already pretty tight and also tightened the Water pump cover.
Seemed to stop the leaking along the top of the head.
Bubbling etc.
I really do not understand how.

I have also put the mechanical fan back in
Lewis

Re: Sprint headgasket - Now VXG project thread (pic heavy)

#35 Post by Lewis »

Amended the title of this thread to reflect what's going on in here :) Bit of a backlog of posts to cover so here goes....

Well, the engine's now singing along quite happily. Needs a minor tune but other than that, job's a good'un.

Image

Result!

I spent the first bit of today doing odds and ends - tightening up the exhaust manifold, refitting some missing door bolts and check straps, checking the fluids, pumping up the tyres (which, remarkably, after about 2 months have only lost a few PSI each) and spraying random bits with WD40.

I also fixed the choke linkage - part of the retainer for it had broken, so I headed to the local specialist, Carburetter Exchange, in Leighton Buzzard to see if he had a replacement part. Unfortunately he didn't (apparently it's not really classified as a 'spare' so not stocked) but he very kindly gave me a random jet adjustment screw he had that, reckoning it would do the job a treat.

Once home, I hammered it into the hole and...it fitted perfectly! Did the job a treat so I can now start the car in the cold from inside without having to faff about. Result! You can find Carburettor exchange here - highly recommended by everyone who goes there:

http://www.carburetterexchange.co.uk

Now - I'm getting bored with the hodge-podge colours, so I rustled up some supplies from Homebase and set about seeing what I could do. A quick bit of sanding, masking and cleaning with spirits to remove oil and dirt and:

Image

One clean bonnet. A few quick rolls later (must stress this is just a guide coat and a test to see how it does being applied in this weather) and ....

Image

Voila!

A first test coat of some satin black paint. Doesn't really show much at the moment, so I'm looking forward to tomorrow when I can put on a 2nd coat and see what the finish, colour and effect really looks like.

Battery's coming back to life now too - after being abused so much running the V8 Toledo and cranking constantly it wasn't happy at all. Now it's being used, cycled and charged a little it actually managed to start the car up all on it's own today.

Onwards!
Last edited by Lewis on Sat Dec 20, 2008 4:56 pm, edited 2 times in total.
Lewis

Re: Sprint headgasket - Now VXG project thread (pic heavy)

#36 Post by Lewis »

Later I pulled off the front bumper for no good reason and also removed all the badges (I guess I'll get around to removing the overriders and associated hardware soon!).

Did get another coat on the bonnet though and tested a (just sprayed, hence the shine!) matching spraycan on a ready-to-go area to see what kind of finish I get compared to the roller. All I have to do is wait for it to dry!

Image

I'm likin' it, so far.... those two dents in the bonnet in that rough patch - that's from when two sparkplugs tried to make a break for freedom :lol: War wounds! Sometimes people don't pay enough attention putting plugs in, cross thread them, then they consequently escape...

Tomorrow I think I should get serious and pull off all the trim, rip of all the vinyl and start prepping it - as well as giving it all a really good wash so it's clean and ready to go :) That way I can start piling on paint when I get the chance.
Last edited by Lewis on Sat Dec 20, 2008 4:54 pm, edited 1 time in total.
Lewis

Re: Sprint headgasket - Now VXG project thread (pic heavy)

#37 Post by Lewis »

More progress!
Firstly, excuse the quality of the photography. By the time I got around to taking any pics it was half past three and already getting pitch black!

Anyway, to do it properly, all the trim's got to come off. I removed all the chrome edging strips and door trims. Now I've just got the rear bumper to go but it requires jacking up so I can get the towbar off too - weight saving!

Image

I also spent what felt like an hour painstakingly removing the coach lines from the car, ready for paint.

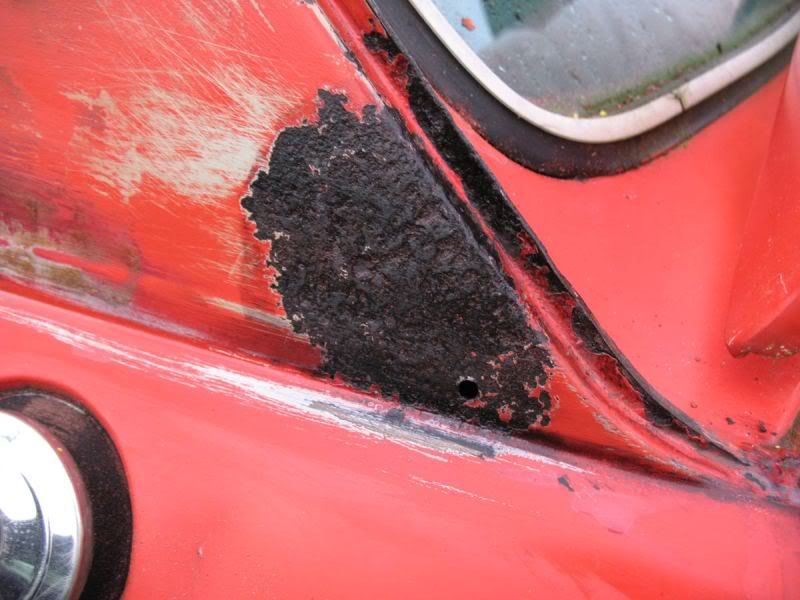
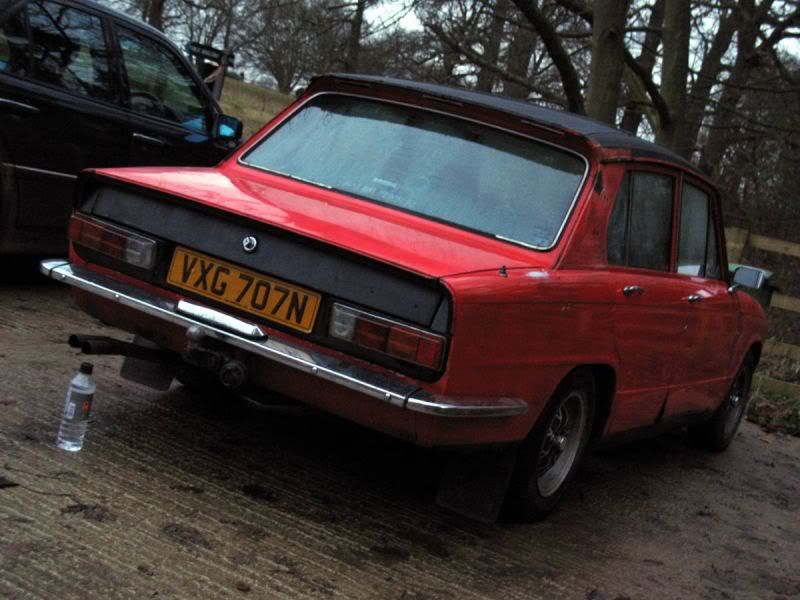
The rear vinyl pillar trims had not suffered the tests of time well; if I'm honest I prefer the clean, unblemished look of the earlier cars (like my old 1500s) without the chrome as they seem to show their shape better and look sharper.

Consequently, I pulled them off :lol:

Image

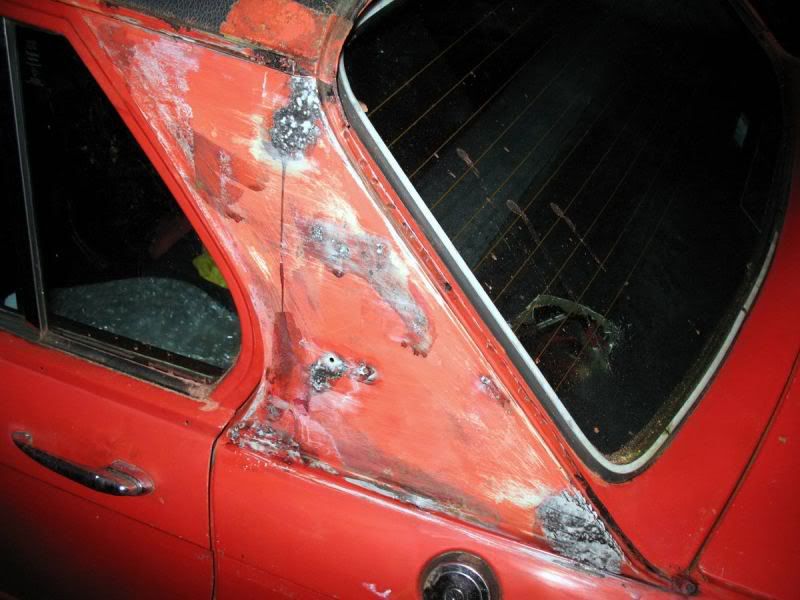
.......exposing the usual corrosion behind. Poor condition vinyl makes a good rust trap, as proven here.

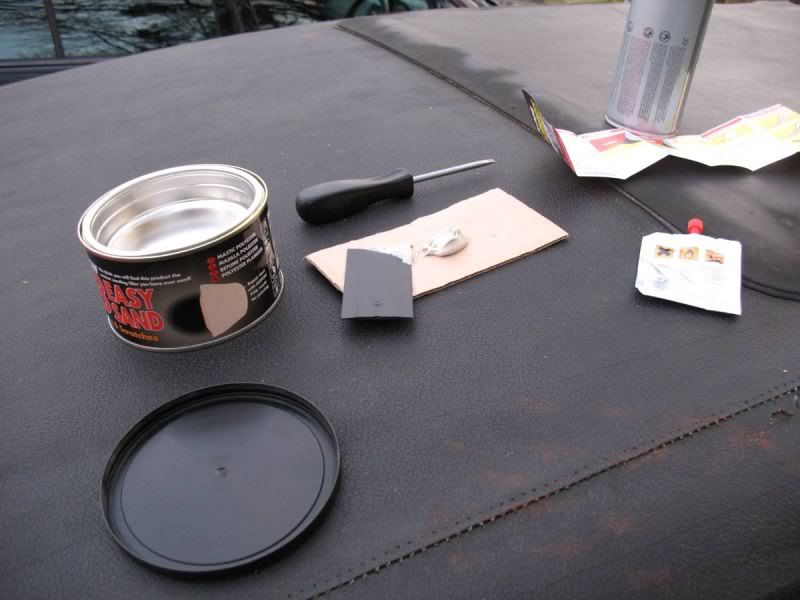
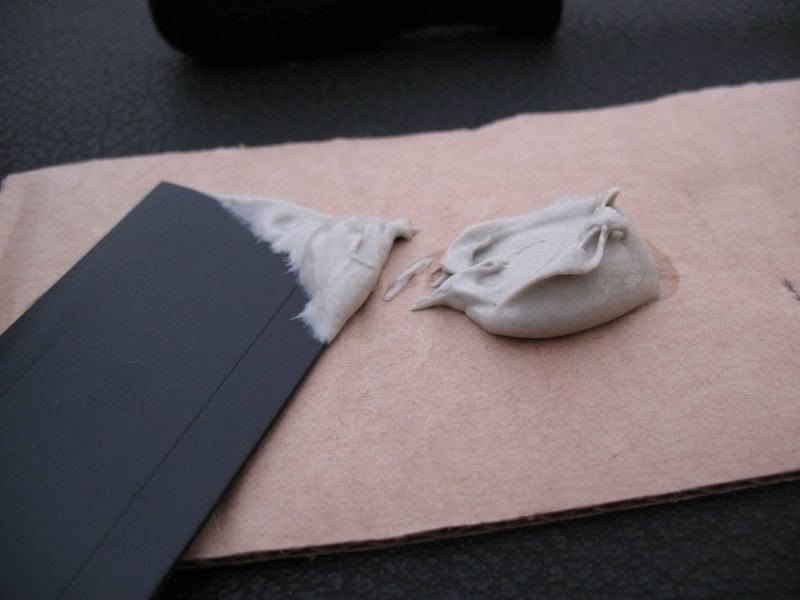
I washed it, sanded it all down, cleaned it with thinners and let it dry. Then, to convert the rust to a safe, paintable material I sloshed some Kurust on it.

Image

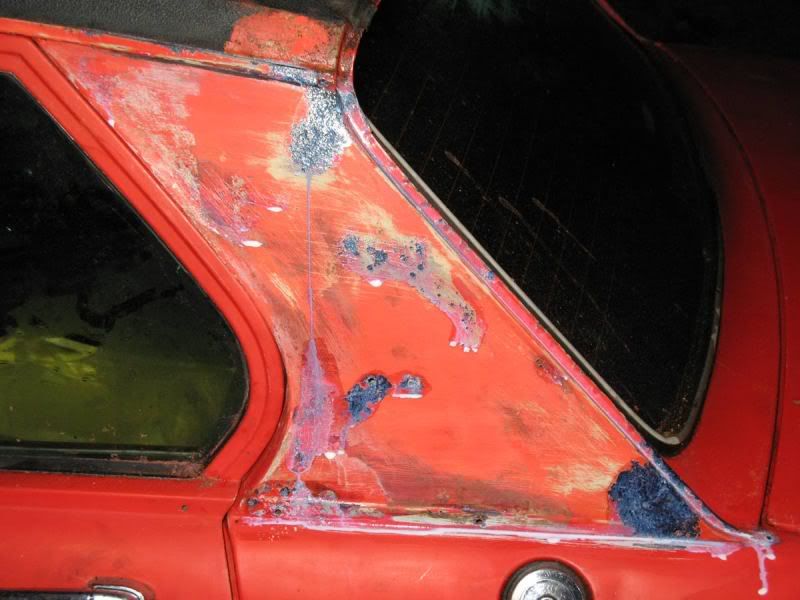
You can just see it starting to 'blue' here, indicating the rust is converted to 'safe' metal.

Image

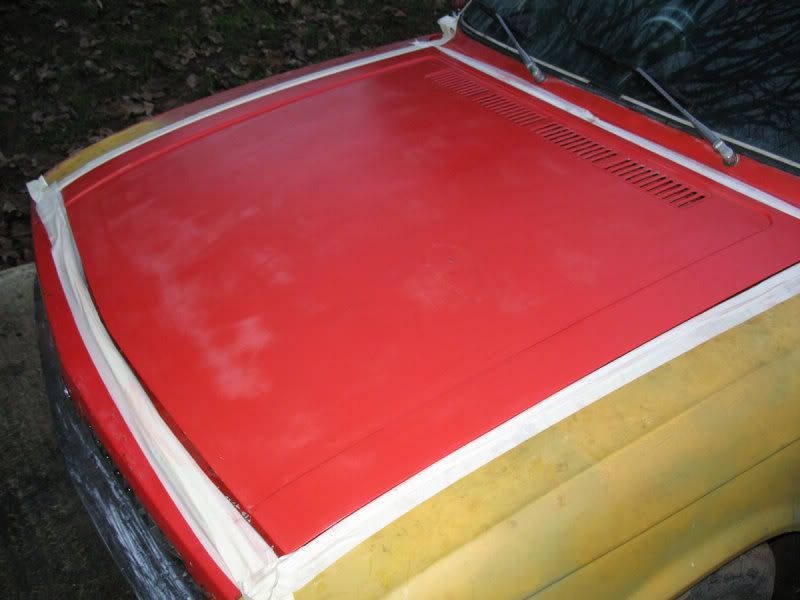
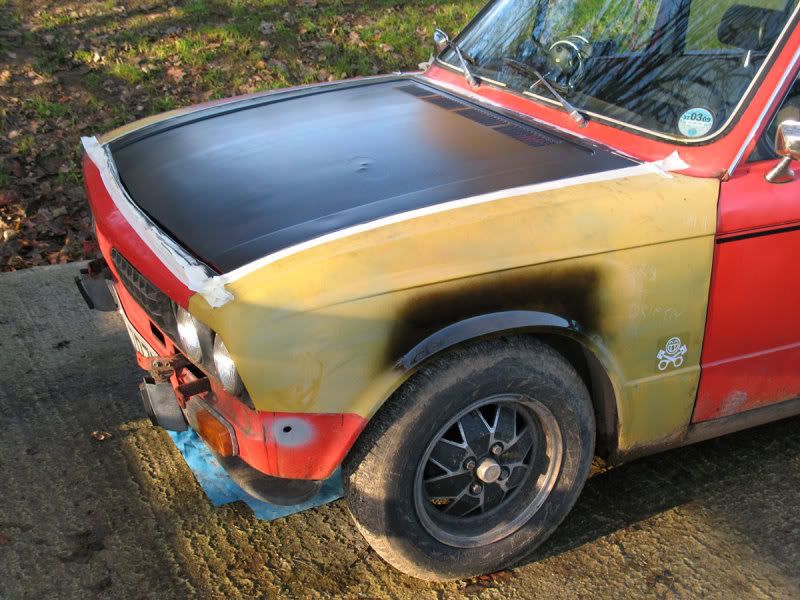
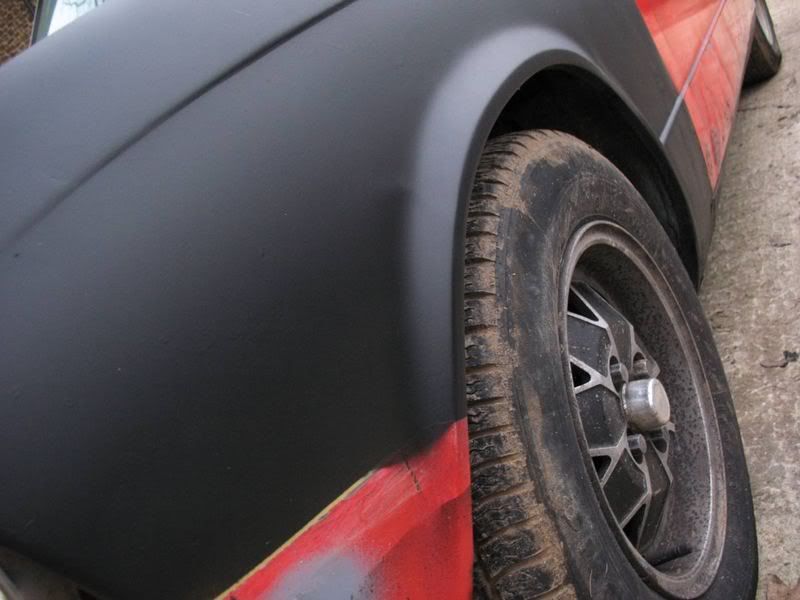
To check I really did like the look I was going for, I masked up the front wing roughly and with a can of matching spraypaint, ran a few quick guide coats over (still wet in the shots):

Image

Image

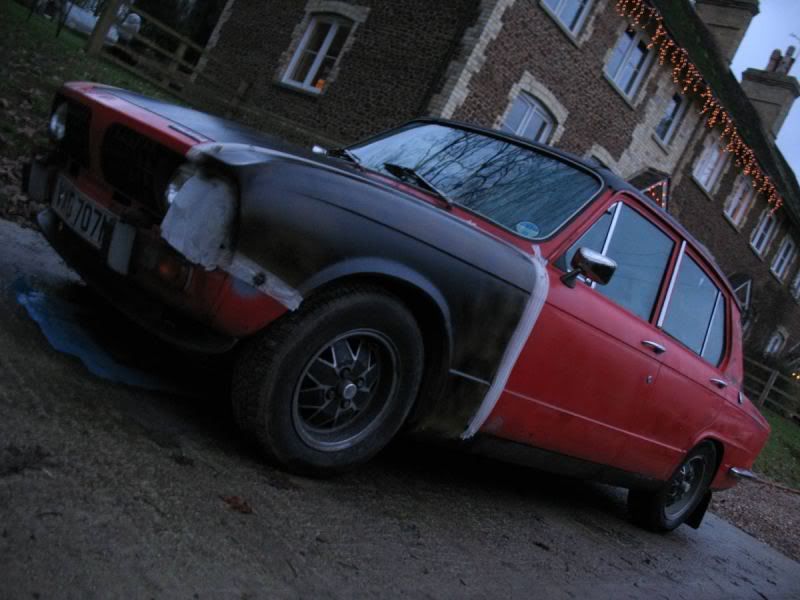
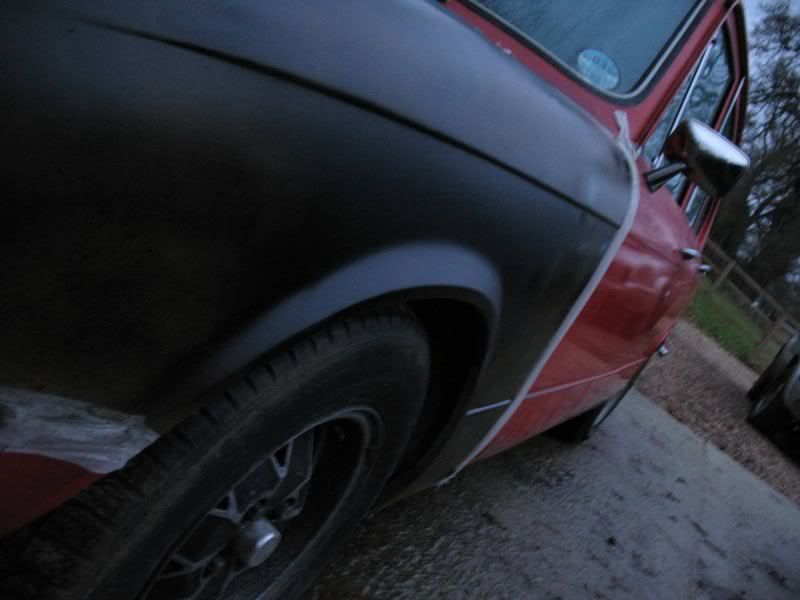
.....and I do like it, so that's definitely the look I'll be rolling out soon!

Image

Less is more! :)

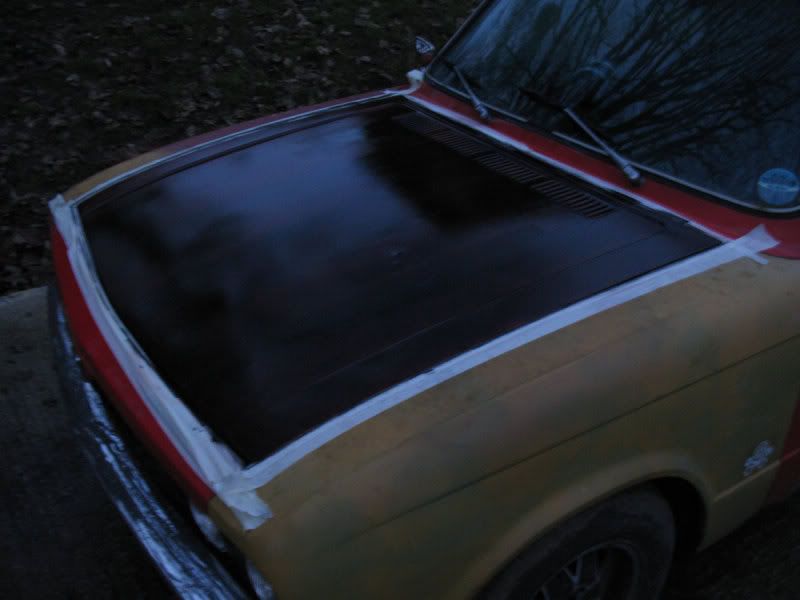
So, tomorrow, I'll finish removing the vinyl from the roof and start prepping in earnest. Today I just ran a knife around the trapped bits so I can pull the whole shooting match off but it requries preheating to soften the adhesives a bit (you can see in some of the shots where I've ripped bits off as a test!). The vinyl on the roof is really quite shot, so it won't be missed.

I'll also see if I can find the neater drop-down chrome rear as seen on the 1500 and fit it to my Sprint too (think of the weight saving!).

I also think most of the chrome will be blacked out but I may photoshop that before I do it! :)
Last edited by Lewis on Sat Dec 20, 2008 5:03 pm, edited 3 times in total.
Lewis

Re: Sprint headgasket - Now VXG project thread (pic heavy)

#38 Post by Lewis »

So I came out this morning to lovely solid, rust-free, metal:

Image

That Kurust stuff is really good! Highly recommended and very easy to use. Don't be put off by the little containers either, as it has a very watery consistency and goes an awful long way.

Now, due to the pitting, the surface of the pillars wasn't quite level at some points. Primer might fill the gaps and level it out but I suspected I'd end up with a wavy surface at points. I headed out to Halfords and bought some filler, something I've never tried using before.

Image

And on my palette 8)

Image

I have to say, I'm really impressed with how easy it is to use. Simply pile some filler onto some cardboard, drop some setting agent into it (the quantity really isn't overly critical), mix it thoroughly then apply it where needed, dragging a sharp-edged tool across to smooth it out and remove any excess filler.

It can be made to set very quickly too, using additional activator, which is really good for doing tricky or deep surfaces/holes. This was what I did when filling in some of the trim holes - as I'm not reinstating the chrome door trims, in line with my 'clean' look :)

After finishing the filling, I was left with two nice flat pillars with all unnecessary holes filled:

Image

Image

Tomorrow I'll quickly sand them back just to make sure it's dead even, then prime and paint!

I also grabbed a few cans of Halfords satin spray today, to test out:

Image

Here I'd sprayed the grill in the bonnet to see how it matched up. The Halfords satin is slightly flatter than the paint I have, which is kinda what I'm looking for - so I intend to do as much as possible in the paint then go over the car lightly with the spray, just to take the edge off and give the spot-on finish that I'm looking for :)

That should also have the added benefit of getting any bits I missed with my rollers and brushes! :D

I'm hoping to get a lot done tomorrow - so I hope the weather holds out! Fingers crossed!
User avatar
Sprintinbits
Guest contributor
Guest contributor
Posts: 1406
Joined: Wed Oct 18, 2006 7:56 pm
Location: Sunny Hertfordshyre

Re: Sprint headgasket - Now VXG project thread (pic heavy)

#39 Post by Sprintinbits »

Good stuff dude!

What's the deal with that Kurust?
Can you really just paint straight over it or do the filler thing?
I didn't know you could do that.

Have you had any rust come back through when you have done this previously?
If not, that could save me a lot of time with my roof on my red sprint.

Are you now in the Pimento gang then? 8)
User avatar
Oli_88
Guest contributor
Guest contributor
Posts: 3225
Joined: Wed Jan 23, 2008 5:19 am
Location: Fleet

Re: Sprint headgasket - Now VXG project thread (pic heavy)

#40 Post by Oli_88 »

We both think worryingly alike...
I though about de-trimming mine too. I like it I do...

Good work Lewis.
1978 Twilight Purple Dolomite 1850HL The Lolomite.
It's 106 miles to Chicago, we've got a full tank of gas, half a pack of cigarettes, it's dark, and we're wearing sunglasses.
Hit it.
Dollyboy

Re: Sprint headgasket - Now VXG project thread (pic heavy)

#41 Post by Dollyboy »

yes m8.

top job, and good reading indeed.

i wish i had the patience to take pics step by step

SE's have to wait a few yrs for a satin finish, but your approach is better. gona be mean lookin m8, keep on trucking :wink:
straylight

Re: Sprint headgasket - Now VXG project thread (pic heavy)

#42 Post by straylight »

very entertaining read lewis and another reason we need a "project" forum <hint, hint>

I was confused initially, I thought you were going for the licorice allsort look, hence the black bonnet. I expected to see yellow wings next :D

I also use a killrust equivalent and swear by it. Chemically it is kosher.

great read, keep it coming.

stu
User avatar
xvivalve
TDC West Mids Area Organiser
Posts: 13578
Joined: Thu Sep 28, 2006 1:13 pm
Location: Over here...can't you see me?

Re: Sprint headgasket - Now VXG project thread (pic heavy)

#43 Post by xvivalve »

What's the deal with that Kurust?
Can you really just paint straight over it or do the filler thing?
Yes, but my experience is it will show through again. Only one true cure for rust...cut it out.

Personally I prefer Jenolite, at least it takes you back to bright metal where it can and is honest about what is left.

I like the Satin black look though Lewis, very MadMax
DoloWIGHTY

Re: Sprint headgasket - Now VXG project thread (pic heavy)

#44 Post by DoloWIGHTY »

Have found that that Halfords Satin Black is the closest match to any for the rear panel and black paint used on the sills on HL/Sprint spec black bits.
Lewis

Re: Sprint headgasket - Now VXG project thread (pic heavy)

#45 Post by Lewis »

Haven't been many updates due to poor weather but here's what's happened in the meantime.

I spent a mindless few hours stripping the vinyl and have still got to get rid of most of the adhesives, horrible stuff. The pillars are primed and ready to go, as is the bootlid - and I've stripped and prepped most of the surfaces now. Managed to get it all off without removing the webasto too, which is a bonus!

I have also filled a few more holes and a crease that was present in one otherwise solid arch. The door bottoms are tatty in places but to be honest, doors come off and I'd rather get it all one colour and look at it before going any further.

Started looking at MG metro carburettors (or appropriately rebuilt HIF44s, or my HS6s modified to take boost which shouldn't be too hard) and an Eaton M45 as an 'interesting' period alternative for induction too. Just waiting on some mockup parts to turn up.

Still trying to decide what to do with the interior too - part of me wants standard, trimmed, the other wants stripped (or partially stripped) with lots of period (or earlier) gauges and switches. Will have to have a look and a think.

My front windscreen seal arrived too, so that's next! :)

Have some pics:

Paint's holding well against the elements - had heavy rain, dew, frost and wind:

Image

Vinyl - gone!

Image

Arch and pillars ready to go:

Image

Rear edge cleaned and tidied up:

Image

.......and a comparision shot:

Image

Funny how similar they appear when you look! :)

I have use of a garage for the next few days, so will complete the paint job in due course! Being heated and undercover will give me all I need to get it done :)

Can't wait to see the finished result.
Post Reply