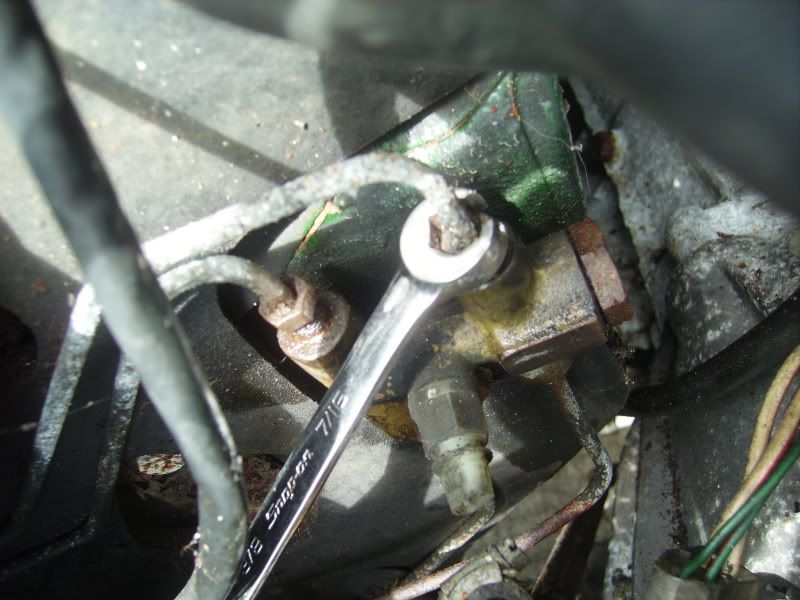
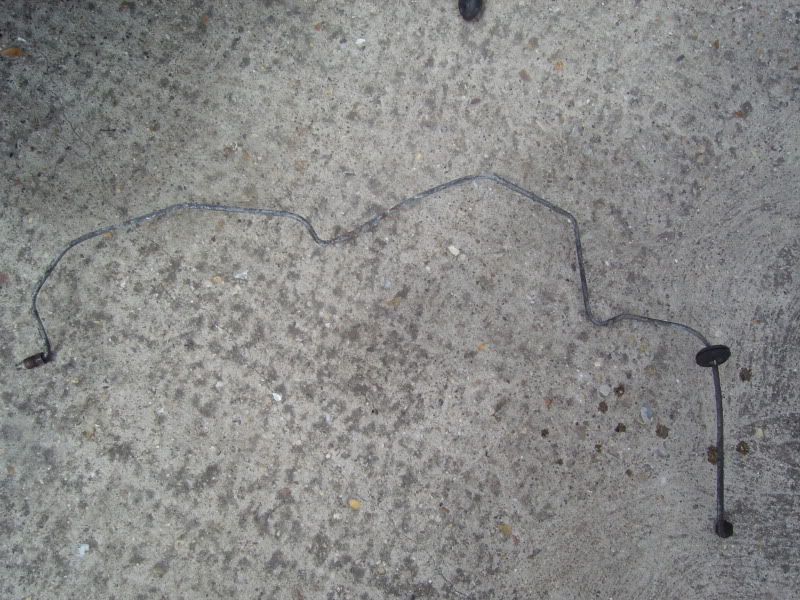
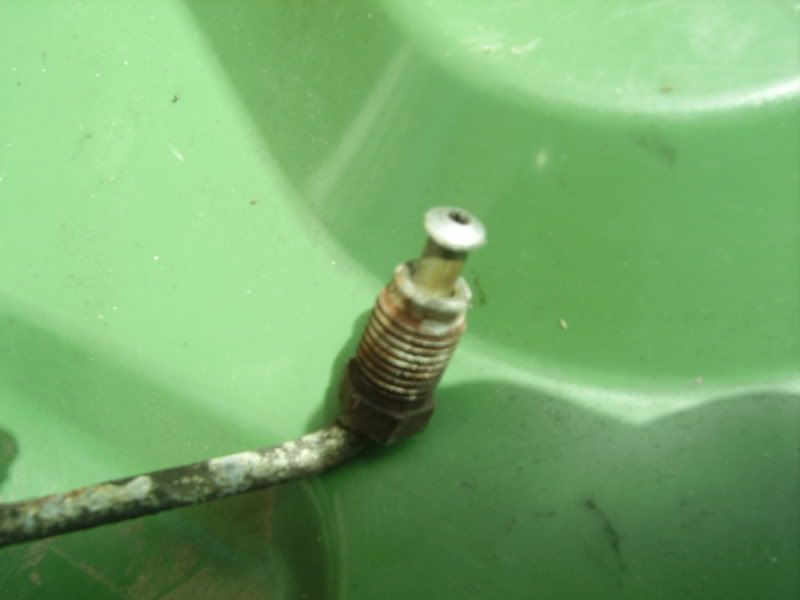
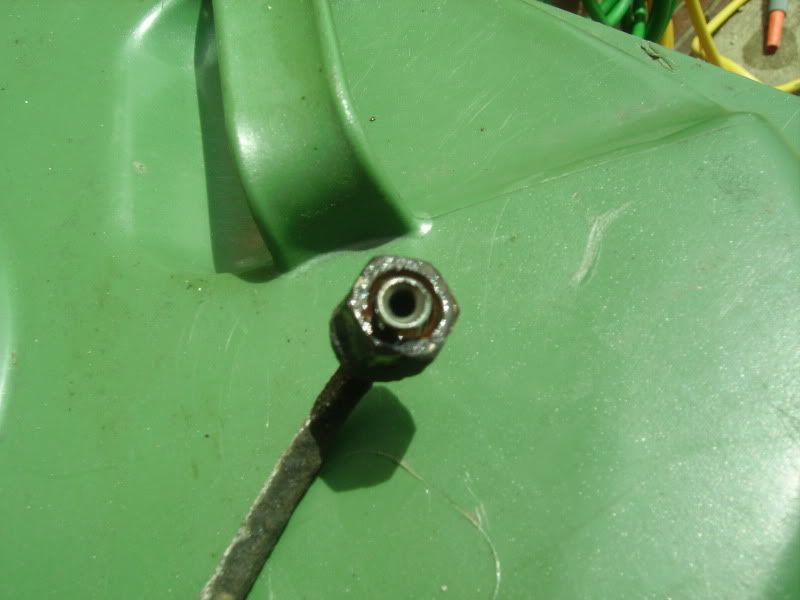
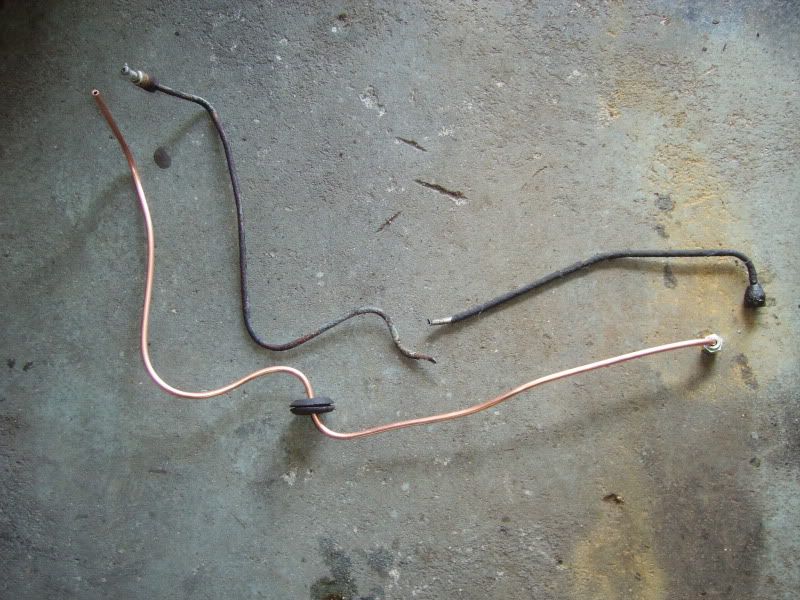
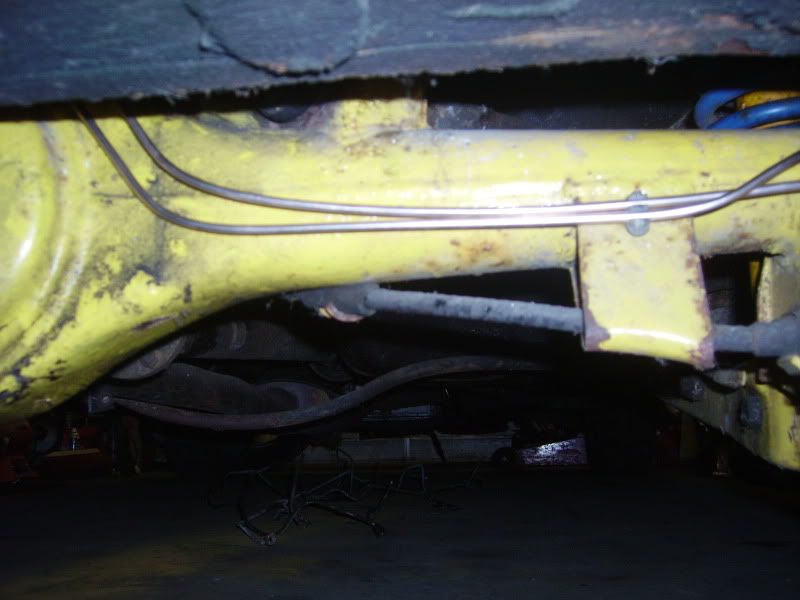
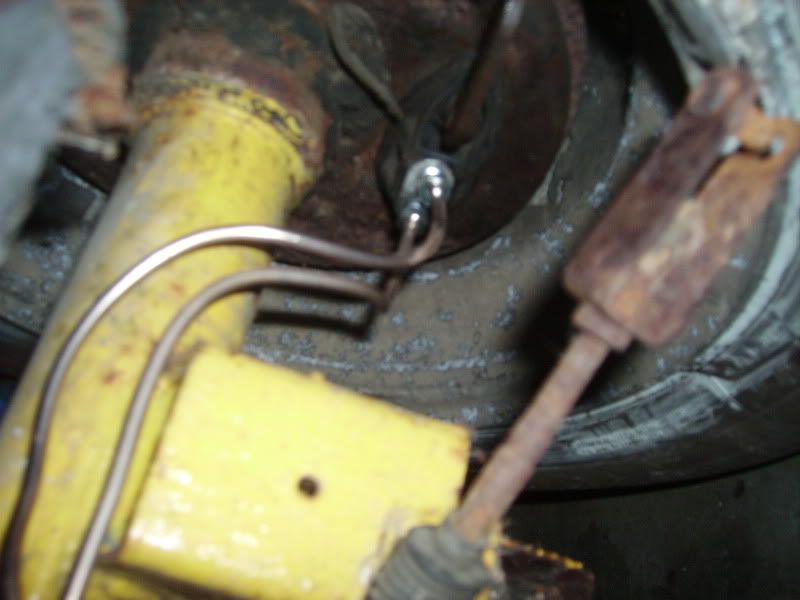
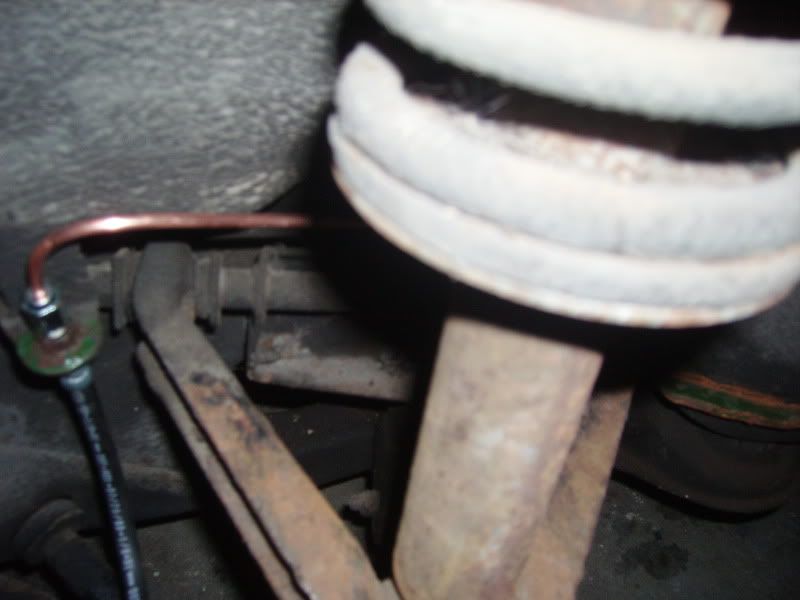
Golly the green dolly Picture restoration. 14 yrs unused

Restoring your car? Tell us about it here!
Message
Author
r1150rt

Re: Golly the green dolly Picture restoration. 14 yrs unused

#46 Post by r1150rt »

JPB wrote:If you do use copper across the axle tubes, make a couple of coils at either end, between the cylinder union and the pipe where it's clamped to the tube, copper will fracture readily in this situation if it's expected to flex over a relatively short, straight length of a pipe.
Many thanks for your help.
I must admit that prior to joining this forum, and after many years as an MOT tester and MOT station owner I have never heard of this practice. In fact over the years I have replaced many brake pipes with copper in this very situation, and never thought any more of it.
You are undoubtably right, and as you have personal experience of this problem, I bow to your superior knowledge on this subject. I can see how this may occur, it's just that the amount of 'movement' from the cylinder in this situation must be very minute. If the brake is correctly adjusted, just how much does the cylinder 'move'. I can apprieciate that if you move a copper pipe to and fro over any length of time it will 'work harden' and finally fail. But does it move far enough in this situation to create a work hardened failure. From your experiences it obviously does. but it just goes to show how we can easily overlook something really simple which could lead to a diaster.
Purplebargeken

Re: Golly the green dolly Picture restoration. 14 yrs unused

#47 Post by Purplebargeken »

You are making excellent progress with 'Golly'. I am always in awe of people with sound mechanical confidence and knowledge. My cap is off to you.

Lovely car in my opinion.

Great photos, please keep 'em coming.

All the best.

Ken
User avatar
PeteH
TDC Member
Posts: 67
Joined: Tue Jun 22, 2010 12:06 am
Location: Limerick, Ireland

Re: Golly the green dolly Picture restoration. 14 yrs unused

#48 Post by PeteH »

Lovely car, like the JCB yellow rear axle! Best of luck, nice to see another Dolly saved, some advice from my experience rebuilding the VW aircooled engine - once you are sure the motor is free and you have fresh oil and filter fitted, take the plugs out & spin it on the starter till the oil light goes out - then keep spinning it for another 20 secs, this primes up the lubrication system without loading the bearings, then in with the plugs and hopefully away you go...
1977 Dolomite 1300 Brooklands Green, 10 trouble free years
2007 Toyota Auris Terra (boring but reliable daily driver)
JPB

Re: Golly the green dolly Picture restoration. 14 yrs unused

#49 Post by JPB »

r1150rt wrote:If the brake is correctly adjusted, just how much does the cylinder 'move'.....
By exactly the same amount as the piston moves, slightly more when the parking brake is applied, OK, you could under adjust the shoes to allow a bit more travel in the slide end thereby lowering the frequency of the vibration but ultimately, there'd still be the potential for mechanical failure at some point between the end clamp and the cylinder but with the added problems that you'd then have a lousy parking brake action and too much pedal travel.

The norm is a couple of 2¼" coils immediately behind the cylinder, or use steel which only needs to be loose enough not to catch on the edge of the arm bracket when you pull up on the parking brake, so is the safer and more elegant solution.
User avatar
sprint95m
TDC Member
Posts: 6502
Joined: Thu Aug 09, 2007 1:22 pm
Location: Caithness, Scotland

Sad to say.....

#50 Post by sprint95m »

Like you I have pondered this..........
r1150rt wrote: I can see how this may occur, it's just that the amount of 'movement' from the cylinder in this situation must be very minute. If the brake is correctly adjusted, just how much does the cylinder 'move'. I can apprieciate that if you move a copper pipe to and fro over any length of time it will 'work harden' and finally fail. But does it move far enough in this situation to create a work hardened failure.
If you remove the rubber boot first, then have an assistant apply the footbrake you will observe hardly any movement.
However, if the brakes are not adjusted properly you will obviously have more movement and if the copper pipes are made without a decent loop the likelihood of a work hardened failure is therefore even more increased.

Solutions?
Replace the two copper brake pipes every service?
Use kunifer instead of copper?
Use stainless steel braided to the cylinders in conjunction with either copper or kunifer?
Do as John does, use steel as per original?


Whilst I have heard of brake pipe failures on "dead" axles where the pipe work is hidden above the axle, I have not
heard of a failure on a Dolomite/Marina type application. It is good of John to highlight this.
Thanks John. I think I shall use stainless steel braided.
TDC Forum moderator
PLEASE help us to maintain a friendly forum,
either PM or use Report Post if you see anything you are unhappy with. Thanks.
r1150rt

Re: Golly the green dolly Picture restoration. 14 yrs unused

#51 Post by r1150rt »

Some progress with 'Golly' but not all the pics came out that good.
Decided to strip out the front wheel bearings and check to see the condition of the bearings and either replace or re-pack.
Wanted to change the tyres as the ones fitted had good tread but the side walls were shot.
Removed the hub assy
Image
Took the bearings out, and cleaned inside the hub and the bearings themselves.
Image
Bearings were in excellent condition, but the old grease had gone 'hard'
So repacked the rear bearing and hub,
Image
Cleaned up the stub axle,
Image
Re-fitted the hub and repacked the front bearing,
Image
Assembled the washer, nut, grease cap, and new split pin.
Image
Tighten the nut up tight, to seat the bearings.
Image
Then. The important bit. You MUST back the nut off to give a clearance of 002"-008" between the back of the nut and the washer.
This will give some 'end float' at the wheel rim. These cars MUST have this end float. The bearings MUST NOT be pre-loaded.
Some MOT testers may feel this is an indication of a worn bearing as you do not see this on modern cars as the bearings are 'built up' affairs and have no end float except when they are worn. If these bearings are done up tight they will overheat and in extreme cases can cause the stub axle to fail. There was a tragic accident which I was aware of in the late eighties where this happened and the car concerned went over a central barrier and collided with on coming traffic, killing a whole family in the car.

Next looked at the wheels.
Image
Break the bead,
Image
Tyre off.
Image
Cleaned up ready to be painted.
Image
Fitted all four wheels so I can now move her about with ease.
Decided that I am going to use 'kunifer' to do the rear axle brake pipes and the rest will be done in copper. I received all the parts I need to make the pipes so that is the job for this coming weekend
DoloWIGHTY

Re: Golly the green dolly Picture restoration. 14 yrs unused

#52 Post by DoloWIGHTY »

As you say so important to put that end float into the bearings, so many MoT stations now don't understand, in fact with my own car I tighten them up before the MoT then put the end float back in again when I get home as the Tester said "I will not tolerate any play in wheel bearings". Only takes a few minutes to do, saves a lot of "debating" with the man and as we get along fine it's a shame to spoil our happy relationship :D.

Great work on this car btw. :thumbsup:
Jon Tilson
Guest contributor
Guest contributor
Posts: 11179
Joined: Tue Oct 03, 2006 9:45 pm
Location: Middlesex

Re: Golly the green dolly Picture restoration. 14 yrs unused

#53 Post by Jon Tilson »

I didn't notice the oil seal when you put the front wheel bearing back on.
If you go by the book you are supposed to measure the end float and mark position of castellated nut without the oil seal, then put it all back with the oil seal in place.

My method is to tighten the bearing until I just feel resistance and then back it off a couple of flats so its completely free. With umpteen years experience of triumph front wheel bearings I trust my own built in end float guage...:-) I reckon if you did the maths on the thread pitch you would find the end float specs agree with one to three flats on the castellated nut...:-)

Anyone driving a car with a failing wheel bearing bad enough to shear a stub axle must have been deaf! Still a very sad case though.

Stanpart your Mot tester wants reporting if he makes comments like that!!! Ridiculous.

Jonners
Note from Admin: sadly Jon passed away in February 2018 but his humour and wealth of knowledge will be fondly remembered by all. RIP Jonners.
r1150rt

Re: Golly the green dolly Picture restoration. 14 yrs unused

#54 Post by r1150rt »

Jon Tilson wrote:My method is to tighten the bearing until I just feel resistance and then back it off a couple of flats so its completely free. With umpteen years experience of triumph front wheel bearings I trust my own built in end float guage..
Exactly the same as me. I stated the 002"-008" end float as that is what the manual states, but I have never actually measured it.
When you think back to the sort of cars we were working on in the 70's and 80's most of the front wheel bearings on rear wheel drive cars had end float.
Cars like the Marina, Ital, Cortinas, escorts etc.
They all rode on taper roller bearings as opposed to the 'clean' bearings that are used on the rear of most cars today. As most cars are now FWD, it is the rears that are now non driven wheels, so only need a bearing for rolling support.

Seems a different world now. I remember the mk4 cortina being released. I thought it was brilliant. When the Montego was released our local BL dealer gave us one to use for the weekend, so we could evaluate it and give our feedback. We thought it was a world beater!!!!! The same was when the Mondeo was released in '92. Hard to think now, but one day someone will consider a mk1 mondeo as a classic.
r1150rt

Re: Golly the green dolly Picture restoration. 14 yrs unused

#55 Post by r1150rt »

Hi all,
Out there today for the whole day. Serviced the daily runner then got the 'dolly' out of the garage for a bit more fettling.
I wanted to get all the brake pipes done today. I decided to do all the pipes in copper except for the rear axle ones which will be in Kunifer.

Brake tube nut spanner came in handy as these nuts had been on there since 1980!!!!
Image
1st pipe comes off.
Image
Op 1 end, only has end single flared
Image
Op2 end double flare to give a different finish.
Image
New pipe made up nearly.
Image
New brake hoses are fitted.
Image
5 way splitter valve. This has a switch fitted which tells you if you suffer failure in one of the brake systems. There are two brake circuits on the tandem master systems. One operates on the rear brakes only, the other on the front brakes only. If you get a problem anywhere on the brakes one circuit will still be working. This valve tells you you have a problem.
Image
Master cylinder; Before.
Image
Master cylinder after.
Image
Copper pipes everywhere.
Image
Rear axle gets kunifer pipes. I will be removing the axle later on once I know the condition its in. I won't know until after the test drive. If its ok I will just be painting it and cleaning it up. If its noisy then I will have to decide where to go with it. Hope it's ok.
If you look at the floor in this shot you can see all the old pipes stacked up.
Image
Fitted brand new rear cylinders. Not rebuilt the brake yet.
Image
Front pipe fitted.
Image
Some of these pics are not as good as some of the early ones. This is because I am using an old camera. My daughter is studying to be a photographer, and likes to take the pictures, but she is not here this weekend, so I am doing them myself. Sorry for the poorer quality.
Battery is now fitted. Now shows me that there are a lot of electrical issues in the pipeline, as nothing seems to work.
Engine will crank, and does run. But there is nothing from the lights, indicators, wipers, horn, etc etc etc.
Luckily, I don't mind electrical problems on cars of this era. Modern stuff leaves me cold. But our cars were built when things electrical were still done in a logical way. So fixing them is a logical step by step method.
Having said all that I bet now I can't fix any of them!!!!!!!!!!
sd1850

Re: Golly the green dolly Picture restoration. 14 yrs unused

#56 Post by sd1850 »

Blimey i know what you mean u need to be an astro physics prof to fix modern multiplexed electrics :roll: . I restored an MGBGT a few years back and the electrics were a mess some clown had ruined the indicators and banged in various live feeds from the battery plus put the horn and other things on toggle switches on the centre consul :roll: a little knowledge is defo a dangerous thing :lol: .All fixed and restored using common sense wiring diagrams and correct parts.
Jon Tilson
Guest contributor
Guest contributor
Posts: 11179
Joined: Tue Oct 03, 2006 9:45 pm
Location: Middlesex

Re: Golly the green dolly Picture restoration. 14 yrs unused

#57 Post by Jon Tilson »

Some lovely plumbing going on there.
Did you reseal teh master cylinder? Good idea if not...these dual masters are unobtainium new.
I've reconned a few lately and found the bores cleaned up nicely with 1200 wet and dry and brake fluid. Its easier to do the pipes off if you remove the reservoir first.
This just prizes off...

Best to use an easy bleed or vaccum bleeder to save wear on the master seals too. Too much pumping can wear them out.

Jonners
Note from Admin: sadly Jon passed away in February 2018 but his humour and wealth of knowledge will be fondly remembered by all. RIP Jonners.
r1150rt

Re: Golly the green dolly Picture restoration. 14 yrs unused

#58 Post by r1150rt »

Jon Tilson wrote:Best to use an easy bleed or vaccum bleeder to save wear on the master seals too. Too much pumping can wear them out.
Yes, I agree there. When ever I bleed any brake system, I always avoid pushing the pedal all the way to the floor. If you do then you are pushing the seals further than they have ever been in their lives, which sometimes causes them to fail. Renaults used to be the worst for this problem.

Didn't know the master was unobtainable though. Thanks for the tip.
User avatar
Howard81
TDC Member
Posts: 3415
Joined: Fri Jan 11, 2008 9:02 am
Location: London

Re: Golly the green dolly Picture restoration. 14 yrs unused

#59 Post by Howard81 »

It is obtainable.. but as a recon unit..

They are secondhand units that have been sleeved with a stainless insert. The club do them, but were out of stock when I needed one. I bought one from Wins for £110, and looked like brand new! It works a treat on my 1500.

Sadly the original wasn't able to be re-sealed as the bore was badly pitted.
1978 Triumph Dolomite Sprint (project thread)
1966 Volkswagen 1300 (project thread)
1962 Austin Mini (project)
1962 MGA 1600 Mark II
1965 Mobylette SP50 (project)
2001 Rover 75 2.5-litre V6
User avatar
sprint95m
TDC Member
Posts: 6502
Joined: Thu Aug 09, 2007 1:22 pm
Location: Caithness, Scotland

Hi, it has been a while..........

#60 Post by sprint95m »

Any updates of how you are getting on?
TDC Forum moderator
PLEASE help us to maintain a friendly forum,
either PM or use Report Post if you see anything you are unhappy with. Thanks.
Post Reply