New Gilbert
-
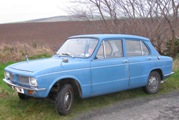
Triumph1300

- TDC Member
- Posts: 1500
- Joined: Wed Sep 27, 2006 10:59 am
- Location: Coventry
Re: New Gilbert
See you at Stoneleigh
BWJ
1966 Triumph 1300 Royal Blue
1966 Triumph 2000 Blue
1965 Triumph 2000 black and rust
1967 BSA B40wd green
2018 Jaguar E pace 2018
NOBODY expects the Canley Inquisition!
1966 Triumph 1300 Royal Blue
1966 Triumph 2000 Blue
1965 Triumph 2000 black and rust
1967 BSA B40wd green
2018 Jaguar E pace 2018
NOBODY expects the Canley Inquisition!
-
epcot_pete
Re: New Gilbert
Done really well past few days. Made a wooden 'A' frame on large castors which the front subframe sits on. I can raise the body quite high in the garage but cannot move it, so the idea is to push the assembled subframe under the raised body. Tried it today with no engine and it works a treat so dead chuffed. There is enough room under the body for the engine and gearbox when assembled so dead chuffed again. Body back now onto four wheels and able to push out of garage to concentrate on outside of body. Put bonnet on and was really pleased with the fit of the front box section that the bonnet hinges are screwed to. When I had the car the front had been bashed in the past so this box section did not fit properly with large gap on one side. Have been able to fill the top of the box section so that there is no visual gap which looks quite good.
- Attachments
-
- Photo shows fit between bonnet and box section now
- DSC09510.JPG (81.02 KiB) Viewed 4394 times
-
- Car when I first bought it showing gaps between bonnet and box section
- DSC06128b.jpg (84.45 KiB) Viewed 4394 times
-
- 'A' frame with subframe on the top.
- DSC09508.JPG (99.67 KiB) Viewed 4394 times
-
- 'A' frame pushed under raised body
- DSC09509.JPG (65.13 KiB) Viewed 4394 times
-
epcot_pete
Re: New Gilbert
Have just spent days or even weeks preparing the body for primer painting. I don't think I have worked so hard getting the surfaces flat and free of defects and still keep finding them, it is totally frustrating! Managed to get two coats of primer on and light sanding using 1200 grit gave excellent finish but also showed up some marks/indents which were not noticeable beforehand! Also I made the mistake of painting some grey oxide paint on some areas early on in the restoration to stop them from going rusty, only to realise that it is oil based and the primer reacted with it. So had to grind back to bare metal and start again and re-primer again. Have now got some more coats on and it looks good. Paint should be thick enough now to rub down any defects without touching metal. Hope to start wedgewood blue application this weekend so I can get car out of garage next week and paint the doors, bonnet and bootlid. While doing that, I will put body on blocks and take wheels off for refurb and new tyres.
- Attachments
-
- IMG_3976.jpg (70.98 KiB) Viewed 4357 times
-
- IMG_3977.jpg (60.45 KiB) Viewed 4357 times
-
- IMG_3978.jpg (51.15 KiB) Viewed 4357 times
-
Edin Dundee
Re: New Gilbert
Re: New Gilbert
Superb effort. Well done. Keep up the great work. I especially like the new "doors" 
Wait, is that "passenger" in the back seat waving or flipping the bird!?
Wait, is that "passenger" in the back seat waving or flipping the bird!?
-
epcot_pete
Re: New Gilbert
My children are still children and have draw windows and people on all 4 door openings! By the way they are 38 and 36!!!!!!!!!!!!!!!!!!!!
-
Jon Tilson
- Guest contributor

- Posts: 11179
- Joined: Tue Oct 03, 2006 9:45 pm
- Location: Middlesex
Re: New Gilbert
Had to be done....
Jonners
Jonners
Note from Admin: sadly Jon passed away in February 2018 but his humour and wealth of knowledge will be fondly remembered by all. RIP Jonners.
-
epcot_pete
Re: New Gilbert
I am pressing on with the body and doors/bonnet/boot to get the best finish prior to paint. Doors are a nightmare as fitting new bottoms has distorted the door outer skin quite badly in places, but determined to get best fit and finish no matter how much filler is used.
I have made 3 big mistakes lately which has cost me a lot of time and patience.
As the project is some 18 months old, as I finished de-rusting a panel I decided to brush paint it with a lead oxide paint. This gave a fairly good finish and would protect the bare metal for years. It was also good to get into those areas hard to access like the heater intake 'box' section that houses the wiper motor and bonnet catch, with a long handled brush it was great and looked really good. I also did areas in engine bay, front valance, other areas of the body and doors etc., in fact all over the place!!!
First problem encountered was when I sprayed the primer - it reacted with the oxide paint as it was oil based and I was using cellulose - I honestly did not know until my paint supplier explained it to me. Had to rub the paint off in certain areas and wet & dry others which worked in some places and not others. So I concentrated on the outer body until primer attached no problem. Other areas like the engine bay and inside door openings I will brush paint with a paint mixed by my supplier in wedgewood blue.
Second problem occurred today when spraying the top coat. To get the wedgewood blue paint out of the 5 Ltr tin, I used an old yogurt pot which is what I do when I emulsion in the house. Seemed logical to me, but I left the pot sitting on top of the paint and replaced the lid......... About an hour later I took the lid off to find the pot had melted into a blob on top of the paint. I quickly scooped out the mess loosing about 1/2 Ltr of paint. Thought all was well after stirring and made another mix up - third problem, I forgot to strain the paint into the gun and when spraying it deposited small white lumps about the size of a pin head. They did flatten out using 800 grade and I mixed another mix using a strainer and was better although finish not so good, so I finished paint and gave up for the day. On stripping gun down for cleaning, it was full of white bits from the disintegrated yogurt pot and had blocked some of the small holes!
Gun nice and clean, some more disposable strainers bought and will leave the paint to harden off until the weekend and will start again by wet & drying the surface and couple of coats of top coat.
Would appreciate any tips on getting a good finish, especially on the roof. I've heard that thinning the last coat to 75% thinners helps - any thoughts? Thanks
- Attachments
-
- IMG_3980[1].jpg (58.25 KiB) Viewed 4279 times
-
- IMG_3979[1].jpg (54.55 KiB) Viewed 4279 times
-
epcot_pete
Re: New Gilbert
Paint finish reasonably good from clean spray gun and double strained paint, should be able to cut back to a good finish in a couple of weeks when paint has hardened. Good to see it out of the garage and masking removed. Will jack up onto blocks and remove wheels for refurb and new tyres. Will also hand paint the inside wheel arches, boot and engine bay. Nice day today so got interior out from loft and gave it a good wash and dry in the sun. Bought some lovely remnant carpet from Kidderminster which is about the same colour as original but about 4 times as thick! Doors, bonnet and boot are nearly finished from filling and rubbing down so soon can be put into garage and sprayed.
- Attachments
-
- IMG_3984[1].jpg (85.7 KiB) Viewed 4247 times
-
- IMG_3982[1].jpg (70.37 KiB) Viewed 4247 times
-
- IMG_3981b[1].jpg (67.35 KiB) Viewed 4247 times
-
- IMG_3981[1].jpg (82.91 KiB) Viewed 4247 times
-
epcot_pete
Re: New Gilbert
Lovely weather of late has allowed me to get on well with the car. I have hand painted the engine bay, heater intake, wheel arches and inside of boot so the car looks dramatically different. It is so much easier hand painting to get to all those awkward corners that the spray gun cannot get to. The body is now outside under a gazebo allowing the sprayed body paint to harden off before polishing and to work on interior and headlining. Have managed to clean and get wire loom in place and hope to fit refurbished heater and window wipers soon so I can fit sound deadening material.
Inside the garage I have the doors, bonnet and boot lid suspended from roof and have sprayed two coats of primer. A few small areas of damage have shown through after primer which were not noticeable before - most frustrating!!!! So will fill these, rub down and re-spray localised areas before allowing a couple of days of drying before applying top coats. I will then store these panels to dry for a couple of weeks and put the refurbished wheels and new tyres back onto the body, push body back into the garage and raise it off the sub-frame to allow me to finish building it and assembling the transmission and engine.
The drivers sun-visor had collapsed on one side and was floppy so took it apart and found the hardboard inside had diminished to dust! Will make a new one and find a way of fitting it to the metal 'hinge'. I have added photos of this as the manufacturing method of 50 years ago seems that the metal 'hinge' pressing is spot-welded sandwiching the hardboard! Even if the hardboard had holes for the spot-welds to get metal to metal contact, the burning smell must have been awful for the operator!
Still lots do and end of May coming up fast!!!!!!!
- Attachments
-
- Front of car showing hand painted engine bay and heater intake.
- DSC09528.JPG (64.65 KiB) Viewed 4220 times
-
- Panels after priming
- DSC09530.JPG (66.73 KiB) Viewed 4220 times
-
- Panels after priming
- DSC09529.JPG (77.77 KiB) Viewed 4220 times
-
- View of the spot-weld with the hardboard cut away
- DSC09527.JPG (61.51 KiB) Viewed 4220 times
-
- Another view of the spot-weld
- DSC09526.JPG (80.47 KiB) Viewed 4220 times
-
- The dismantled sun-visor
- DSC09525.JPG (69.59 KiB) Viewed 4220 times

Re: New Gilbert
Nice work, looking superb 
1978 Pageant Sprint - the rustomite, 1972 Spitfire IV - sprintfire project, 1968 Valencia GT6 II - little Blue, 1980 Vermillion 1500HL - resting. 1974 Sienna 1500TC, Mrs Weevils big brown.
-
epcot_pete
Re: New Gilbert
When I bought the car and had it checked over at the garage, the Guy said that one tyre was so poor that I should not use it on the road! Little did he know that I had drove it back from Grimsby a few days earlier and did 50 to 70mph on the motorways!!!
What we did not understand was that there was a brand new tyre on the spare. Now after pumping it up we realised that it was leaking from the rim and closer inspection showed that it had a 'ding' previously. Had all the tyres removed so I can refurbish the rims and checked the 'Ding', it was 5.0mm deep! Toledo Man suggested a 2lb lump hammer but I found a copper faced one did the trick and put the rim within 0.5mm, which was probably the tolerance used 50 years ago.
So having cleaned all the old paint off the wheels, they will be painted tomorrow and allowed to dry before having new tyres fitted next Tuesday.
- Attachments
-
- The 5.0mm 'Ding' in the rim
- DSC09613.JPG (59.85 KiB) Viewed 4166 times
-
- Looking visually and dimensionally good.
- DSC09614.JPG (64.47 KiB) Viewed 4166 times
-
NickMorgan
- Guest contributor
- Posts: 1282
- Joined: Wed Oct 04, 2006 7:45 pm
- Location: East Lothian, Scotland
Re: New Gilbert
Great work. It is very inspiring to read about what you have been doing. I am sure you have learned a lot during the process. I need to give my Toledo a re-spray, but there is so much that I don't know, such as the compatability of paints and how much to thin them before painting. Not to mention not having anywhere to do it, and not having any time or money!!
1959 TR3A, 1970 Triumph 1300, 1974 Toledo
 Thanks Photobucket
Thanks Photobucket -
Purplebargeken
Re: New Gilbert
So, once you have finished when would you like me to book the LWT in with you for painting?
Utterly fabulous effort and what looks to be an excellent result so far. Much kudos to you for such an undertaking. Simply brilliant.
Ken
Utterly fabulous effort and what looks to be an excellent result so far. Much kudos to you for such an undertaking. Simply brilliant.
Ken
-
epcot_pete
Re: New Gilbert
Well Thanks Guys for comments. It is good to get feedback as sometimes you feel like giving up in despair!
My spraying looks good on photo's but I can assure you I have a lot to learn and hoping to correct errors you cannot see with polishing and 'fudging'. There is an excellent website you may want to visit which I found very good and good advice, hope this link takes you to it: http://uk-mkivs.net/topic/65765-how-to-spray-paint/
If you do want some further info, please contact me.
My lovely wife Joan was giving the job of refurbing the headlining and made an excellent job of it using a soft sheen vinyl paint left over from another job in the house.
- Attachments
-
- Four pictures of how the headlining was before Joan's wonderful touch
- Roof x 4.jpg (60.66 KiB) Viewed 4088 times
-
- The newly painted headlining
- DSC09615.JPG (41.89 KiB) Viewed 4088 times