Page 4 of 22
Re: DTR - Project Recommission 1972 'Dolomite' Manual
Posted: Sat Feb 03, 2018 9:37 am
by Karlos
MIG Wielder wrote: ↑Fri Feb 02, 2018 2:56 pm
What's the secret of 1850 head removal then please James ? That looked just so easy from the piccys
The "head-masters secret".
Could be nylon rope pushed into the cylinders through the sparkplug hole, them crank the engine to force the head up.
Could be hardwood wedges hammered between the block and head.
Could be a purpose made tool.
Will we ever find the secret?
Re: DTR - Project Recommission 1972 'Dolomite' Manual
Posted: Sat Feb 03, 2018 9:48 am
by dollyman
I think he is just teasing us, if it has come off that easy? maybe he should go and buy a lottery ticket

Re: DTR - Project Recommission 1972 'Dolomite' Manual
Posted: Sat Feb 03, 2018 11:28 am
by lazeruspete
Karlos wrote: ↑Sat Feb 03, 2018 9:37 am
MIG Wielder wrote: ↑Fri Feb 02, 2018 2:56 pm
What's the secret of 1850 head removal then please James ? That looked just so easy from the piccys
The "head-masters secret".
Could be nylon rope pushed into the cylinders through the sparkplug hole, them crank the engine to force the head up.
Could be hardwood wedges hammered between the block and head.
Could be a purpose made tool.
Will we ever find the secret?
That rope idea is genius. does it work?
Re: DTR - Project Recommission 1972 'Dolomite' Manual
Posted: Sat Feb 03, 2018 12:02 pm
by James467
dollyman wrote: ↑Sat Feb 03, 2018 9:48 am
I think he is just teasing us, if it has come off that easy? maybe he should go and buy a lottery ticket
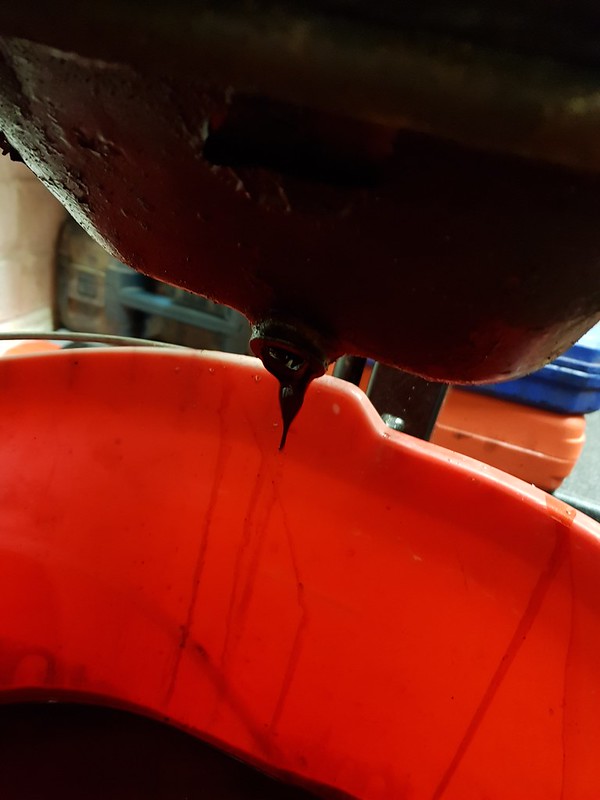
So the secret is brass (or at least I think they are brass) wedges very carefully driven in between the block and head. I have done this on the engines I have picked up from various places, some have been left standing for ages and it always works. If you are careful there is no damage to the block or head as the wedges are a softer material.
You need to remove the timing gear, chain, guides etc...
Take out as many studs as you can and soak the rest in penetrating oil, I used diesel.
I then drive the wedges in just under the exhaust ports and in the same place on the opposite sides. The aim is to get the head moving thus breaking the corrosive resistance on the stud. If you are lucky then you can just remove the stud. If not you can then you can raise the head enough so that the stud is flush with the hole, then you have a well in which to get more penetrating fluid in. So with a soak, some up and down jiggery pokery and some choice words the head slides off. Then I use a very big Laser stud remover to remove the studs from the block. This does damage the studs but I'm replacing them with Nickel plated ones so I don't care.
Of course it helps if you have my engine stand mount as the head is then mounted horizontal.

Tony's new tool that he is designing will work better though.
Re: DTR - Project Recommission 1972 'Dolomite' Manual
Posted: Sat Feb 03, 2018 12:21 pm
by James467
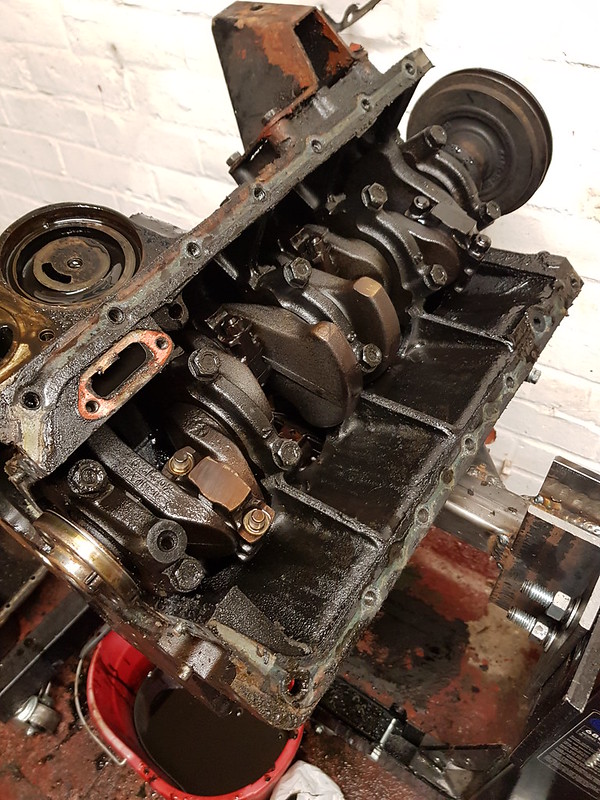
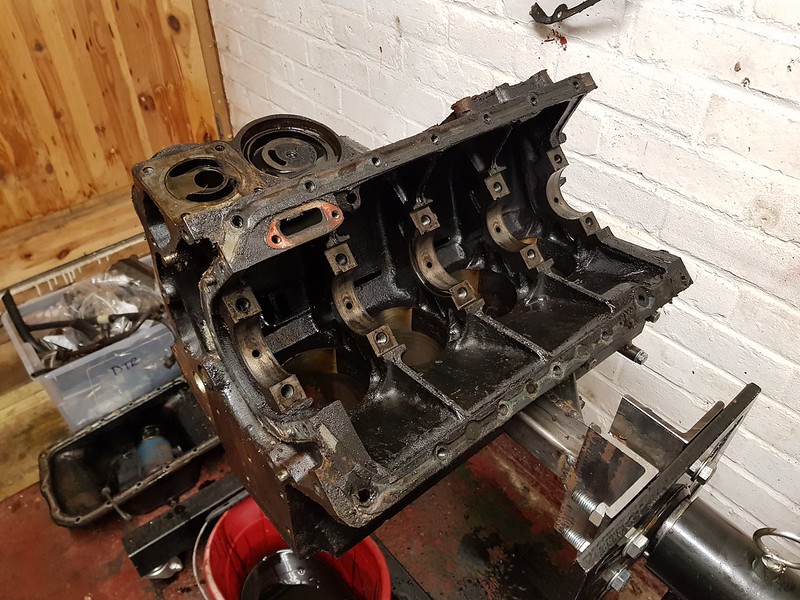
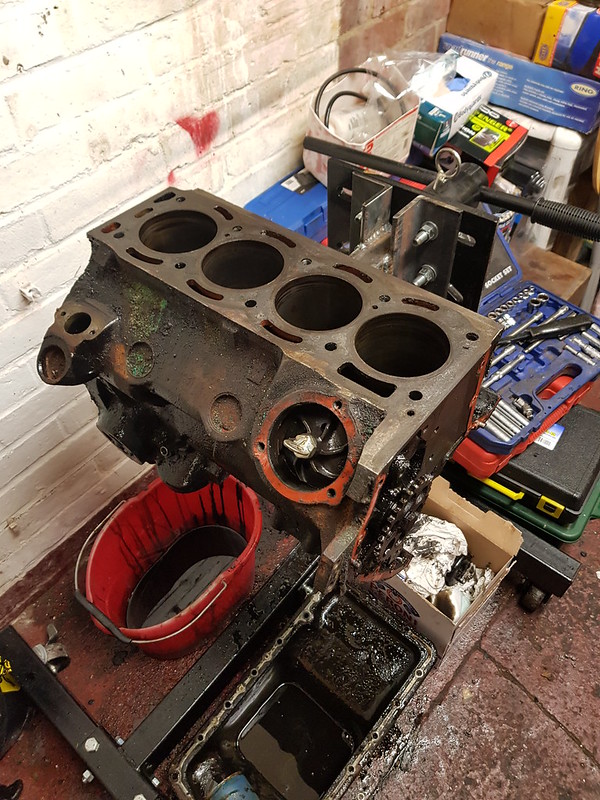
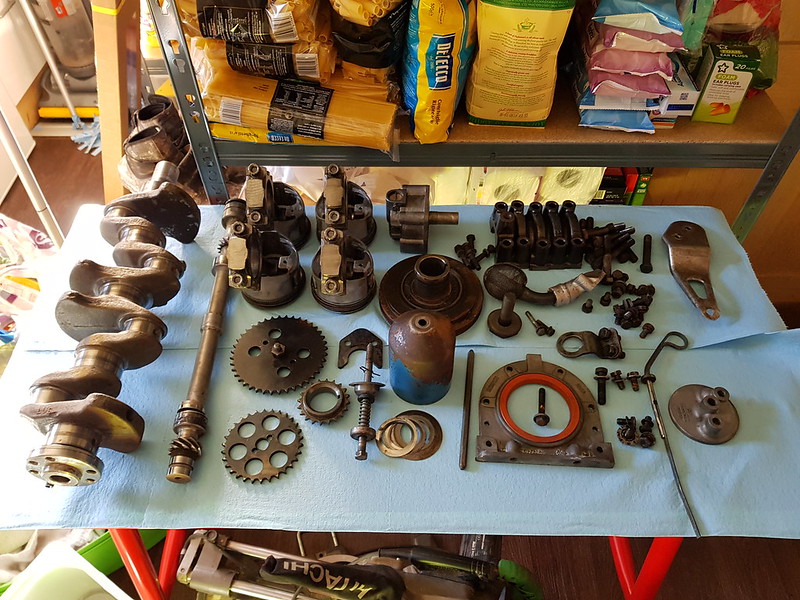
The engine has done a genuine 90k, I have the MOTs so it will be interesting to see what the internal condition is.
The amount of sludge coming from the sump wasn't a good start!
It's a bit dirty in there but not too bad, the sludge was confined to the bottom of the sump.
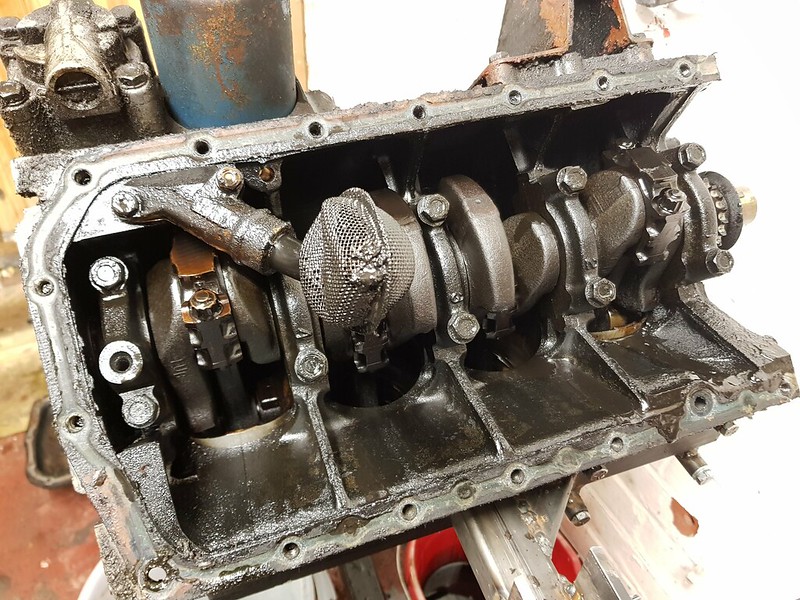
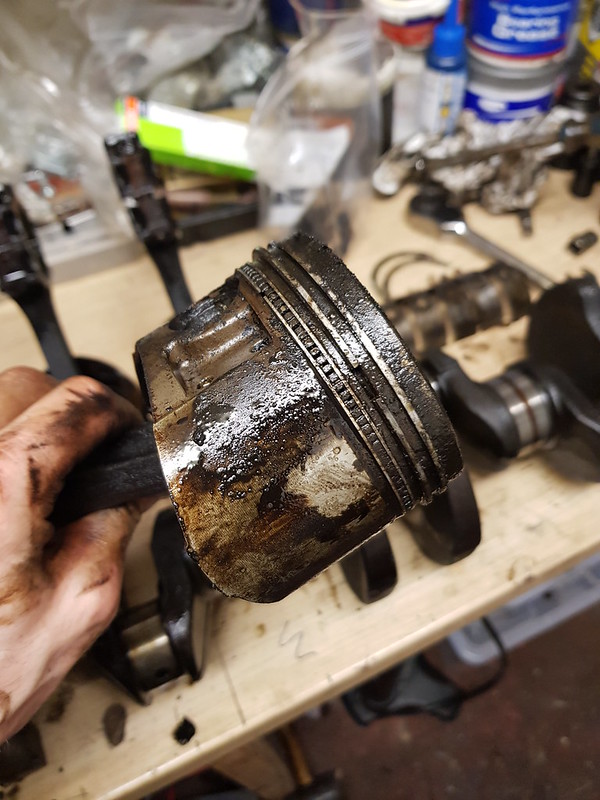
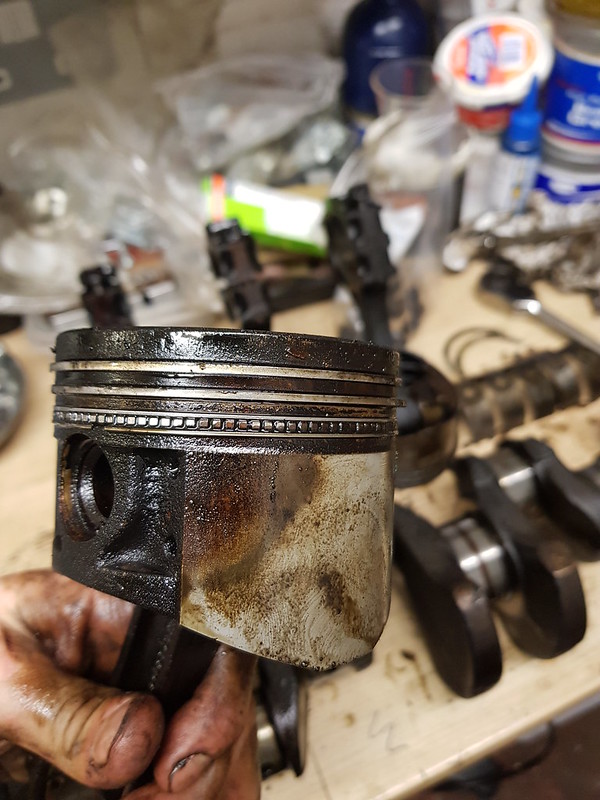
Pistons came out easily, number 1 needed a knock but thats a cylinder that I had a compression problem on.
Just need to pull the water pump and jackshaft and I can get on and clean it and get the cylinders honed. They cylinders are very good, they look look like they only need a hone, I'll measure everything once it's all clean.
Everything ready to be cleaned.
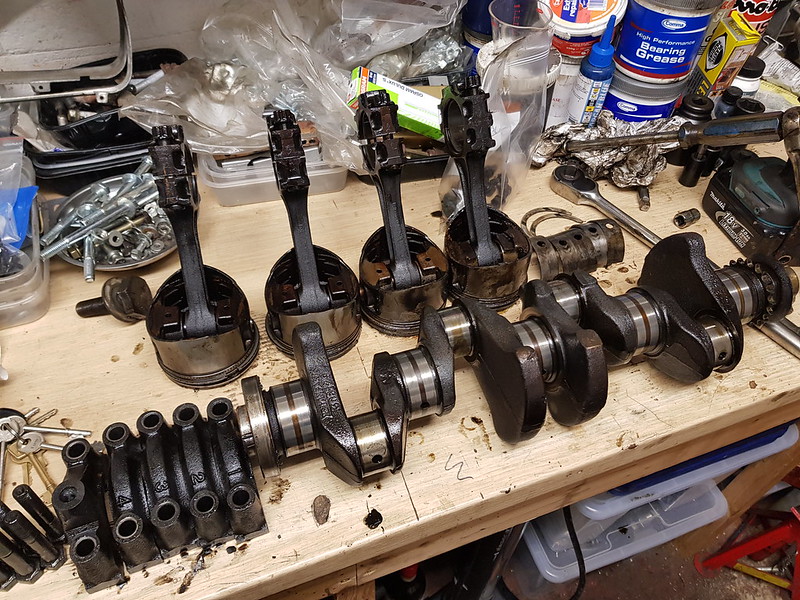
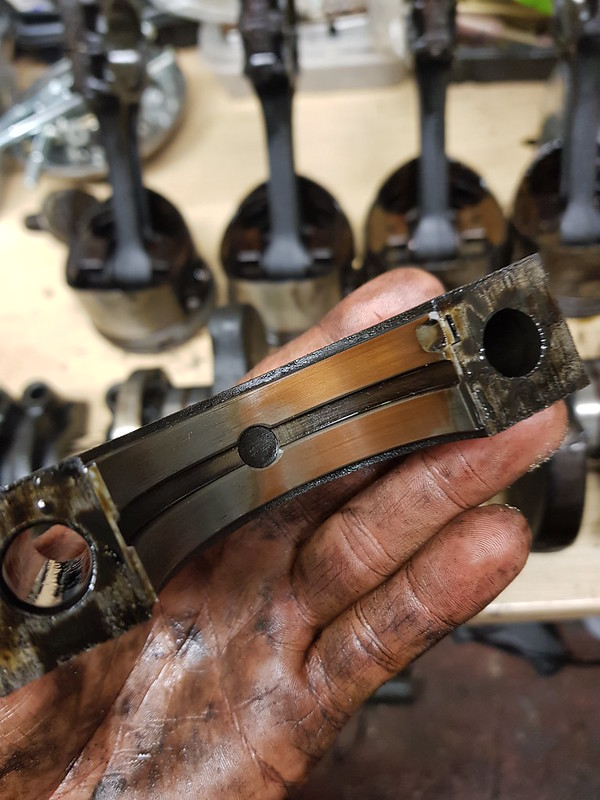
Bearings look pretty standard for 90k, all standard size VP. No damage to the journals I'll just get the crank polished.

This is the problematic no 1 piston, the rings are stuck and it's filthy, it will clean up ok though. All the oil control rings are gummed up but that's to be expected.
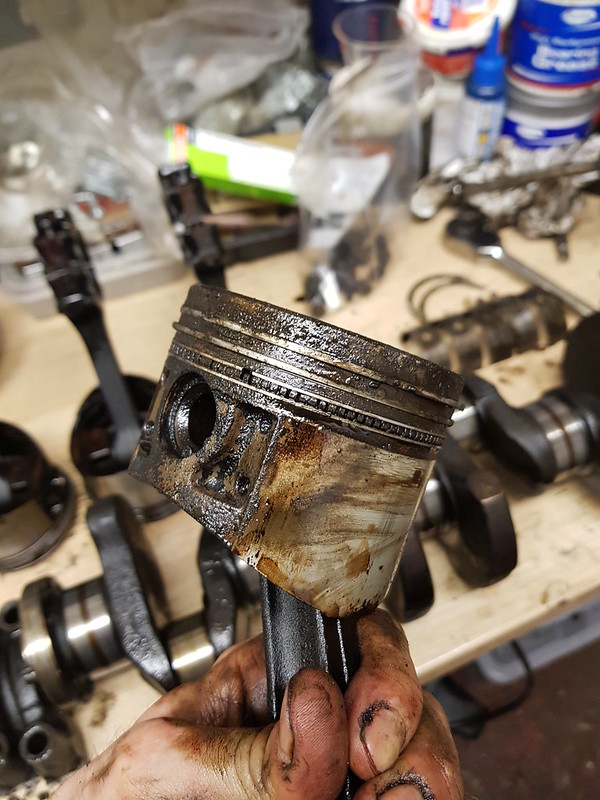
The rest of the pistons are in superb condition with minimal thrust face wear. They will all clean up and can be used again with new rings.
Re: DTR - Project Recommission 1972 'Dolomite' Manual
Posted: Sat Feb 03, 2018 12:45 pm
by Mahesh

Let me know when your free for a engine dismantle and desludge.
Re: DTR - Project Recommission 1972 'Dolomite' Manual
Posted: Sat Feb 03, 2018 12:55 pm
by Karlos
lazeruspete wrote: ↑Sat Feb 03, 2018 11:28 am
Karlos wrote: ↑Sat Feb 03, 2018 9:37 am
MIG Wielder wrote: ↑Fri Feb 02, 2018 2:56 pm
What's the secret of 1850 head removal then please James ? That looked just so easy from the piccys
The "head-masters secret".
Could be nylon rope pushed into the cylinders through the sparkplug hole, them crank the engine to force the head up.
Could be hardwood wedges hammered between the block and head.
Could be a purpose made tool.
Will we ever find the secret?
That rope idea is genius. does it work?
I haven't done it that way myself but if I was to I would probably take the camshaft out first so that the valves are seated and don't get bent. It is a last resort procedure. I have always had success using James' method but with wooden wedges.
Re: DTR - Project Recommission 1972 'Dolomite' Manual
Posted: Tue Feb 06, 2018 2:22 pm
by James467
I am waiting for the block to be honed and some parts to arrive, everything has had an initial clean just so I can strip the pistons oil pump etc... Suprisingly it has all come up rather well, the sump had about a 15mm layer of sludge in the bottom which took ages to get rid of!
Engine reassembly can be done in the evenings, the most pressing issue for me is the welding which needs to be completed in the next week or so to keep me on track for the NEC.
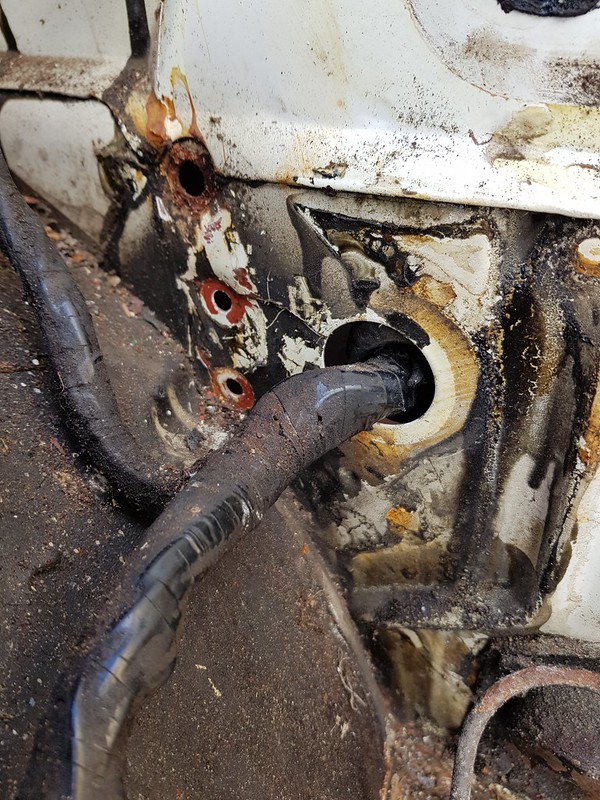
I striped the bulkhead pad off mainly to gain access to weld the bulkhead fatiuge crak with ease, I also wanted to check for any other areas for rust, there are none!
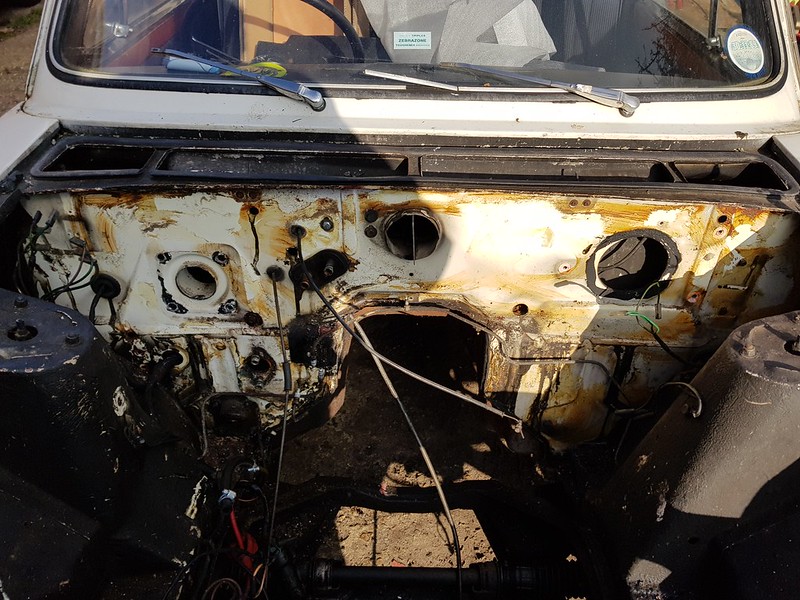
The fatigue crack will be easy to repair, I have a reinforcing plate when it all goes back together.
I finished stripping the trim from the body, bumper off etc... and the rust on the drivers side isn't too bad, easily repairable.
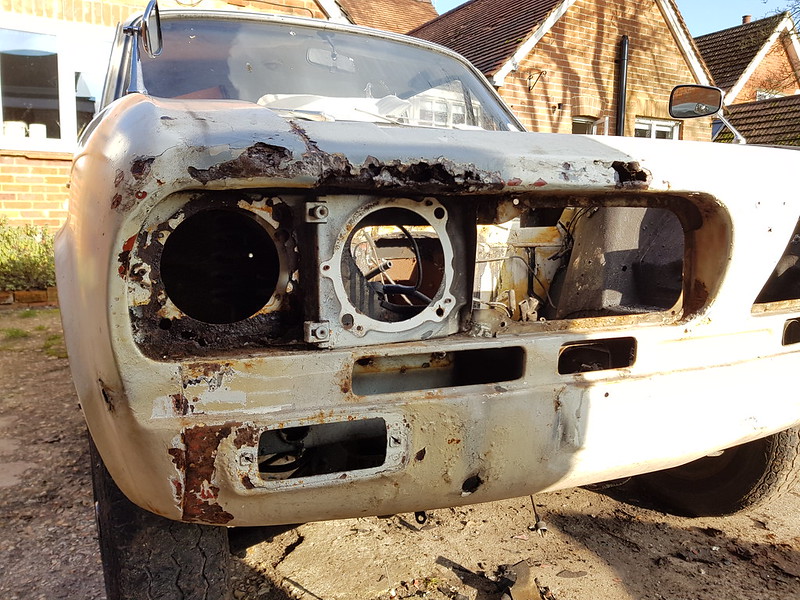
Lots of body filler on the passenger side.
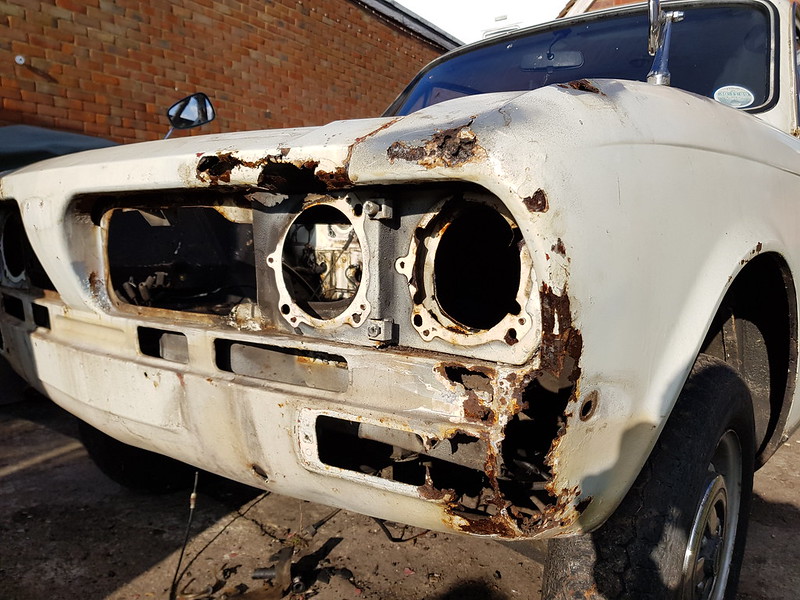
It will look better once stripped back, the rust is only confined to the outer panels and the valence isn't difficult to fix but the wing is a real pain, I can fab a panel for it but I need an english wheel to get the curvature all nice and flat.
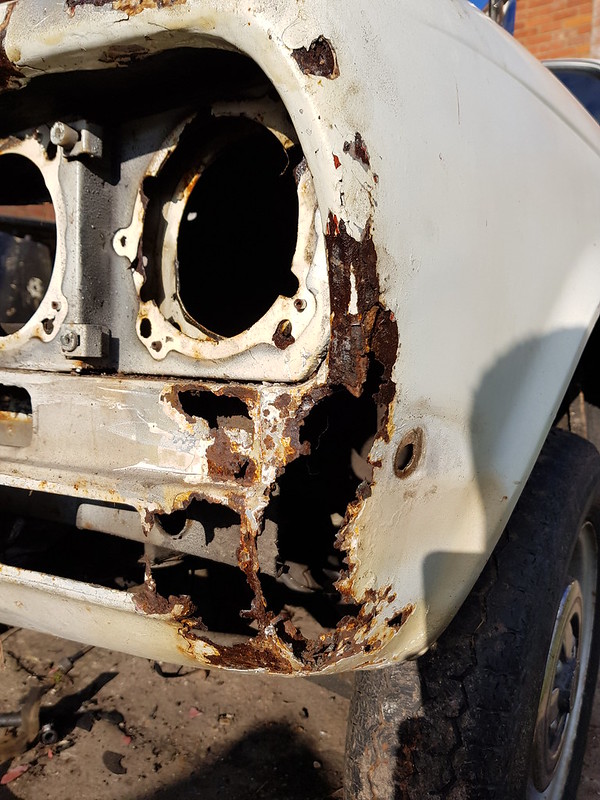
Sods law I just sold my wings from YGD to Graham! Actually they were way to good to cut up. I will have to have a think about how to tackle this area. Ideally I need a passenger wing that has some damage closer to the door that I can cut up.
On to the rest of the car and there are a couple of holes in the rear passenger wheel well, and a small hole in the drivers sill behind the wing. Both about the size of a 10p and should be easy to repair.
I am still trying to decide weather or not to strip off the ziebart from the engine bay.
Re: DTR - Project Recommission 1972 'Dolomite' Manual
Posted: Tue Feb 06, 2018 3:21 pm
by SprintMWU773V
James467 wrote: ↑Tue Feb 06, 2018 2:22 pm
I am still trying to decide weather or not to strip off the ziebart from the engine bay.
I would, horrible stuff
Re: DTR - Project Recommission 1972 'Dolomite' Manual
Posted: Tue Feb 06, 2018 3:23 pm
by James467
SprintMWU773V wrote: ↑Tue Feb 06, 2018 3:21 pm
James467 wrote: ↑Tue Feb 06, 2018 2:22 pm
I am still trying to decide weather or not to strip off the ziebart from the engine bay.
I would, horrible stuff
I really hate it! How do you get it off? Scraper?
Re: DTR - Project Recommission 1972 'Dolomite' Manual
Posted: Tue Feb 06, 2018 3:38 pm
by SprintMWU773V
Soften with white spirit and then scrape off gently in my experience. You could also use some car tar remover like Autoglym but this is quite expensive so white spirit is probably better.
Re: DTR - Project Recommission 1972 'Dolomite' Manual
Posted: Tue Feb 06, 2018 3:39 pm
by James467
SprintMWU773V wrote: ↑Tue Feb 06, 2018 3:38 pm
Soften with white spirit and then scrape off gently in my experience. You could also use some car tar remover like Autoglym but this is quite expensive so white spirit is probably better.
Thanks Mark, I'll give it a go
Re: DTR - Project Recommission 1972 'Dolomite' Manual
Posted: Tue Feb 06, 2018 6:57 pm
by new to this
James467 wrote: ↑Tue Feb 06, 2018 3:23 pm
SprintMWU773V wrote: ↑Tue Feb 06, 2018 3:21 pm
James467 wrote: ↑Tue Feb 06, 2018 2:22 pm
I am still trying to decide weather or not to strip off the ziebart from the engine bay.
I would, horrible stuff
I really hate it! How do you get it off? Scraper?
I think my cars was ziebarted i have small plugs fitted along sills but in the engine bay mines painted,not seen one like yours before
Dave
Re: DTR - Project Recommission 1972 'Dolomite' Manual
Posted: Tue Feb 06, 2018 9:44 pm
by Carledo
It takes a while and it's hellishly messy, but petrol dissolves ziebart quite handily, I just soak it and then rub it off with a rag, then there's no scratching from the scraper. Patience is the key!
I'll check my shed, there may just be a wing in there you can use. I had 2 n/s ones and know I sold one but can't remember about the other!
Steve
Both the Carledo and the Dolomega are Ziebarted, including the full underbonnet area and the inside of the bonnet itself. But I believe you could, in the day, elect NOT to have the engine bay treated and save a few bob into the bargain. The place I REALLY hate getting it off from is the heater plenum cavity! Everywhere else is relatvely simple.
Re: DTR - Project Recommission 1972 'Dolomite' Manual
Posted: Tue Feb 06, 2018 9:47 pm
by James467
Carledo wrote: ↑Tue Feb 06, 2018 9:44 pm
It takes a while and it's hellishly messy, but petrol dissolves ziebart quite handily, I just soak it and then rub it off with a rag, then there's no scratching from the scraper. Patience is the key!
I'll check my shed, there may just be a wing in there you can use. I had 2 n/s ones and know I sold one but can't remember about the other!
Steve
Thanks Steve!