Project Satin Black - Help!!!!!!!!
Re: Project Satin Black - Help!!!!!!!!
Certainly looks like a bent valve to me! Probably got sticky due to being out of use for so long, then the piston bent it. Luckily there doesn't seem to be any damage! Replace the valve or simply whack on a spare head and you should be all set 
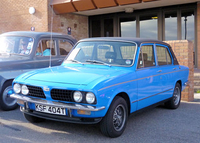
1978 Triumph Dolomite Sprint (project thread)
1966 Volkswagen 1300 (project thread)
1962 Austin Mini (project)
1962 MGA 1600 Mark II
1965 Mobylette SP50 (project)
2001 Rover 75 2.5-litre V6
1966 Volkswagen 1300 (project thread)
1962 Austin Mini (project)
1962 MGA 1600 Mark II
1965 Mobylette SP50 (project)
2001 Rover 75 2.5-litre V6
-
Purplebargeken
Re: Project Satin Black - Help!!!!!!!!
The head is now with my mate. He found 4 more non-springy valve springs, hopefully I will be able to update things on Saturday.
-
Purplebargeken
Re: Project Satin Black - Help!!!!!!!!
Just bought a Dremel type thingy from Lidl, should be ideal for cleaning up various Tolly engine bits.
-
DazasDolly
- Guest contributor

- Posts: 1162
- Joined: Sun Mar 14, 2010 7:44 pm
- Location: Colchester, ESSEX
Re: Project Satin Black - Help!!!!!!!!
They do a cracking job Ken, I carefully cleaned up my fuse box etc with it, handy little tool 
Darren
Darren
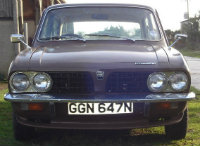
1974 Triumph 1500TC In Maple Brown, (MABLE) GGN 647N
1968 Triumph Vitesse Saloon 2L MK2 Not for the faint hearted, mega restoration
1973 Triumph Spitfire In Mimosa
1968 Triumph Vitesse Saloon 2L MK2 Not for the faint hearted, mega restoration
1973 Triumph Spitfire In Mimosa
-
Purplebargeken
Re: Project Satin Black - Help!!!!!!!!
Hmm, port matching to the gasket. Have been Googling and it looks possibly interesting.
Worthwhile or waste of time and effort. Answers on a forum sized postcard please.
Worthwhile or waste of time and effort. Answers on a forum sized postcard please.
-
Purplebargeken
Re: Project Satin Black - Help!!!!!!!!
Well the plan today was meant to be: go to mate's place, collect head which was to be stripped, cleaned and put back together again. Reality?
My git of a mate made me do the work myself
So, with the aid of his valve spring compressor:

These were then all lined up in order, so that no mixing up occurred:

This was the state of most of the valves:

It looked like they had been coated in black paint or tar. Very odd.

It ties in with this earlier picture:

This is part way through the cleaning process:

The valves were all cleaned and lapped in using a couple of different grades of paste. Nice even outcome on the valve seats
The valve springs, collets and valve spring seats were all cleaned up and everything was refitted. More piccies to follow tomorrow of the finished article.
Just have to make a couple of gaskets, get new hoses and away we go.
It was actually very satisfying to have done it all today and I was pleased that my mate made me do it. A really good day!
My git of a mate made me do the work myself
So, with the aid of his valve spring compressor:
These were then all lined up in order, so that no mixing up occurred:
This was the state of most of the valves:
It looked like they had been coated in black paint or tar. Very odd.
It ties in with this earlier picture:
This is part way through the cleaning process:
The valves were all cleaned and lapped in using a couple of different grades of paste. Nice even outcome on the valve seats
The valve springs, collets and valve spring seats were all cleaned up and everything was refitted. More piccies to follow tomorrow of the finished article.
Just have to make a couple of gaskets, get new hoses and away we go.
It was actually very satisfying to have done it all today and I was pleased that my mate made me do it. A really good day!
-
Jon Tilson
- Guest contributor
- Posts: 11179
- Joined: Tue Oct 03, 2006 9:45 pm
- Location: Middlesex
Re: Project Satin Black - Help!!!!!!!!
If you cabn afford it, its worth getting hardened exhaust valve seats. Depends how long you want to keep it amnd how hard you drive it I suppose...
Used to be about a tenner a seat and then machining cosst to ft them...probably about a ton all in...
What do others think with more ohv knowledge? My spit still has its lead memeory and has o/d so never revs that high.
Jonners
Used to be about a tenner a seat and then machining cosst to ft them...probably about a ton all in...
What do others think with more ohv knowledge? My spit still has its lead memeory and has o/d so never revs that high.
Jonners
Note from Admin: sadly Jon passed away in February 2018 but his humour and wealth of knowledge will be fondly remembered by all. RIP Jonners.
-
Purplebargeken
Re: Project Satin Black - Help!!!!!!!!
Hiya Jon, that would've been the way forward but cash is a bit tight at the moment. I'll have to stick with an additive at the moment, plus my mileage is never that extensive (sadly). I guess when I retire that should change lol++. Plus I now have the confidence to remove the head should I decide to go that way. I'd like to view this Tolly as a keeper, so who knows. Tollies have to be my favourite if I am honest.
I forgot to add that the valves were undamaged and all straight. From the amount of crud I am presuming they were just gummed up and with non-use, had just stuck solid.
Today will see the crowns getting a clean up (apart from round the edges ). A final wipe over and the on with the head.
I forgot to add that the valves were undamaged and all straight. From the amount of crud I am presuming they were just gummed up and with non-use, had just stuck solid.
Today will see the crowns getting a clean up (apart from round the edges
-
Purplebargeken
Re: Project Satin Black - Help!!!!!!!!
As promised, I went down to the garage and continued work on getting the cylinder head back in its rightful place.
First of all, more cleaning up of the piston crowns. This is the before picture:

Afterwards:

You can see that i got a little carried away on the first piston crown but heeded the advice given on the others.
Head gasket on after cleaning away the remnants of the old one:
There you go. The nuts are just finger tight for now, until I get the torque wrench out of the loft:

I just need the following items and I can carry on:
Water pump gasket (may just make one)
Rad hoses
New thermostat
Odds and sods of other hoses and clips
Oh, must flush the rad out!
First of all, more cleaning up of the piston crowns. This is the before picture:
Afterwards:
You can see that i got a little carried away on the first piston crown but heeded the advice given on the others.
Head gasket on after cleaning away the remnants of the old one:
There you go. The nuts are just finger tight for now, until I get the torque wrench out of the loft:
I just need the following items and I can carry on:
Water pump gasket (may just make one)
Rad hoses
New thermostat
Odds and sods of other hoses and clips
Oh, must flush the rad out!
-
Lord Tolly

- Guest contributor
- Posts: 997
- Joined: Sat Oct 24, 2009 10:48 am
- Location: Norwich
Re: Project Satin Black - Help!!!!!!!!
Almost there
well done
Fingers crossed Ken you will be up and running soon
well done
Fingers crossed Ken you will be up and running soon
Round The U Bend Looking for my Camera
-
DoloWIGHTY
Re: Project Satin Black - Help!!!!!!!!
Splendid work Ken, a bit parky today as well so I know how difficult it can be to motivated to get out there and start twiddling you nuts (if you understand?)
-
Lord Tolly
- Guest contributor
- Posts: 997
- Joined: Sat Oct 24, 2009 10:48 am
- Location: Norwich
Re: Project Satin Black - Help!!!!!!!!
Tell me about it Alan I was outside today trying to make engine paint dry with a hairdryer 
Round The U Bend Looking for my Camera

Re: Project Satin Black - Help!!!!!!!!
I must be young and daft then.DoloWIGHTY wrote:Splendid work Ken, a bit parky today as well so I know how difficult it can be to motivated to get out there and start twiddling you nuts (if you understand?)
In no particular order today I achieved, handbrake adjustment, brake bleeding, changed steering rack gaiters and track rod ends, set the tracking, did the timing, permanently mounted the exhaust, changed the carb mounts, gearbox mounts and probably some other mucking about.
Oh and it moved under its own power. Only a few inches, but still...
Anyway, well done Ken!
Very satisfying to do these things yourself, isn't it?
1978 Twilight Purple Dolomite 1850HL The Lolomite.
It's 106 miles to Chicago, we've got a full tank of gas, half a pack of cigarettes, it's dark, and we're wearing sunglasses.
Hit it.
It's 106 miles to Chicago, we've got a full tank of gas, half a pack of cigarettes, it's dark, and we're wearing sunglasses.
Hit it.

Re: Project Satin Black - Help!!!!!!!!
Are you sure you have the right headgasket? You have a recessed engineblock and i do not see the tag on your headgasket.
Jeroen
Jeroen
Classic Kabelboom Company. For all your wiring needs. http://www.classickabelboomcompany.com
Re: Project Satin Black - Help!!!!!!!!
I did zoom in the picture and it shows at cil 1 that the gasket is a normal one.
Jeroen
Jeroen
Classic Kabelboom Company. For all your wiring needs. http://www.classickabelboomcompany.com