Page 7 of 30
Re: The Next Level
Posted: Tue Aug 18, 2015 2:54 pm
by Carledo
It really needs one with the motor and all the gubbins on the left in order to clear the brake pedal, since the car is auto there's a big empty space where the clutch pedal and associated bits normally go! I may be able to turn it to suit and just relocate the brackets or cut the outer column, turn the top section and weld it up again, if all else fails that should work and its not like i'd be cutting anything that might get me in trouble if it failed in service! Today I also found in my junk shed, a lower column from a Shogun/Pajero which looks like it might help, it has U/Js with different size/spline shafts on each end.
More later and there WILL be pics, its just very tedious loading them onto the computer then uploading them to photobucket before I can put them on here!
Steve
Re: The Next Level
Posted: Wed Aug 19, 2015 10:00 pm
by Carledo
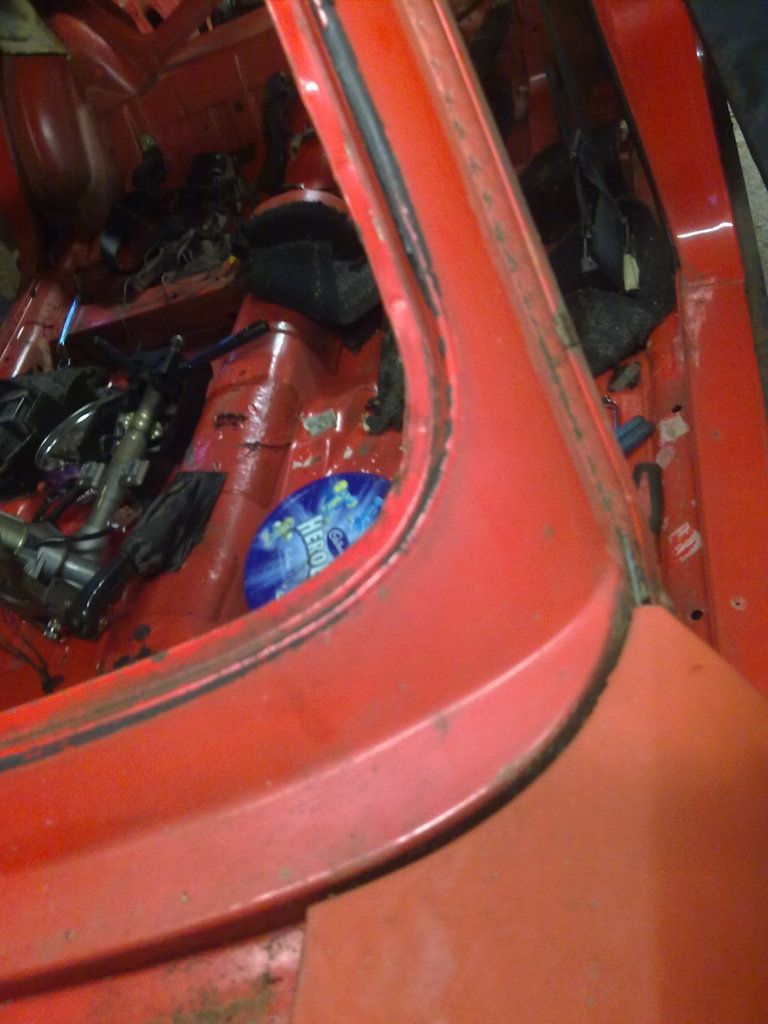
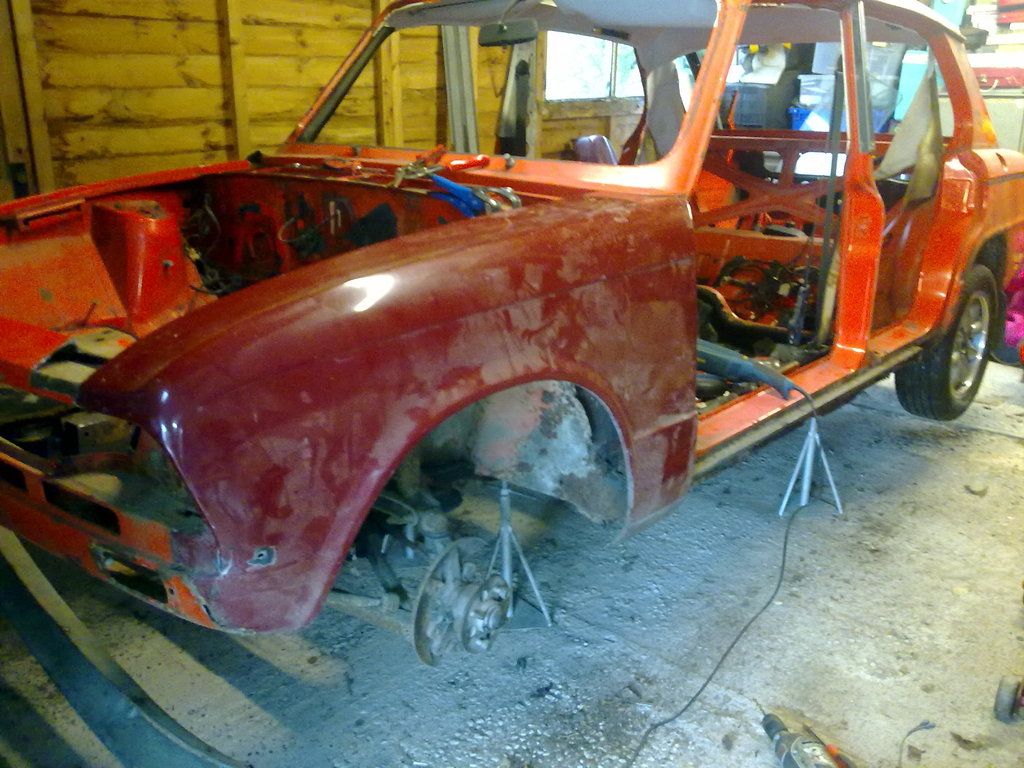
Finally some pics! I'm pleased to report that standing a couple of years has not caused any more problems I can see. There are a couple of tiny areas needing work that I was not aware of till the strip, this in the rear window aperture:-
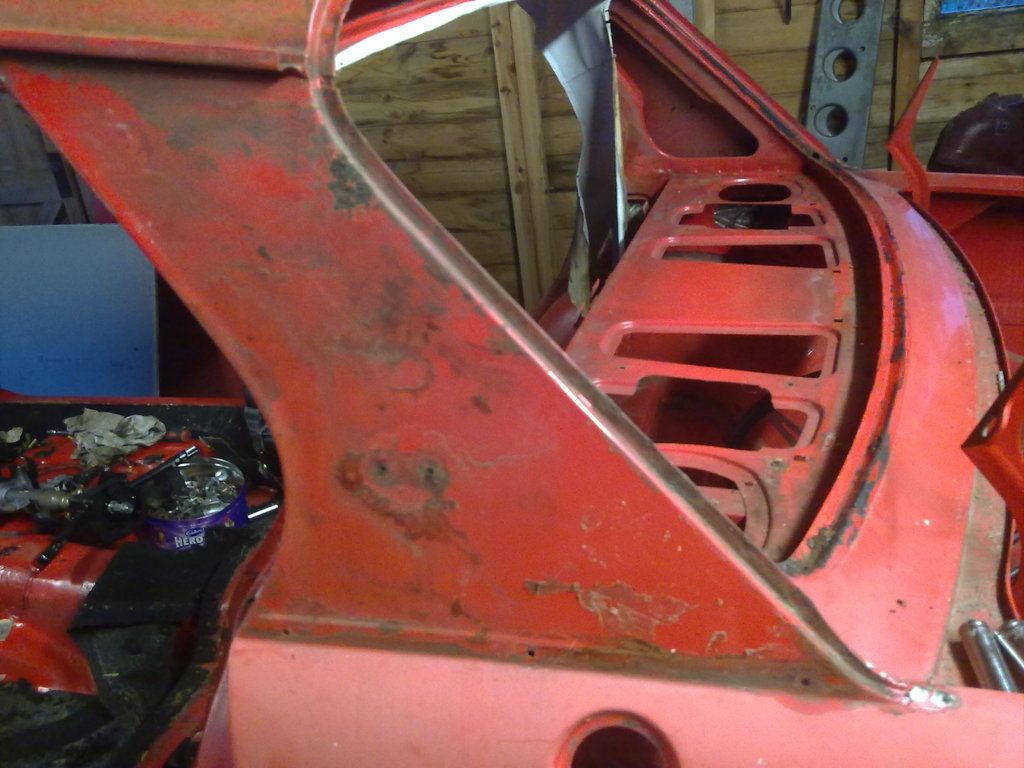
and this small patch of rust on the C pillar rear edge near the top, not a hole but needs doing :-
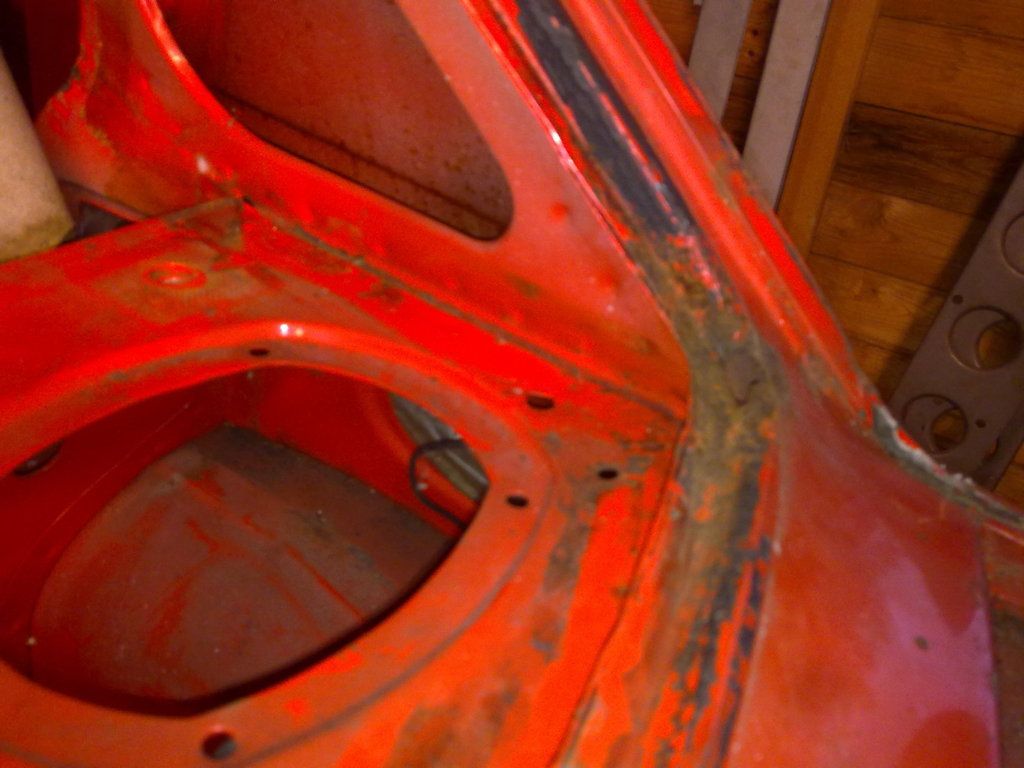
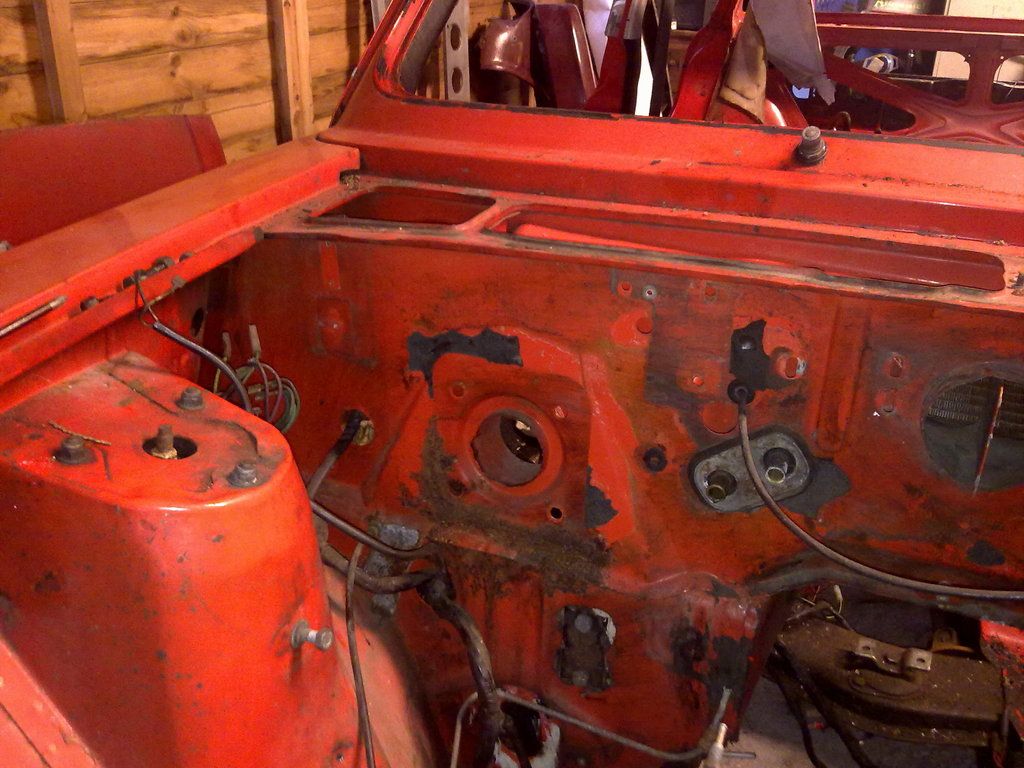
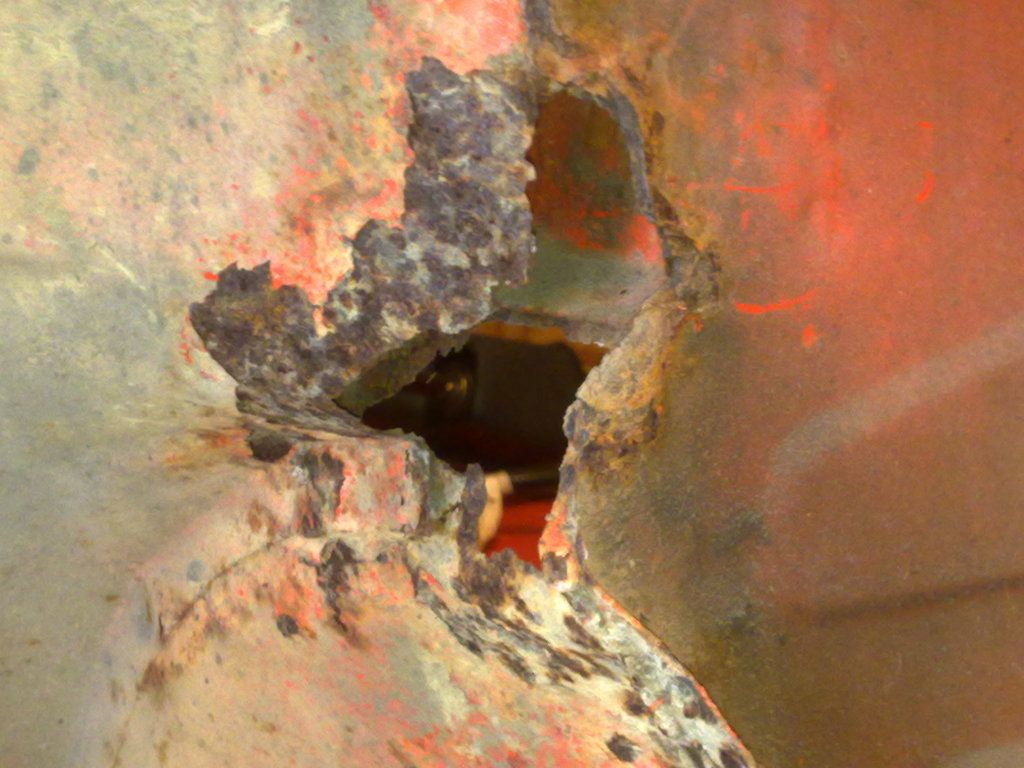
This one has me a bit baffled, I have been congratulating the car on the complete intact-ness of the front screen surround yet this panel inside is badly rotted, it's worse than the pic shows, all the brown bit is lace and holes and will need repairing
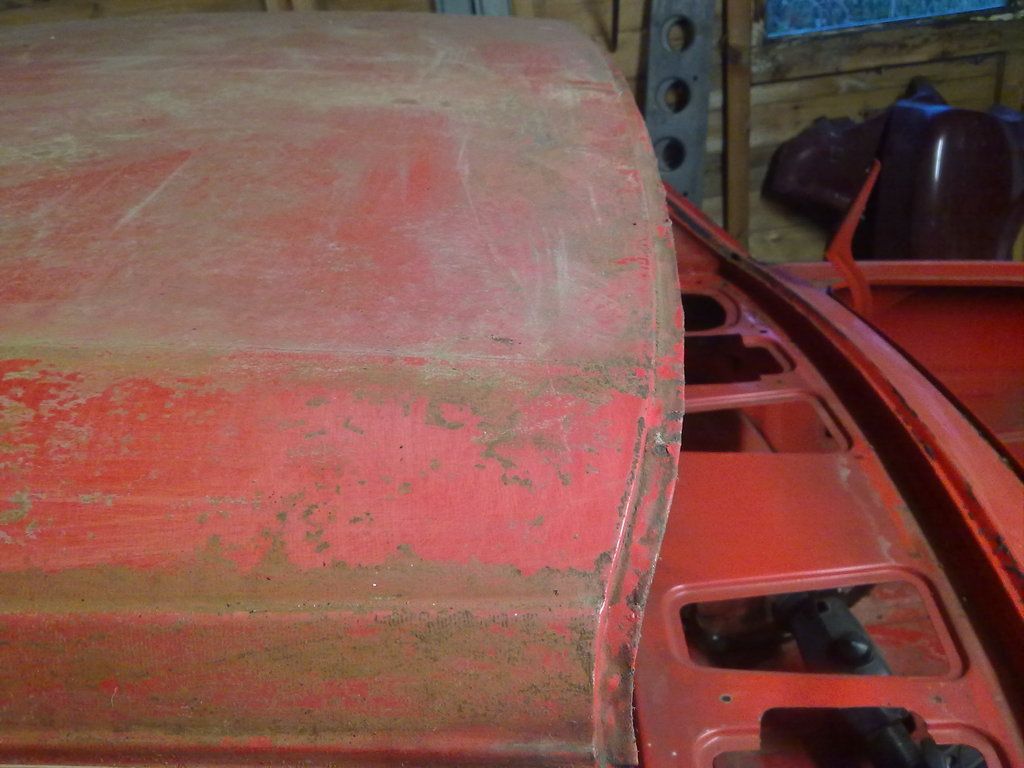
On the up=side, the rear of the roof is fine, both above and below
and the outer screen frame is very good
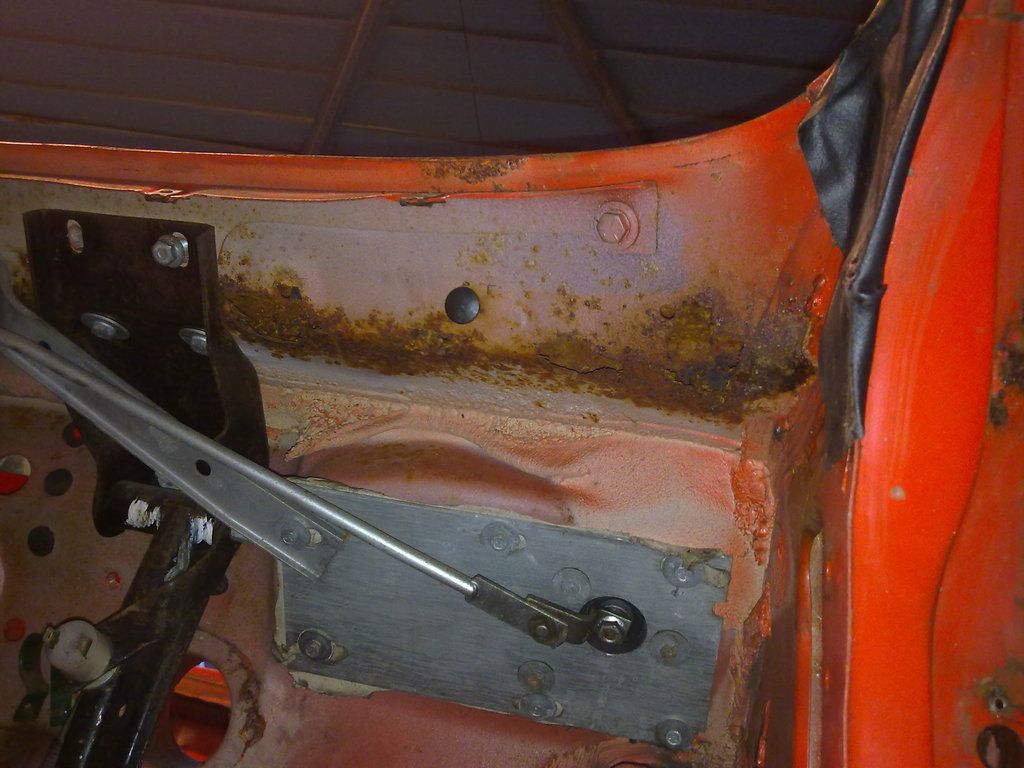
the bulkhead only needs minor attention behind the servo
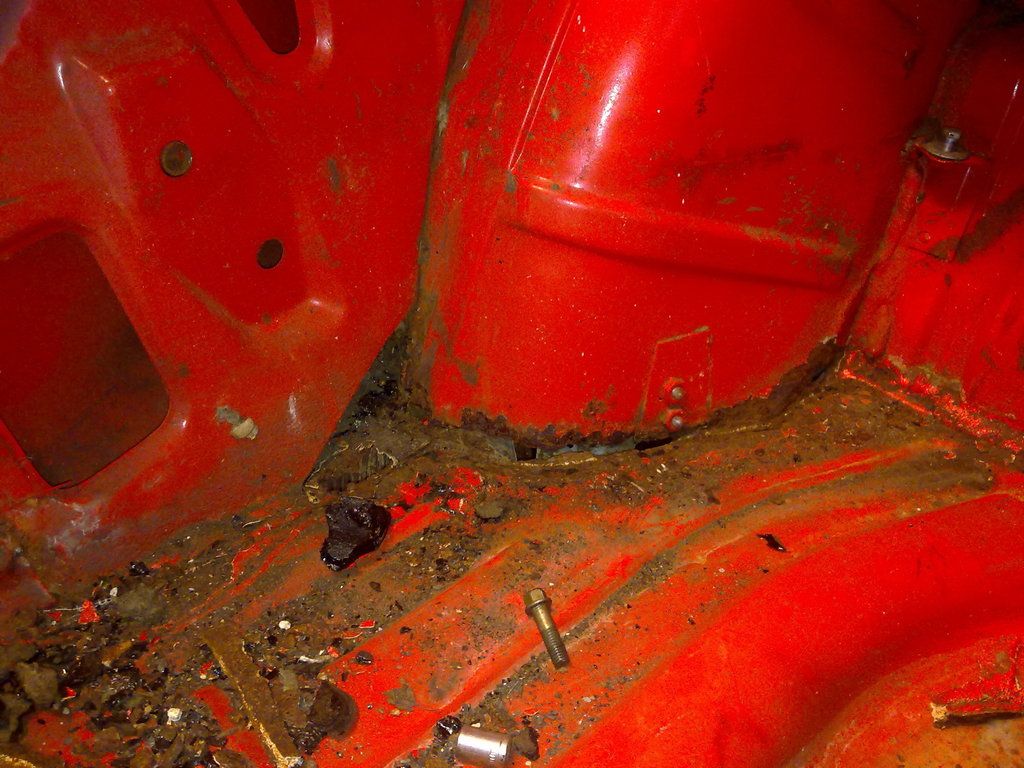
and though its worse than I first thought, probably due to the impact damage which has resulted in a new inner and outer rear valance being fitted long ago, the boot floor is almost certainly recoverable without recourse to a new panel
Enough for now, more later!
Steve
Re: The Next Level
Posted: Wed Aug 19, 2015 10:24 pm
by Carledo
A couple more teasers, the power steering column
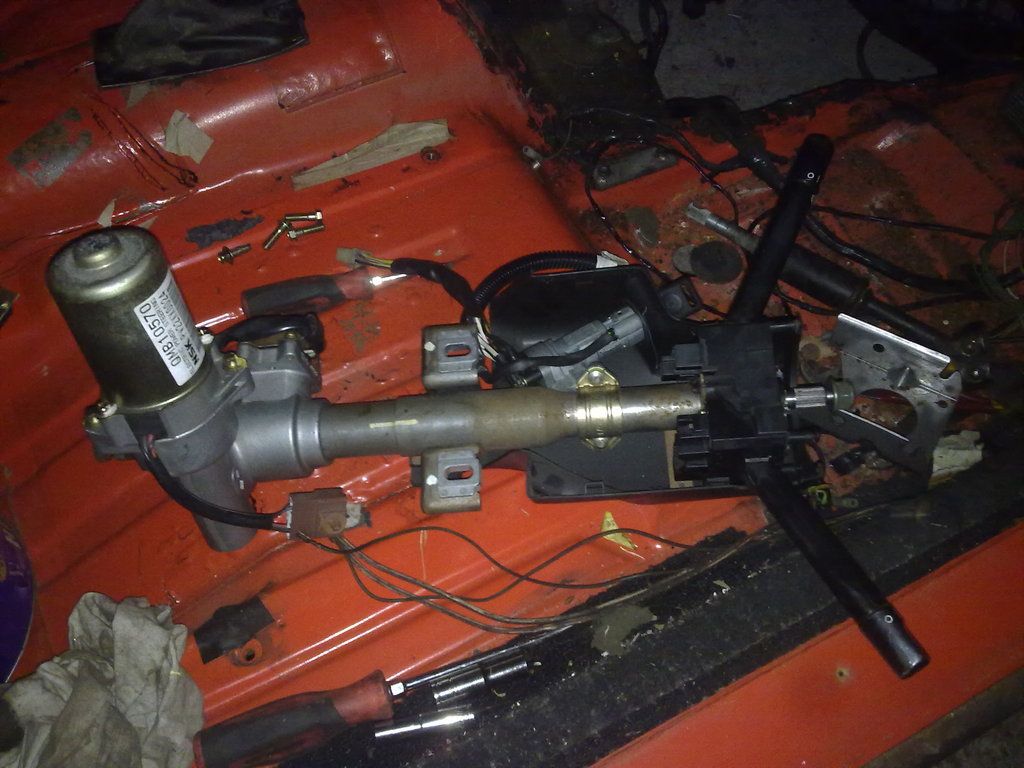
I reckon if I cut round the outer, between the motor an the support bracket and move the motor from its current 1-o-clock position (relative to the steering lock and switch gear) to something like 10.30 then weld it back together, I stand a chance of making it work!
and the wire pile!
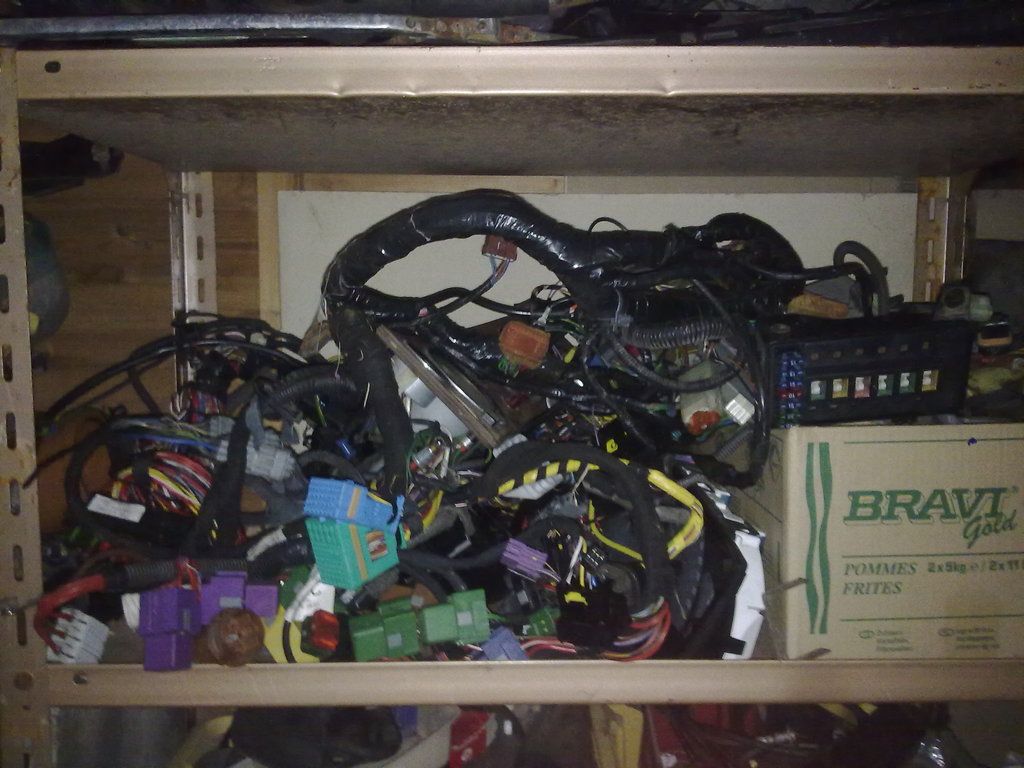
this is most of the engine bay and dash loom from the Omega (there is more still in the car plus what's attached to the engine and box) plus the MGF dash harness. It doesn't look much like this, I must lay it out on the floor to expose it's true epic proportions!
Steve
Re: The Next Level
Posted: Wed Aug 19, 2015 11:41 pm
by Pippin
Carledo wrote:This one has me a bit baffled, I have been congratulating the car on the complete intact-ness of the front screen surround yet this panel inside is badly rotted, it's worse than the pic shows, all the brown bit is lace and holes and will need repairing
Has it rotted through from the other side? If it's where I think it is, are the drain holes in the bulkhead box section clear? There's a thread somewhere explaining where all the hard to find drain holes are.
Re: The Next Level
Posted: Wed Aug 19, 2015 11:53 pm
by geeksteve
Pippin wrote:
Has it rotted through from the other side? If it's where I think it is, are the drain holes in the bulkhead box section clear? There's a thread somewhere explaining where all the hard to find drain holes are.
The drain holes are very thin, like slits. They block so easily. When I was sorting my bodywork out I opened them up a bit - put a punch in the hole and used it to widen it (beat the thing through, including handle!)
Steve
Re: The Next Level
Posted: Thu Aug 20, 2015 7:22 am
by tony g
I dug out this VERY helpful thread:
viewtopic.php?f=4&t=16792&hilit=find+drain+holes
Tony
geeksteve wrote:Pippin wrote:
Has it rotted through from the other side? If it's where I think it is, are the drain holes in the bulkhead box section clear? There's a thread somewhere explaining where all the hard to find drain holes are.
The drain holes are very thin, like slits. They block so easily. When I was sorting my bodywork out I opened them up a bit - put a punch in the hole and used it to widen it (beat the thing through, including handle!)
Steve
Re: The Next Level
Posted: Thu Aug 20, 2015 2:05 pm
by Carledo
geeksteve wrote:Pippin wrote:
Has it rotted through from the other side? If it's where I think it is, are the drain holes in the bulkhead box section clear? There's a thread somewhere explaining where all the hard to find drain holes are.
The drain holes are very thin, like slits. They block so easily. When I was sorting my bodywork out I opened them up a bit - put a punch in the hole and used it to widen it (beat the thing through, including handle!)
Steve
Where this has rotted is much higher than the drain holes for the heater cavity (which are miraculously clear) they are about the level of the bottom of the wiper motor mounting plate (the rectangular grey panel, lower right of the pic) the rot is in what I suppose you would call the screen frame reinforcement and is an almost horizontal panel only an inch or two below the screen aperture. My current theory is leaks around the wiper spindles. The nuts on the wiper wheelboxes are solid and trying to undo them is turning the wheelboxes instead of undoing the nuts so i've covered them in plus gas and will try again later, with some big pipe grips on the wheelbox to stop it turning!
Steve
Re: The Next Level
Posted: Wed Sep 02, 2015 9:32 pm
by Carledo
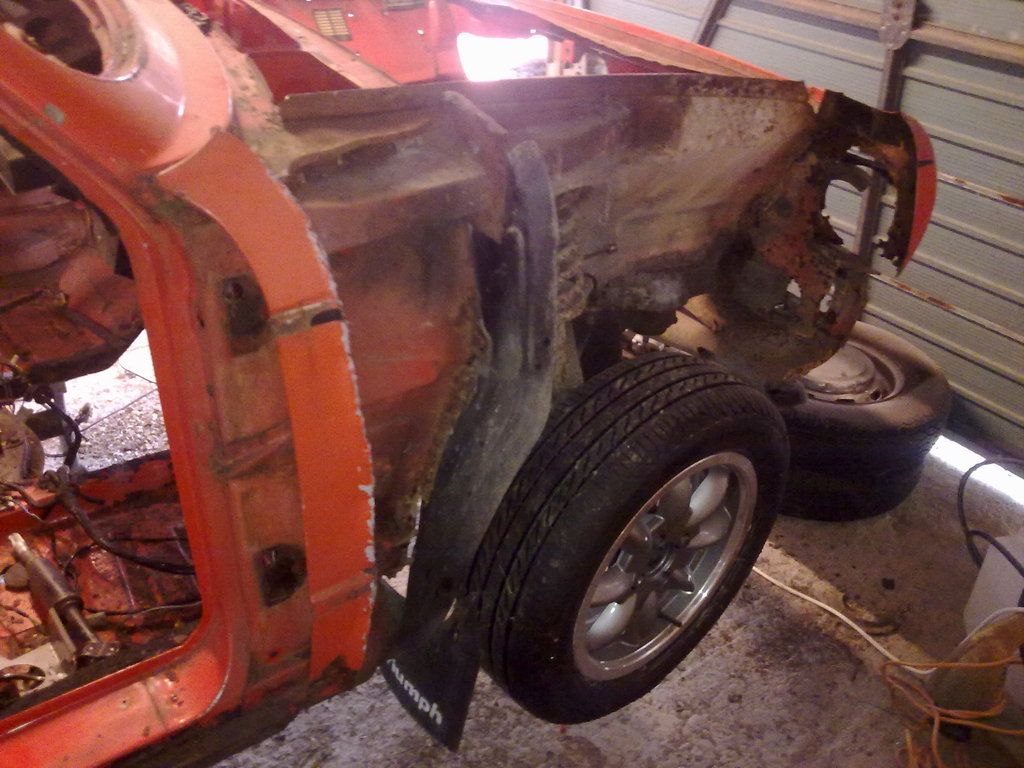
Bank holiday Monday rain has given me an excuse for a bit more progress and I happily spent the day removing the front wings.
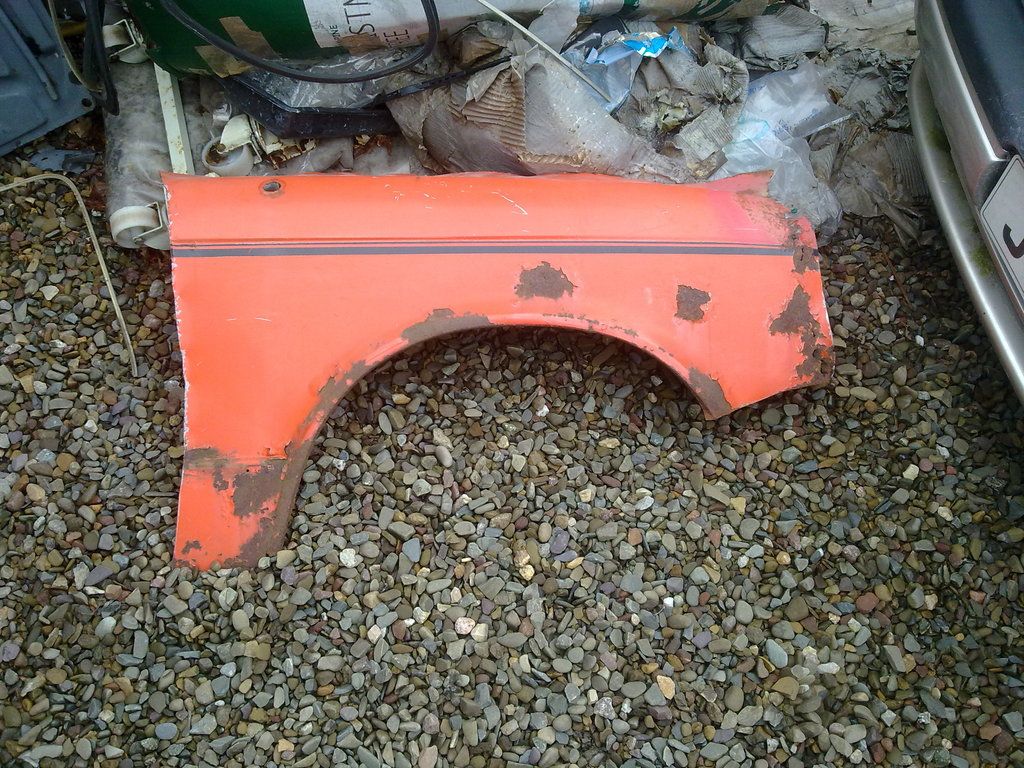
The N/S wing proved a disappointment, I had intended to re-use it (it's clearly not an original panel and was only roughly tacked on) but when it was nearly off I noticed a crack in the paint which, when investigated, revealed a load of filler and a very nasty dent which had been roughly bashed out, stretching the metal badly. So I'm going back to plan A and using the old wings off the Carledo which are only rotten at the valance join. Recycling rules!
The bodged repair to the bit of the sill behind the front wing was no real surprise and can be dealt with.
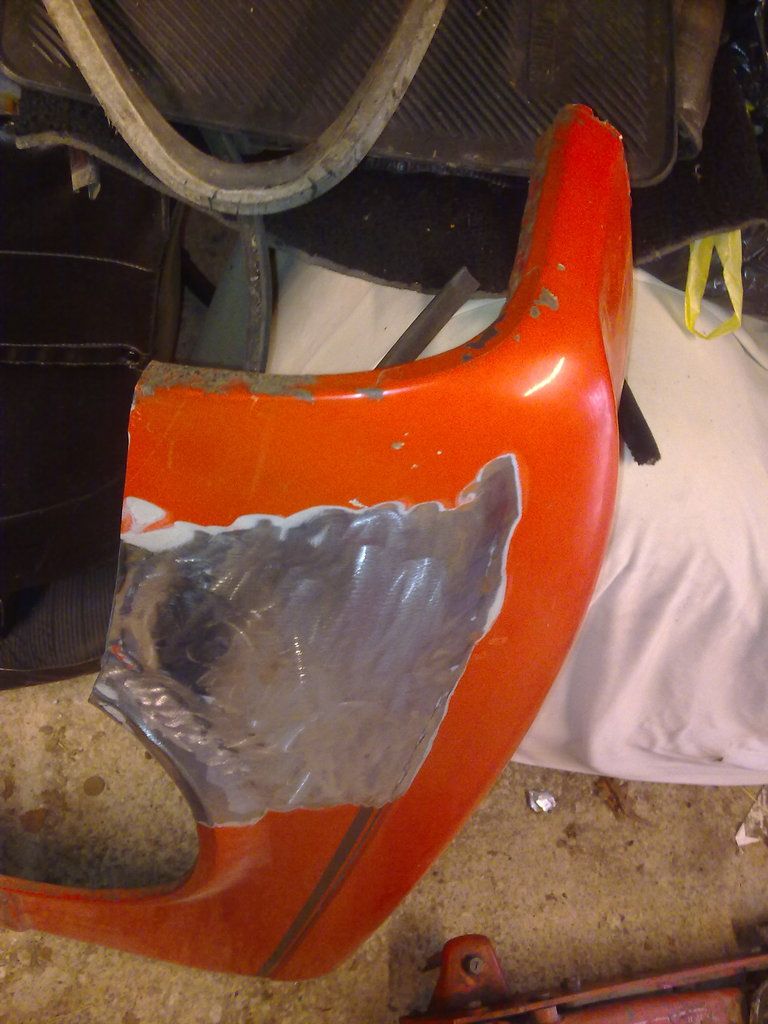
Whats left of the o/s wing, only fit for the bin!
The n/s wing, the damage is not very obvious but is around the front edge of the wheel arch and from there up to the coachline is like a relief map of the moon!
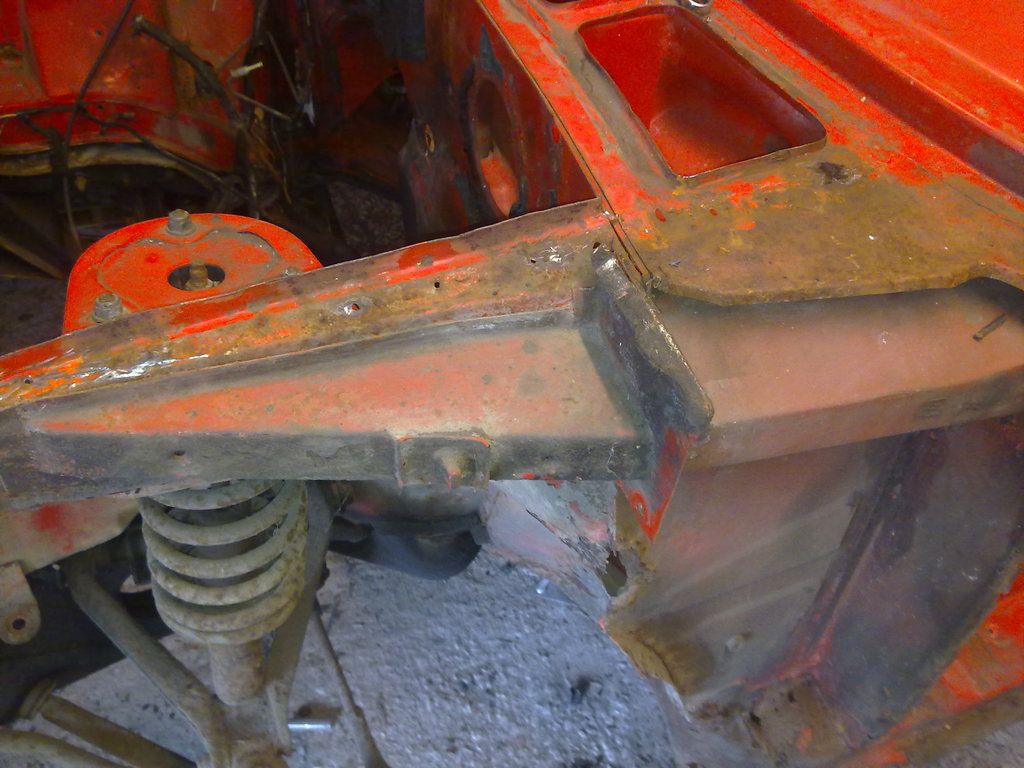
Both upper stiffeners are in good nick and don't need work!
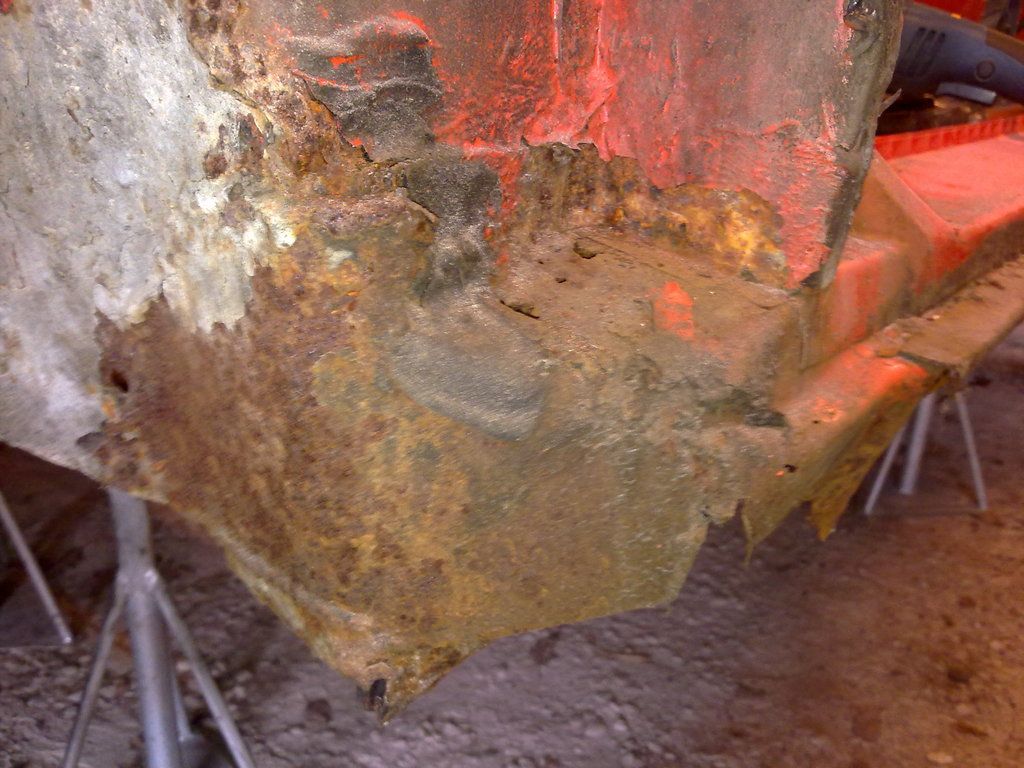
But this does!
And this! The ful horror of the tricky triple seam rot in the bulkhead/flitch/arch.

Overview.
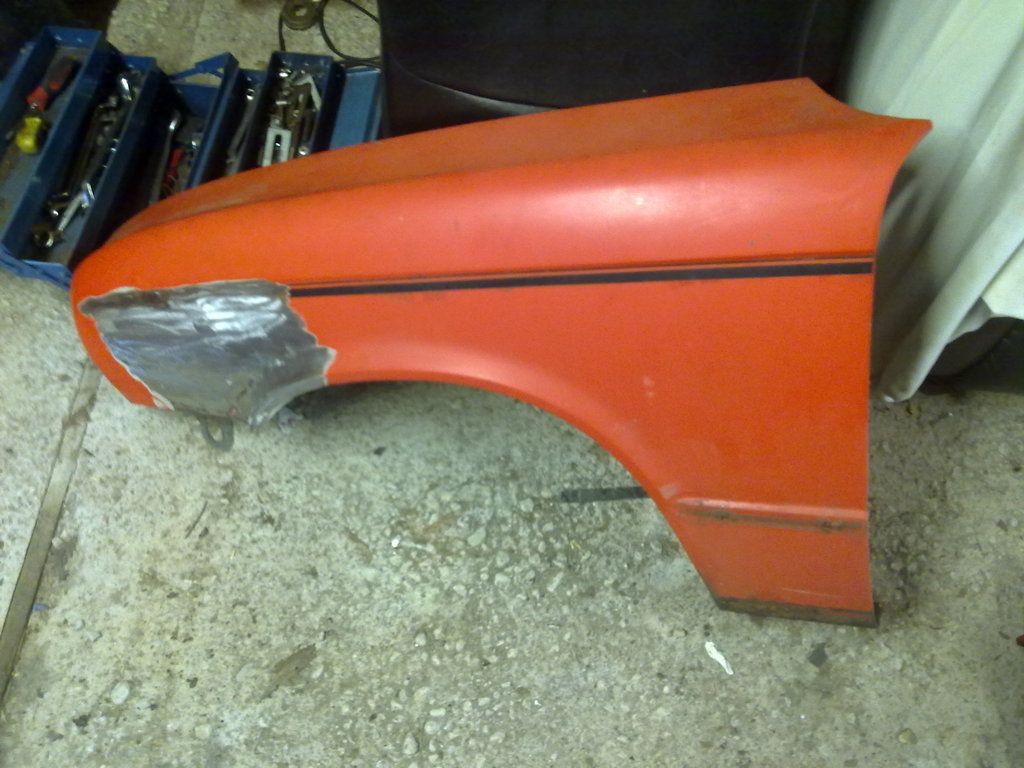
Couldn't resist a quick try fit of the Toledo wing!
Steve
Re: The Next Level
Posted: Thu Sep 03, 2015 12:15 pm
by lazeruspete
Hi Steve,
I had the same problem with the under-dash area on mine, pictures of how we repaired it are in my thread. I can post them here or pm you with them if it helps?
Pete
Re: The Next Level
Posted: Thu Sep 03, 2015 8:16 pm
by Dolly-Dimple
Fantastic resto thread - it will be oh so worth it and an absolute stunner when finished! All the very best with it - will be watching with interest and enthusiasm

Kind Regards
Russell.
Re: The Next Level
Posted: Thu Sep 03, 2015 10:29 pm
by Carledo
Dolly-Dimple wrote:Fantastic resto thread - it will be oh so worth it and an absolute stunner when finished! All the very best with it - will be watching with interest and enthusiasm
Kind Regards
Russell.
I'm looking at doing the RBRR in her in 2018 or 2020 at the latest so you may get to see her in the tin!
Thanks for the kind words!
Steve
Re: The Next Level
Posted: Fri Sep 04, 2015 4:59 am
by Dolly-Dimple
Superb Steve!!! Ill look forward to that
Kind Regards
Russell.
Re: The Next Level
Posted: Sat Sep 05, 2015 9:53 am
by Mahesh
Hi Steve,
Looking at the pics, it looks like your going to be ready for the RBRR 2016!
Let me know if your up for co-driver, I am only waiting for Club Triumph to announce the entrants forms.
Also I'm most interested in your power steering conversion, have you ever driven a Sprint with this ?,
does it feel the same but only lighter or do you lose the sensation of road connection.
Kind regards
Mahesh
Re: The Next Level
Posted: Sat Sep 12, 2015 11:42 pm
by Carledo
I don't know of ANYONE who has a working PAS set on a Sprint, though a few, like me, have it in the works! The electric system i'm using works with a road speed sensor such that over 15mph there is no assistance - so you get the best of both worlds. power when you need it at parking speeds and manual for maximum feel at driving speeds!
I don't think my car will be ready by next October, I have to fit it in around a fulltime job - and considerable financial restraints! But I DO have 90% of the parts I need to complete, which I have been accumulating over the last couple of years, so paintwork and vinyl roof are really thev only things I need to save up for!
Steve
Re: The Next Level
Posted: Sun May 15, 2016 9:10 pm
by Carledo
Well it looks like the MGF PAS is a non starter, there are just too many things that don't tally up for an easy fit.
On the upside, I now have a scrap Corsa in the yard so i'll be having a look at that to see if I can make it work.
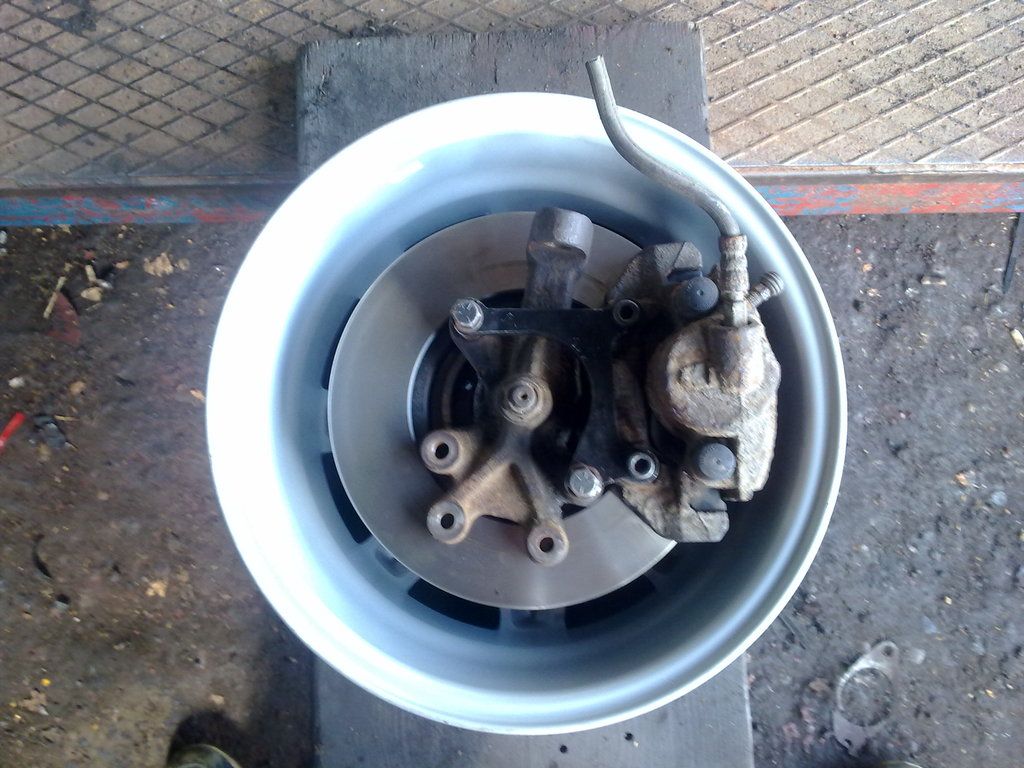
In the meantime, I have got my uprated TJ brake kit with its 256mm discs and Puma calipers and carriers all together and successfully try fitted

and a dry and unbusy morning last week let me get this massive lump out of the donor car - finally!
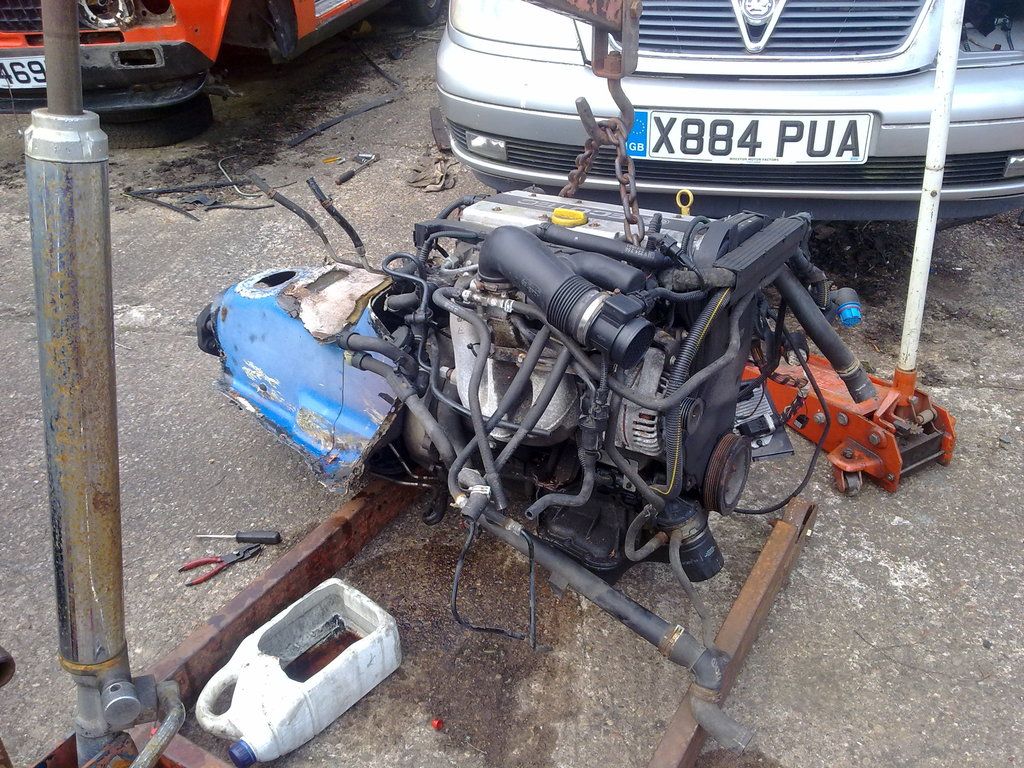
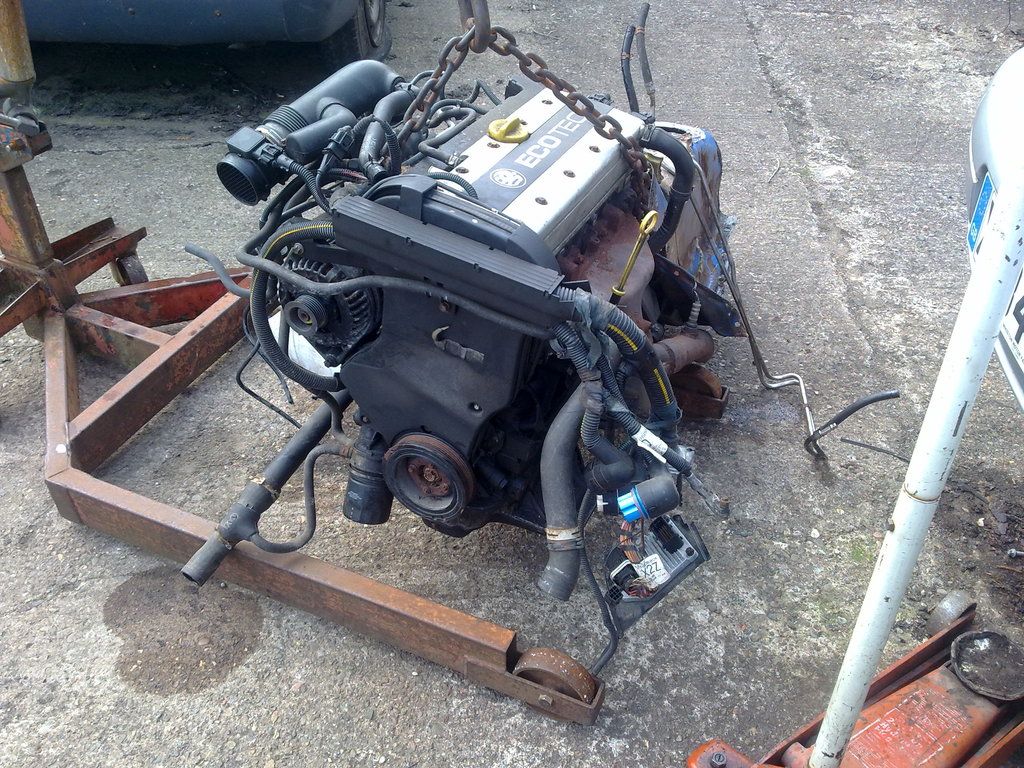
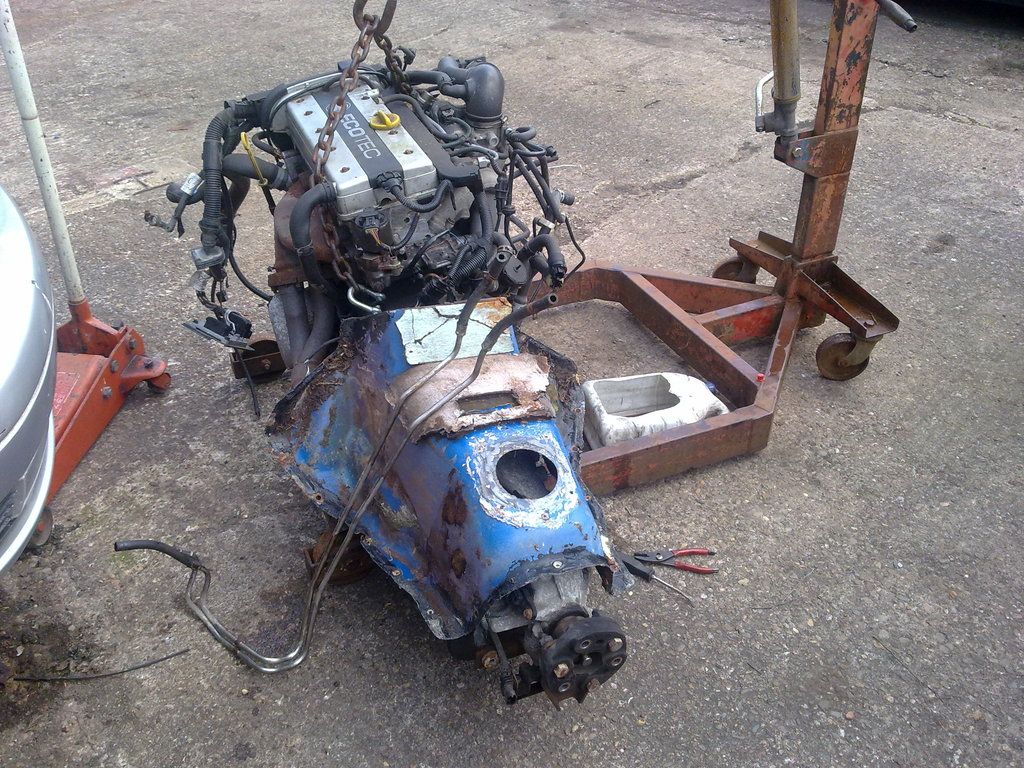
measurements suggest that the auto trans is 20cms LONGER than the manual version in the Carledo, which takes the prop joint back under the tunnel reinforcement, however the diameter is small enough not to need to chop the strengthener out - thank you God!
The tunnel housing in the pic is from a 1500 manual, so I think the auto tunnel will do nicely.
At least I don't have to worry about where the gear lever comes out!
Steve