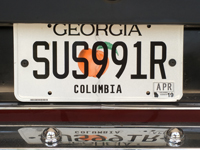
SUS 991R - accidental restoration in Virginia
-
straylight
Re: SUS 991R - accidental restoration in Virginia
blindingly bright !
and looking great too, well done on returning to the job.
any pics of the bmw accident damage ? Good to hear you are okay.
stu
and looking great too, well done on returning to the job.
any pics of the bmw accident damage ? Good to hear you are okay.
stu
Re: SUS 991R - accidental restoration in Virginia
Afraid not, Stu - just flashbacks, even after 10 months. Save to say, if it had been a convertible I probably wouldn't be typing this. The E34 always was said to be a very safe car - one of the reasons I went for it in the first place - and I think I would agree. The EMS people were amazed we were alive, never mind walked out with barely a scratch.straylight wrote: any pics of the bmw accident damage ?
_____________________________________________________
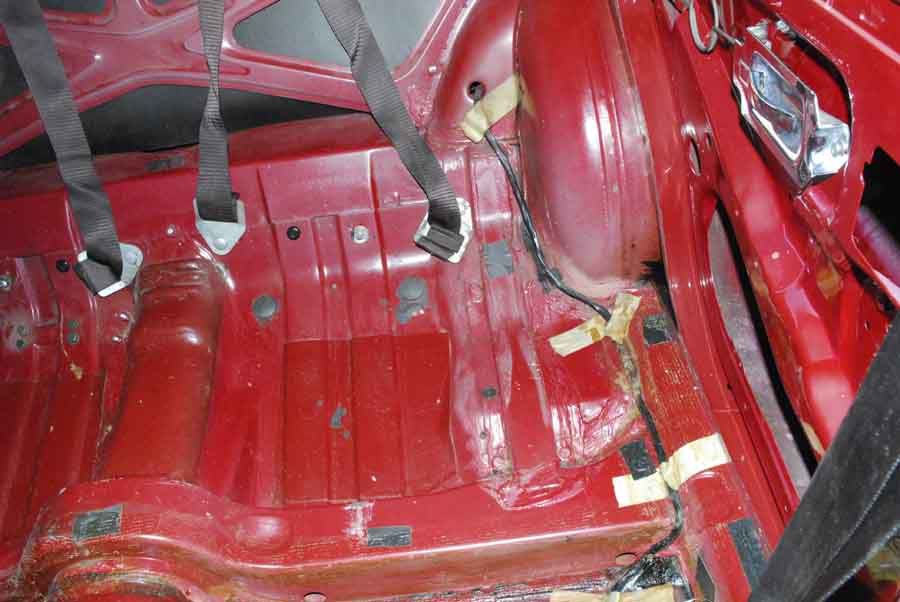
Anyway, with the doors and exterior painted, it was time to remove all the bits and pieces that I had been storing inside the car while I painted. I also took out the front and back seats, and the rear parcel shelf. On removing the passenger's seat, my heart leapt and I experienced extreme joy at finding......
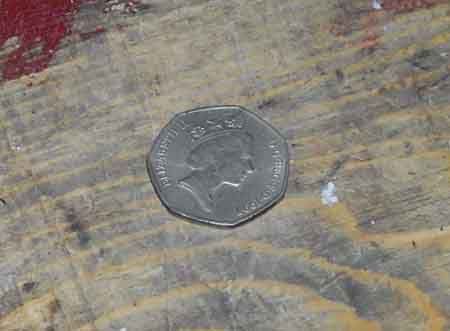
...until I realized that I couldn't spend it anywhere anytime soon.......
Carpets and underfelt came out too, and I cleaned the floor with warm water and some detergent and dried it.
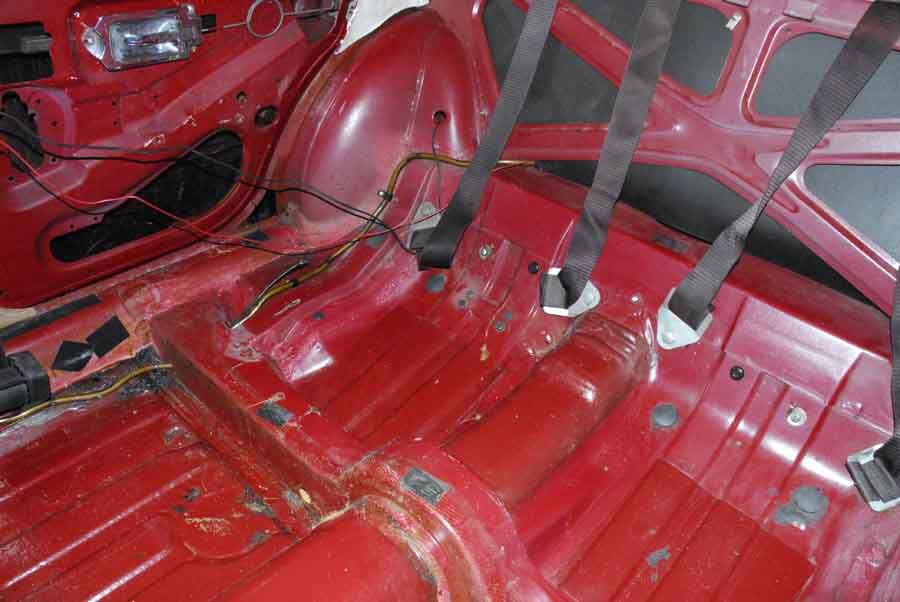
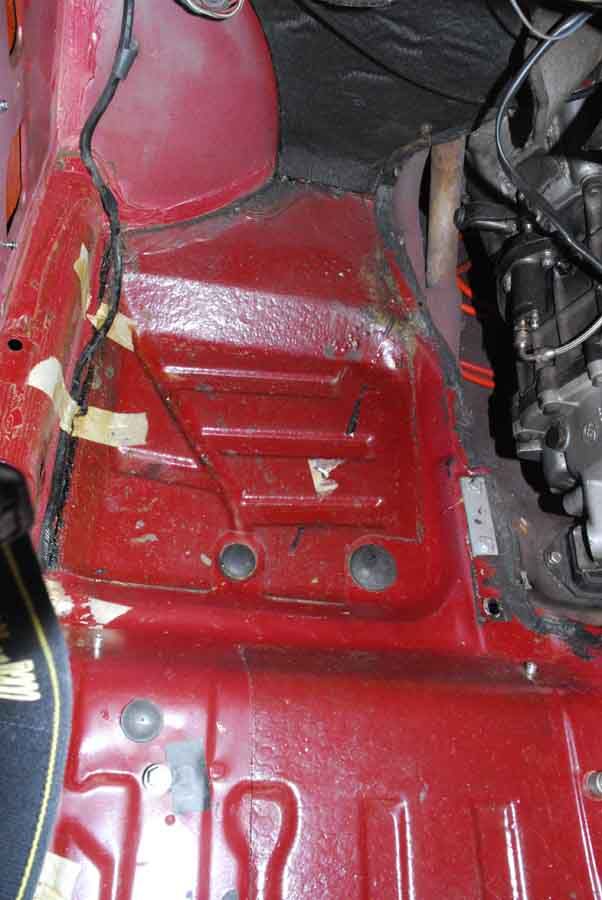
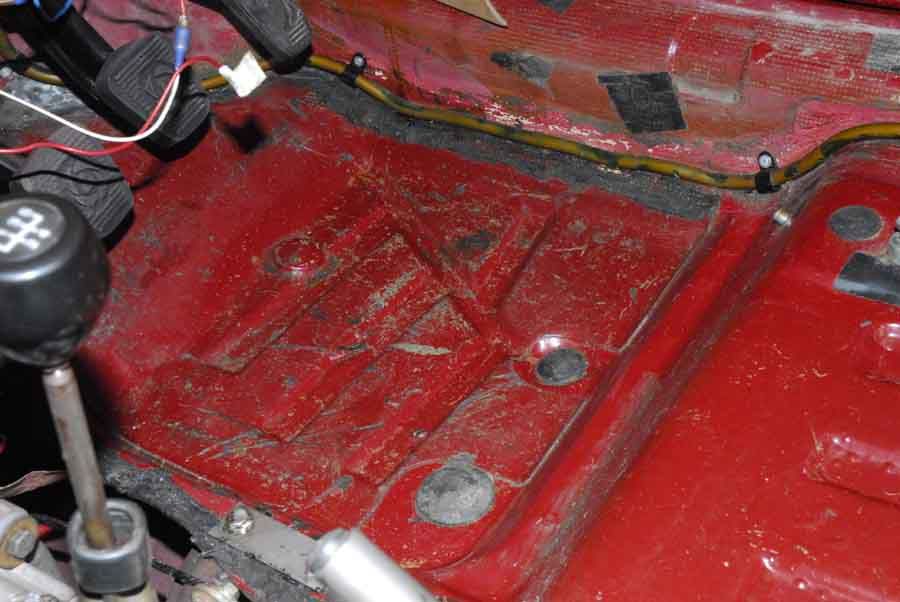
(A jumble of wires, etc. to be sorted out)
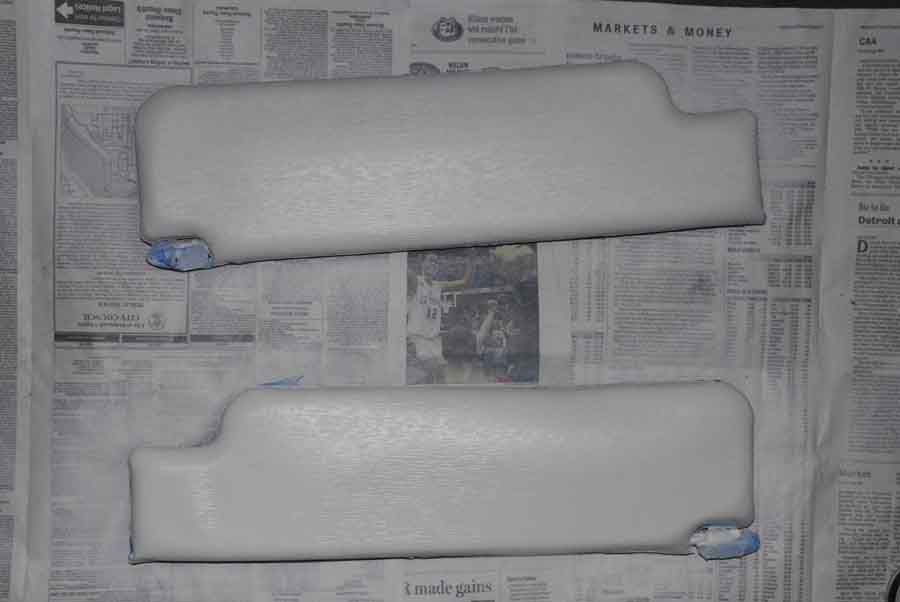
The headlining was a bit yellowed in several places, probably the adhesive seeping through as it didn't clean off. I thought about replacing it with new, but decided not to for two reasons. First, the cost of posting the material from UK (I couldn't find suitable material here) was quite high and, second, apart from the discoloration there wasn't much wrong with the existing headlining. Years ago when I was on my very first project (a 1976 Spit 1500) I used a substance called Formula 40 Vinylkote to recolour the interior. I used a similar approach for the Dolly headlining:
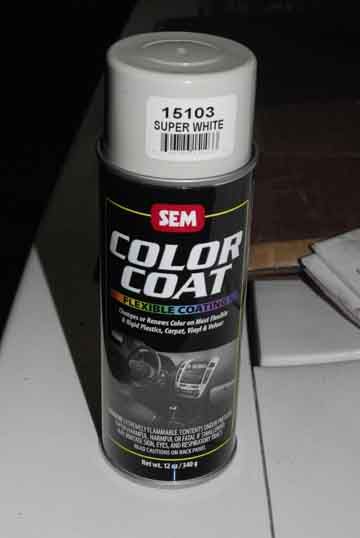
- bought from Eastwood for around $10. Brought the headlining up a treat. I used it on the sunvisors too:
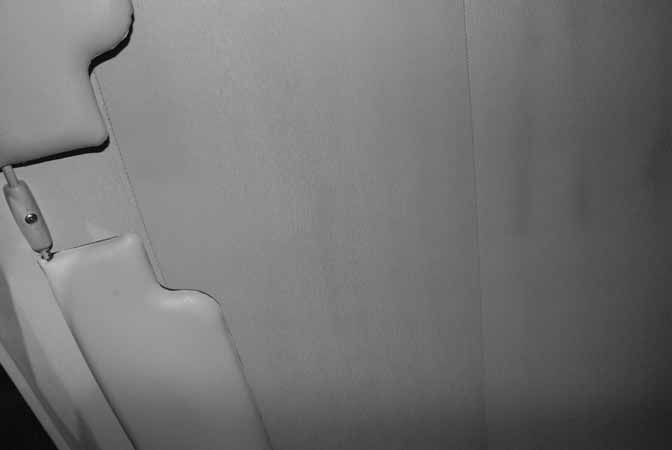
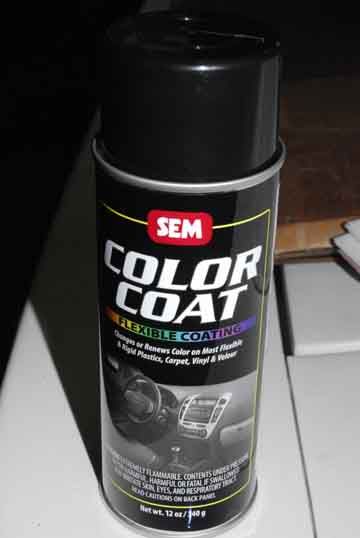
As this seemed to work quite well, I used the black version on the front parcel shelf and the boot trim boards:
Re: SUS 991R - accidental restoration in Virginia
When we returned to UK in mid-1997, I got stranded in various interesting locations as the car would just cut out and not start again. I thought it might have been the electronic ignition, as there were reputedly some dodgy units of the particular type that I have floating around. Needless to say, this was a wrong diagnosis. Complete fuel starvation due to intermittent failure of the Facet fuel pump.  After going back to the original mechanical SU pump, everything was fine. However, as I am doing several upgrades to the car as we go along, I decided to try the (allegedly) better, reliable, new version of the Facet pump. I mounted it in the boot, with a fuel filter between the tank and the pump:

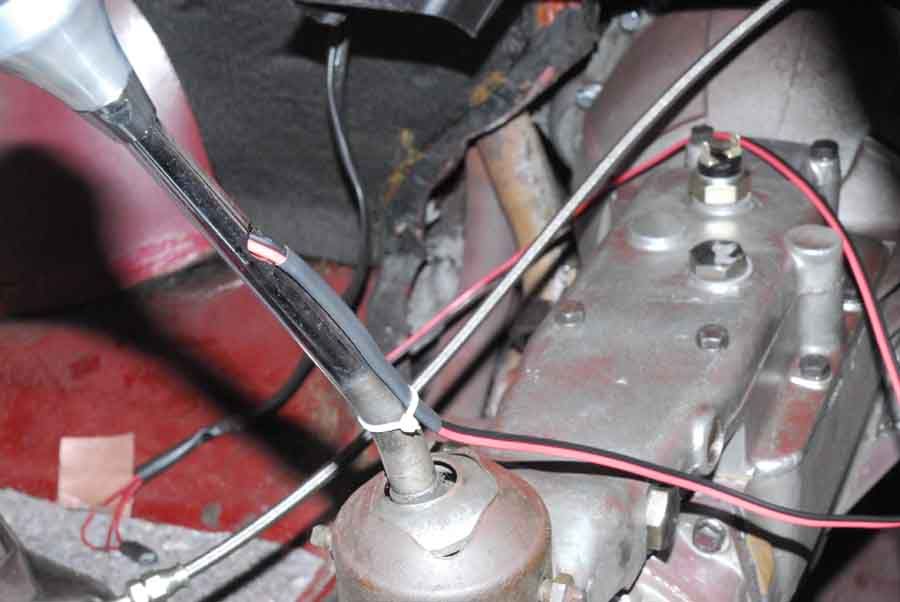
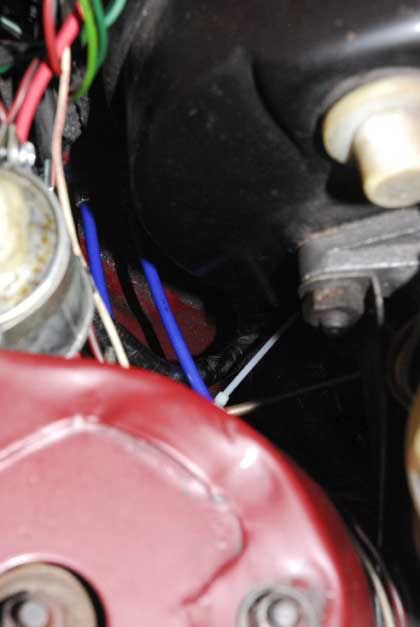
I ran a positive feed from the engine bay back through the car, running beside the fuel line:
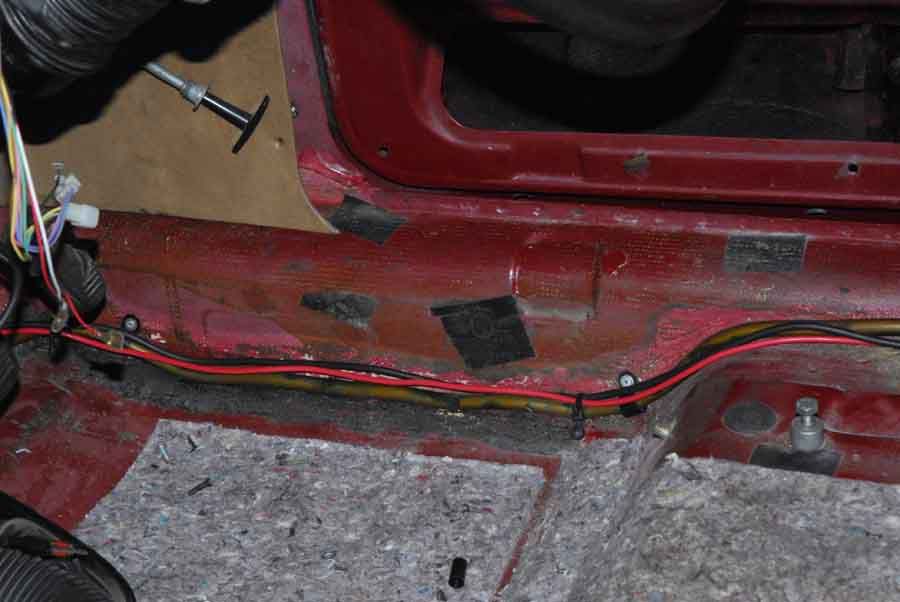
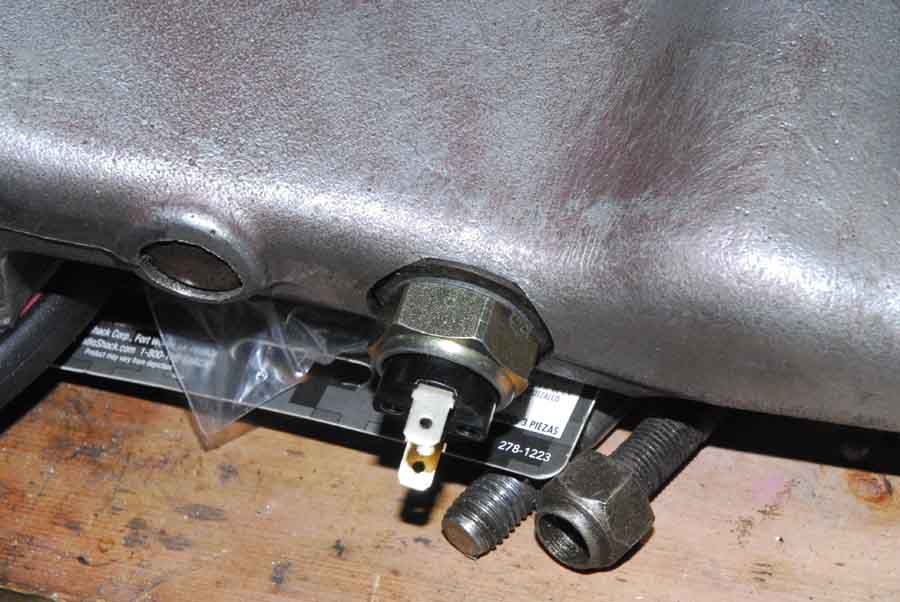
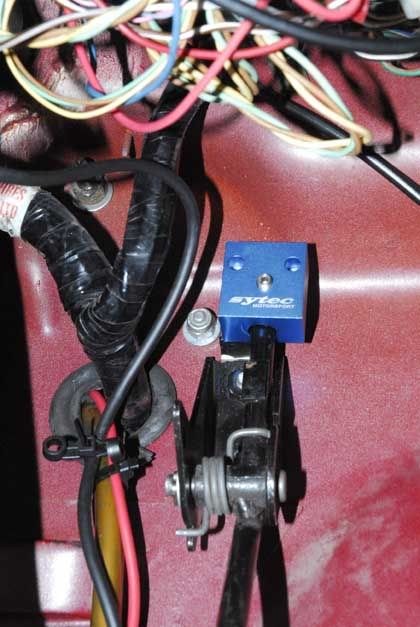
I also added an emergency cut-off switch - this cuts off the power to the pump in the event of a drop in oil pressure (e.g. in the event of a crash and subsequent engine stall - well, you can't be too careful, can you?), but allows 12v supply on cranking, as well as a constant 12v while the oil pressure is at normal levels. I fitted it into the oil pressure take-off from the pump:
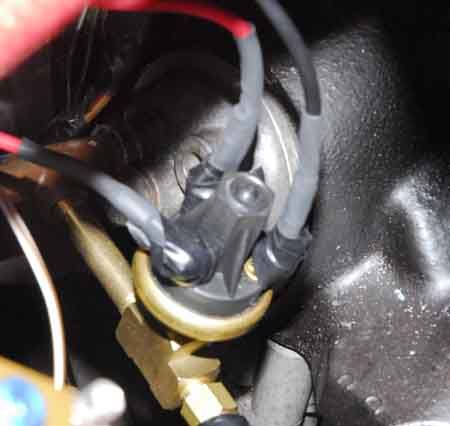
The fuel line runs into the engine bay to an 85mm Filter King pressure regulator, which I've had forever, and then to a fuel sensor for the fuel computer, then up to the carbs.
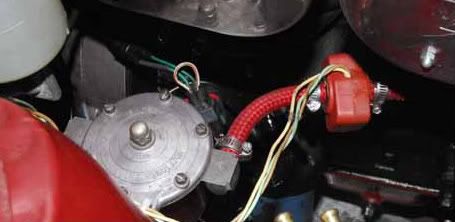
I wanted to check the fuel pressure, but the Filter King is not the version with a take-off for a pressure gauge. I put in an adapter on a temporary basis, so that I could add a simple gauge:
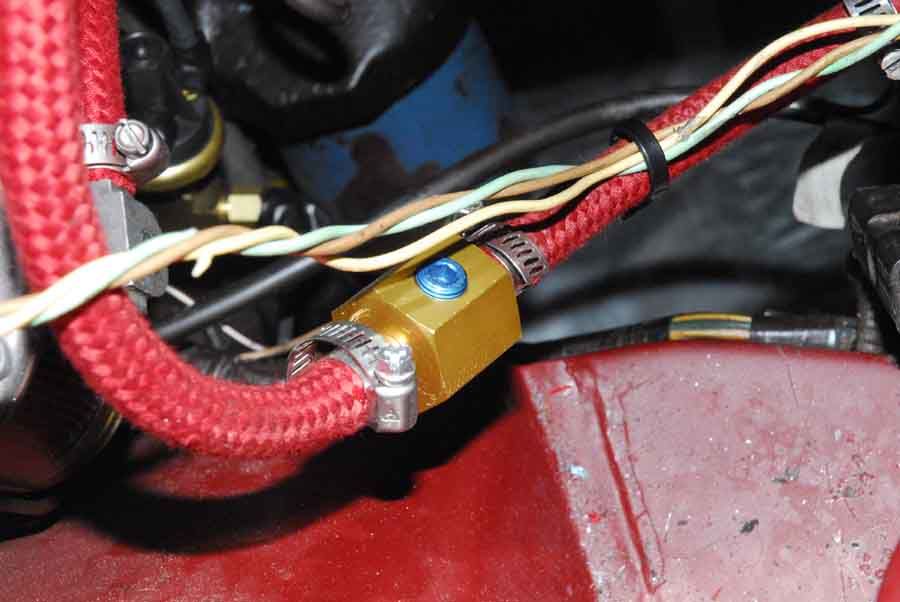
Pressure was measured at 3psi, so OK for my needs.
I ran a positive feed from the engine bay back through the car, running beside the fuel line:
I also added an emergency cut-off switch - this cuts off the power to the pump in the event of a drop in oil pressure (e.g. in the event of a crash and subsequent engine stall - well, you can't be too careful, can you?), but allows 12v supply on cranking, as well as a constant 12v while the oil pressure is at normal levels. I fitted it into the oil pressure take-off from the pump:
The fuel line runs into the engine bay to an 85mm Filter King pressure regulator, which I've had forever, and then to a fuel sensor for the fuel computer, then up to the carbs.
I wanted to check the fuel pressure, but the Filter King is not the version with a take-off for a pressure gauge. I put in an adapter on a temporary basis, so that I could add a simple gauge:
Pressure was measured at 3psi, so OK for my needs.
Re: SUS 991R - accidental restoration in Virginia
Another little change from before:

Having had the LT77 5-speed gearbox fitted, in the interim I had sourced a non-overdrive gearbox from a late ('73) TR6. I rebuilt it - new bearings, synchro rings - and converted it to o/d by changing the mainshaft and swapping the input shaft for a Sprint item. Although the late TR6 and Sprint gearboxes share the same layshaft constant gear (by part number anyway), I had a problem putting it back together (see viewtopic.php?f=4&t=9013 ). Bought a new gear of the correct p/n (159621) from a major supplier, who assured me it meshed properly with the Sprint input shaft. Utter tosh! Had to put this project on the back burner, but eventually got an excellent s/h constant gear from another source, who also told me that the new constant gears being sold by at least two suppliers are unsuitable for use in a Sprint gearbox and only fit the TR6. Oh well, you live and learn. Correct gear in, everything went back perfectly!
Overdrive filters cleaned, new oil seals at rear and on speedo drive pinion, then fitted to the car.
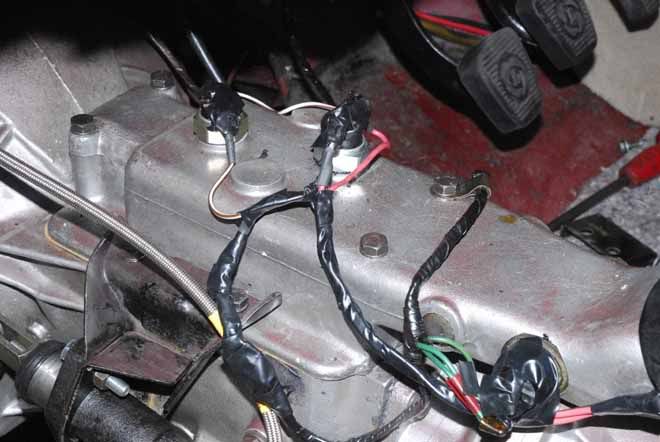
I stripped the top cover and tapped it for o/d switches on 2nd, 3rd and 4th gear:
Thanks to the "Buckeye Triumphs" website for the procedure http://www.buckeyetriumphs.org/technica ... itches.htm
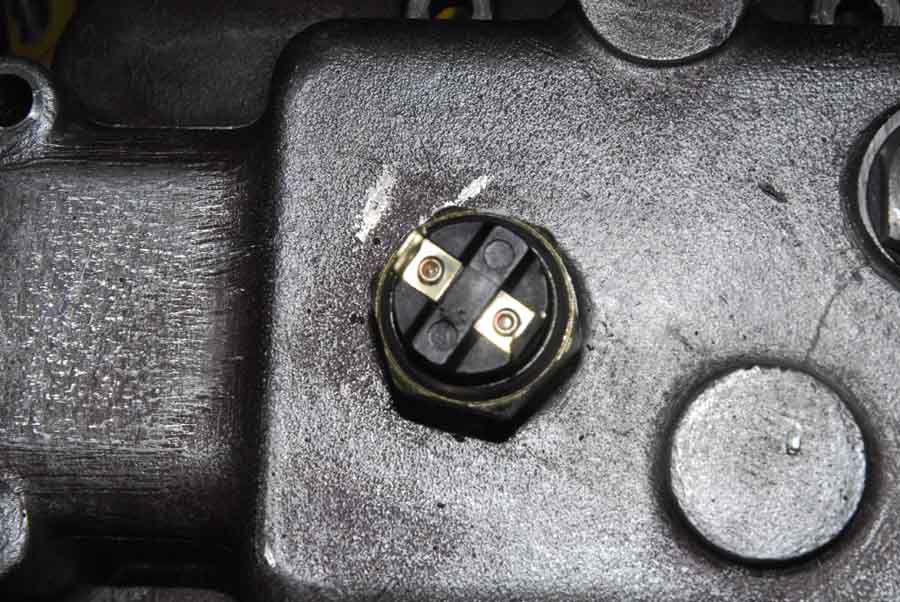
I also added a new reverse light switch:
I made a harness for the o/d and reverse light switches.
I checked all the electrical connections and switch operations using a meter before I refitted the top cover to the gearbox and filled up with Redline MTL.
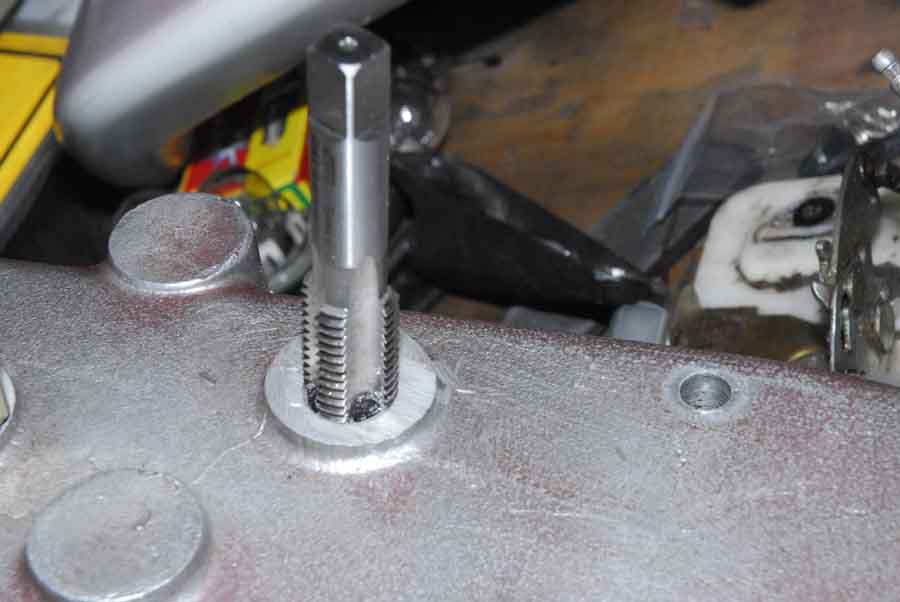
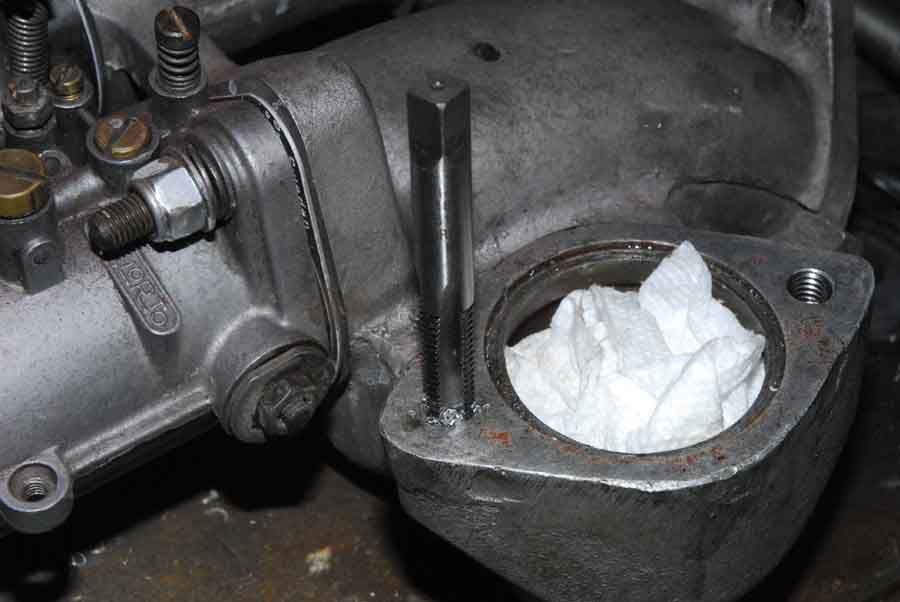
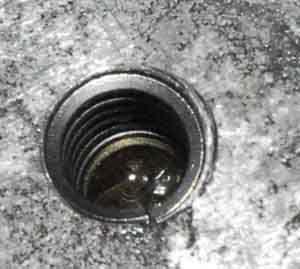
While I was in a tapping mood, I helicoiled the thermostat housing:
Having had the LT77 5-speed gearbox fitted, in the interim I had sourced a non-overdrive gearbox from a late ('73) TR6. I rebuilt it - new bearings, synchro rings - and converted it to o/d by changing the mainshaft and swapping the input shaft for a Sprint item. Although the late TR6 and Sprint gearboxes share the same layshaft constant gear (by part number anyway), I had a problem putting it back together (see viewtopic.php?f=4&t=9013 ). Bought a new gear of the correct p/n (159621) from a major supplier, who assured me it meshed properly with the Sprint input shaft. Utter tosh!
Overdrive filters cleaned, new oil seals at rear and on speedo drive pinion, then fitted to the car.
I stripped the top cover and tapped it for o/d switches on 2nd, 3rd and 4th gear:
Thanks to the "Buckeye Triumphs" website for the procedure http://www.buckeyetriumphs.org/technica ... itches.htm
I also added a new reverse light switch:
I made a harness for the o/d and reverse light switches.
I checked all the electrical connections and switch operations using a meter before I refitted the top cover to the gearbox and filled up with Redline MTL.
While I was in a tapping mood, I helicoiled the thermostat housing:
Re: SUS 991R - accidental restoration in Virginia
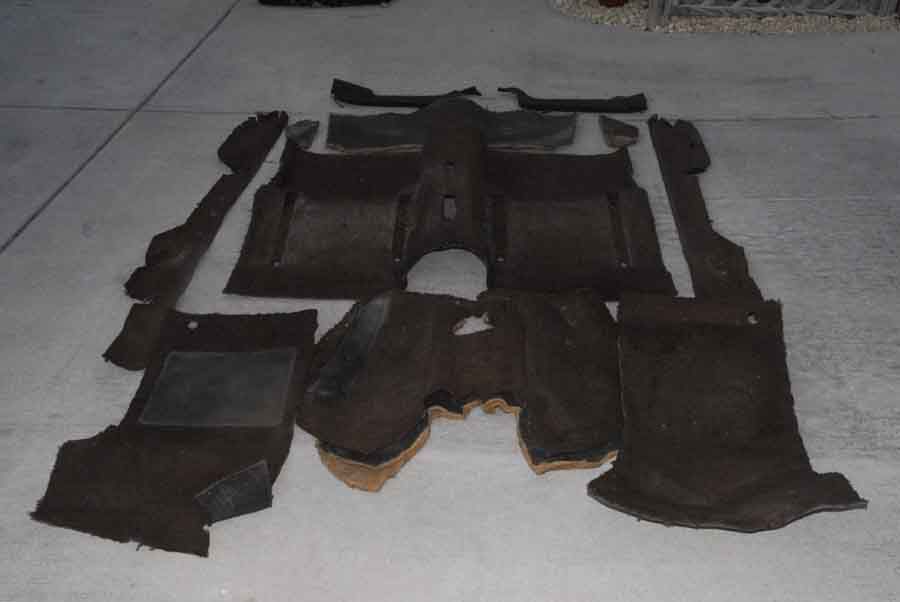
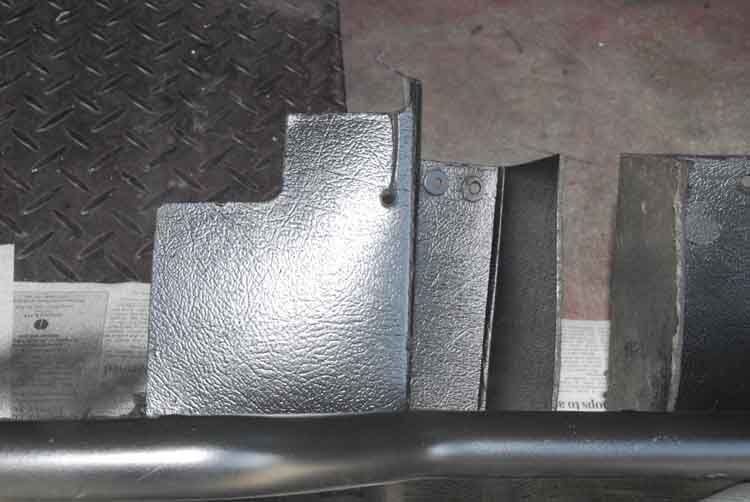
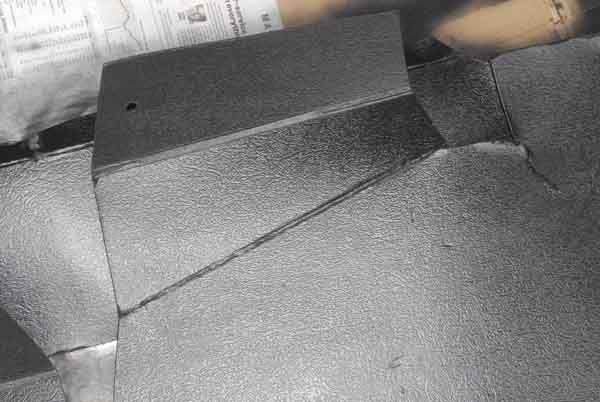
I went to work on the interior. After 34 years, I decided to replace the original carpets (I kept them, of course).
I used this "space-age" insulating material, purchased online at englishparts.com (Atlanta)-
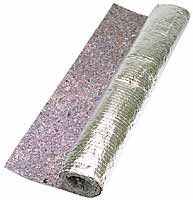
We'll see how well it works soon..
I also went for a lighter shade of carpet, beige/light brown instead of the previous dark brown. All cut from a roll. And three new pedal rubbers.
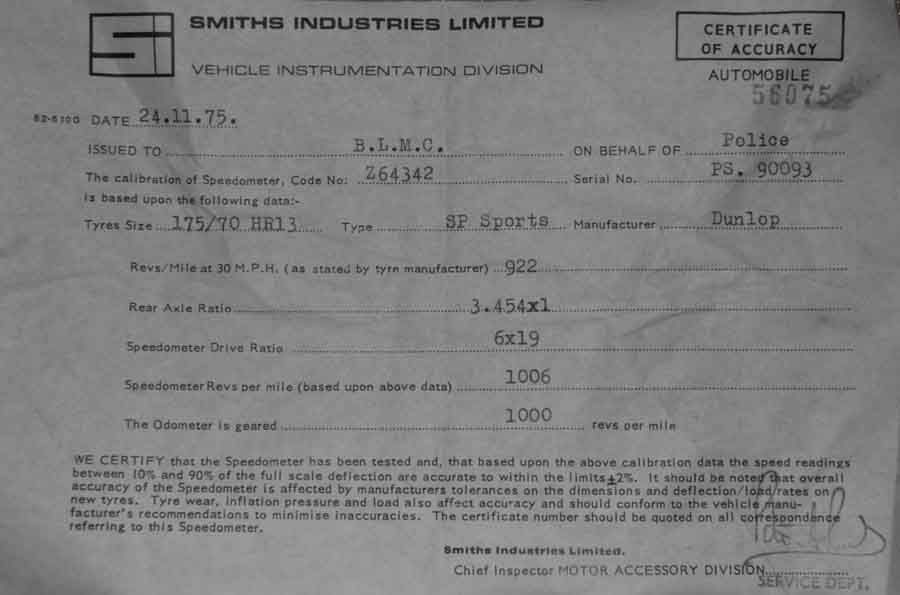
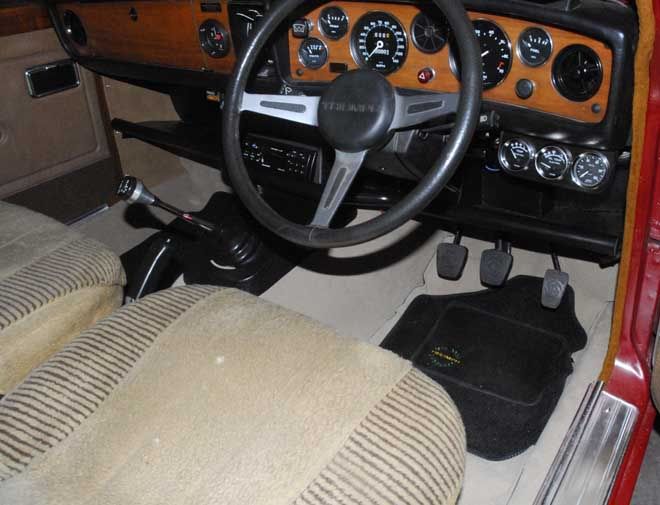
For a new life in a new country - a new speedo.....
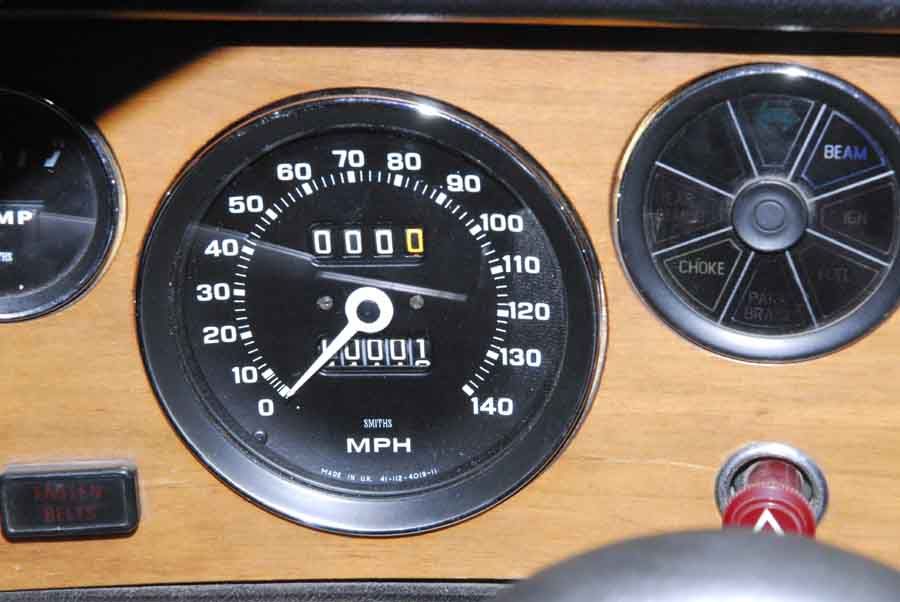
.....still with the original spec sheet!
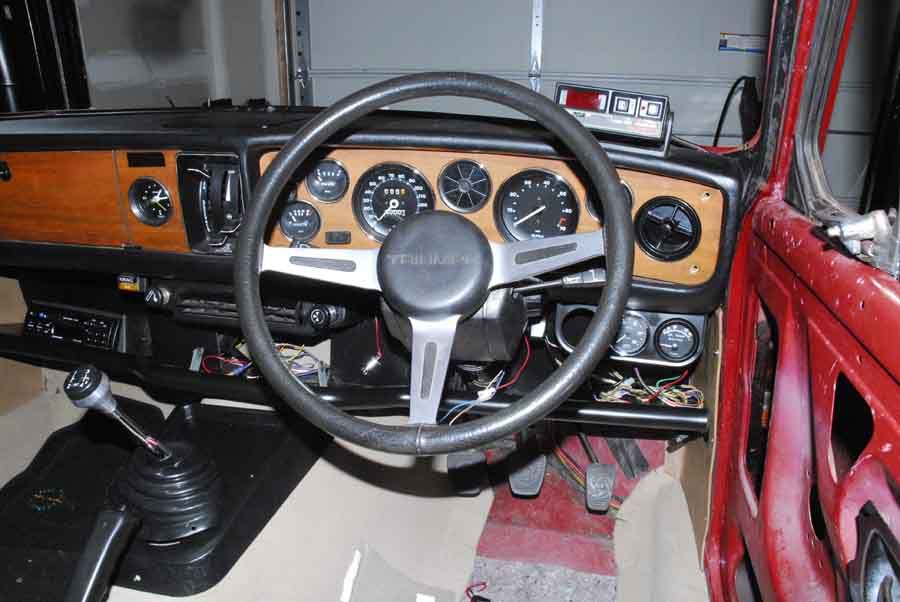
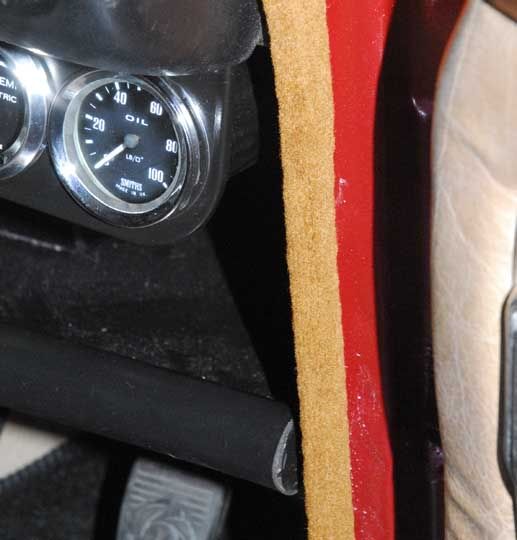
I also relocated my oil pressure gauge from the left side of the column to the right - and added oil temp and water temp gauges as well:

I used this "space-age" insulating material, purchased online at englishparts.com (Atlanta)-
We'll see how well it works soon..
I also went for a lighter shade of carpet, beige/light brown instead of the previous dark brown. All cut from a roll. And three new pedal rubbers.
For a new life in a new country - a new speedo.....
.....still with the original spec sheet!
I also relocated my oil pressure gauge from the left side of the column to the right - and added oil temp and water temp gauges as well:
-
straylight
Re: SUS 991R - accidental restoration in Virginia
fantastic additions there, smart mods. Really good work. Not so sure about running the fuel pump with an oil pressure cut off switch though, but easy enough to bypass if you need to scrape home in an emergency. You've gone to a lot of effort.
what's the gauge on the right of the steering wheel, on top of the dash ?
funny saving the carpet ! Is there a dolomite owner who has ever thrown anything out ?
stu
what's the gauge on the right of the steering wheel, on top of the dash ?
funny saving the carpet ! Is there a dolomite owner who has ever thrown anything out ?
stu
-
Toledo Man

- Guest contributor

- Posts: 7542
- Joined: Tue Oct 03, 2006 5:52 pm
- Location: Halifax, West Yorkshire
- Contact:
Re: SUS 991R - accidental restoration in Virginia
I've noticed that you've rerouted the fuel line through the interior of the car along the inner sill. Acclaims have the fuel and brake lines routed that way. This protects them from the elements but replacement is a pain in the a*** because the trim. seats and carpet all have to come out. I suppose it beats doing it from beneath the car. Won't the carpets clean up or are they a bit worn. Can't really tell from the photo.
It's coming along nicely though.
It's coming along nicely though.
Toledo Man
West Yorkshire Area Organiser
Meetings take place on the first Wednesday of the month at 8.00pm at The Railway, 1 Birstall Lane, Drighlington, Bradford, BD11 1JJ
2003 Volvo XC90 D5 SE (PX53 OVZ - The daily driver)
2009 Mercedes-Benz W204 C200 CDI Sport (BJ58 NCV - The 2nd car)
1991 Toyota Celica GT (J481 ONB - a project car)
Former stable of SAY 414M (1974 Toledo), GRH 244D (1966 1300fwd), CDB 324L (1973 1500fwd), GGN 573J (1971 1500fwd), DCP 625S (1977 Dolomite 1300) & LCG 367N (1975 Dolomite Sprint), NYE 751L (1972 Dolomite 1850 auto) plus 5 Acclaims and that's just the Triumphs!
Check my blog at http://triumphtoledo.blogspot.com
My YouTube Channel with a bit of Dolomite content.
"There is only one way to avoid criticsm: Do nothing, say nothing and BE nothing." Aristotle
Re: SUS 991R - accidental restoration in Virginia
It's getting a bit hot here with summer fast approaching - and our AC broke. The "boss" started to clear some of the boxes that were surrounding the knackered unit as the service guy is coming today. "Where did all these boxes of car spares come from?" she said..straylight wrote: funny saving the carpet ! Is there a dolomite owner who has ever thrown anything out ?
stu
Stu, the box on top of the dash is a '70s style fuel computer called a Mobelec Maximiser. My dad fitted it when he had the car before me. It stopped working sometime in the mid-'90s, but I didn't want to remove it (and leave the two mounting holes visible). I came across a new one on ebay about a year ago, which is what you see. There is a fuel sensor which goes into the fuel line (it's shown in one of the pics I posted) and the wiring runs back to the unit on the dash. Some of the wiring is what you see hanging down behind the other gauges - I'll tidy it later, promise. There's also a sensor on the back of the speedo. Between then, they figure out mpg as the car is driven, as well as the final figure for the trip. Typical '70s electronic gadgetry/toy that my dad loved.
TM: The carpets might clean up - which is one reason I didn't toss them out. Maybe I will try them in the washing machine.
The fuel line was done many many moons ago by BK (what, no asterisks??
-
Sprint36
Re: SUS 991R - accidental restoration in Virginia
Stop working on the body, there's an engine to be built. 
Pistons are now in the home straight...
...somewhere between Richmond and you.
David
Pistons are now in the home straight...
...somewhere between Richmond and you.
David
Re: SUS 991R - accidental restoration in Virginia
Sprint36 wrote:Stop working on the body, there's an engine to be built.
Pistons are now in the home straight...
...somewhere between Richmond and you.
David
....and received in double quick time, thanks David.
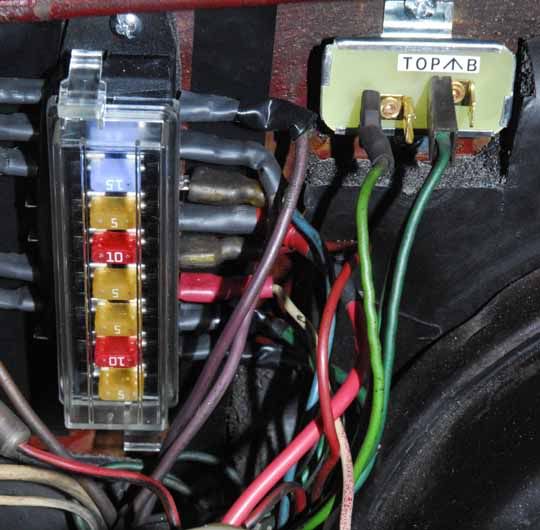
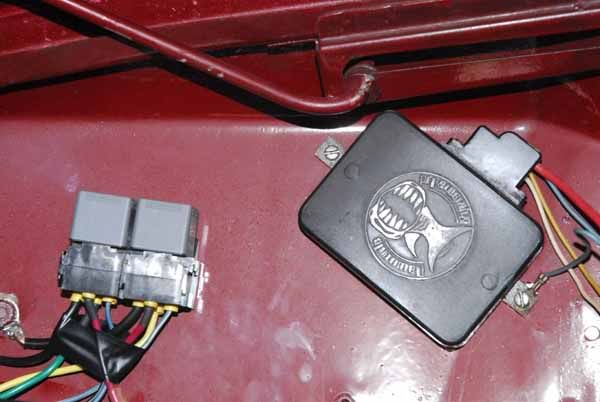
Last weekend I did a fuse box upgrade and relocated the voltage regulator a little to the left:
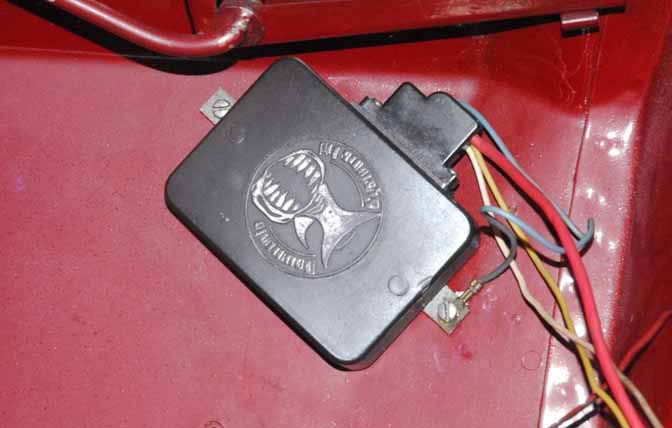
I also replaced the coil with an uprated one
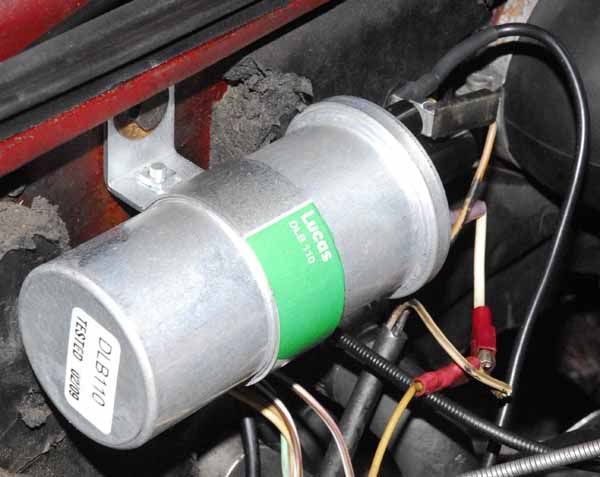
and hooked up the Piranha ignition unit
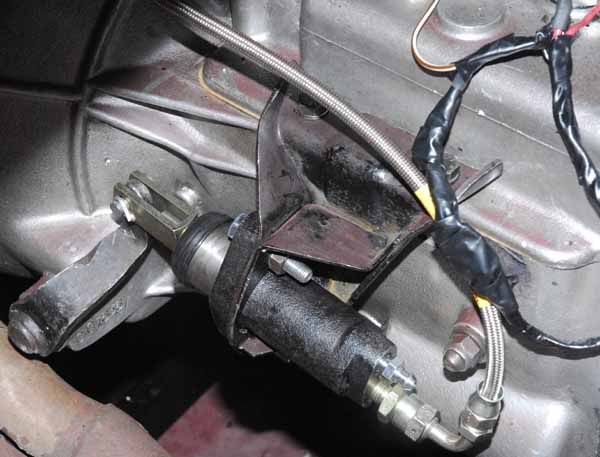
This weekend just past, I decided to re-bleed the clutch. I disconnected it and bled it off the car. As I'd had trouble with the second-hand hose, I replaced it with a Goodridge braided item.
While I had the tunnel off, I took a pic of the home-made harness (all soldered connections and heat-shrink underneath the tape
Another upgrade was a swap to a Bosch 75amp alternator
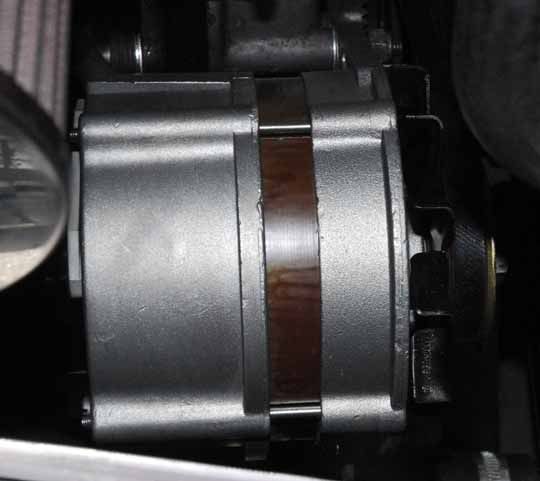
Because of its slightly different size, the fan belt I had was too short. I found out that one for a Porsche 911 was the right size.
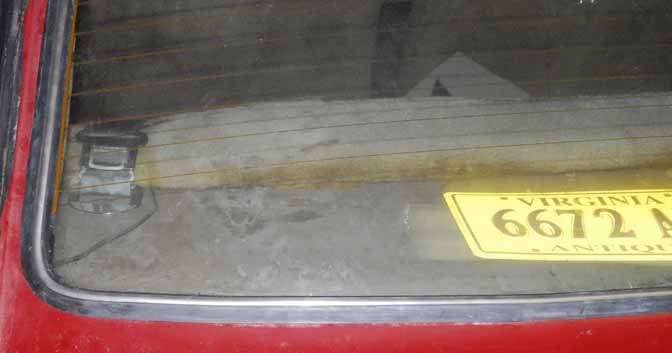
Tonight, I refitted the rear bumper corners and the trim to the rear screen:
Jobs still to do:
- finish undersealing
- put on alternative throttle linkage (Sytec)
- new tyres
- collect new windscreen and fit
- fit remaining door / sill / gutter trim
- wire and fit LHD headlights and relays
- brake overhaul / upgrade
It's getting close......
Re: SUS 991R - accidental restoration in Virginia
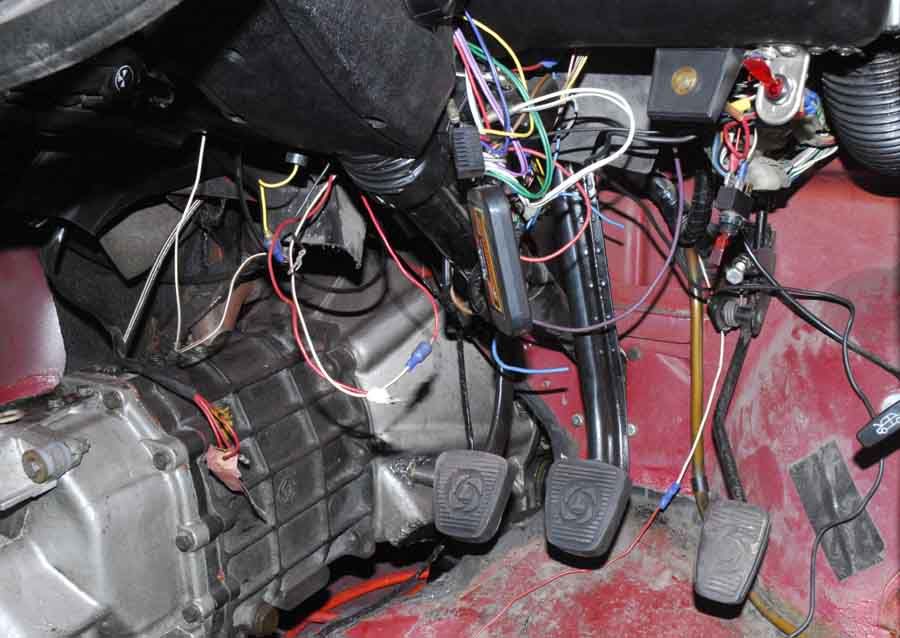
Tonight I removed the accelerator pedal and swapped the bracket (auto) for a manual bracket. Fitted the cable block to the top of the pedal, ready for drilling the bulkhead for the dual cables. Started to put the new linkage on the carbs, will finish at the weekend if I get a chance.
Re: SUS 991R - accidental restoration in Virginia
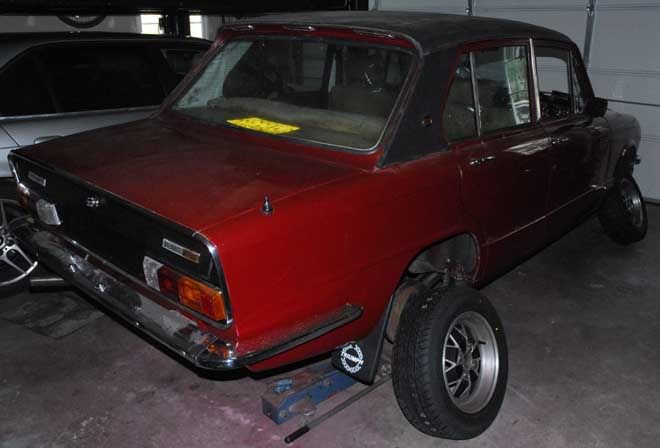
This weekend has been way, WAY too hot and humid to do anything much, so yesterday I removed the wheels and took them to one of the local tyre places to be re-shod. I had ordered tyres online which were delivered on Thursday. I had agonized over the choice - stick with H-rated (limited selection in 13") or go to T-rated. I decided to go for the H-rated ones. Next was to choose between standard 175/70 and 185/60, which some people on here run. I went for 185/60. Then it was a toss-up between some Federal SS535s or Sumitomo HTR200s. I had a set of Sumitomo tyres on a previous car and was pretty happy with them, so I stuck with those. Collected the wheels this morning - ah, the smell of new rubber.....


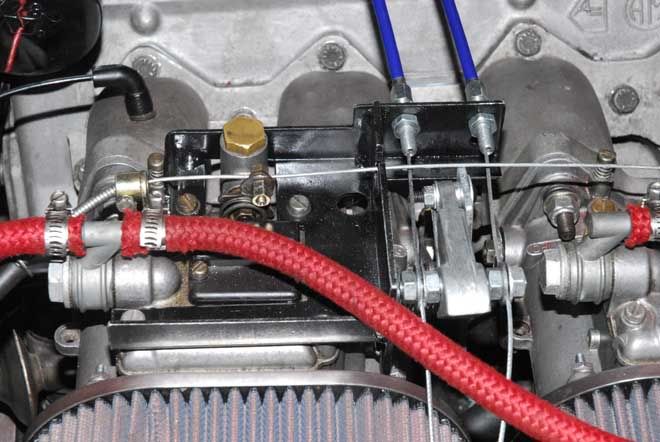
Last weekend I finished off installing the Sytec linkage. I had to modify it slightly to accommodate the choke cable. The (very poor) instructions that came with the linkage said to attach the choke cable to one carb only, that would be sufficient to get it started. I was skeptical, although I tried it anyway - it started, but with difficulty and, not surprisingly, very rough. Much better with the choke operating on both carbs.
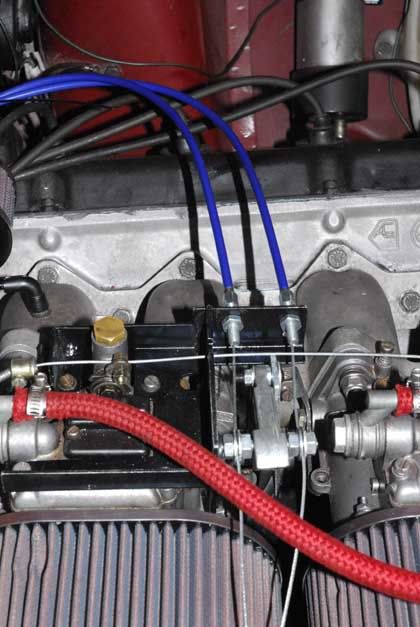
I had to swap over the fuel unions and re-route the petrol pipe from the way it was before as the throttle mechanism was fouling it and I didn't want (a) a burst petrol pipe or (b) any "Toyota" moments
The bulkhead was drilled for the twin cable access
and connected to the pedal block, which I had attached to the throttle pedal:
In two weeks' time (when work is hopefully a little less crazy) I plan to drive to Pennsylvania to pick up my new windscreen.
Last weekend I finished off installing the Sytec linkage. I had to modify it slightly to accommodate the choke cable. The (very poor) instructions that came with the linkage said to attach the choke cable to one carb only, that would be sufficient to get it started. I was skeptical, although I tried it anyway - it started, but with difficulty and, not surprisingly, very rough. Much better with the choke operating on both carbs.
I had to swap over the fuel unions and re-route the petrol pipe from the way it was before as the throttle mechanism was fouling it and I didn't want (a) a burst petrol pipe or (b) any "Toyota" moments
The bulkhead was drilled for the twin cable access
and connected to the pedal block, which I had attached to the throttle pedal:
In two weeks' time (when work is hopefully a little less crazy) I plan to drive to Pennsylvania to pick up my new windscreen.
Re: SUS 991R - accidental restoration in Virginia
Having had to remove the interior (again!  ) to sort out the slave cylinder and clutch hose, I got everything replaced and the radio re-fitted. As this was an auto-to-manual conversion, I had to make up two small retaining brackets to mount the centre console around the gear lever. Very simple, - one horizontal bracket in front of the gear lever, bent up from aluminium (or "a-loo-mi-num", as they say in these parts - finally, I'm getting the hang of the language ) and riveted to the tunnel, drilled and a couple of "speed nuts" clipped on. One vertical bracket, similar deal, but held by the rear tunnel bolt. Yes, I forgot to take piccies before I put the carpets back.
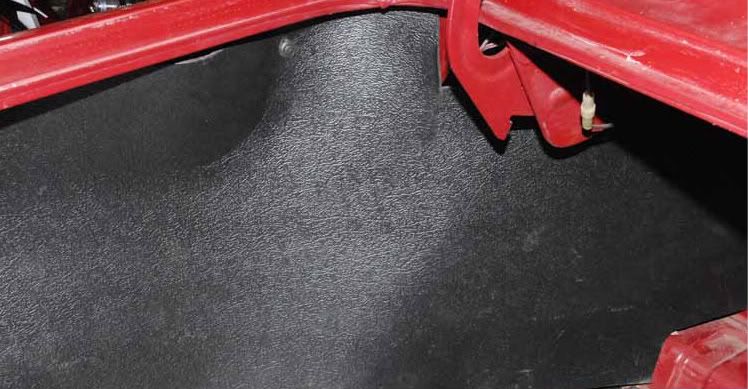
Here is the interior:
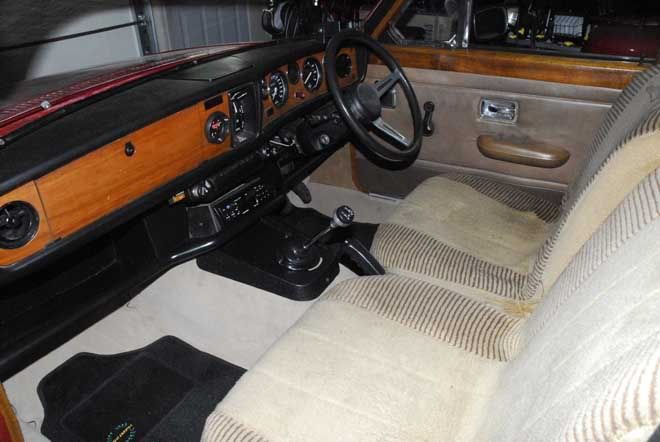
I used new furflex. After three attempts to order from a well-known supplier and four months of waiting, I finally got it from Woolies (not FW).
Flying Dolomite
Here is the interior:
I used new furflex. After three attempts to order from a well-known supplier and four months of waiting, I finally got it from Woolies (not FW).
Flying Dolomite
Re: SUS 991R - accidental restoration in Virginia
Work has held up work on the car for the last couple of months, so much so that I couldn't take time to drive to collect my windscreen - so I got them to send it to me. A couple of weeks ago a large coffin-like box arrived.

Now all I need to complete the car is a windscreen rubber that fits.............
I also got around to wiring up my "lefty" headlights - halogen units powered through two relays that I located on the o/s inner wing.
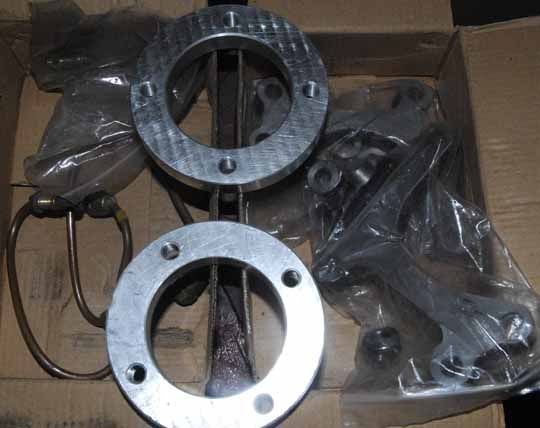
Around the same time as the windscreen made its appearance, I received my world-famous trackerjack brake upgrade package! One day's shipping from Hampshire to Virginia - absolutely stunning! equaled only by the quality of the kit. (Thanks, TJ). As well as the brackets, I received a pair of bespoke alloy clamp rings in lieu of the cut-down dolly discs.
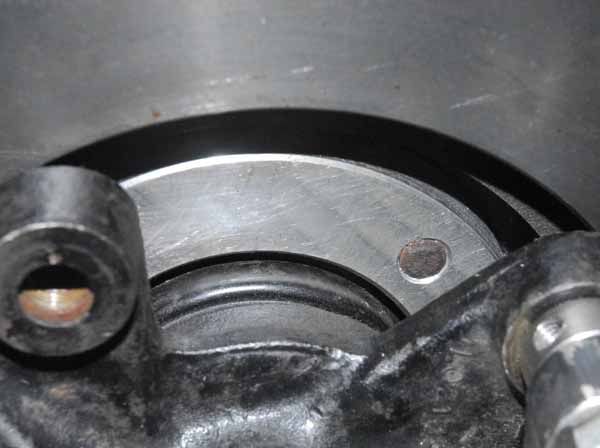
I drilled the VW discs to fit the hub and modified the vertical link in order to fit the brackets. I had hoped to have this on the car by now, but several problems have arisen, aside from the 100+ degree temperatures in my garage. Taking off the o/s vertical link and hub assembly was a piece of cake. The other side turned into one of straylight's proverbial 5 hour jobs, due to rusty bolts. I won in the end, though.
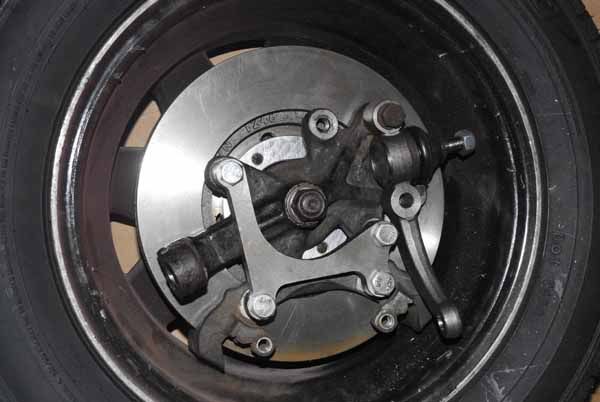
I had sourced Escort calipers and pads, and assembled everything and tried it in a Sprint wheel. Two issues - catching on the stick-on weights and not quite enough clearance between caliper and inner aspect of wheel to be comfortable. Both should be easily solved.
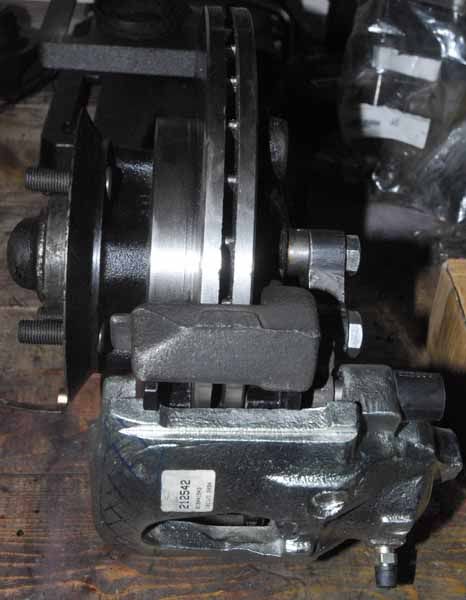
Of more concern is the relationship of the pads, calipers and discs. There is a gap of several mm between the outboard pad and the end of the caliper when the pad is in contact with the disc.

I've no experience of things Ford, so a question for those who have fitted these - do I have pads that are not wide enough (the number on the box seemed correct), or are the calipers too wide, or am I doing something stupid? It seems to me that the problem would be solved if the caliper (in the pic below) were moved to the left relative to the slider - should there be a spacer between caliper and slider that's missing in my setup?
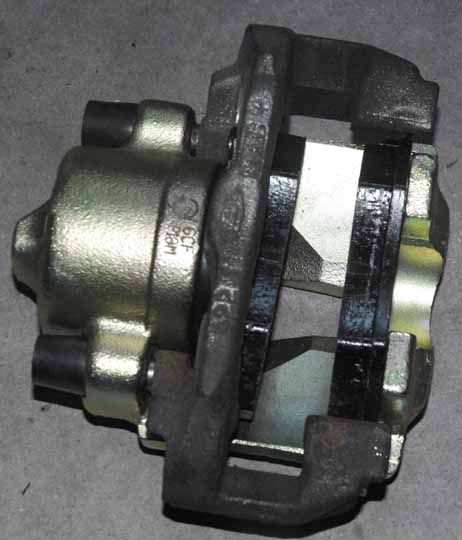
Any thoughts and comments appreciated.
Now all I need to complete the car is a windscreen rubber that fits.............
I also got around to wiring up my "lefty" headlights - halogen units powered through two relays that I located on the o/s inner wing.
Around the same time as the windscreen made its appearance, I received my world-famous trackerjack brake upgrade package! One day's shipping from Hampshire to Virginia - absolutely stunning!
I drilled the VW discs to fit the hub and modified the vertical link in order to fit the brackets. I had hoped to have this on the car by now, but several problems have arisen, aside from the 100+ degree temperatures in my garage. Taking off the o/s vertical link and hub assembly was a piece of cake. The other side turned into one of straylight's proverbial 5 hour jobs, due to rusty bolts.
I had sourced Escort calipers and pads, and assembled everything and tried it in a Sprint wheel. Two issues - catching on the stick-on weights and not quite enough clearance between caliper and inner aspect of wheel to be comfortable. Both should be easily solved.
Of more concern is the relationship of the pads, calipers and discs. There is a gap of several mm between the outboard pad and the end of the caliper when the pad is in contact with the disc.
I've no experience of things Ford, so a question for those who have fitted these - do I have pads that are not wide enough (the number on the box seemed correct), or are the calipers too wide, or am I doing something stupid? It seems to me that the problem would be solved if the caliper (in the pic below) were moved to the left relative to the slider - should there be a spacer between caliper and slider that's missing in my setup?
Any thoughts and comments appreciated.