Just a little bit of work to do....

Re: Just a little bit of work to do....
Looking good, your gap at the top of the wing where it meet's the screen base looks quite big, was this adjusted ( sorry not trying to be negative ) 
-
clairebear
Re: Just a little bit of work to do....
I know the guy who did the work for us had trouble getting the wings to fit properly. Do you mean the gap in one of the pics where it's still in the middle of being done? There's a mahoosive gap on one of the pics where the wing meets the corner of the screen - this was taken when the wing was just clamped on. At that time it still needed to be seated properly. However there's a very large gap where the wing meets the drivers door, I think this is more to do with the positioning of the door itself. Hoping that we can budge the drivers door fowards a little and maybe even the rear door too, try and make the gaps a bit more uniform and not so noticeable.
As for the height at the front we've asked the question before (on here as well I think!) and there was a mixed opinion on it. Obviously I asked the question in the first place cos we thought the same thing but some say its ok others aren't so sure. Any thoughts would be great though in case there is a problem that needs fixing
As for the height at the front we've asked the question before (on here as well I think!) and there was a mixed opinion on it. Obviously I asked the question in the first place cos we thought the same thing but some say its ok others aren't so sure. Any thoughts would be great though in case there is a problem that needs fixing
Re: Just a little bit of work to do....
im referring to the pic where the wing is still not in grey primer  so it was only clamped then ,the doors can be adjusted forward easily enough though to make the gap up,the gaps even on cars from new where not perfect ( mine are not perfect after fitting a new set of doors
-
JPB
Re: Just a little bit of work to do....
If the wing now fits ok at the scuttle and also at its gap with the rear door, then possibly the door needs to be built up with suitable sized welding rods on its leading edge, then shaped with lead and filed to fit, as used to be done occasionally to get doors to fit shells properly during manufacture on many BL (and probably other makers') products of the time.
The gap doesn't look bad in the picture of the n/s of the car, only the bottom edge of the wing itself appears to be slightly proud of the bottom edge of the sill and that could be solved by warming the grp with a hot hair dryer and carefully bending by hand, cooling it with a splash of water when the position looks right and bonding or screwing it into its revised position. Once you've moved it a little in that way, it won't try to spring back and couldn't in any case if it had, by then been stuck down.
Overall though, the car looks eminently ready for paint and that's only a very minor bit of fettling compared to all of the good work already done.
-
Jon Tilson
- Guest contributor

- Posts: 11179
- Joined: Tue Oct 03, 2006 9:45 pm
- Location: Middlesex
Re: Just a little bit of work to do....
I would say the wing was right. I think the front of the cill is too high.
The door would come forwards a couple of mill and once the cill is black it will look fine.
Jonners
The door would come forwards a couple of mill and once the cill is black it will look fine.
Jonners
Note from Admin: sadly Jon passed away in February 2018 but his humour and wealth of knowledge will be fondly remembered by all. RIP Jonners.
-
DoloWIGHTY
Re: Just a little bit of work to do....
Once the paint is on I think you'll find that the gaps wont look that obvious, it's just the contrast now between the white primer and the black panel gaps draws your eye at present.
-
straylight
Re: Just a little bit of work to do....
great pics, many thanks. The car is coming along a treat, big thumbs up for the effort you've invested, she's going to be a cracker.
stu
stu
-
clairebear
Re: Just a little bit of work to do....
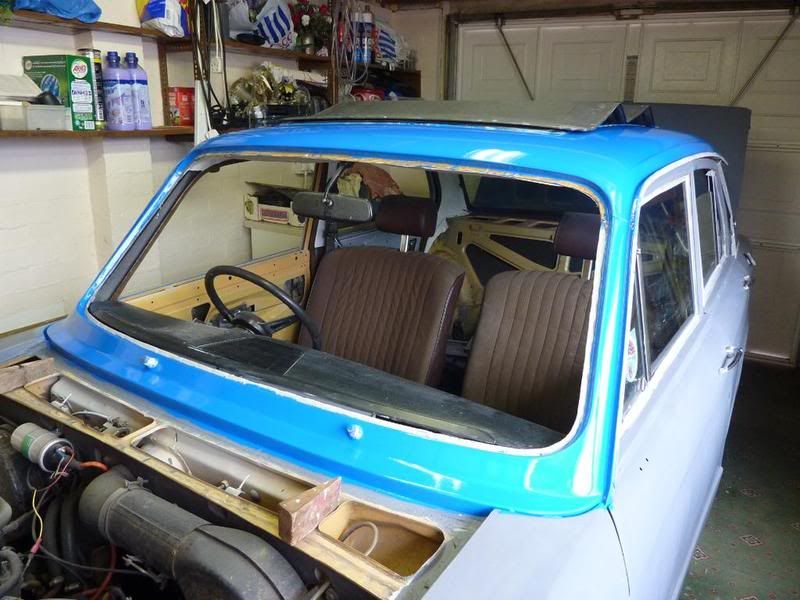
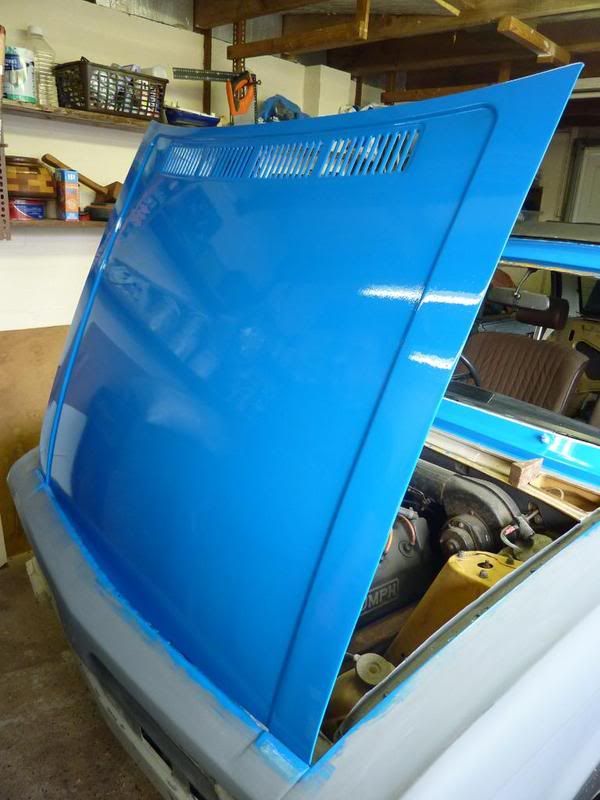
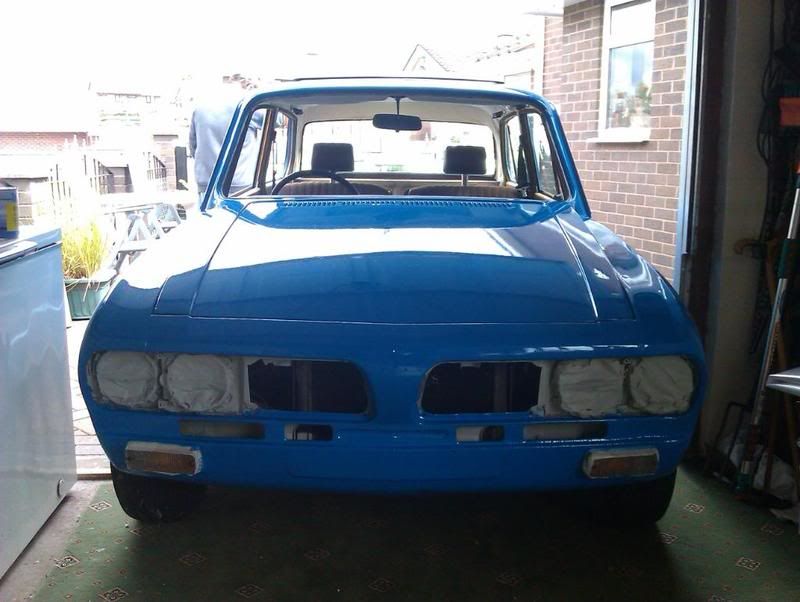
Painting started a few days ago with a few hiccups. We'd bought some "coach painting" paint from a local supplier which unfortunately turned out to not be coach painting paint at all. The stuff dried far to quickly, even to the point of clogging up the brushes within 10 minutes or so 
So off to Walsall we trundled after finding one of the few shops in the country that still did Tekaloid coach painting enamel. It's amazing what a difference having the right paint does for you, lol This palaver has put us back a couple of days but at least we can see we're getting somewhere now.
The coat of colour went on today and she's looking great. Here's a small, sneak peak until she's all varnished up and wheeled out of the garage:

So off to Walsall we trundled after finding one of the few shops in the country that still did Tekaloid coach painting enamel. It's amazing what a difference having the right paint does for you, lol
The coat of colour went on today and she's looking great. Here's a small, sneak peak until she's all varnished up and wheeled out of the garage:
-
SprintMWU773V

- TDC Staffs Area Organiser
- Posts: 5429
- Joined: Wed Oct 18, 2006 2:08 pm
- Location: The Old Asylum
Re: Just a little bit of work to do....
What did you use for wings in the end, GRP?
Mark
1961 Chevrolet Corvair Greenbrier Sportswagon
1980 Dolomite Sprint project using brand new shell
2009 Mazda MX5 2.0 Sport
2018 Infiniti Q30
1961 Chevrolet Corvair Greenbrier Sportswagon
1980 Dolomite Sprint project using brand new shell
2009 Mazda MX5 2.0 Sport
2018 Infiniti Q30
-
clairebear
Re: Just a little bit of work to do....
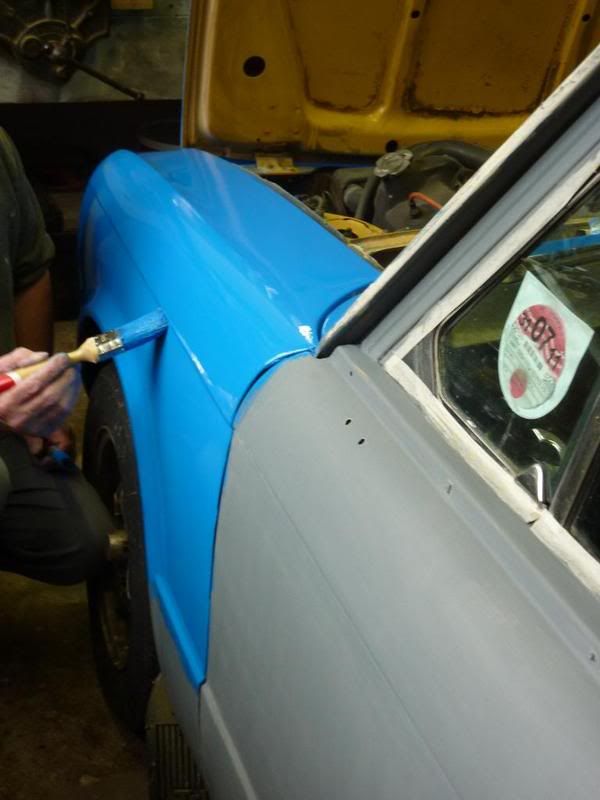
Yes Mark, GRP front wings both sides. Fit's not too bad and the paint seems to have gone on just fine....
-
clairebear
Re: Just a little bit of work to do....
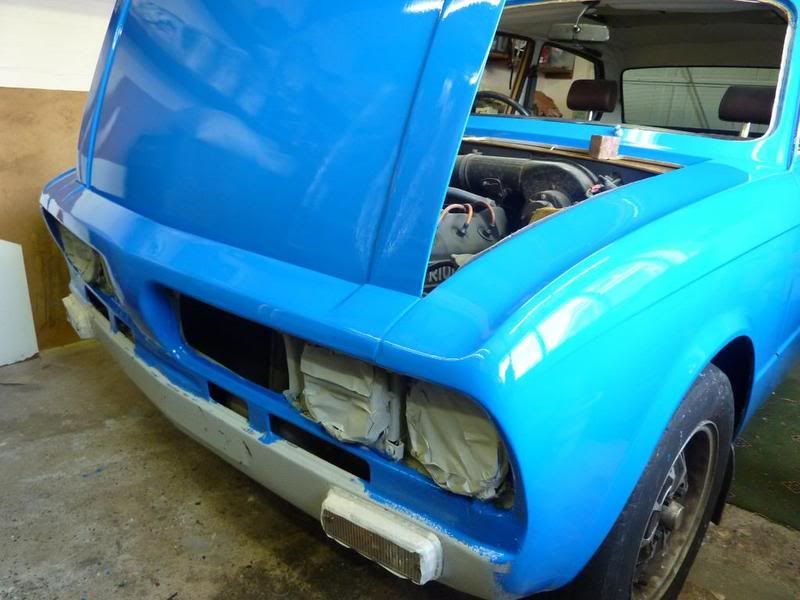
After much huffing and puffing, swearing and scraped knuckles trying to put the doors back together Daisy's pretty much all done....just a few things to bolt back on like the rear bumper, front spoiler, but I'll put the pics up and I hope you all like her
Proof that she was coach painted by my Dad's fair hand, lol:
Been to our big local show today, which has always been what we were aiming for. Didn't manage to quite get her completely back together but at least we made it!

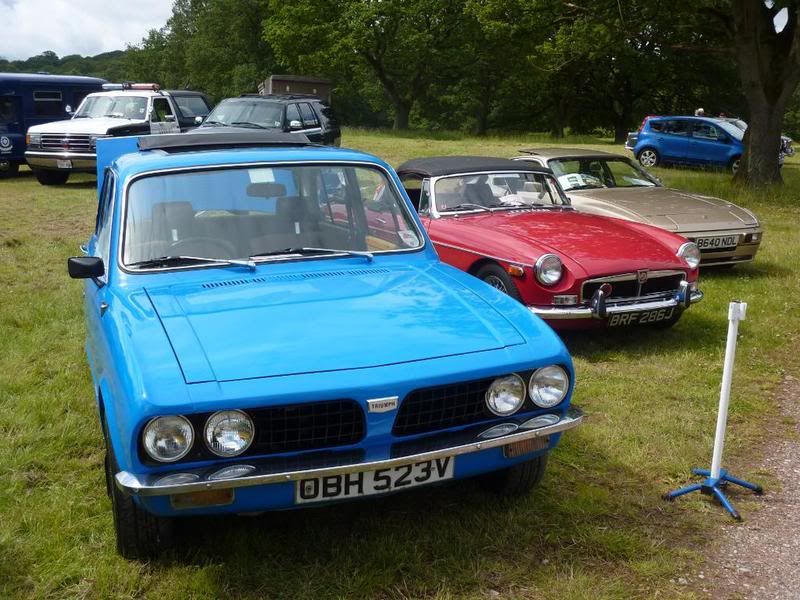
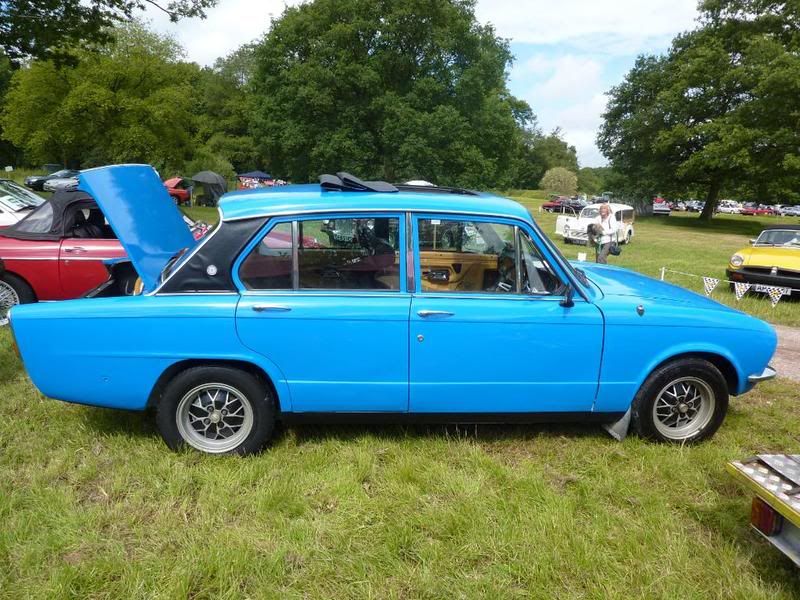

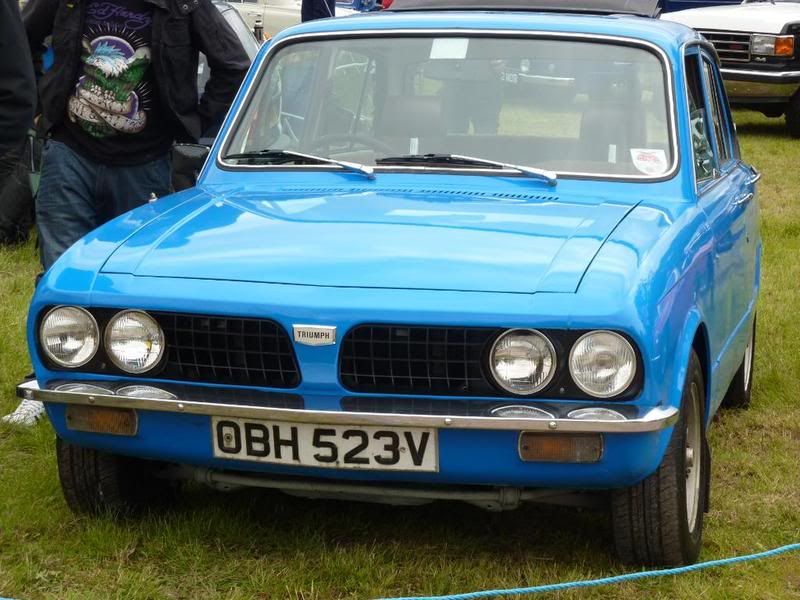
Proof that she was coach painted by my Dad's fair hand, lol:
Been to our big local show today, which has always been what we were aiming for. Didn't manage to quite get her completely back together but at least we made it!
-
Mike
Re: Just a little bit of work to do....
Looks NICE did you varnish after the paint was applied or mix varnish in with the paint?,I coach painted my J2 two colours used cream over burgundy Still looks smart ten years later.
-
clairebear
Re: Just a little bit of work to do....
Thanks Mike!
We never bothered with the varnish to be honest. The shop we bought the Tekaloid from said you didn't HAVE to varnish it but you could. My Dad tried a small piece on the bottom of the wing after flatting it to see how it bought the colour back and you really couldn't see a difference. It's had two coats of colour though - the first one looked fine to me but my Dad assured me it would really give the colour some depth. After that 2nd coat you could see how much it had brought the colour to life, suppose my Dad was right then, just don't tell him I said that!
Also it was painted in my Aunt's garage which seemed pretty clean but when our backs were turned and we left the 1st coat to dry I think the dust fairies had a field day. The 1st coat had a lot of dust in it so it got flatted, the garage roof covered in plastic and the floor wetted then the 2nd coat went on. This one came out much better so we didn't want to push our luck and try the varnish too, the paint finish looked good so it was a case of lets not mess with it
-
JPB
Re: Just a little bit of work to do....
Proof there that a good coach painting job is massively better than a bad spraying one. Very tidy indeed, you must be chuffed to bits.
-
Mike
Re: Just a little bit of work to do....
I think you will be ok without the varnish its only really needed on the very dark reds, blues and greens as these can fade over time. Also Its a lot easier to touch in any repairs if its not been varnished.But nice to see old skills being usedclairebear wrote:Thanks Mike!
We never bothered with the varnish to be honest. The shop we bought the Tekaloid from said you didn't HAVE to varnish it but you could. My Dad tried a small piece on the bottom of the wing after flatting it to see how it bought the colour back and you really couldn't see a difference. It's had two coats of colour though - the first one looked fine to me but my Dad assured me it would really give the colour some depth. After that 2nd coat you could see how much it had brought the colour to life, suppose my Dad was right then, just don't tell him I said that!
Also it was painted in my Aunt's garage which seemed pretty clean but when our backs were turned and we left the 1st coat to dry I think the dust fairies had a field day. The 1st coat had a lot of dust in it so it got flatted, the garage roof covered in plastic and the floor wetted then the 2nd coat went on. This one came out much better so we didn't want to push our luck and try the varnish too, the paint finish looked good so it was a case of lets not mess with it