So, after much umming, arring and arghing (MOT fail, trousers on fire, fuel-line and heat gun declarable etc.) I thought it worth bringing the world a Trevor thread.
Trevor is, or rather was my very beautiful 1300 who failed his MOT quite a lot. I am putting him back on the road because I miss driving and am a tight fisted northerner who really enjoys hard physical labour. I have a plan (of sorts) and some of the pieces to make him better. There will be pictures soon of some of what wants doing and what I have done so far. I go back to uni in mid January, hopefully taking a gearbox with me to rebuild.
Today I started cutting out the new floor panel from the chunk of former 1300 I have. This and the chassis leg which comes from it will be used, to replace the rotten parts on Trevor, I'll provide pictures of this tomorrow. In the two hours of light I had after trying to locate a DIY store that was open I managed to cut the vast majority of the floor section out, I think there's about 4 inches of material left holding it together. Tomorrow I shall focus on removing this section, then removing the suspension turrets. Then comes the "fun" part. I hope to get the outer sills replaced (I have bought the relevant club parts) and the jacking points rebuilt so I have something to support him on when I drop the engine etc. to repair... well everything in the engine bay and replace the front floor pan. As far as welding is concerned I'm going to get some practice in patching up the old parts (such as the suspension turrets) before I even think about removing stuff from Trev. If the worst comes to the worst (as far as my wallet is concerned) I could scrape the money to get it done professionally, but that would ruin the fun and I wouldn't gain the satisfaction of learning to weld properly (I have welded before, just a while ago, and mostly gas rather than MIG)
Just one question tonight. Is the front part of the chassis leg on a FWD the same as that of a Dolomite? I know the club does rebuilt kits for the dolly and this would save me a bit of fabrication.
As ever, advice, insight and instruction is welcome.
Love, Light and Peace
Ed
The long promised Trevor thread

From memory.......
Dolomite chassis legs are different to 1300 fwd, however it may be possible to use the relevant of a Dolomite leg
on a 1300, namely the section attached to the inner wing. Me, I would fabricate my own.
I concur, you should repair/replace the sill structure (including the jacking points) first.
When doing this I keep the car on all its wheels (supported on sleepers to gain elevation) and leave the doors on for as long as
possible. It is handy to use the doors as a reference by checking their opening/closing and panel gaps.
Then replace the floor sections.
I presume you'll have to drop the back suspension?
If so, leave this until last and do one side at a time, keeping the other bolted in position (again to use a reference).
Good luck and remember each step, no matter how little, is a step nearer completion.
TDC Forum moderator
PLEASE help us to maintain a friendly forum,
either PM or use Report Post if you see anything you are unhappy with. Thanks.
PLEASE help us to maintain a friendly forum,
either PM or use Report Post if you see anything you are unhappy with. Thanks.
-
ed1993
Re: The long promised Trevor thread
Quick lunchtime update (no pictures yet). Just come in having removed one of the turrets. The floor section is still as attached as it was last night, fairly confident it is now attached mostly by nostalgia. Had a moment of excitement as a cutting disk snapped and shot at my thigh, fortunately it glanced off my phone. Shaken slightly. I've got a solid plan in place for the sill replacement. Just need a better extension lead (I'm thinking I'll make one) up to the top of the garden so I can work if it's raining. Just as a winter stop-gap until the garage is wired up.
-
ed1993
Re: The long promised Trevor thread
Right, so I now have 1 floor (roughly cut)
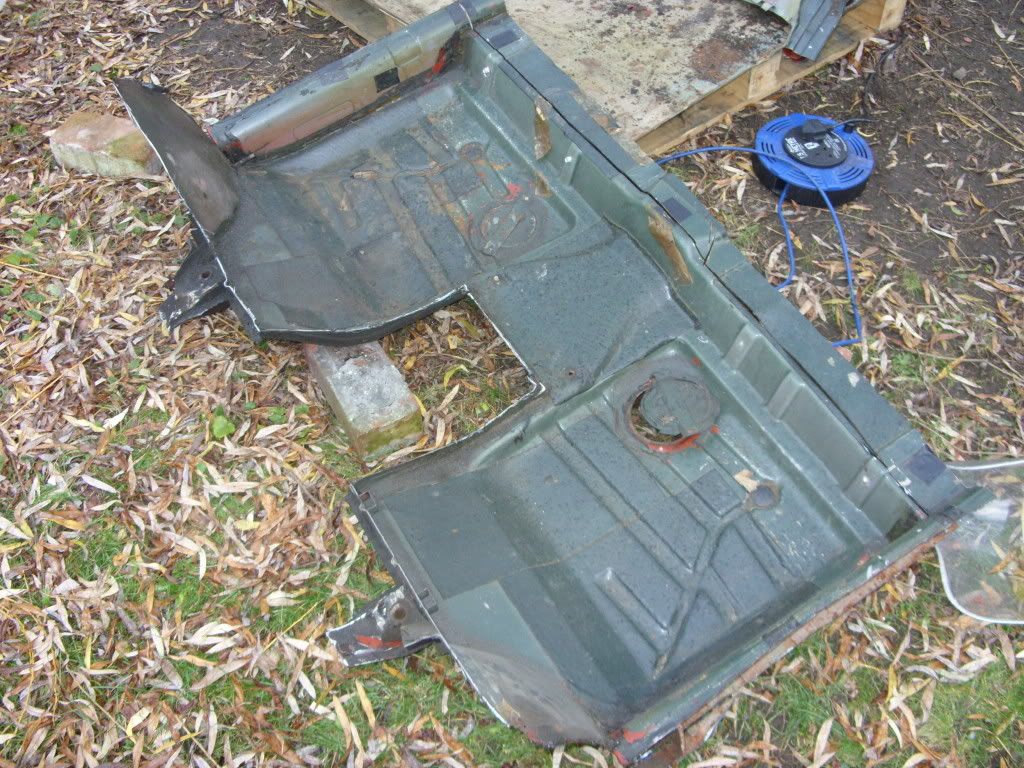
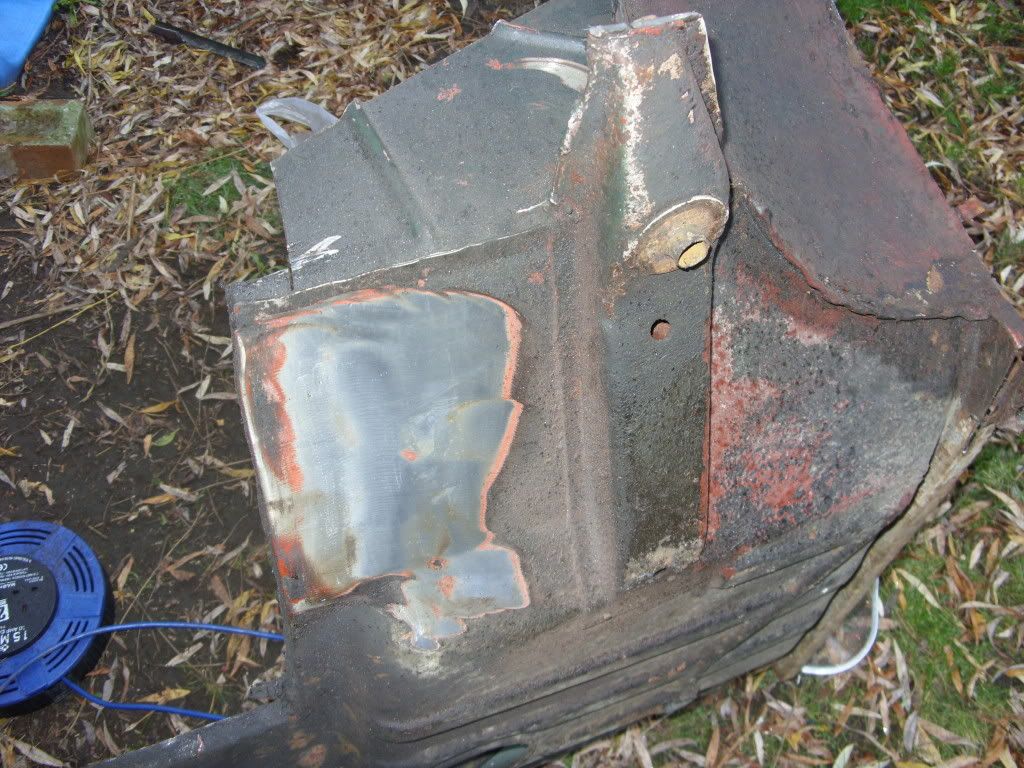
I then got excited that I had this paint removing disk and worried about a soft bit on the floor (turned out it was just underseal that had bubbled as I was cutting it, but look! Clean metal (although now vaselined for good measure)
Not quite sure what to do with this bit though.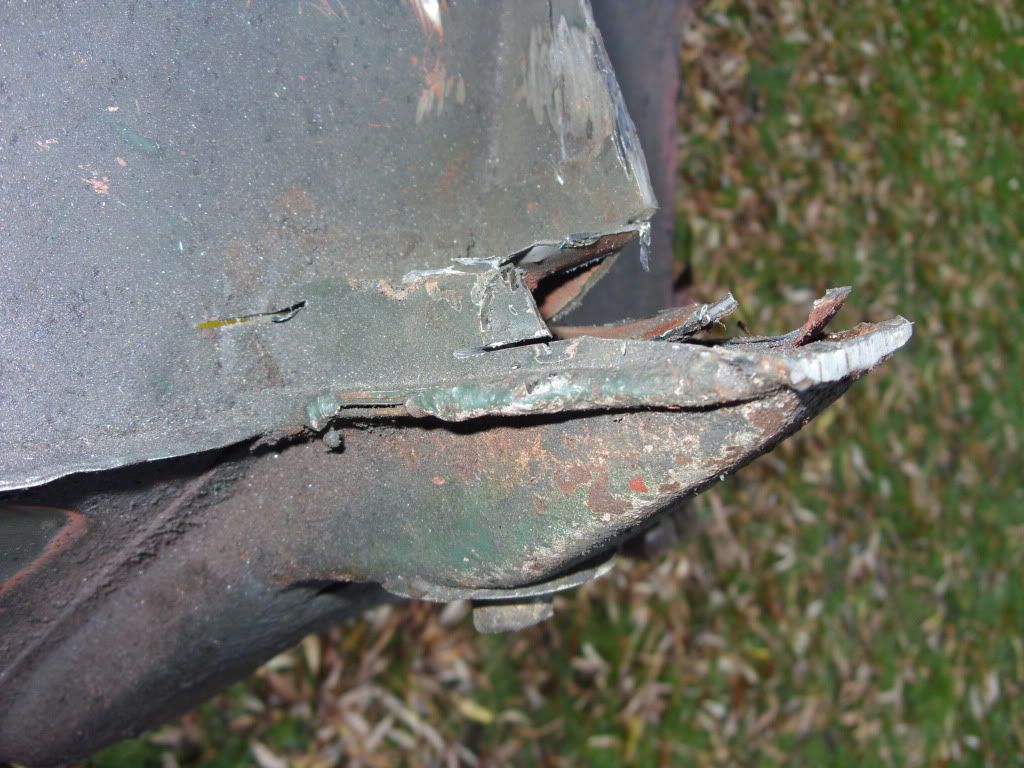
I need this part of the chassis leg (from the floor to the point pictured) because mine have been hideously "repaired" in the past. My revised plan is to rebuild the engine bay (and the chassis legs under the inner wing) then using a spare subframe as a guide, fit the new floor/chassis legs as one part, taking careful measurements to ensure it is all straight and merry.
Tomorrow I'm going to separate off the suspension turrets from the bits of wing they are attached to and red-oxide them ready for fitting and trim off the excess floor that I have. There's bits of the bulkhead still attached where I couldn't get the grinder in properly and some rotten bits which will need repairing. Then strip the old crap off the bottom and red-oxide that too.
For now however I have to tidy away and fix up my leg, unfortunately the phone shielded me only from the worst, some got through and it is rather sore!
Goodnight!
-
ed1993
Re: The long promised Trevor thread
So, yesterday was written off by terrible weather, but this morning I was able to get out and remove the other suspension turret and begin drilling out spot welds (fun!) before further rain stopped play. I am now well on my way to having all the parts I can see myself needing. Which worryingly could potentially mean I could get on to reconstruction before I head back over to uni (technically I think it would be possible to finish the job, but I don't want to rush myself so that's not the plan).
Questions
Is there any problem with recycling bits of metal which formerly made up the inner wing? I have probably just about enough to repair what I need to repair. I've chucked anything which got bent or twisted or stressed when I was removing it, and seeing as it's the right gauge I can't see any strength issues.
Does anyone have the dimensions for the triangular beam which runs between the inner and outer wing? On both my car and the chunk these have disintegrated beyond useful measurement, I'm going to fabricate my own, either in Lancaster or (if I can talk my way back in) College. I need to build... well I'll get photos of what I'm thinking of doing as soon as I can.
Is there any reason not to weld whilst it is cold? (although between 5 and 8 degrees C isn't really cold)
Yes ............
The triangular beam or trumpet is a known weak spot.
Use a thick steel plate, 1.2 or 1.6mm. It is simpler to make these as three parts and weld together on the car.
You can use the later Dolomite mudshields to prevent (hopefully) a re-occurance of the corrosion here.
Please, before you start on the inner wings, you must have the sill structure sorted. It is to do with alignment.....
TDC Forum moderator
PLEASE help us to maintain a friendly forum,
either PM or use Report Post if you see anything you are unhappy with. Thanks.
PLEASE help us to maintain a friendly forum,
either PM or use Report Post if you see anything you are unhappy with. Thanks.
-
ed1993
Re: The long promised Trevor thread
The sills are top of the bill, not only do I need them for the structure, I have to rebuild the jacking points in order to actually support the shell, I also figure it's probably going to be easier welding as it is straight, although I am going to get practice in on the spare bits. Cheers for all the useful tips by the way, Ian. I think the sheet metal bender at uni can do up to 3mm so I might have a go using that first, although the NS one looks like it might be repairable, we'll see anyway. The main problem that I can see with this part is the presence of a pin which (I presume) locates the suspension turret. The pin on both bits I've looked at has lacked any sort of rust proofing, not even red oxide. My guess would be that once moisture gets into the beam the pin oxidises, expands and allows ingress into the surrounding metal. Mud shields sound like a good idea though.
-
ed1993
Re: The long promised Trevor thread
So, a quick update.
Had a couple of days written off by bad weather, one or two by other engagements and half days working inside on other projects meaning that Trev was put on the back burner a little. I'm now focussing on doing all the prep work for welding over Easter, this should give me a good chance of getting all the welding work done in one burst. Today dad and I also acquired some old roofing timbers from a house over the road so I can raise Trev up to do the work. Dad has kindly promised to make me some sort of ramp from them. Anyway today I removed all the old underseal, paint and rust from the replacement floor panel and started removing the remnants of the bulkhead that came out with it. Once I have the thing free and clear I shall spray it with some red primer ready for Easter. I've also got to remove the suspension turrets, but I may not use them now, not sure. Either way they will be afforded the same treatment as the replacement floor. I'm then going to work on the front subframe with any time I have left to try and loosen the bolts which secure it, they are all stiff as hell, hopefully the trumpet valve oil I poured in will have penetrated enough!
Not bad progress for dark northern days, but hopefully more and better over the Easter
-
ed1993
Re: The long promised Trevor thread
So I'm now two days into my "holiday" and progress has been unsurprisingly slow. I've been let down by delivery of some tools (spot weld bits) and the drill bits I have are totally inadequate (and I am loath to go and buy new bits when I've got the right ones coming!) so I've been inside the car removing and cleaning the interior for storage and I've also removed, stripped and cleaned the blower motor, even priming some parts, so hopefully the time was not totally wasted.
I also removed a door (Dan was right when he said it was a two man job!) and started breaking the front wing welds. It looks like it has been removed before which makes the repairs made to the inner wing even more incredible!
I've also started filing all the little fixings, which takes time but from experience will be worth it. The whole of the front of the car is basically being dismantled and rebuilt so that's quite a few little things to lose. Unfortunately I managed to loose a washer across the garden when I dismantled the blower motor but hey, a washer's a washer!