Start of new project.

Track days, racing, rallying, hill climbs, autotests, tuning & uprating etc.
Message
Author
User avatar
soe8m
Guest contributor
Guest contributor
Posts: 3179
Joined: Thu Oct 06, 2011 1:13 am
Location: The continent

Re: Start of new project.

#16 Post by soe8m »

Ha Ronald,

You know me, no fear. :mrgreen:

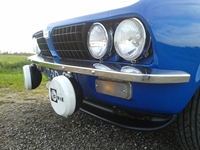
I do not see any problems. My 1850 had also almost a 1:12 compression ratio (at the start) :D . The deck was skimmed and the head. The head gave a few problems because you cannot skim a 1850 head a lot. You are going to hit the valve seats. My solution was to skim it under an angle. (see picture). This way i could have the desired compression. The only thing was that i needed to drill the angled holes in the head 1,5mm bigger because it didn't match the engineblock anymore. :|

I started in this 1850 engine also with a fast road cam and that went fine. I replaced it by std. at 20.000km because the pistons were pushing the valves back at high revs instead of the valvesprings pulling them. With the fast road or std. i never ever had a backfire. Also when it had the LPG injection not fitted yet. The last 10.000km was at three cylinders and it stalled when it had only two left. When it started running on three cylinders i did a leaktest. Cyl 1 60% leak, cyl 2 30% cyl 3 90% and cyl 4 90%. The cyl 1 and 2 became faulty because they had to pull the car. The inlets were leaky and two exhaustvalves were oval and VERY leaky so that's a hell of an overlap and still no backfire.

The revs will be limited to 7000rpm by the electronic ignition. (I know myself so no adjustable in car limiter). This engine was in my inca sprint doing above 7000. Not much additional power but the sound.......
I'm going to fit a programmable 123 ignition. You can set two curves in it and have the revs limited. When it's on petrol there's a retarded curve so i can run on 95 only for starting en warming up. On LPG it turns automatically to the advanced LPG curve. I'm also very curious what the output will be. With the std cam and hs6 fitted it had about 135 at the rear wheels and it should be more now. 8)

Jeroen
head1850.jpg
head1850.jpg (17.28 KiB) Viewed 5881 times
Classic Kabelboom Company. For all your wiring needs. http://www.classickabelboomcompany.com
User avatar
soe8m
Guest contributor
Guest contributor
Posts: 3179
Joined: Thu Oct 06, 2011 1:13 am
Location: The continent

Re: Start of new project.

#17 Post by soe8m »

Saturday was a long but a productive day. I did have some new holes in my engine block and head and Hans has brakes again on his Benz Van.

The first pictures do relate to the rounding of the sharp boring edges. The first picture is of a cracked engine and the second of a little burst where all the drama starts with.

The block and head have 5 widened holes that have dowels in them for exact location of the head. The head cannot move anymore and the headgasket also not. When having the valves adjusted all stay's in the same place. The second set of the pictures is measuring the head chambers what the size is and the difference between. They have to be relatively the same and one was 2cc off so i have to grind something out of the head to match the rest. The rest had all 0,5cc difference max. I decided not to have a 1:12 compression but around the 1:11 for a more long lasting life. For LPG is more compression more efficiency but the pressure on the bottom end will be too much. My former engine did last 260.000km abuse and this one has to go over it ofcourse.

Jeroen
cracked1.JPG
cracked1.JPG (41.31 KiB) Viewed 5803 times
barst.jpg
barst.jpg (12.86 KiB) Viewed 5803 times
Classic Kabelboom Company. For all your wiring needs. http://www.classickabelboomcompany.com
User avatar
soe8m
Guest contributor
Guest contributor
Posts: 3179
Joined: Thu Oct 06, 2011 1:13 am
Location: The continent

Re: Start of new project.

#18 Post by soe8m »

.
dowel1.JPG
dowel1.JPG (41.5 KiB) Viewed 5803 times
dowel2.JPG
dowel2.JPG (36.1 KiB) Viewed 5802 times
dowel3.JPG
dowel3.JPG (45.92 KiB) Viewed 5799 times
Classic Kabelboom Company. For all your wiring needs. http://www.classickabelboomcompany.com
User avatar
soe8m
Guest contributor
Guest contributor
Posts: 3179
Joined: Thu Oct 06, 2011 1:13 am
Location: The continent

Re: Start of new project.

#19 Post by soe8m »

.
liter1.JPG
liter1.JPG (45.73 KiB) Viewed 5797 times
liter2.JPG
liter2.JPG (50.57 KiB) Viewed 5798 times
liter3.JPG
liter3.JPG (46.68 KiB) Viewed 5796 times
Classic Kabelboom Company. For all your wiring needs. http://www.classickabelboomcompany.com
User avatar
soe8m
Guest contributor
Guest contributor
Posts: 3179
Joined: Thu Oct 06, 2011 1:13 am
Location: The continent

Re: Start of new project.

#20 Post by soe8m »

Hello,

Yesterday i made a decent dolomite engine adapter for my engine stand. Normally it's a bit akward on the stand, not centrated and not easy to turn because of the heavy side at the rear. This way it's nice in balance.

Tonight did some minor fitting. Some new plugs, waterpump bush and the arp main cap studs. Also made the fuel rail and the throttle valve on the plenum and made the injector keep plates.

There's not much to fit right now because the flywheel is being machined and the cranckshaft has to be balanced first with this flywheel and freudenberg damper. I have to make a little alu bush for the oilpump this week to have it centrated in the engineblock. The county can move quite a lot and off centre gives wear to the pump, driveshaft and gear. It would also my hole matching do no good.

Jeroen
stand.JPG
stand.JPG (46.02 KiB) Viewed 5712 times
shiny.JPG
shiny.JPG (43.79 KiB) Viewed 5712 times
arp1.JPG
arp1.JPG (45.39 KiB) Viewed 5713 times
Classic Kabelboom Company. For all your wiring needs. http://www.classickabelboomcompany.com
User avatar
soe8m
Guest contributor
Guest contributor
Posts: 3179
Joined: Thu Oct 06, 2011 1:13 am
Location: The continent

Re: Start of new project.

#21 Post by soe8m »

Plenum with original TR7 EFI hardware.
plenum1.JPG
plenum1.JPG (46.13 KiB) Viewed 5715 times
Classic Kabelboom Company. For all your wiring needs. http://www.classickabelboomcompany.com
User avatar
TahitiSPRINT
TDC Member
Posts: 380
Joined: Fri Oct 20, 2006 10:10 am
Location: Netherlands

Re: Start of new project.

#22 Post by TahitiSPRINT »

Ha Jeroen,

Nice standard of work! Out of interest: how much cc volume are the combustion chamber volumes now? Broadspeed had 45cc with a 10,35 cr (+/- 0,35) but I’m sure you and Hans have better ideas about that :wink:

About the new extended inlet manifold and TR7 EFi plenum: I guess these will give a massive improvement in torque (longer inlet tract = higher torque) but maybe limits the maximum power a little, as does the relatively small TR7 throttle body. Did you choose the length by calculations or a theory?

And when are you planning to do the test runs on the Dyno? If needed I’m available to help :D
Ronald
Club Triumph Holland - Dolomite Registrar


www.triumphowners.com/tahitisprint
User avatar
Oli_88
Guest contributor
Guest contributor
Posts: 3225
Joined: Wed Jan 23, 2008 5:19 am
Location: Fleet

Re: Start of new project.

#23 Post by Oli_88 »

That is a complete work of genius on that head skimming. Very impressed!
1978 Twilight Purple Dolomite 1850HL The Lolomite.
It's 106 miles to Chicago, we've got a full tank of gas, half a pack of cigarettes, it's dark, and we're wearing sunglasses.
Hit it.
User avatar
soe8m
Guest contributor
Guest contributor
Posts: 3179
Joined: Thu Oct 06, 2011 1:13 am
Location: The continent

Re: Start of new project.

#24 Post by soe8m »

Ha Ronald,

It's not all high tech but also some farmers wisdom and the best of the worst constructions possible because of lack of space or parts and more importand: time...

I could have made me a whole new plenum with a bigger throttle valve but the easiest was to reuse some parts. The length of the pipes are actually determined by the place of the plenum, see the first few pictures in this topic. It's on the same spot as it was on my former engine. This way i do not have to make a new airmass metering unit bracket. I also fabricated a special curved black silicone intake hose between the throttle valve housing and airmass metering unit what i all can reuse now like the wiring loom.

The volume was at cil 1 44cc and the rest slightly more than 45cc. I'm having all the same and then determine how much the head is going to be skimmed. Then check again and finetune. This engine was already build about 10 years ago and has run about 10.000km but it's also build with 10 years less experience from now. I've learned a lot of my former engine also what can be achievable with LPG. You must have read the LPG article in the triumph magazine how it all started.

I see this engine as an engine and a fuel sytem attached to it. The engine itself gets all the best and the fuelsystem the best possible with some compromises, especially the petrol system what i'm hardly wil be using. The engine itself will be a sort off pre rally engine with some expirimental constructions like the extra camshaft oil feed and some exprimental parts.
But not a competition engine because it has to run more than 260.000km :mrgreen:

Jeroen

When the dynorun is, no idea. There's also a gearbox and axl.....

But you can speed it up if you like???? Amsterdam-Nijverdal is only 1,5h drive :wink:
Classic Kabelboom Company. For all your wiring needs. http://www.classickabelboomcompany.com
ponchoj

Re: Start of new project.

#25 Post by ponchoj »

Good work.

I'm piecing together an LPG setup for my Dolomite. I'm on the lookout for a second hand engine to rebuild to suit. Mine will be LPG only, no petrol.

I'm also going injection but with two throttle bodies on a standard intake with a bit of fettling. I'll be running VEMS (possibly with an LPG piggy back system on top - as it may be the only way I'll get it certified here). With running VEMS I can use EDIS and bin most of the distributor....I've actually got a few COPs in the garage that look like they may fit - will see at the weekend. :) I'll put pictures up as soon as I've got a suitable engine to play with....I don't want to touch the one in the car until this one is ready.


I have an excel spreadsheet for determining intake runner length for up to the 5th harmonic if it's of any use to you for future intake builds? It's great for dialing in those peak figures. lol.


Gas is the way forward ;)


Just curious, what did you do to reach your 11-12:1 CR? How much meat is on the head for skimming?
User avatar
soe8m
Guest contributor
Guest contributor
Posts: 3179
Joined: Thu Oct 06, 2011 1:13 am
Location: The continent

Re: Start of new project.

#26 Post by soe8m »

About 1:11 max with skimming. The rest you have to obtain by block decking. The project has a little pauze in it. Just fitted a new design auto drive plate on my wife's 2500 what will stay in one piece. When this car is ready the roof is going off my house and when the new one is on i'll go further the project.

Jeroen
Classic Kabelboom Company. For all your wiring needs. http://www.classickabelboomcompany.com
User avatar
soe8m
Guest contributor
Guest contributor
Posts: 3179
Joined: Thu Oct 06, 2011 1:13 am
Location: The continent

Re: Start of new project.

#27 Post by soe8m »

soe8m wrote:About 1:11 max with skimming. The rest you have to obtain by block decking. The project has a little pauze in it. Just fitted a new design auto drive plate on my wife's 2500 what will stay in one piece. When this car is ready the roof is going off my house and when the new one is on i'll go further the project.

Jeroen
As for the roof, i'm cutting rooftiles, rooftiles, rooftiles and rooftiles. ](*,)
A lot of angles and extensions so a lot of cutting and climbing. Replaced the lead of the chimney's today so making progress.

As for the 2500, the new drive plate is staying in 1 piece now but the torque converter is ripped apart now. (2nd). I do now know why it's called a flex plate. It has to flex otherwise the torque converter does flex and it does flex the bowl off the welded ring with the threaded holes. :cry: Out of converters and have one repaired and the next plan is to cut out some banana shaped holes out of my new drive plate/flange so it can flex but does not break like the original sheet metal drive plates.

My new project has a little progress. I did try fit the cranckshaft with the freudenberg damper and it does fit but have to modify the alternator bracket. I use a tr7 EFI one that puts the alternator further away from the enginebecause of the injection parts. The flywheel is leightened again and there's no possibility to have more of it. Will weight and put pictures soon. It's now being balanced all together.

The head/valves are ready. In the pictures you can see the dowels for the inletmanifold. It's matched with the head. The red paint is for matching. Fit and spray. Take off and see what to grind out. The valve seats have a three angular pattern. This for better flow. The valves have also a three angular pattern for max flow. I did lap 1 valve to check the contact area if it was 2mm and it was.

The next thing to do is to make the extra oilfeed in the head and then it can be put together after measuring the combustionchambers again. The head was skimmed so there can be a little difference in cc's.

Jeroen
kop1.JPG
kop1.JPG (370.55 KiB) Viewed 5171 times
kop3.JPG
kop3.JPG (376.39 KiB) Viewed 5171 times
kop2.JPG
kop2.JPG (285.49 KiB) Viewed 5171 times
Classic Kabelboom Company. For all your wiring needs. http://www.classickabelboomcompany.com
User avatar
trackerjack
Guest contributor
Guest contributor
Posts: 4727
Joined: Fri Nov 23, 2007 11:33 pm
Location: hampshire

Re: Start of new project.

#28 Post by trackerjack »

Good solid sound engineering Jeroen 8)
track action maniac.

The lunatic is out................heres Jonny!
User avatar
trackerjack
Guest contributor
Guest contributor
Posts: 4727
Joined: Fri Nov 23, 2007 11:33 pm
Location: hampshire

Re: Start of new project.

#29 Post by trackerjack »

soe8m wrote:Saturday was a long but a productive day. I did have some new holes in my engine block and head and Hans has brakes again on his Benz Van.

The first pictures do relate to the rounding of the sharp boring edges. The first picture is of a cracked engine and the second of a little burst where all the drama starts with.

The block and head have 5 widened holes that have dowels in them for exact location of the head. The head cannot move anymore and the headgasket also not. When having the valves adjusted all stay's in the same place. The second set of the pictures is measuring the head chambers what the size is and the difference between. They have to be relatively the same and one was 2cc off so i have to grind something out of the head to match the rest. The rest had all 0,5cc difference max. I decided not to have a 1:12 compression but around the 1:11 for a more long lasting life. For LPG is more compression more efficiency but the pressure on the bottom end will be too much. My former engine did last 260.000km abuse and this one has to go over it ofcourse.

Jeroen
cracked1.JPG
barst.jpg
This damage is exactly what happened to my engine after 10 years of track days, the really annoying thing is that if you look at the design of these Dolly lumps and compare them with a Pinto you note that the web that connects to the main bearing is solid on the Pinto and Triumphd could have easily beefed up their webs (they have holes in them!) and do away with the huge lump of cast iron that makes a flat sump then make the sump go up the side which would have created a more reliable and lighter engine.
track action maniac.

The lunatic is out................heres Jonny!
User avatar
zombeh
Guest contributor
Guest contributor
Posts: 699
Joined: Tue Dec 26, 2006 12:36 am
Location: Isle of Wight

Re: Start of new project.

#30 Post by zombeh »

Is there any particular reason you've gone for an early block this time? Or just a case of what was available? and do you have any photos of anything you've done to the water pump outlet? :)
Post Reply