Now then young man. I have been following your project with avid interest since it went up.
As the guy you purchased this vehicle from around 10 years ago (Stafford, number 3, you know the street) I can resist the temptation to put in my two peneth worth no longer.
First off I admire what you are doing. It will certainly be an excellent example and a fine car when it is done. I guess though we all have different goals and different ideas. As you know I had MWU 773V for around 10 years. I ran it as an every day car ('pressed' into service I think you described it as) for all of those 10 years. This was not because I had little choice but because I firmly believe that classic cars are to be used and enjoyed, upto and including, as the daily run about. My goal in all of those 10 years was to keep it as original as possible and in as a good a condition as possible. Having done nearly all the work on the car myself I know it intimately and at this point I feel I need to defend my corner so to speak. While I had it time and cost were of no consequence and at no time was work ever 'bodged'. All repairs were carried out at least to a high structural standard (cut out rot, butt weld in new, etc). I know the car had some areas of 'concern' but as I knew the car intimately I kept on top of them. So, now please bear in mind, that you have now had the old girl as long as I had had. In which case perhaps "This has been developing for some time (10 years perhaps?), brought about by much bodgery and general deterioration" is not a very fair reflection on my care of the old girl while in my hands?
Many of the photos you have posted (drivers footwell) I would not recognise as the car I knew those 10 years ago.
So, onto the restoration. As I said we all have different aims and ideas. As someone else has already mentioned this perhaps falls into the category of reconstruction as opposed to restoration. Personally I would have kept the old body shell, blow the expense and restored it. Yes, maybe it would not be as good as a reshell, but it would have certainly been feasible and would have kept the original car.
The engine you will find no issues with. Can't remember exactly what I did now but it certainly had new shells and rings at the very minimum. Bores at the time were fine and were just de-glazed. Water pump was refurbished too.
Feel free to ask questions and if I can remember I will do my best to reply.
MWU773Vforever.
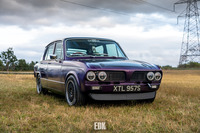
Operation Orange - 1980 Sprint restoration

So....
Were you responsible for this patch on the inside of the NS back wheel arch...?mwu773vforever! wrote:All repairs were carried out at least to a high structural standard (cut out rot, butt weld in new, etc).
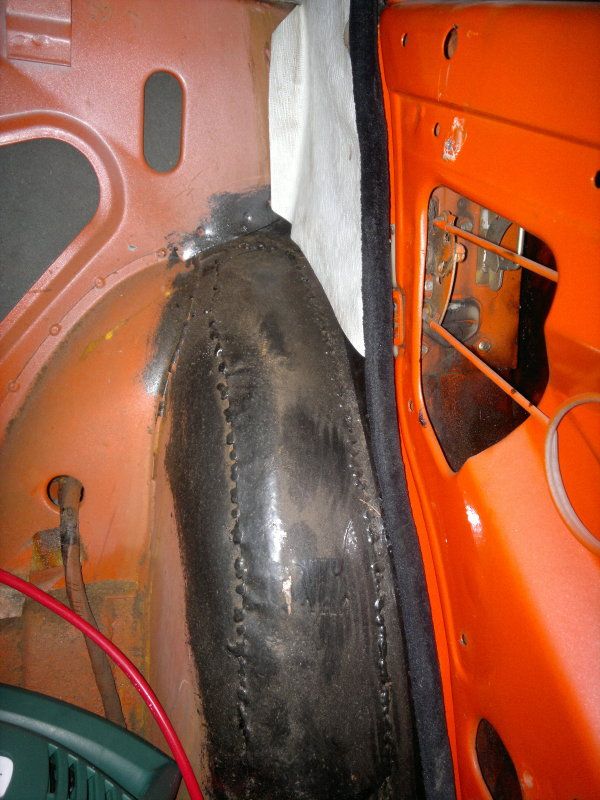
It should have been done on the outside and seam welded to prevent water ingress.
(Today, to meet the MOT standard, patches have to seam welded anyway.)
Please, lets not hijack Mark's carefully documented thread by turning it into a slanging match.
Thanks,
Ian.
TDC Forum moderator
PLEASE help us to maintain a friendly forum,
either PM or use Report Post if you see anything you are unhappy with. Thanks.
PLEASE help us to maintain a friendly forum,
either PM or use Report Post if you see anything you are unhappy with. Thanks.
-
mwu773vforever!
Re: Operation Orange - 1980 Sprint restoration
Yes, that was my responsibility, guilty as charged. That was done by the local garage as I recall. Wasn't happy with it at the time but my hand was forced so had to live with it. Also there was a patch put on in the passenger footwell now I come to think of it. So my statement 'at no time was work ever 'bodged'." is obviously not entirely true. Let's just say I always did my utmost.
It is not my intention of turning this fine thread into a slanging match, so lets not. Just defending my corner a little as the previous owner seemed to be getting some bad press!
If Mark wants any info feel free to let me know and will see what I can come up with.
All the best......
It is not my intention of turning this fine thread into a slanging match, so lets not. Just defending my corner a little as the previous owner seemed to be getting some bad press!
If Mark wants any info feel free to let me know and will see what I can come up with.
All the best......
-
Jon Tilson
- Guest contributor

- Posts: 11179
- Joined: Tue Oct 03, 2006 9:45 pm
- Location: Middlesex
Re: Operation Orange - 1980 Sprint restoration
If the patch was done 10 years ago it hasn't done too badly....
I'd be quite pleased if my welding was that neat....
Jonners
I'd be quite pleased if my welding was that neat....
Jonners
Note from Admin: sadly Jon passed away in February 2018 but his humour and wealth of knowledge will be fondly remembered by all. RIP Jonners.
-
SprintMWU773V

- TDC Staffs Area Organiser
- Posts: 5429
- Joined: Wed Oct 18, 2006 2:08 pm
- Location: The Old Asylum
Re: Operation Orange - 1980 Sprint restoration
Ah Yes Paul Tuckley, previous owner.
Whilst indeed much time has passed since I purchased the car from Paul I have no issue with how he looked after it and I certainly have no issues with him personally. I seem to remember he was a very nice chap and gave me a lot of information about the car. I bought the car fair and square and have been perfectly happy with it for what it was. I bought the car blind on Ebay and was really a classic novice back then. The car was his every day car and used year round, it wasn't a show car by any means but looked smart which is what I wanted at the time.
However I stand by my claim that some of the work carried out was not to the 'highest' standards but then you try and find a car of this age and type that hasn't had similar work carried out. To be fair to Paul most of the work was carried out by Brian Kitley, I have the receipts. I'm not going to provide further comment on that!
I hope Paul continues to enjoy the thread and the car as it develops.
Mark
1961 Chevrolet Corvair Greenbrier Sportswagon
1980 Dolomite Sprint project using brand new shell
2009 Mazda MX5 2.0 Sport
2018 Infiniti Q30
1961 Chevrolet Corvair Greenbrier Sportswagon
1980 Dolomite Sprint project using brand new shell
2009 Mazda MX5 2.0 Sport
2018 Infiniti Q30
-
SprintMWU773V
- TDC Staffs Area Organiser
- Posts: 5429
- Joined: Wed Oct 18, 2006 2:08 pm
- Location: The Old Asylum
Re: Operation Orange - 1980 Sprint restoration
All the fine weather has motivated me to get on with a few jobs!
The heater ducting has been installed, the top one may need to come off when I fit the windscreen screen but at least it prevents it from getting lost. The lower one mounts onto a small metal bracket either side of the heater itself. Both of these had suffered a little so I rubbed them down and gave them a lick of new gloss black paint (sorry I forgot to take pics). It's a bit sad really as you won't even see them but I just couldn't put them back in as they were.
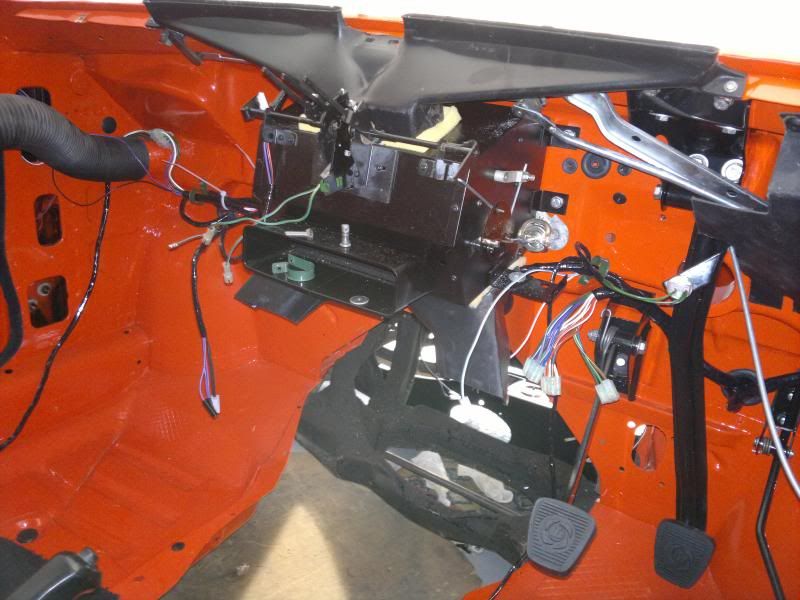
I’d removed the windscreen wiper motor and arms from the donor a few weeks or so ago. I cleaned them up and tested the motor with my regulated power supply and then re-fitted to the shell. It was a bit fiddly to get the motor itself in having secured and sealed the back plate in already. Things were make much easier by having no windscreen!
I’ve also restored the windscreen washer bottle bracket. My original one was looking rather worse for wear so I thought I would restore it. I had some items to go off to the powder coaters so I asked them to do the bracket as well. There are 3 pieces to the bracket and all came back looking nice and shiny. My original had long since lost its strap so I made my own. I simply bought a strip of insertion rubber and butchered an old camera strap so I could add a little buckle to make it easier to take out if I wanted to. Originally a nasty cheap, water hugging foam was stuck to the bracket. I purchased a small sheet of closed cell foam and cut a few bits to fit on the back and also the base of the bracket. The longer bit on the back I only stuck on one end so it can be hinged enabling better access to the mounting screws.

A new washer motor, bottle and tubing completes the job, took ages to fit but I am pleased with the result. I did take some better pictures of the item but I seem to have lost them somewhere so you'll have to take my work for it on the finish. Generally less impressed by the location and ease of fitment though, thanks Triumph.
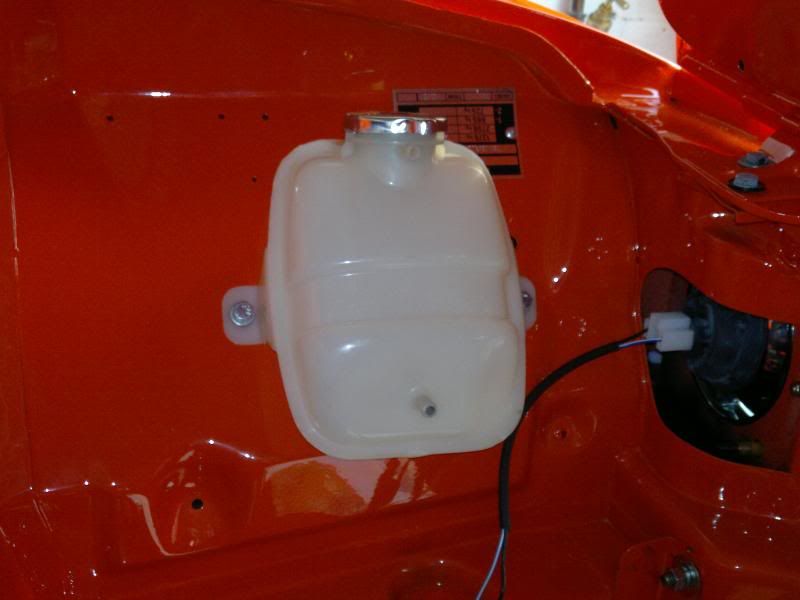
Staying under the bonnet I’ve added an expansion tank. I was not happy with the condition of my original one which despite extensive cleaning was still very stained. I felt it would have rather let the under-bonnet area down and have for some time been keeping an eye open for a better one. Unfortunately when MG Rover went bump the tooling was lost which means that NOS expansion tanks part number ARH259 are all but extinct in the UK. I even resorted to trying MG suppliers as it was also used in some MG models but to no avail.
Then a few weeks ago one cropped up on EBay but had not sold, incorrectly listed for a TR7, trouble was it was in Florida. I contacted the seller and asked him if he still had it and could he re-list it? He obliged and it was duly listed for $15.50 (about £10). Postage was quite expensive but all in all it was delivered for less than £30, a significant saving on the last ones sold by Brown and Gammons at over £100! The item arrived a few days later and as you can see below it now sits in my engine bay c/w a nice shiny stainless steel cap.
Back inside I thought that fitting the handbrake lever would be a plan, this was pretty easy and it required no renovation bar a bit of a clean. Once fitted I cleaned up a spare main carpet I had and temporarily fitted it to get it out of the way, plus it looks more like a car inside.
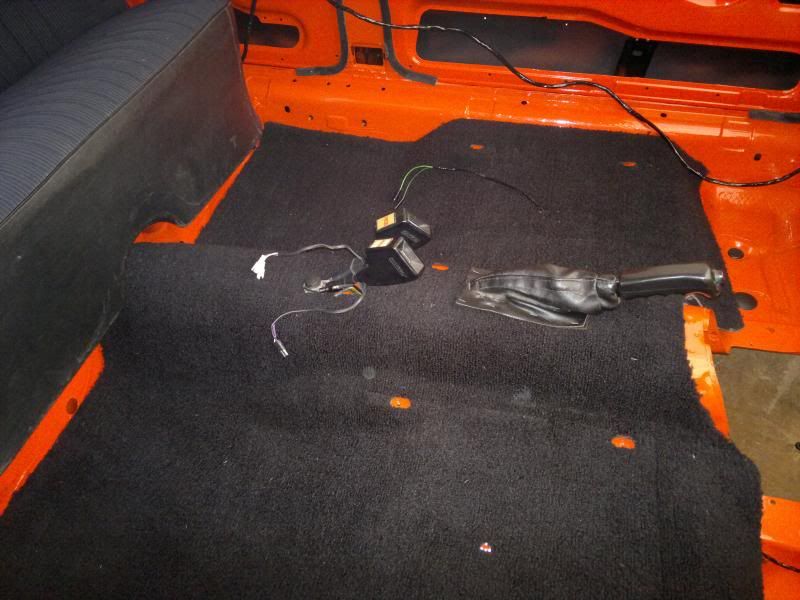
I still need to properly stick the rear loom section down but figured this will be easier when everything is a bit more finalised position wise.
Over the weekend I also removed the steering column from the donor car, including the column support bush mounting plate. As you can see mine looks a little worse for wear, certainly it seems very out of shape though I am unsure how it was damaged, the picture does not really show the issue very well.
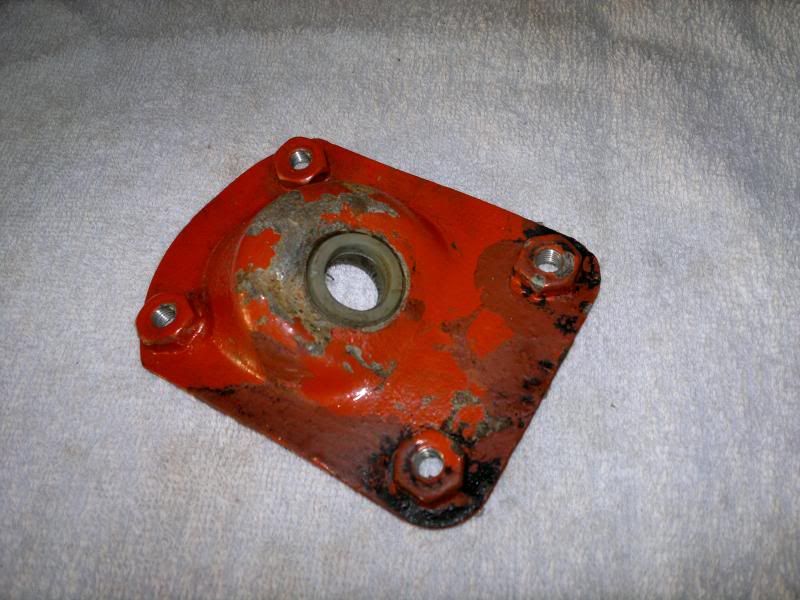
I have managed to source a replacement which I’ll paint, stick a poly bush in it and re-fit.
At some point the car was fitted with an alarm system. It must have been quite a complex system as various parts of the wiring loom have been hacked about to fit it. The ignition wiring in particular had quite a few modifications to it, including a number of fuses.
I’ve just remove this wiring and thrown it away. I will renew the ignition switch wiring with a better used example, it’s fiddly to get to so it makes sense to renew it now rather than get it all together and it falls apart.
I was hoping to show you my newly painted heater blower motor and box but having painted both myself I was not happy with the finish that the Chassis Black aerosol gave. This was a bit of a shame as I’d worked hard to rub them down, prep and paint them. The finish was very speckled and not very smooth at all. It’s great paint in terms of being hard wearing but the finish was way off. Consequently the blower motor, box, tube and servo have all been dropped off at the same chap who painted my fuel tank. He’ll redo them all in a nice smooth Black epoxy finish for me.
Also I have started to think about my brake pipes and have removed the master cylinder to get to the servo and also the front pipes so am building up some good samples. I’ve already decided to go copper-nickel it’s just a case of Stevsons or Automec? I cannot be bothered to flare my own pipes so the pre-made kits seem attractive, I should be more than capable of bending them using an appropriate tool.
The heater ducting has been installed, the top one may need to come off when I fit the windscreen screen but at least it prevents it from getting lost. The lower one mounts onto a small metal bracket either side of the heater itself. Both of these had suffered a little so I rubbed them down and gave them a lick of new gloss black paint (sorry I forgot to take pics). It's a bit sad really as you won't even see them but I just couldn't put them back in as they were.

I’d removed the windscreen wiper motor and arms from the donor a few weeks or so ago. I cleaned them up and tested the motor with my regulated power supply and then re-fitted to the shell. It was a bit fiddly to get the motor itself in having secured and sealed the back plate in already. Things were make much easier by having no windscreen!
I’ve also restored the windscreen washer bottle bracket. My original one was looking rather worse for wear so I thought I would restore it. I had some items to go off to the powder coaters so I asked them to do the bracket as well. There are 3 pieces to the bracket and all came back looking nice and shiny. My original had long since lost its strap so I made my own. I simply bought a strip of insertion rubber and butchered an old camera strap so I could add a little buckle to make it easier to take out if I wanted to. Originally a nasty cheap, water hugging foam was stuck to the bracket. I purchased a small sheet of closed cell foam and cut a few bits to fit on the back and also the base of the bracket. The longer bit on the back I only stuck on one end so it can be hinged enabling better access to the mounting screws.

A new washer motor, bottle and tubing completes the job, took ages to fit but I am pleased with the result. I did take some better pictures of the item but I seem to have lost them somewhere so you'll have to take my work for it on the finish. Generally less impressed by the location and ease of fitment though, thanks Triumph.
Staying under the bonnet I’ve added an expansion tank. I was not happy with the condition of my original one which despite extensive cleaning was still very stained. I felt it would have rather let the under-bonnet area down and have for some time been keeping an eye open for a better one. Unfortunately when MG Rover went bump the tooling was lost which means that NOS expansion tanks part number ARH259 are all but extinct in the UK. I even resorted to trying MG suppliers as it was also used in some MG models but to no avail.
Then a few weeks ago one cropped up on EBay but had not sold, incorrectly listed for a TR7, trouble was it was in Florida. I contacted the seller and asked him if he still had it and could he re-list it? He obliged and it was duly listed for $15.50 (about £10). Postage was quite expensive but all in all it was delivered for less than £30, a significant saving on the last ones sold by Brown and Gammons at over £100! The item arrived a few days later and as you can see below it now sits in my engine bay c/w a nice shiny stainless steel cap.

Back inside I thought that fitting the handbrake lever would be a plan, this was pretty easy and it required no renovation bar a bit of a clean. Once fitted I cleaned up a spare main carpet I had and temporarily fitted it to get it out of the way, plus it looks more like a car inside.

I still need to properly stick the rear loom section down but figured this will be easier when everything is a bit more finalised position wise.
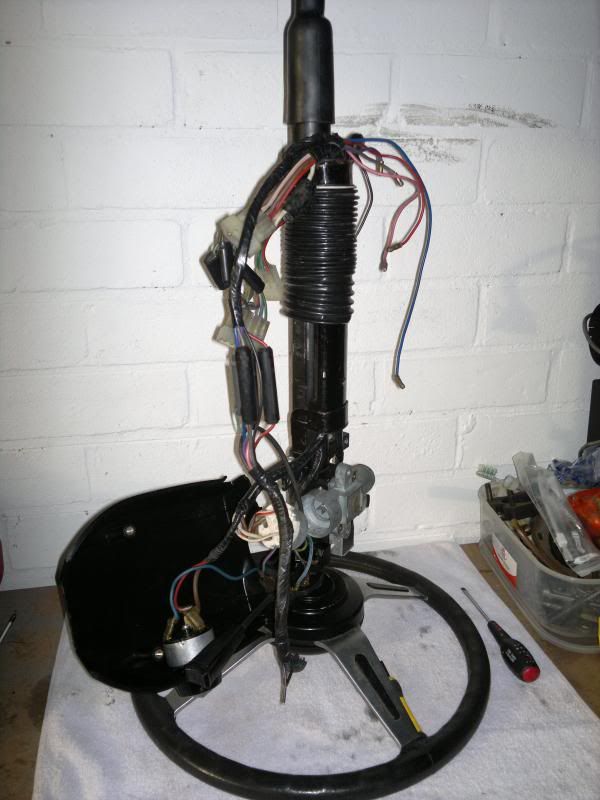
Over the weekend I also removed the steering column from the donor car, including the column support bush mounting plate. As you can see mine looks a little worse for wear, certainly it seems very out of shape though I am unsure how it was damaged, the picture does not really show the issue very well.

I have managed to source a replacement which I’ll paint, stick a poly bush in it and re-fit.
At some point the car was fitted with an alarm system. It must have been quite a complex system as various parts of the wiring loom have been hacked about to fit it. The ignition wiring in particular had quite a few modifications to it, including a number of fuses.

I’ve just remove this wiring and thrown it away. I will renew the ignition switch wiring with a better used example, it’s fiddly to get to so it makes sense to renew it now rather than get it all together and it falls apart.
I was hoping to show you my newly painted heater blower motor and box but having painted both myself I was not happy with the finish that the Chassis Black aerosol gave. This was a bit of a shame as I’d worked hard to rub them down, prep and paint them. The finish was very speckled and not very smooth at all. It’s great paint in terms of being hard wearing but the finish was way off. Consequently the blower motor, box, tube and servo have all been dropped off at the same chap who painted my fuel tank. He’ll redo them all in a nice smooth Black epoxy finish for me.
Also I have started to think about my brake pipes and have removed the master cylinder to get to the servo and also the front pipes so am building up some good samples. I’ve already decided to go copper-nickel it’s just a case of Stevsons or Automec? I cannot be bothered to flare my own pipes so the pre-made kits seem attractive, I should be more than capable of bending them using an appropriate tool.
Last edited by SprintMWU773V on Wed Jul 26, 2017 2:13 pm, edited 1 time in total.
Mark
1961 Chevrolet Corvair Greenbrier Sportswagon
1980 Dolomite Sprint project using brand new shell
2009 Mazda MX5 2.0 Sport
2018 Infiniti Q30
1961 Chevrolet Corvair Greenbrier Sportswagon
1980 Dolomite Sprint project using brand new shell
2009 Mazda MX5 2.0 Sport
2018 Infiniti Q30
Mark....
TDC Forum moderator
PLEASE help us to maintain a friendly forum,
either PM or use Report Post if you see anything you are unhappy with. Thanks.
PLEASE help us to maintain a friendly forum,
either PM or use Report Post if you see anything you are unhappy with. Thanks.
-
grifterkid
Re: Operation Orange - 1980 Sprint restoration
As ever, that is looking amazing... Great progress being made on a great car!
-
SprintMWU773V
- TDC Staffs Area Organiser
- Posts: 5429
- Joined: Wed Oct 18, 2006 2:08 pm
- Location: The Old Asylum
Re: Operation Orange - 1980 Sprint restoration
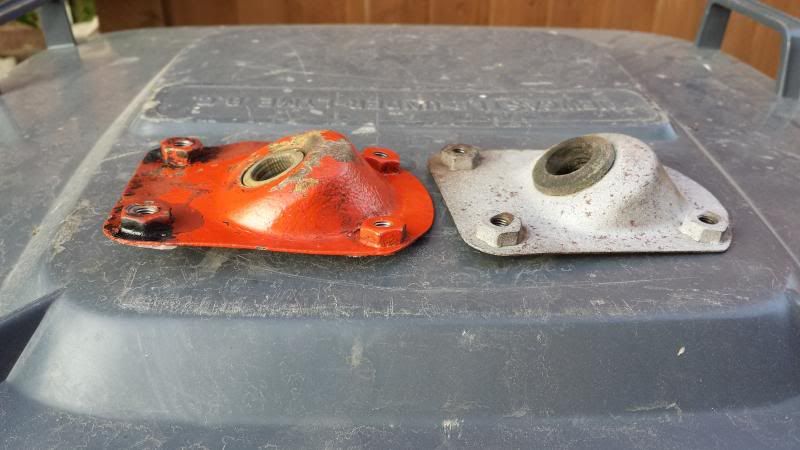
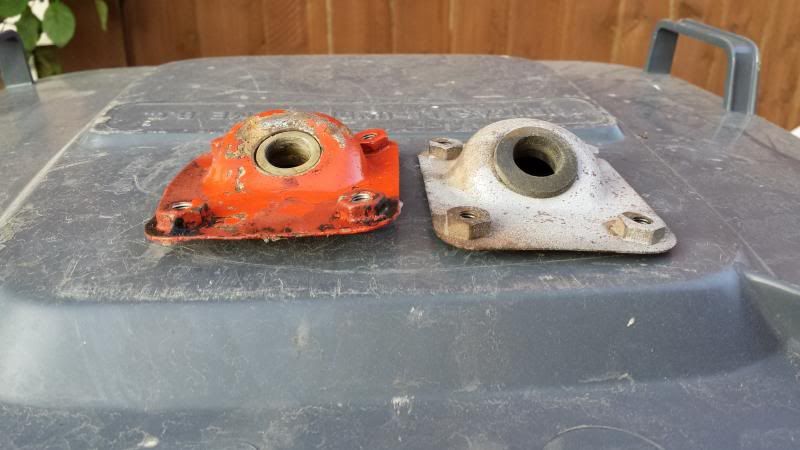
I picked up the replacement column support plate this evening, just look at the weird shape next to my original, still no idea why. I'll get this new one cleaned up and painted before fitting it along with the column.


Last edited by SprintMWU773V on Wed Jul 26, 2017 2:13 pm, edited 1 time in total.
Mark
1961 Chevrolet Corvair Greenbrier Sportswagon
1980 Dolomite Sprint project using brand new shell
2009 Mazda MX5 2.0 Sport
2018 Infiniti Q30
1961 Chevrolet Corvair Greenbrier Sportswagon
1980 Dolomite Sprint project using brand new shell
2009 Mazda MX5 2.0 Sport
2018 Infiniti Q30
-
Toledo Man

- Guest contributor
- Posts: 7542
- Joined: Tue Oct 03, 2006 5:52 pm
- Location: Halifax, West Yorkshire
- Contact:
Re: Operation Orange - 1980 Sprint restoration
Mark, fit a Super Flex bush for the steering column plate. I've had no problems since I fitted mine a few years ago.
Toledo Man
West Yorkshire Area Organiser
Meetings take place on the first Wednesday of the month at 8.00pm at The Railway, 1 Birstall Lane, Drighlington, Bradford, BD11 1JJ
2003 Volvo XC90 D5 SE (PX53 OVZ - The daily driver)
2009 Mercedes-Benz W204 C200 CDI Sport (BJ58 NCV - The 2nd car)
1991 Toyota Celica GT (J481 ONB - a project car)
Former stable of SAY 414M (1974 Toledo), GRH 244D (1966 1300fwd), CDB 324L (1973 1500fwd), GGN 573J (1971 1500fwd), DCP 625S (1977 Dolomite 1300) & LCG 367N (1975 Dolomite Sprint), NYE 751L (1972 Dolomite 1850 auto) plus 5 Acclaims and that's just the Triumphs!
Check my blog at http://triumphtoledo.blogspot.com
My YouTube Channel with a bit of Dolomite content.
"There is only one way to avoid criticsm: Do nothing, say nothing and BE nothing." Aristotle
-
Edin Dundee
Re: Operation Orange - 1980 Sprint restoration
I can't help but notice the bush is fitted different ways on the plates.
-
Toledo Man
- Guest contributor
- Posts: 7542
- Joined: Tue Oct 03, 2006 5:52 pm
- Location: Halifax, West Yorkshire
- Contact:
Re: Operation Orange - 1980 Sprint restoration
It should be fitted from the inside then it won't fall out.
Toledo Man
West Yorkshire Area Organiser
Meetings take place on the first Wednesday of the month at 8.00pm at The Railway, 1 Birstall Lane, Drighlington, Bradford, BD11 1JJ
2003 Volvo XC90 D5 SE (PX53 OVZ - The daily driver)
2009 Mercedes-Benz W204 C200 CDI Sport (BJ58 NCV - The 2nd car)
1991 Toyota Celica GT (J481 ONB - a project car)
Former stable of SAY 414M (1974 Toledo), GRH 244D (1966 1300fwd), CDB 324L (1973 1500fwd), GGN 573J (1971 1500fwd), DCP 625S (1977 Dolomite 1300) & LCG 367N (1975 Dolomite Sprint), NYE 751L (1972 Dolomite 1850 auto) plus 5 Acclaims and that's just the Triumphs!
Check my blog at http://triumphtoledo.blogspot.com
My YouTube Channel with a bit of Dolomite content.
"There is only one way to avoid criticsm: Do nothing, say nothing and BE nothing." Aristotle
-
SprintMWU773V
- TDC Staffs Area Organiser
- Posts: 5429
- Joined: Wed Oct 18, 2006 2:08 pm
- Location: The Old Asylum
Re: Operation Orange - 1980 Sprint restoration
The orange one is as it was when I removed it. I removed the bush to check the hole and then loosely put it back in so I could remember how it was! I ordered a poly one from Wins yesterday as I also ordered some replacement ignition wires to replace the cut and shut ones currently on the car.
I assume the bush must have been replaced at some point as I was surprised at the condition of both of them given their reputation for disintegrating.
I assume the bush must have been replaced at some point as I was surprised at the condition of both of them given their reputation for disintegrating.
Mark
1961 Chevrolet Corvair Greenbrier Sportswagon
1980 Dolomite Sprint project using brand new shell
2009 Mazda MX5 2.0 Sport
2018 Infiniti Q30
1961 Chevrolet Corvair Greenbrier Sportswagon
1980 Dolomite Sprint project using brand new shell
2009 Mazda MX5 2.0 Sport
2018 Infiniti Q30
Re: Operation Orange - 1980 Sprint restoration
My money is on someone lowering the Subframe before undoing the steering lower coupling.
Guess how I know what that looks like?
Guess how I know what that looks like?
1978 Twilight Purple Dolomite 1850HL The Lolomite.
It's 106 miles to Chicago, we've got a full tank of gas, half a pack of cigarettes, it's dark, and we're wearing sunglasses.
Hit it.
It's 106 miles to Chicago, we've got a full tank of gas, half a pack of cigarettes, it's dark, and we're wearing sunglasses.
Hit it.
-
DF
Re: Operation Orange - 1980 Sprint restoration
Have you any idea what the wipe in seam sealer is called as I need too do my shell soon ?SprintMWU773V wrote:Been a while since I've been able to report on any meaningful progress. Whn I dropped by shell off back in May the shop was already packed with work which meant my project was not the centre of attention until they had been completed. One project in particular was making use of the roll over spit thing which my shell needed to be fixed onto.
Paul has spent the last 3 weeks or so working to get the alignment, swage lines etc all lined up as best as he can. This has been quite an involved job as has removing and repairing a variety of dents and dings that the shell has picked up during 30 years of storage.
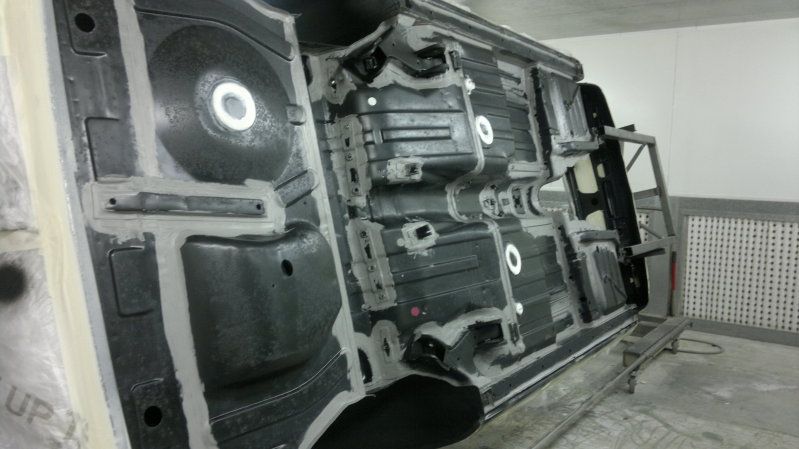
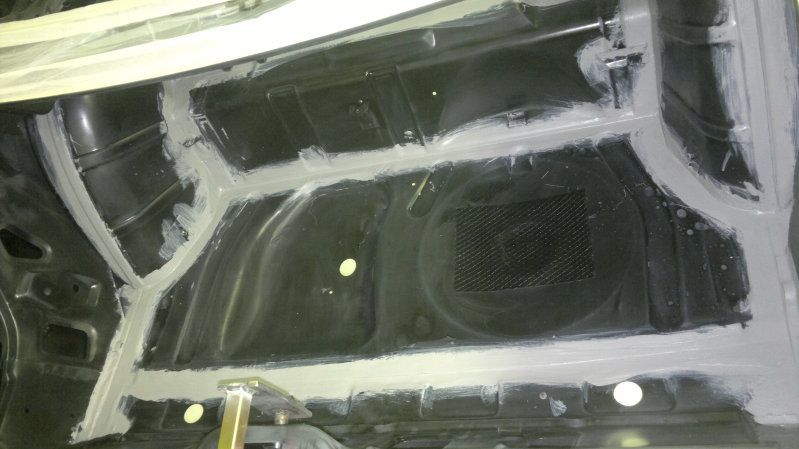
One of the most important stages though was well underway when I popped in the other day. When they were new the application of seam sealer and underbody coatings was pretty poor to say the least which lead to an early death for many a Dolomite. I decided that if it were possible to improve on the original application of both of these then I would do so. With the car on the spit Paul and his team have gained perfect access to all the underside of the car to apply seam sealer where required. In particular the rear wheel arches needed some work to ensure that any gaps were filled to prevent leakage into the boot etc.
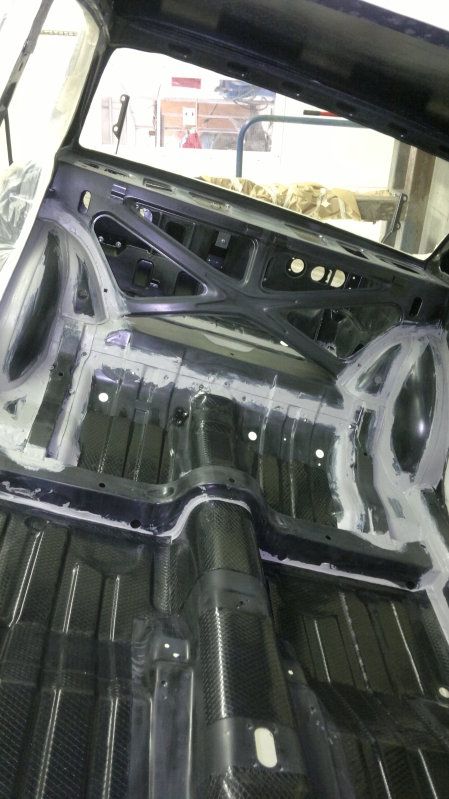
Also the heat fusiable anti-drum pads have been installed on the floors and also the boot floor as per original style. I'll employ better more modern style pads for inside the rear panels and doors as these are not really seen. The caulking gun has also been hard at work on the inside of the car.
Originally I could not detect any seam sealer under the bonnet around the turrets etc. Paul was unhappy about leaving these unfilled so we settled on a 'wipe-in' application to help prevent problems with the joints here. By the time it's painted you won't even notice.
The next job is to apply an epoxy based orange primer to the under side of the car. This is tough and flexible and body coloured. From there a stone ship will be applied and again body coloured. next time I go over the car should be orange underneath and inside with the rest of the body in a white high build primer with the doors attached ready for my inspection prior to the final top coat being applied.
Or any of the seam sealer they have used as im sure its good stuff and would like to use the same.