NWL – Project Concours Carmine Sprint

Restoring your car? Tell us about it here!
Message
Author
User avatar
James467
TDC Sprint Registrar
Posts: 1934
Joined: Wed Jul 04, 2007 12:27 pm
Location: Hampshire

Re: NWL – Project Carmine Sprint

#16 Post by James467 »

The bolts themselves don't appear to have any rust on them at all, the pressed steel shields have some surface rust, nothing too bad though. So it looks like the seals were doing their job.

Image

So to save any unnecessary work they wont be swapped out, I don't want to risk damaging the joint so I wont have these powder coated.

All of the suspension is pretty rust free, after a good clean up a lot of the original powder coat still remains. Maybe this is due to the car spending 90% of its life down in Somerset the 'California' of the UK!!! :D
User avatar
lazeruspete
Guest contributor
Guest contributor
Posts: 822
Joined: Sun Oct 21, 2012 11:15 pm

Re: NWL – Project Carmine Sprint

#17 Post by lazeruspete »

Fantastic work and great pics. It is clear that the car has had great love and care throughout its life and its recent experiences are no different.

I enjoy how you laid out the carburetor parts :)

I know of another sprint which had the same problem as you had with the pistons. So obviously a common fault.

I look forward to the next installment :)
1980 Dolomite Sprint Track Day Car....KLJ 895W. now redtopiffied :P

viewtopic.php?f=19&t=23031

Volkswagen Golf MK3 Gti....R301UUJ. RIP 22-5-13
Volkswagen Golf MK4 TDGTI 150 MM53VNT Sold 7-8-17
BMW 320d Coupe M-Sport YL08 XBZ with factory fitted Performance Pack - Sold 22/05/21
BMW 330d Touring M-Sport WN63 XPY - best daily ever

Proud TDC Member!
User avatar
SprintMWU773V
TDC Staffs Area Organiser
Posts: 5429
Joined: Wed Oct 18, 2006 2:08 pm
Location: The Old Asylum

Re: NWL – Project Carmine Sprint

#18 Post by SprintMWU773V »

I also decided to keep the original joint. I've just painted my lower arms with chassis black primer and top cot. Actually looks really good. I was able to mask up the bush/bearing easily enough too. I would have powder coated them but felt that with the bush in it'd melt in the heat. It hardly seemed worth taking the bush out to coat only to put it back in, even if I do have a hydraulic press.

You might also want to decide whether you want to go poly in the trailing arms as many have had issues. I'm keeping the originals in mine, pressed them out of the NOS arms and will press them back in when coated.

Must write an update!
Mark

1961 Chevrolet Corvair Greenbrier Sportswagon
1980 Dolomite Sprint project using brand new shell
2009 Mazda MX5 2.0 Sport
2018 Infiniti Q30
User avatar
Flyfisherman
Guest contributor
Guest contributor
Posts: 980
Joined: Sat Sep 04, 2010 10:42 am

Re: NWL – Project Carmine Sprint

#19 Post by Flyfisherman »

James467 wrote:The bolts themselves don't appear to have any rust on them at all, the pressed steel shields have some surface rust, nothing too bad though. So it looks like the seals were doing their job.
Image
James

When you removed the bearing cover (pressed steel shields -part No. 216907) from the lower wishbone arm did you find or you should have found 4 rubber seals (part No. 216909) its these seal in conjunction with the bearing cover that prevents dirt and water entering the joint.

Paul
Image
MIG Wielder
TDC Member
Posts: 2334
Joined: Sun Mar 16, 2008 2:52 pm

Re: NWL – Project Carmine Sprint

#20 Post by MIG Wielder »

James467 wrote:I have made progress stripping the front suspension down for refurbishment and have a question about the front lower arm. The bush in it is rose jointed, from what I can see the bush kit I have contains a poly-type replacement bush in it. There seems to be absolutely no wear in the bush itself, it's nice and stiff, so I don't see any reason to replace it. What is the general consensus about having a poly bush here? I personally feel that there was a
Hi James, I also have poly-bushes on my 1850 on long-term test from the Club. They work well. No problems after 4 years and 40,000 miles . I was also after the reason this rose-joint was fitted here if anybody knows please ? Doesn't this lower joint only have vertical movement ?
Good to see Roe Engineering still around btw.
Tony.
User avatar
James467
TDC Sprint Registrar
Posts: 1934
Joined: Wed Jul 04, 2007 12:27 pm
Location: Hampshire

Re: NWL – Project Carmine Sprint

#21 Post by James467 »

Thanks everyone, I think I'll just keep the originals in and use the polys as a backup.

I have replacement rubber bushes for the rear trailing arms, I remember reading something about the rear arms twisting slightly as they moved and that poly bushes could cause cracking and failure of the arms? Someone may correct me here.
When you removed the bearing cover (pressed steel shields -part No. 216907) from the lower wishbone arm did you find or you should have found 4 rubber seals (part No. 216909) its these seal in conjunction with the bearing cover that prevents dirt and water entering the joint.
Paul, yes they were there and in pretty good nick as well. Surprisingly the front bush kit from Rimmers contains replacements for these as well as the Poly bush.
User avatar
Toledo Man
Guest contributor
Guest contributor
Posts: 7542
Joined: Tue Oct 03, 2006 5:52 pm
Location: Halifax, West Yorkshire
Contact:

Re: NWL – Project Carmine Sprint

#22 Post by Toledo Man »

Remember that not all polyurathane bushes are created equal and you do get what you pay for.

My top recommendation is Super Flex which I understand are the same hardness as the original rubber so they're the perfect choice. They ain't cheap but they're worth every penny.
2nd choice is Polybush which Jigsaw Racing sell. I rebushed my Dolomite 1300 with a full set of the orange ones for the rear suspension and I had no issues with the trailing arms.
Toledo Man

West Yorkshire Area Organiser
Meetings take place on the first Wednesday of the month at 8.00pm at The Railway, 1 Birstall Lane, Drighlington, Bradford, BD11 1JJ

2003 Volvo XC90 D5 SE (PX53 OVZ - The daily driver)
2009 Mercedes-Benz W204 C200 CDI Sport (BJ58 NCV - The 2nd car)
1991 Toyota Celica GT (J481 ONB - a project car)
Former stable of SAY 414M (1974 Toledo), GRH 244D (1966 1300fwd), CDB 324L (1973 1500fwd), GGN 573J (1971 1500fwd), DCP 625S (1977 Dolomite 1300) & LCG 367N (1975 Dolomite Sprint), NYE 751L (1972 Dolomite 1850 auto) plus 5 Acclaims and that's just the Triumphs!

Check my blog at http://triumphtoledo.blogspot.com
My YouTube Channel with a bit of Dolomite content.

"There is only one way to avoid criticsm: Do nothing, say nothing and BE nothing." Aristotle
User avatar
James467
TDC Sprint Registrar
Posts: 1934
Joined: Wed Jul 04, 2007 12:27 pm
Location: Hampshire

Re: NWL – Project Carmine Sprint

#23 Post by James467 »

Remember that not all polyurathane bushes are created equal and you do get what you pay for.

My top recommendation is Super Flex which I understand are the same hardness as the original rubber so they're the perfect choice. They ain't cheap but they're worth every penny.
2nd choice is Polybush which Jigsaw Racing sell.
I agree, and that's a very good point.
User avatar
James467
TDC Sprint Registrar
Posts: 1934
Joined: Wed Jul 04, 2007 12:27 pm
Location: Hampshire

Re: NWL – Project Carmine Sprint

#24 Post by James467 »

I am at the stage in the restoration where I am waiting on people. Burlen have the carb bodies for re-bushing and the engine work isn't finished yet (Michael at Roe is my neighbour so I'm not putting too much pressure on him!). I need to get the rear axle off to complete the powder coating batch, I'll do that when it's not raining and I'm waiting for my final Rimmers order to arrive so I've started to do some small enjoyable jobs.

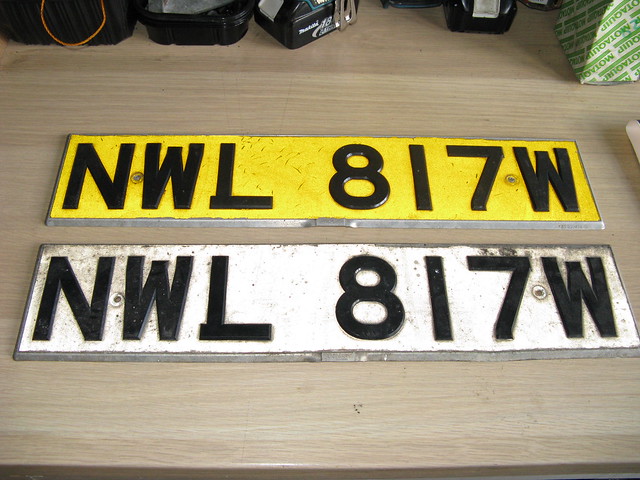
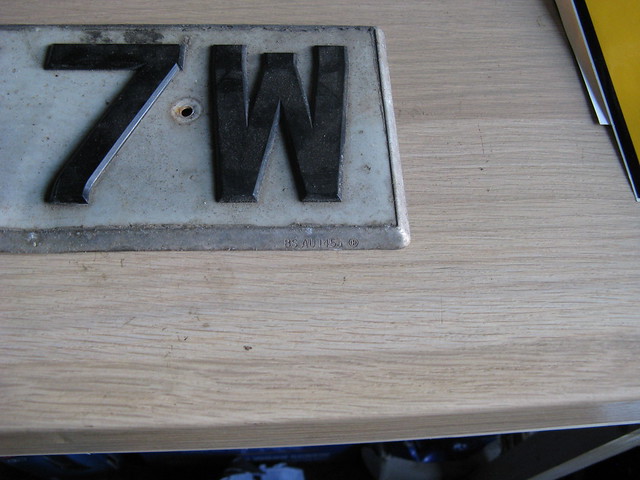
Anyone who knows me knows that I am really funny about having the correct period numberplates on a car especially when I am aiming for concourse standard and to show the car. I am lucky in that NWL is sporting her correct original Unipart plates and not the more modern plastic variety. Unfortunately after 33 years they are looking a little tatty.
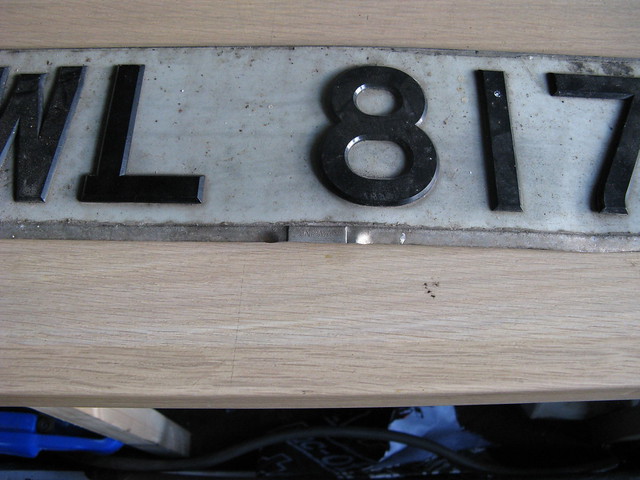
Image

A small dent...

Image

Image

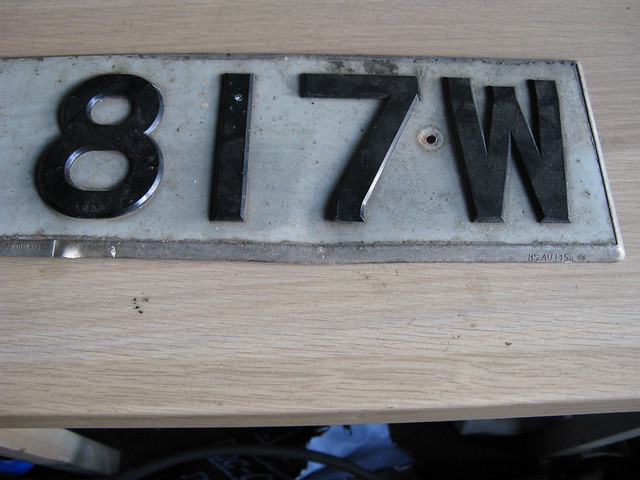
To prove to the MOT tester that they are legal and original (although I have never had a problem here!)

Image

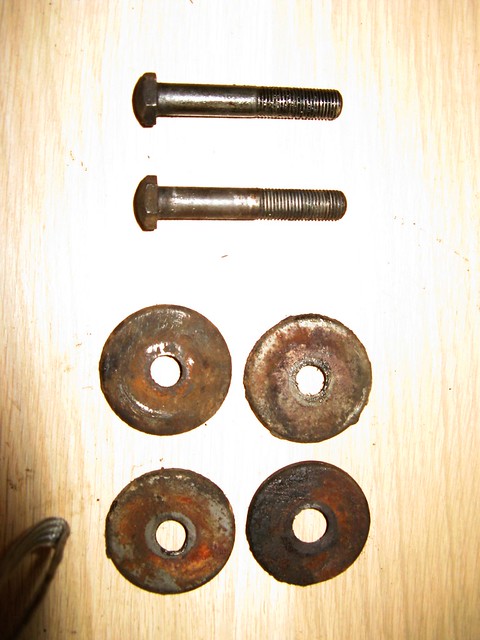
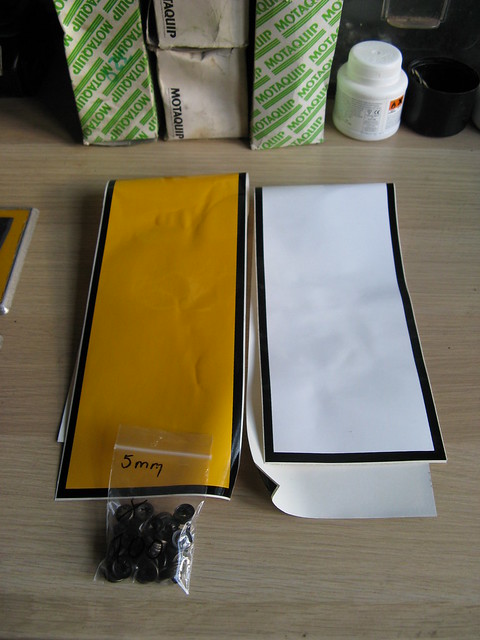
But with some new reflective numberplate vinyl, a good clean and replacement starlock fasteners they should come up like new.

Image

I carefully remove the letters by cutting the old fastners off

Image

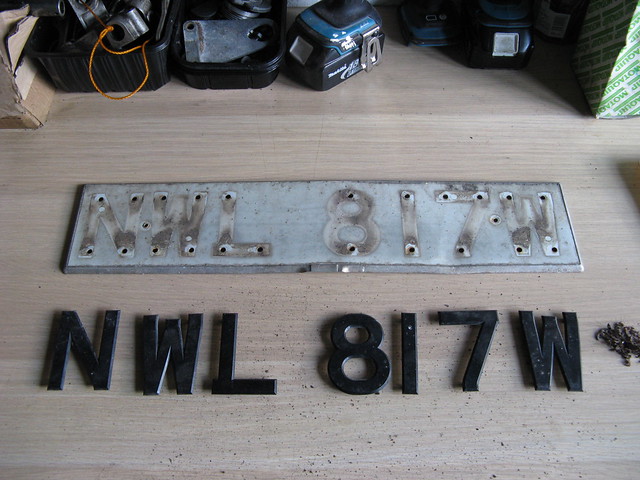
The old vinyl is removed with a heat gun and scraper

Image

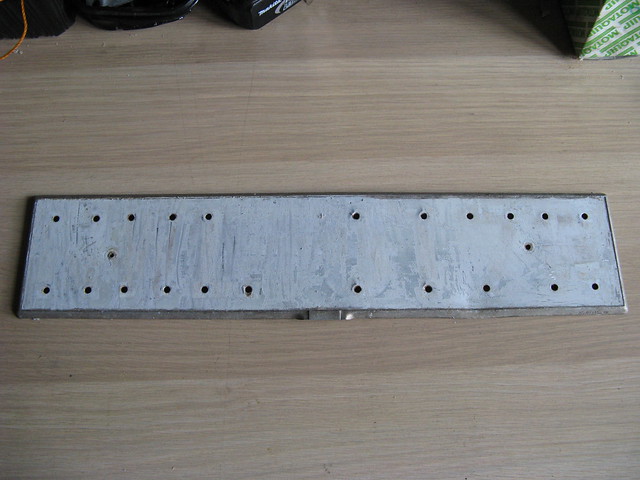
The old adhesive can be stubborn to remove, for some reason this time cellulose thinners didn't work, the only thing that got it off was a soaking in old dot 5.1 brake fluid from my mountain bike and a good scrub with wire wool.

A bit of panel beating straightened out the damage.

Image

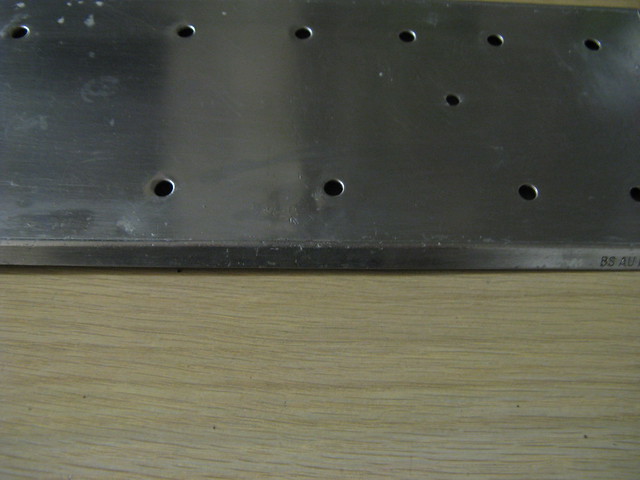
Once the old adhesive was removed the backing plate scrubbed up really well with a scouring pad and some very hot water, I then used some Autosol to polish up the rim before another wash and degrease before heating up the plate a bit with the heat gun to help the new vinyl adhere properly and cutting the holes out with a sharp scalpel. The letters were given a good wash in fairy liquid and very hot water and now look like new.

Image

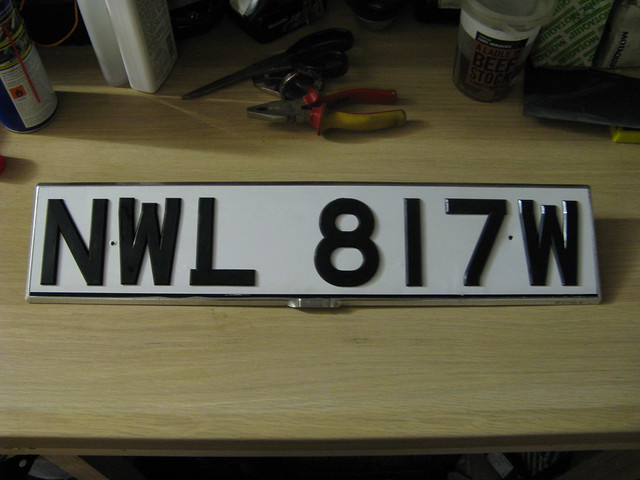
This is as far as I got, I'm not happy with the supposedly reflective vinyl backing, it's not reflective and it's too white. The old vinyl had a hint of silver and I'm a stickler for originality so I have ordered some more from a different supplier. It's the same stuff that is used on the euro style steel pressed plates so I'm pretty confident that it should match up nicely. I'll wait for this to arrive before I start the rear.
Edin Dundee

Re: NWL – Project Carmine Sprint

#25 Post by Edin Dundee »

:thumbsup: That's impressive.
User avatar
Flyfisherman
Guest contributor
Guest contributor
Posts: 980
Joined: Sat Sep 04, 2010 10:42 am

Re: NWL – Project Carmine Sprint

#26 Post by Flyfisherman »

Image
User avatar
Reg
Guest contributor
Guest contributor
Posts: 1264
Joined: Wed Oct 04, 2006 8:10 pm
Location: Darn saarf..

Re: NWL – Project Carmine Sprint

#27 Post by Reg »

Good work indeed! 8)

Glad you kept the original number plate didgits, for those "half" raised figures on yours were only made from '77 to '81 and so, are getting very hard to get hold of. :shock:

After all these years I finally found someone who has them!..and even then, he had to get another chum to supply him with the "G's" :lol:

Well worth the hunting and the wait though..very pleased with them..and like yours..they look sooo much better. 8)
Jon Tilson
Guest contributor
Guest contributor
Posts: 11179
Joined: Tue Oct 03, 2006 9:45 pm
Location: Middlesex

Re: NWL – Project Carmine Sprint

#28 Post by Jon Tilson »

Keeping the rose joint is the correct decision.

It works in 2 planes, for and aft as well as up and down.

Not sure the poly one will work the same way.

Jonners
Note from Admin: sadly Jon passed away in February 2018 but his humour and wealth of knowledge will be fondly remembered by all. RIP Jonners.
User avatar
James467
TDC Sprint Registrar
Posts: 1934
Joined: Wed Jul 04, 2007 12:27 pm
Location: Hampshire

Re: NWL – Project Carmine Sprint

#29 Post by James467 »

Keeping the rose joint is the correct decision.
Thanks John, to be sure I ordered replacement arms with the joints from Rimmers!

Thanks for the link Paul that's really usefu, l I normally use Framptons.

Thanks Reg, I've only ever seen one other plate with the half raised figures and I want to keep her original, it's worth the effort.
mec

Re: NWL – Project Carmine Sprint

#30 Post by mec »

awsome job, where did you get the reflective backing and clips from as i could do with sorting mine !
Post Reply