
Jon there is a ' H ' shim thereJon Tilson wrote:Massive brake fit fail here....
The H shaped shim is missing between the handbrake lever and the shoe. Extremely crucial and the whole shebang with handbrake and
self adjusting gubbins will not work without it.
Alun had some new ones made if yours are lost.
I take it you realise the threaded adjusters are handed for the side of car? The lever turns the wheel to make the threaded bit move outwards.
Sure you already know this but some may not...
Jonners
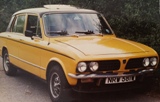
RUK - Project Recommission 1972 'Dolomite' Auto
Re: RUK - Project Recommission 1850 Auto

Re: RUK - Project Recommission 1850 Auto
Don't worry, yes, there is the H shim in there, it isn't east to see at that angle of pic.
The adjusters should be on the correct sides as well.
The adjusters should be on the correct sides as well.
-
Jon Tilson
- Guest contributor

- Posts: 11179
- Joined: Tue Oct 03, 2006 9:45 pm
- Location: Middlesex
Re: RUK - Project Recommission 1850 Auto
Egg on my face there then...
Couldn't see it for looking....
The other crucial thing with rear brakes is to get the cylinder retaining clips right, so the cylinder slides properly. Without onr in front of me I cant remember which way round they go but the curved clip goes toward the backplate and has pips that locate in the flat one. The curved one acts like skis on the backplate.
Jonners
Note from Admin: sadly Jon passed away in February 2018 but his humour and wealth of knowledge will be fondly remembered by all. RIP Jonners.
-
Carledo
- TDC Shropshire Area Organiser
- Posts: 7242
- Joined: Sun Aug 21, 2011 5:12 pm
- Location: Highley, Shropshire
Re: RUK - Project Recommission 1850 Auto
The smaller, curved and pipped plate goes on first from the side nearest the handbrake actuating lever, followed by the larger and thicker holed clip from the front. Actually, its virtually impossible to get the outer clip on from the handbrake lever side anyway, so not THAT much chance of getting it wrong.Jon Tilson wrote:Egg on my face there then...
Couldn't see it for looking....
The other crucial thing with rear brakes is to get the cylinder retaining clips right, so the cylinder slides properly. Without one in front of me I cant remember which way round they go but the curved clip goes toward the backplate and has pips that locate in the flat one. The curved one acts like skis on the backplate.
Jonners
Steve
'73 2 door Toledo with Vauxhall Carlton 2.0 8v engine (The Carledo)
'78 Sprint Auto with Vauxhall Omega 2.2 16v engine (The Dolomega)
'72 Triumph 1500FWD in Slate Grey, Now with RWD and Carledo powertrain!
Maverick Triumph, Servicing, Repairs, Electrical, Recomissioning, MOT prep, Trackerjack brake fitting service.
Apprentice served Triumph Specialist for 50 years. PM for more info or quotes.
Re: RUK - Project Recommission 1850 Auto
Alun may have posted a picture on Facebook of me trying to undo wheel nuts with a pipe wrench but I am a competent mechanic! Honest! 
Brakes are all on correctly including the little clips, Steve's right they only go on one way.

Can someone sanity check me here, is the adjuster is the right way round? This is the OS (drivers side) rear brake.

I took off the bumper ready for welding. The front end is a bit more rotten than first thought. The main areas that need attention are just from previous repairs that need re-doing properly. There's mig wire sticking out everywhere plus a massive blob of weld which is why the headlight surround never fitted properly. God knows who welded it, probably the same lazy bugger who taped around the badges rather than removing them when they sprayed the car. This may not be a concours car but I am still going to do a proper job treating the rust.


It looks like someone ran out of body filler so went down to Homebase and bought a tub of polyfiller.
I think that headlight panel may need to come off to do a proper job of it.
As all that is required for the MOT with the rest of the car is reassembly of bits, plus I am waiting for some things, rad, pipe clips etc... I'm going to devote more time to sorting out this front end.
So I think the next thing I'm going to do is attack that front end and strip all the paint off the corners so we can see what we are really dealing with.
Brakes are all on correctly including the little clips, Steve's right they only go on one way.
Can someone sanity check me here, is the adjuster is the right way round? This is the OS (drivers side) rear brake.
I took off the bumper ready for welding. The front end is a bit more rotten than first thought. The main areas that need attention are just from previous repairs that need re-doing properly. There's mig wire sticking out everywhere plus a massive blob of weld which is why the headlight surround never fitted properly. God knows who welded it, probably the same lazy bugger who taped around the badges rather than removing them when they sprayed the car. This may not be a concours car but I am still going to do a proper job treating the rust.
It looks like someone ran out of body filler so went down to Homebase and bought a tub of polyfiller.
I think that headlight panel may need to come off to do a proper job of it.
As all that is required for the MOT with the rest of the car is reassembly of bits, plus I am waiting for some things, rad, pipe clips etc... I'm going to devote more time to sorting out this front end.
So I think the next thing I'm going to do is attack that front end and strip all the paint off the corners so we can see what we are really dealing with.
Re: RUK - Project Recommission 1850 Auto
More bodged repairs!

I'll wire brush it all tomorrow and get rid of that filler.
The bonnet sits proud one end, turns out that the hinge is bent a bit where it's welded to the bonnet.


I'll wire brush it all tomorrow and get rid of that filler.
The bonnet sits proud one end, turns out that the hinge is bent a bit where it's welded to the bonnet.
Re: RUK - Project Recommission 1850 Auto
Someone was a bit keen with the bodyfiller!
It's a lot worse than I expected.


This was part of the eyebrow, its just a lump of filler!

At the moment I'm tempted to pull the wings and outer valence off and fit a fibreglass front end.
It's a lot worse than I expected.
This was part of the eyebrow, its just a lump of filler!
At the moment I'm tempted to pull the wings and outer valence off and fit a fibreglass front end.
Re: RUK - Project Recommission 1850 Auto
That is one very lucky car,
(with you as the owner James)
(with you as the owner James)
NRW 581W Sprint
On the motorway no one can hear me sing!
Construed as a public service, self preservation in reality.
On the motorway no one can hear me sing!
Construed as a public service, self preservation in reality.
-
Jon Tilson
- Guest contributor
- Posts: 11179
- Joined: Tue Oct 03, 2006 9:45 pm
- Location: Middlesex
Re: RUK - Project Recommission 1850 Auto
The wheels and center bits are threaded left or right hand depending on which side they work on.
Click the wheel round by hand as the lever would work it and the center bit should wind out. If it winds in its on the wrong side.
Front end rot is sadly pretty typical for a dolly of that age, before they started fitting better under wing guards. Mine isn't quit as bad but very similar, so watchinh how you do this with great interest.
An outer edge repair panel for the outer front panel in front of the bonnet would be very useful.
Jonners
Note from Admin: sadly Jon passed away in February 2018 but his humour and wealth of knowledge will be fondly remembered by all. RIP Jonners.
-
Carledo
- TDC Shropshire Area Organiser
- Posts: 7242
- Joined: Sun Aug 21, 2011 5:12 pm
- Location: Highley, Shropshire
Re: RUK - Project Recommission 1850 Auto
The club do an upper outer front panel repair section which should just about cover the area shown in the pic of the N/S/F. I may be able to find a chunk of an O/S/F wing to use as a repair section, i'll check my stocks tomorrow. As you well know, you are on your own for decent steel eyebrows!
But my money would be spent on GRP for a daily driver like this one, easier to fit, cheaper than steel and will never rot again! And cutting the wings off entirely would let you get to that scuttle panel/A pillar rot easily.
Steve
But my money would be spent on GRP for a daily driver like this one, easier to fit, cheaper than steel and will never rot again! And cutting the wings off entirely would let you get to that scuttle panel/A pillar rot easily.
Steve
'73 2 door Toledo with Vauxhall Carlton 2.0 8v engine (The Carledo)
'78 Sprint Auto with Vauxhall Omega 2.2 16v engine (The Dolomega)
'72 Triumph 1500FWD in Slate Grey, Now with RWD and Carledo powertrain!
Maverick Triumph, Servicing, Repairs, Electrical, Recomissioning, MOT prep, Trackerjack brake fitting service.
Apprentice served Triumph Specialist for 50 years. PM for more info or quotes.
'78 Sprint Auto with Vauxhall Omega 2.2 16v engine (The Dolomega)
'72 Triumph 1500FWD in Slate Grey, Now with RWD and Carledo powertrain!
Maverick Triumph, Servicing, Repairs, Electrical, Recomissioning, MOT prep, Trackerjack brake fitting service.
Apprentice served Triumph Specialist for 50 years. PM for more info or quotes.
Re: RUK - Project Recommission 1850 Auto
I have to say that the temptation to go GRP is very strong but the rot is only on one side, the other side just has some holes that need dealing with. I think if both sides were that bad I'd go down the GRP route, it's going to be cheaper for me to just repair for now.
The paint needs to be stripped off the front panels first just to make sure there are no more surprises lurking there.
The paint needs to be stripped off the front panels first just to make sure there are no more surprises lurking there.
-
DOLOMITE 135
- TDC Member
- Posts: 122
- Joined: Sun Oct 22, 2006 10:31 am
Re: RUK - Project Recommission 1850 Auto
Probably worth checking if the hinge is seized.The bonnet sits proud one end, turns out that the hinge is bent a bit where it's welded to the bonnet.
Normally when the bonnet hinges seize, the leverage provided by the bonnet bends the hinge mountings leaving the bonnet sitting proud.
Repeated opening and closing can result in the metal around the hinge fatiguing, and the hinge breaking away.
-
SprintMWU773V

- TDC Staffs Area Organiser
- Posts: 5429
- Joined: Wed Oct 18, 2006 2:08 pm
- Location: The Old Asylum
Re: RUK - Project Recommission 1850 Auto
With the right skills it is very repairable without going down the GRP route. I think if they were unsalvageable then yes I'd look at them but there's still plenty of metal left there.
Mark
1961 Chevrolet Corvair Greenbrier Sportswagon
1980 Dolomite Sprint project using brand new shell
2009 Mazda MX5 2.0 Sport
2018 Infiniti Q30
1961 Chevrolet Corvair Greenbrier Sportswagon
1980 Dolomite Sprint project using brand new shell
2009 Mazda MX5 2.0 Sport
2018 Infiniti Q30
Re: RUK - Project Recommission 1850 Auto
100% agree with you Mark, after seeping on it and chatting to Bruce this is definitely repairable.With the right skills it is very repairable without going down the GRP route. I think if they were unsalvageable then yes I'd look at them but there's still plenty of metal left there.
I have stripped the rest of the paint off of the front end this morning to get a clear view of what we are dealing with.

There was a lot of paint on there, it took a couple of coats of paint stripper to get it off.


I uncovered another chunk of filler covering up this...

This is still the best side, only requiring minor repairs.

If I look at it and break the repair work down it's not too bad, I have a good side to take templates from. The weather is going to be good this weekend so I should be able to crack on whilst the kids are at their grand parents.
Re: RUK - Project Recommission 1850 Auto
Before I start the welding I just wanted to finish the brakes.
New club master cylinder fitted.

I also fixed the handbrake, no point adjusting it yet until I've filled and bled the system.
New club master cylinder fitted.
I also fixed the handbrake, no point adjusting it yet until I've filled and bled the system.