I think I've put the centre carrier back on properly.


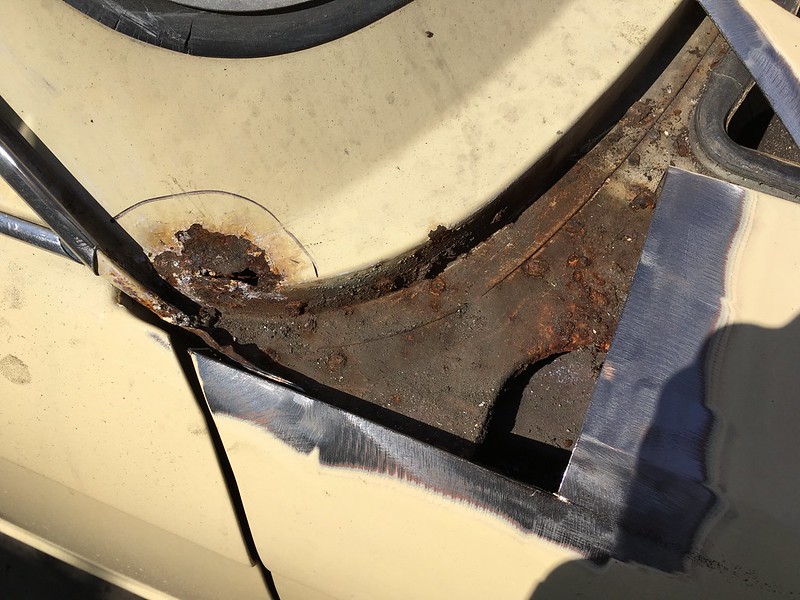

I disagree.James467 wrote:Nothing too bad on both sides.
The hole on the NS never existed before Steve (Carledo) created it at Stoneleigh, hole on the OS was made by me today! Since then the car has been under cover. Previous to that the car has sat in a dry garage for 20 years.sprint95m wrote:I disagree.James467 wrote:Nothing too bad on both sides.
Water will have been running into the channel below the windscreen……..
At the very least I would be removing the instrument panel and glovebox to try and determine if this section is rotten.
Ian.
James467 wrote:Thanks Dave!
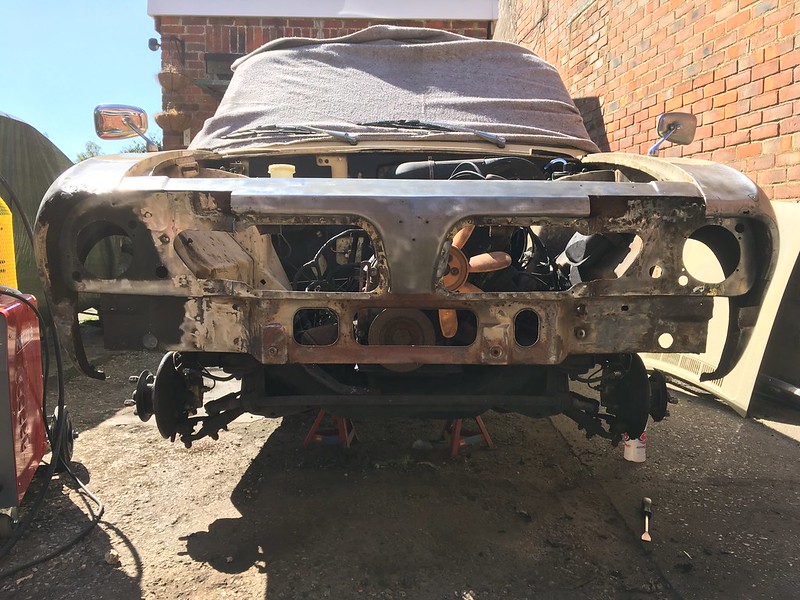
Collected the reconditioned rad this morning, lookin' good!
Removed the outer front valence section and test fitted the club repair panel.
There's some work that needs to be done before I can fit the panel though, some more rust holes have appeared as well as the upper part of the inner valence which needs fabricating and they need to be fixed first.
I cut the tops of the wings off with a 0.8mm cutting disc so I can see what repair work needed to be done at the bottom corners of the screen.
Nothing too bad on both sides if I am honest plus I can repair it without removing the screen. I have some Cold Front putty which will surround the rubber and protect it all from heat, plus the welder will be at it's lowest setting.
That's it for today, I need to clean my bike as I'm riding tonight! I should get a full weekends welding in as the weather is apparently going to be good so hopefully I'll make some good progress on the front end.
No the inner panel doesn't meet the wing, the photo angle doesn't help!James
why have you got a gap at the bottom of the headlamp repair panel, or is it not meant to meet the wing ?
Dave