RUK - Project Recommission 1972 'Dolomite' Auto
-
Triumph1300

- TDC Member
- Posts: 1500
- Joined: Wed Sep 27, 2006 10:59 am
- Location: Coventry
Re: RUK - Project Recommission 1972 'Dolomite' Auto
Nice job there James, shame that the cover sills were ever fitted
BWJ
1966 Triumph 1300 Royal Blue
1966 Triumph 2000 Blue
1965 Triumph 2000 black and rust
1967 BSA B40wd green
2018 Jaguar E pace 2018
NOBODY expects the Canley Inquisition!
1966 Triumph 1300 Royal Blue
1966 Triumph 2000 Blue
1965 Triumph 2000 black and rust
1967 BSA B40wd green
2018 Jaguar E pace 2018
NOBODY expects the Canley Inquisition!

Re: RUK - Project Recommission 1972 'Dolomite' Auto
Thanks Bruce!
There's not a lot now left to do, there is rust in some other areas, air vents at the rear, boot lid etc... but they can all be tackled in due course.
I'm so tantalisingly close!!!
Definitely on track for the MOT on a week Saturday, getting excited now!
There's not a lot now left to do, there is rust in some other areas, air vents at the rear, boot lid etc... but they can all be tackled in due course.
I'm so tantalisingly close!!!
Definitely on track for the MOT on a week Saturday, getting excited now!
Re: RUK - Project Recommission 1972 'Dolomite' Auto
Fantastic job James!  Getting rid of those covers and uncovering the originals is a fab idea and far, far nicer..top work.
Thanks for the updates..
Thanks for the updates..
Re: RUK - Project Recommission 1972 'Dolomite' Auto
Thanks Reg, it certainly looks better without them on!
This morning I finished the inner front valence, fitted the strengthening pieces below the headlights, checked everything lined up then seam sealed and painted everything that would eventually be covered by the outer valence.
Everything got a coat of etch primer first

Everything seam sealed


Then once the sealer had skinned (according to the instructions on the can) I could put on a coat of stone-chip. Need to wait 2 hours before I can put a dusting of body colour on there.

I also sealed all of the welds inside the engine bay, these will be top coated when I do the rest of the car.

I started repairing the worst of the outer valence to get a head start on tomorrow. There is still more work to do but I'm please so far, everything lines up nicely.


I am hopeful that I'll be able to get the lower valence fitted and finished either later today or tomorrow morning.
This morning I finished the inner front valence, fitted the strengthening pieces below the headlights, checked everything lined up then seam sealed and painted everything that would eventually be covered by the outer valence.
Everything got a coat of etch primer first
Everything seam sealed
Then once the sealer had skinned (according to the instructions on the can) I could put on a coat of stone-chip. Need to wait 2 hours before I can put a dusting of body colour on there.
I also sealed all of the welds inside the engine bay, these will be top coated when I do the rest of the car.
I started repairing the worst of the outer valence to get a head start on tomorrow. There is still more work to do but I'm please so far, everything lines up nicely.
I am hopeful that I'll be able to get the lower valence fitted and finished either later today or tomorrow morning.
-
Triumph1300
- TDC Member
- Posts: 1500
- Joined: Wed Sep 27, 2006 10:59 am
- Location: Coventry
Re: RUK - Project Recommission 1972 'Dolomite' Auto
I'm afraid to go to sleep with the speed of progress on this James, looking good, mot on the 13th May looks very feasible!
BWJ
1966 Triumph 1300 Royal Blue
1966 Triumph 2000 Blue
1965 Triumph 2000 black and rust
1967 BSA B40wd green
2018 Jaguar E pace 2018
NOBODY expects the Canley Inquisition!
1966 Triumph 1300 Royal Blue
1966 Triumph 2000 Blue
1965 Triumph 2000 black and rust
1967 BSA B40wd green
2018 Jaguar E pace 2018
NOBODY expects the Canley Inquisition!
Re: RUK - Project Recommission 1972 'Dolomite' Auto
Absolutely!Triumph1300 wrote:mot on the 13th May looks very feasible!
Re: RUK - Project Recommission 1972 'Dolomite' Auto
Inner valence bottom painted!

Test fitted the outer valence to make sure everything lines up, there's some fettling needed to drop it down a tiny bit (notching the strengthening panels will do this) but oh my goodness, it looks like a Dolomite again! I will weld it all up properly once it's fitted as the panel is quite flimsy and I risk distorting it. I have a template cut for the sidelight repairs, I'll do these when it's back on the car for the same reason.


Definitely a good place to end the day!
Test fitted the outer valence to make sure everything lines up, there's some fettling needed to drop it down a tiny bit (notching the strengthening panels will do this) but oh my goodness, it looks like a Dolomite again! I will weld it all up properly once it's fitted as the panel is quite flimsy and I risk distorting it. I have a template cut for the sidelight repairs, I'll do these when it's back on the car for the same reason.
Definitely a good place to end the day!
-
new to this
- TDC Member
- Posts: 1793
- Joined: Mon Dec 12, 2016 9:53 pm
- Location: Harrow Middlesex
Re: RUK - Project Recommission 1972 'Dolomite' Auto
Ive got cover sills on mine,i may do the same as you and remove them,as they make the gap between the sill and doors to close,
i see you have a power file,great little tool,i buy the wider belts and cut them down,you can go through a load
Dave
i see you have a power file,great little tool,i buy the wider belts and cut them down,you can go through a load
Dave
Re: RUK - Project Recommission 1972 'Dolomite' Auto
If you do remove them I found the best way was to simply cut through the lower section then you should be able to bend them up and cut the welds along the top. That's if they were fitted like mine!
This morning I made some boomerangs!

To go here!


They made a massive difference once fitted, the panel was a lot more rigid.
I then straightened all of the joint edges and offered the valence up to the car. This is why I didn't remove the wings, I wanted to make sure that everything still lined up properly.
Once I was happy with the alignment I went ahead and welded it on.


Some fettling and dressing to do on this repair but it should be fine.

I'm moving on to repairing the passenger side now, attaching the wing, repair the sidelight mounting, fitting the eyebrow etc... then on to the drivers side.
This morning I made some boomerangs!
To go here!
They made a massive difference once fitted, the panel was a lot more rigid.
I then straightened all of the joint edges and offered the valence up to the car. This is why I didn't remove the wings, I wanted to make sure that everything still lined up properly.
Once I was happy with the alignment I went ahead and welded it on.
Some fettling and dressing to do on this repair but it should be fine.
I'm moving on to repairing the passenger side now, attaching the wing, repair the sidelight mounting, fitting the eyebrow etc... then on to the drivers side.
Re: RUK - Project Recommission 1972 'Dolomite' Auto
Like the boomerangs
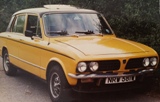
NRW 581W Sprint
On the motorway no one can hear me sing!
Construed as a public service, self preservation in reality.
On the motorway no one can hear me sing!
Construed as a public service, self preservation in reality.
-
new to this
- TDC Member
- Posts: 1793
- Joined: Mon Dec 12, 2016 9:53 pm
- Location: Harrow Middlesex
Re: RUK - Project Recommission 1972 'Dolomite' Auto
James
how come you didn't do the repairs for the sidelight, before refitting the valance,do you know if the plastic plugs are still available for fitting the side light to the valance
Dave
how come you didn't do the repairs for the sidelight, before refitting the valance,do you know if the plastic plugs are still available for fitting the side light to the valance
Dave
Re: RUK - Project Recommission 1972 'Dolomite' Auto
With the repairs I did only being tacked in I was worried about the structural integrity of the panel off the car, plus it moves around a lot! Now it's fitted it is more rigid so once I have seamed the repair patched in properly I can get on and repair them.new to this wrote:James
how come you didn't do the repairs for the sidelight, before refitting the valance,do you know if the plastic plugs are still available for fitting the side light to the valance
Dave
The plastic plugs are still available part number CZA4705L, they are used for Defender grills as well, I got a pack from eBay for a few pounds.
-
Jon Tilson
- Guest contributor

- Posts: 11179
- Joined: Tue Oct 03, 2006 9:45 pm
- Location: Middlesex
Re: RUK - Project Recommission 1972 'Dolomite' Auto
Presume you welded the boomerangs to the flange on the lower front wings from inside the arches?
Did you spot weld those or plug weld them? Your usual excellent photos though....this will be very useful to a few of us.
Jonners
Did you spot weld those or plug weld them? Your usual excellent photos though....this will be very useful to a few of us.
Jonners
Note from Admin: sadly Jon passed away in February 2018 but his humour and wealth of knowledge will be fondly remembered by all. RIP Jonners.
Re: RUK - Project Recommission 1972 'Dolomite' Auto
Thanks Jonners. The OS wing section will be replaced with a repair wing section so I don't need to do that side. On the NS, yes that was the plan. The wing looks like it's an aftermarket one and I just couldn't weld it on, it just kept blowing through even on the lowest setting on my welder. I eventually managed to weld the wing to the valence in such a way that it can be removed if I need to in the future. It's not nice but it's functional and hasn't damaged my valence repair.Presume you welded the boomerangs to the flange on the lower front wings from inside the arches?
So today starting with this I wanted to finish this corner of the car ready for the headlamp panel to be fitted.

I repaired the wing, the indicator panel and seam welded all of the repairs.

Fitted the club GRP eyebrow. This was fitted with a couple of self tapping screws and tigerseal.

I then cut a repair section from the spare upper front valence that I have.

Tacked it in, checked alignment then seam welded it.

The underside where it joins to the eyebrow has been sealed with tigerseal. I test fitted the club headlamp panel from Alun and it fits perfectly, overall I'm really happy with the way this has turned out, everything lines up and with a small skim of filler in a couple of places this should look ok with a rattle can.


The only thing left to do was to give the inner panel a coat of red oxide then a couple of coats of top so I can fit the headlamp panel.

-
SprintMWU773V

- TDC Staffs Area Organiser
- Posts: 5429
- Joined: Wed Oct 18, 2006 2:08 pm
- Location: The Old Asylum
Re: RUK - Project Recommission 1972 'Dolomite' Auto
It's interesting that you've used seam sealer, they didn't bother from the factory I don't think. No wonder they rusted!
Looks great BTW.
Looks great BTW.
Mark
1961 Chevrolet Corvair Greenbrier Sportswagon
1980 Dolomite Sprint project using brand new shell
2009 Mazda MX5 2.0 Sport
2018 Infiniti Q30
1961 Chevrolet Corvair Greenbrier Sportswagon
1980 Dolomite Sprint project using brand new shell
2009 Mazda MX5 2.0 Sport
2018 Infiniti Q30