RUK - Project Recommission 1972 'Dolomite' Auto

Re: RUK - Project Recommission 1972 'Dolomite' Auto
Ooooooohhhhh 31 pages! Mahesh, I'm catching up! 
-
Carledo
- TDC Shropshire Area Organiser
- Posts: 7242
- Joined: Sun Aug 21, 2011 5:12 pm
- Location: Highley, Shropshire
Re: RUK - Project Recommission 1972 'Dolomite' Auto
If you do decide to do a bespoke loom, do what i've done! Get a spare loom and strip and rebuild it somewhere warm (a great winter project) Then install it complete, that way you can do it in a weekend easily!
Steve
Steve
'73 2 door Toledo with Vauxhall Carlton 2.0 8v engine (The Carledo)
'78 Sprint Auto with Vauxhall Omega 2.2 16v engine (The Dolomega)
'72 Triumph 1500FWD in Slate Grey, Now with RWD and Carledo powertrain!
Maverick Triumph, Servicing, Repairs, Electrical, Recomissioning, MOT prep, Trackerjack brake fitting service.
Apprentice served Triumph Specialist for 50 years. PM for more info or quotes.
Re: RUK - Project Recommission 1972 'Dolomite' Auto
Was thinking last night and to be honest, If I do go down the bespoke loom route I'll just ask Jeroen to do it for me.
He loves RUK!
He loves RUK!
Re: RUK - Project Recommission 1972 'Dolomite' Auto
Trackerjack brakes ordered, hope to get them on before TDCIR!
Massive thanks to Jon (trackerjack)
Massive thanks to Jon (trackerjack)
-
Carledo
- TDC Shropshire Area Organiser
- Posts: 7242
- Joined: Sun Aug 21, 2011 5:12 pm
- Location: Highley, Shropshire
Re: RUK - Project Recommission 1972 'Dolomite' Auto
You're not supposed to EAT the wire! That's what rodents are for!
Steve
'73 2 door Toledo with Vauxhall Carlton 2.0 8v engine (The Carledo)
'78 Sprint Auto with Vauxhall Omega 2.2 16v engine (The Dolomega)
'72 Triumph 1500FWD in Slate Grey, Now with RWD and Carledo powertrain!
Maverick Triumph, Servicing, Repairs, Electrical, Recomissioning, MOT prep, Trackerjack brake fitting service.
Apprentice served Triumph Specialist for 50 years. PM for more info or quotes.
'78 Sprint Auto with Vauxhall Omega 2.2 16v engine (The Dolomega)
'72 Triumph 1500FWD in Slate Grey, Now with RWD and Carledo powertrain!
Maverick Triumph, Servicing, Repairs, Electrical, Recomissioning, MOT prep, Trackerjack brake fitting service.
Apprentice served Triumph Specialist for 50 years. PM for more info or quotes.
Re: RUK - Project Recommission 1972 'Dolomite' Auto
Bleeding iPhone autocorrect!James467 wrote: You're not supposed to EAT the wire! That's what rodents are for!
Ste
Re: RUK - Project Recommission 1972 'Dolomite' Auto
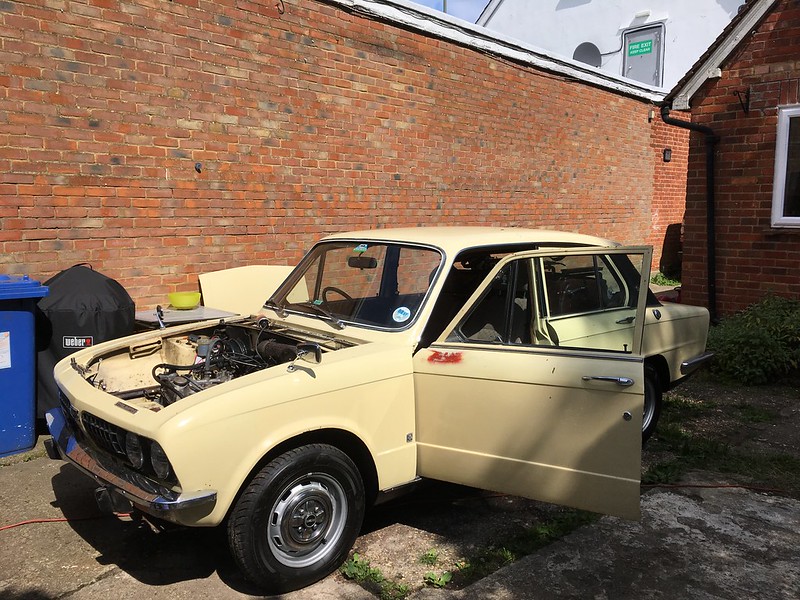
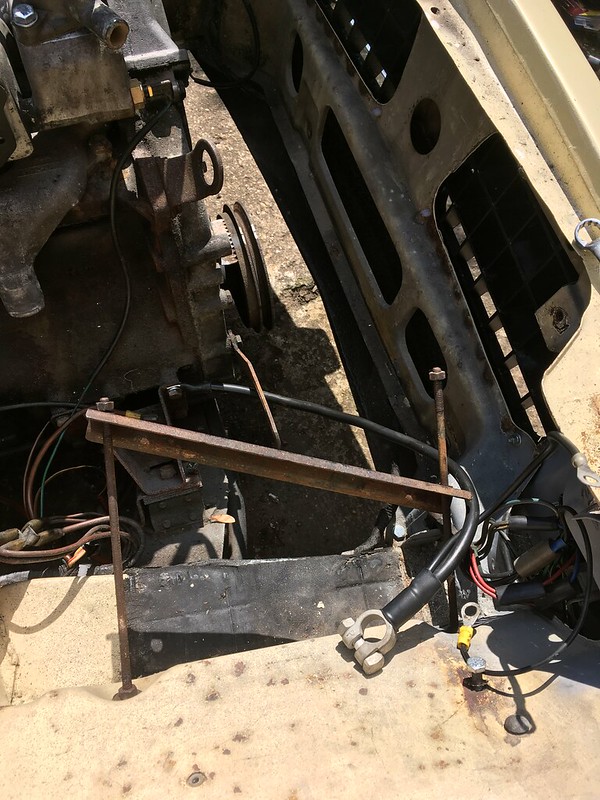
Between thunderstorms today I have tried to crack on with wiring the headlights and relaying some things.
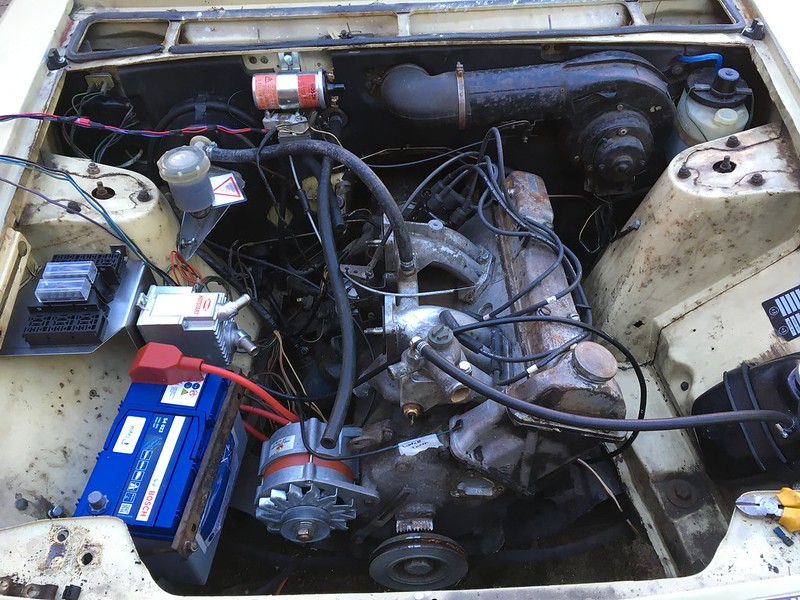
So it was off with the bonnet and out with the old loom.
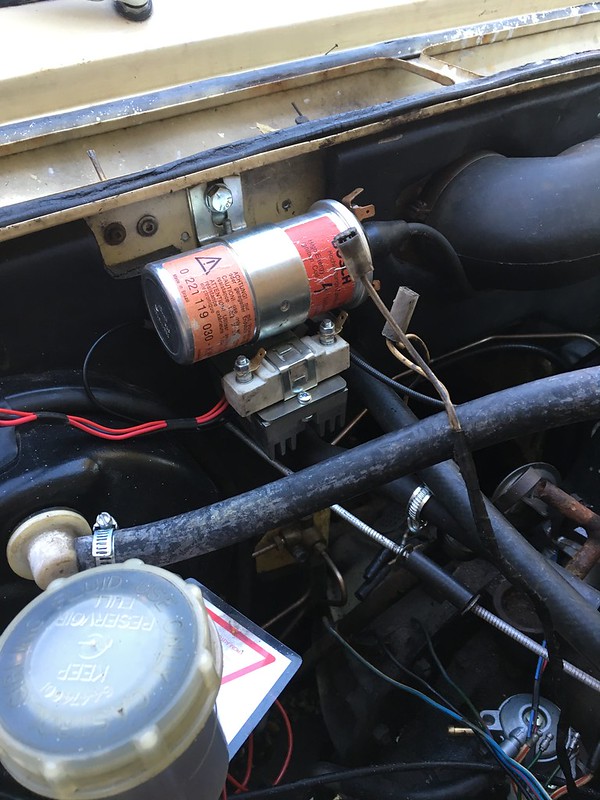
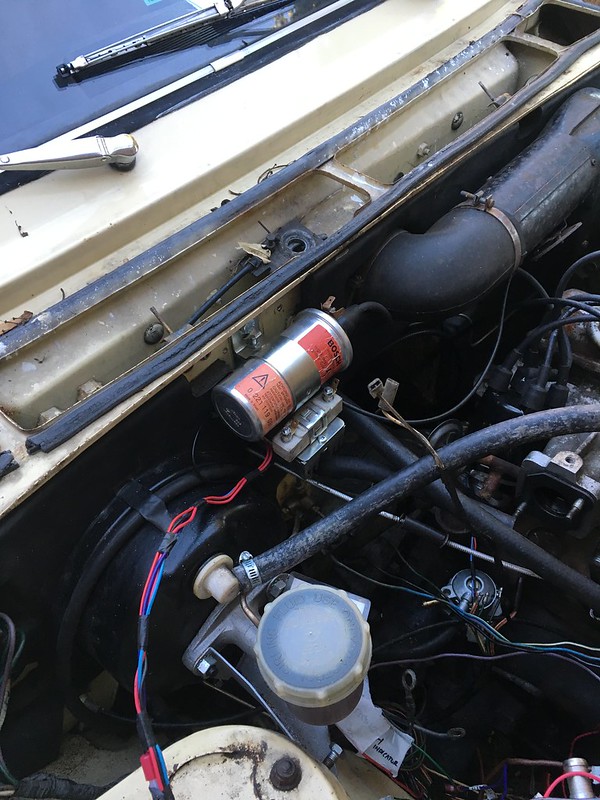
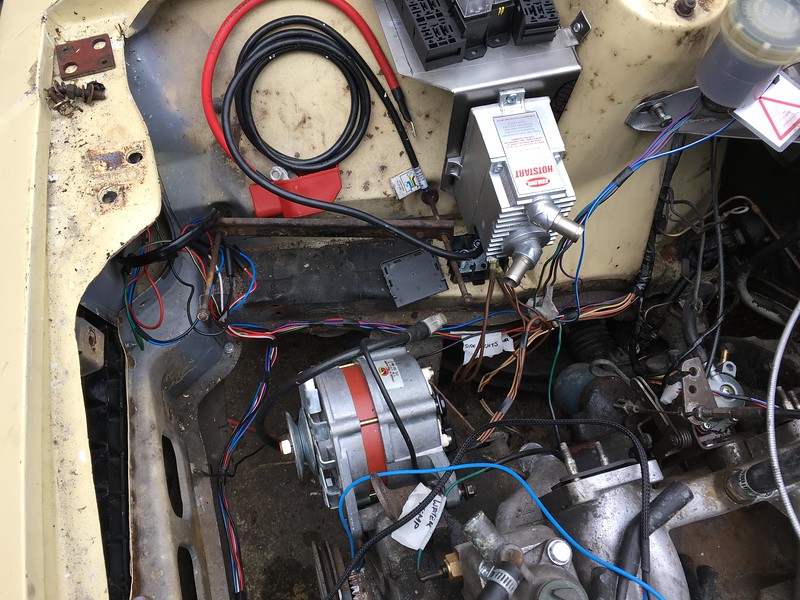
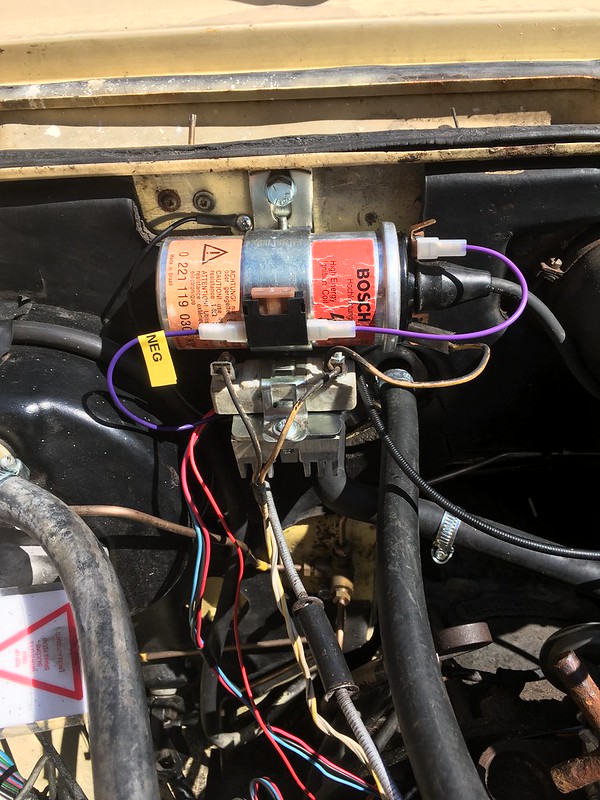
I moved the coil to the bulkhead as per later cars, it seems to me to be a better place for a coil away from vibration and heat. The Lumenition module is mounted underneath, I just need to make a bracket for the resistor.
I pulled all of the front loom out and unwrapped it inspecting all of the wires for damage and labelling everything up. Good thing I did, the NS headlamp dip wire was frayed.
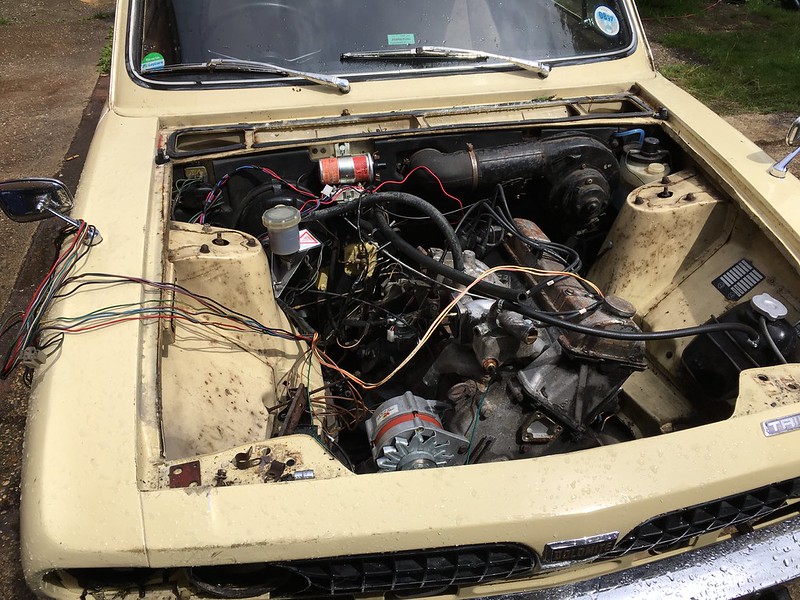
The main things I wanted to replace were the earth strap from the battery to the engine, the battery to solenoid lead and to fit the proper connector for the alternator.
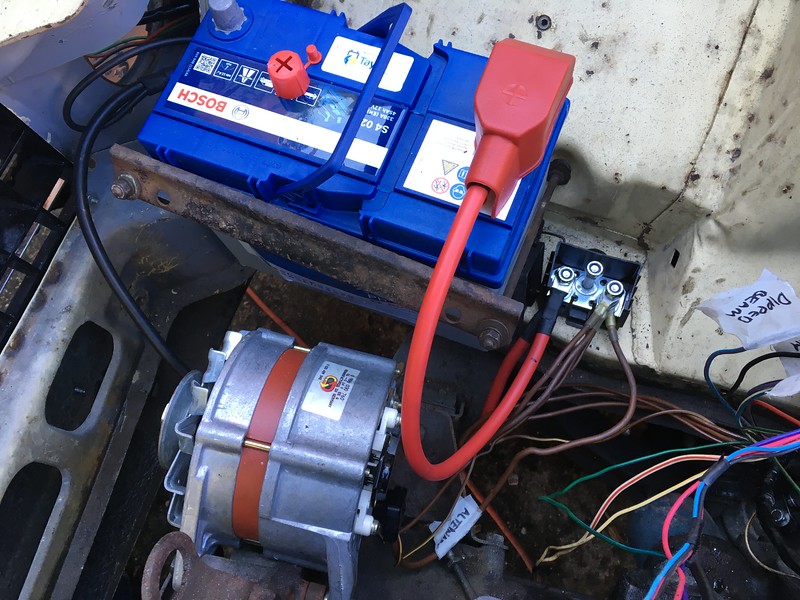
First thing I did was to fit the earth.
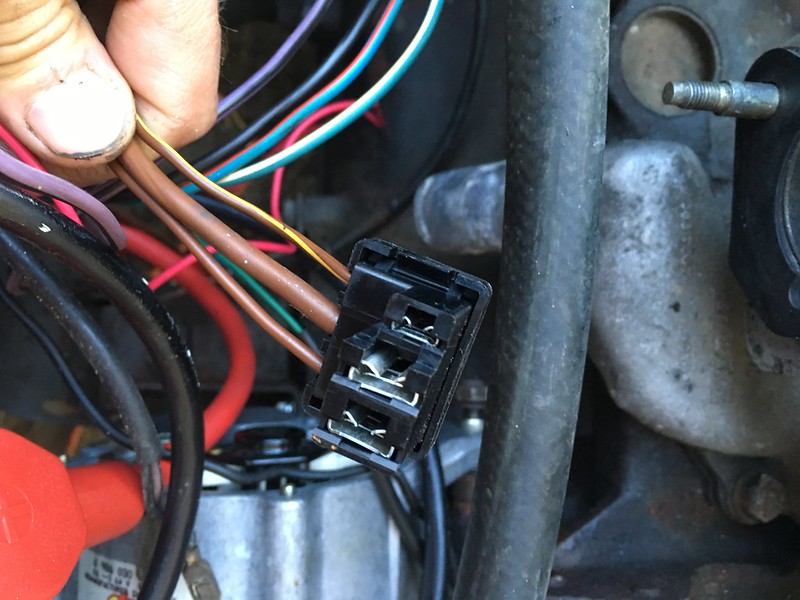
Then I fitted the correct alternator plug, the brown and yellow trace leads and thick brown leads just had spade connectors on, the smaller brown lead was loose and looks like it was cut. As far as I can find out from photos and the wiring diagram this just goes into the plug. Can someone confirm if this is correct?
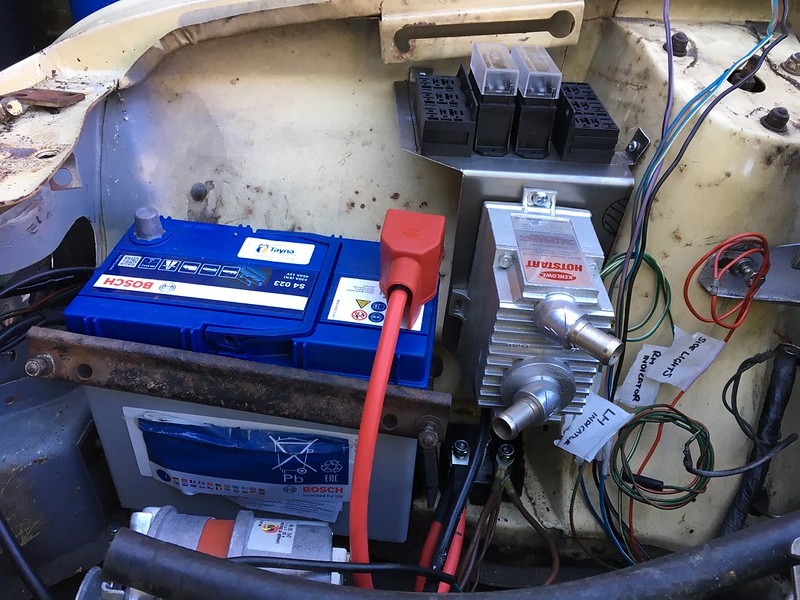
The main harness to battery lead connectors arent available anymore and I wanted something that I could connect other things to so I fitted a small bus box next to the battery. I could then make up a new battery cable to connect to the solenoid.
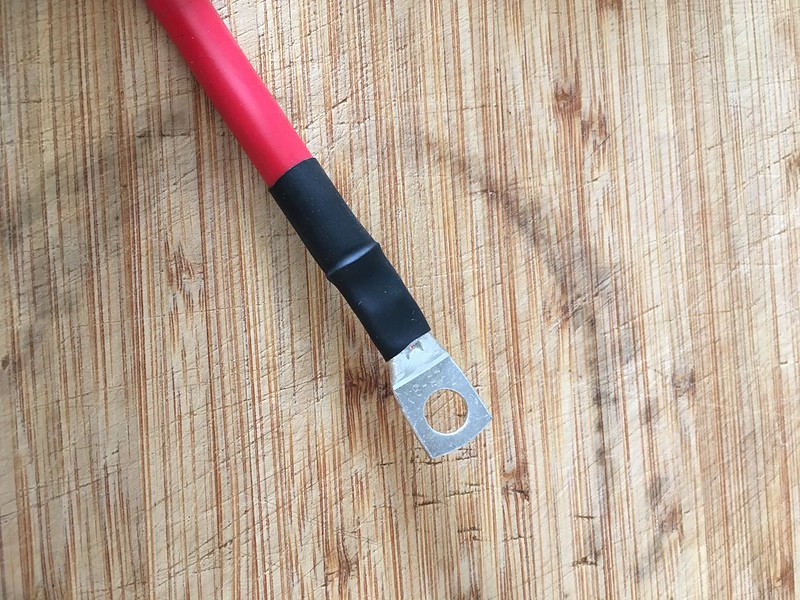
New connectors...

Connected to the new bus box and a new battery cable made up, I may have to shorten this. All of the existing loom brown wires have had new terminals fitted and have been connected temporarily.
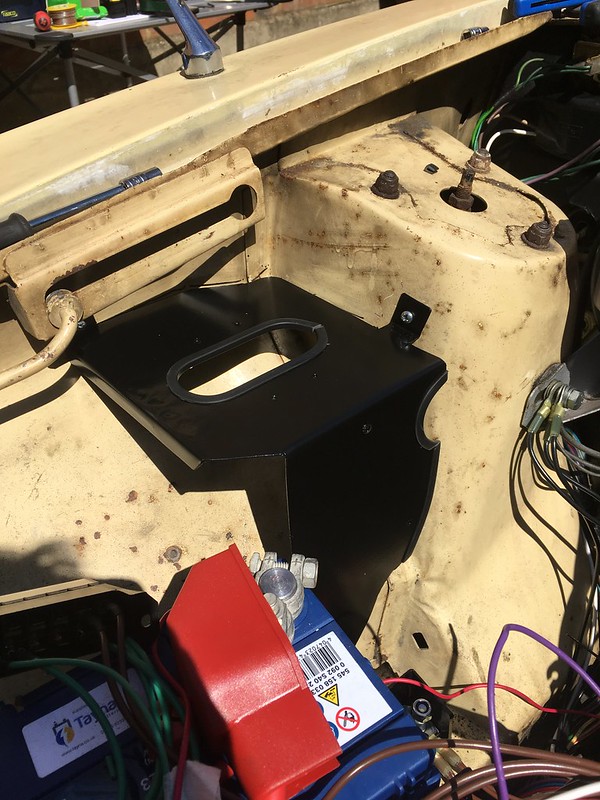
The hotstart ideally needs to be situated here next to the battery for easy pipe routing to the heater inlet and outlets. It isn't connected into the car electrics, you basically plug it into the mains.
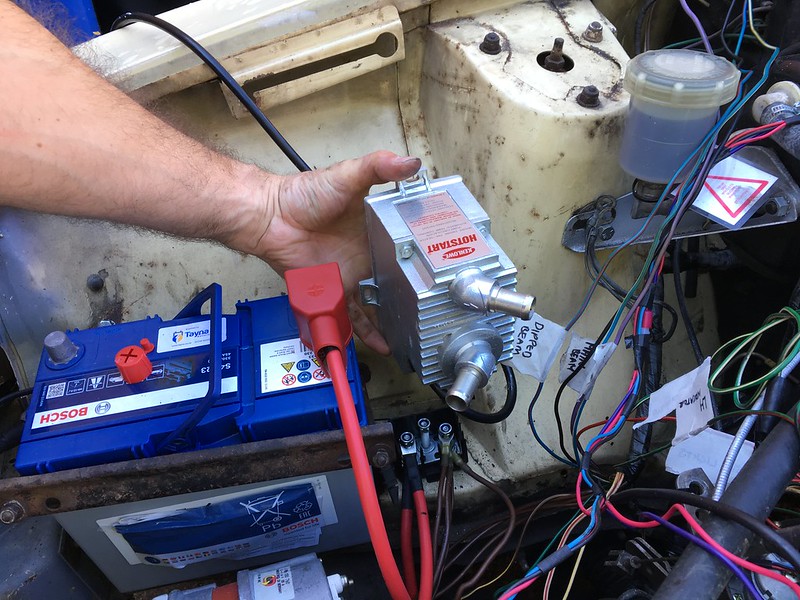
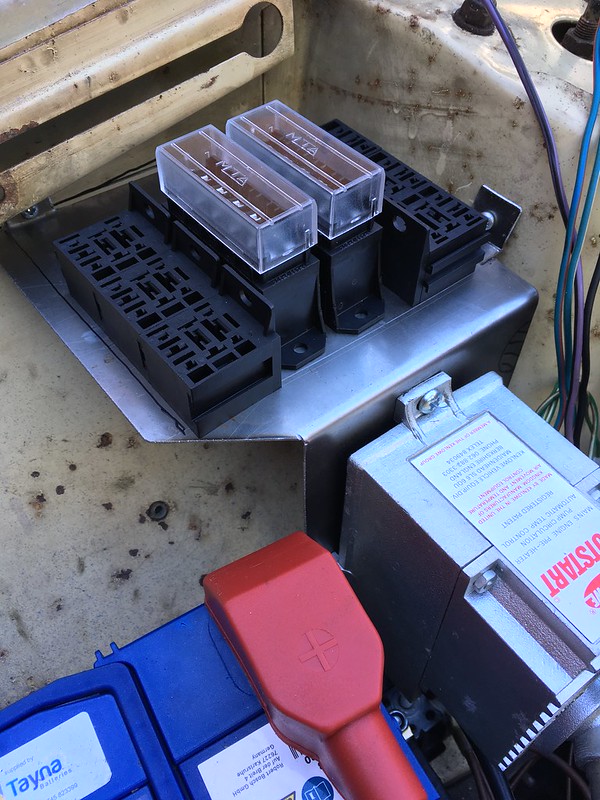
It makes sense to put it here as the new bracket for it can also have the new fuseboxes and relays mounted to it.
So it was out with the cardboard pizza boxes!
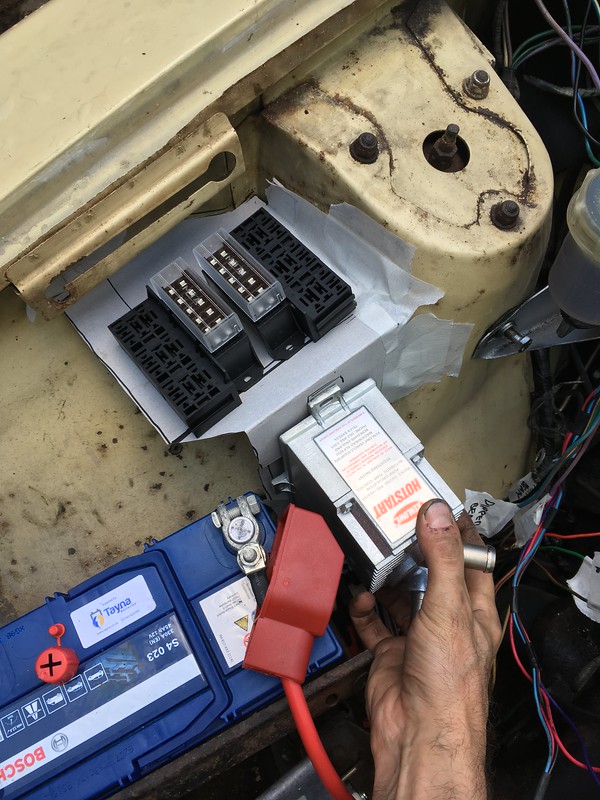
Looking good so I cut it out of 1mm sheet
The fuse boxes and relays clear the bonnet stay.
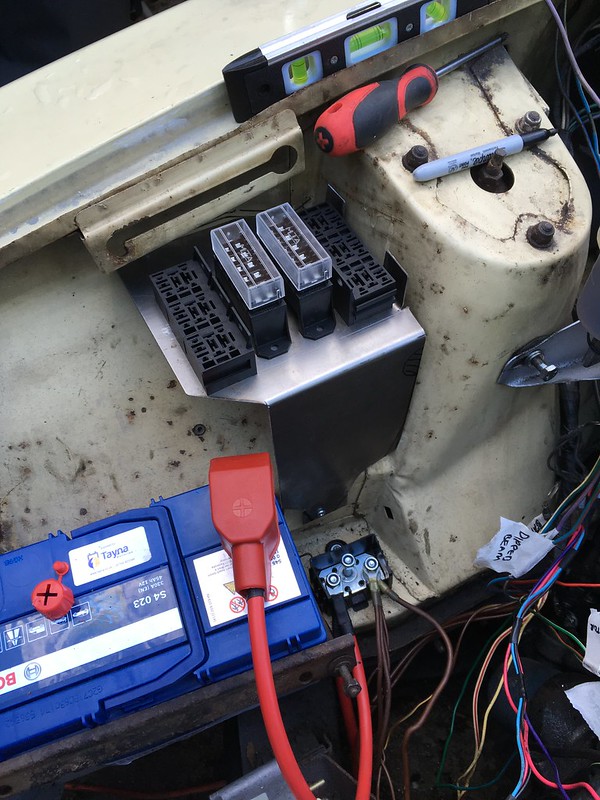
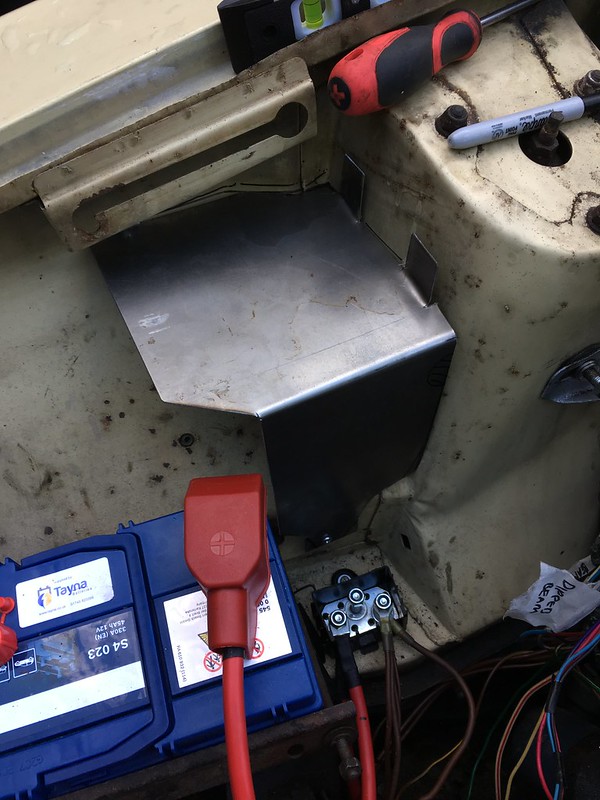
With a bit of fettling it is screwed to the inner wing and the hotstart test mounted. It is surprisingly rigid and looks like it won't need any additional support.
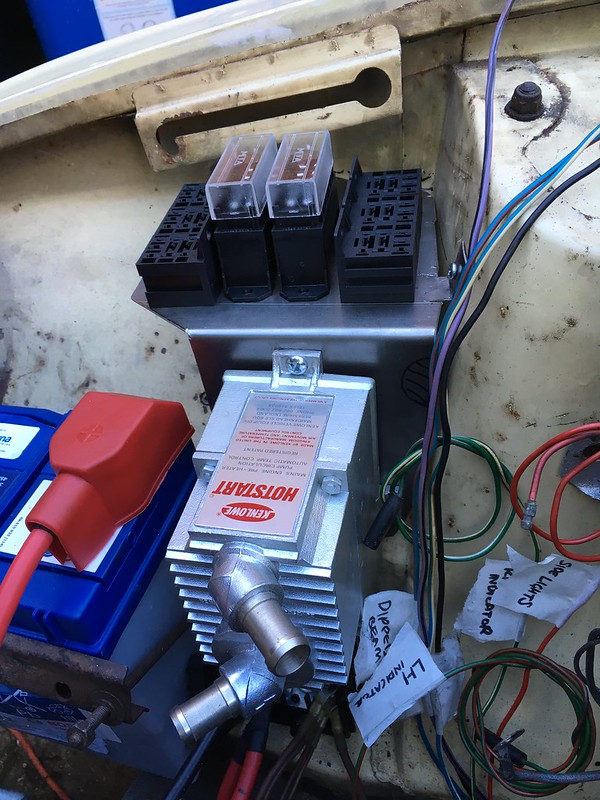
It needs some tidying up and painting, I may cut some holes in the sides and top for cable entry and exit once I have decided how I'm going to route them. Overall I am very please how it has turned out.
Tomorrows jobs are to wire everything up, fit the headlights and tidy the wiring to make it all look factory again!
So it was off with the bonnet and out with the old loom.
I moved the coil to the bulkhead as per later cars, it seems to me to be a better place for a coil away from vibration and heat. The Lumenition module is mounted underneath, I just need to make a bracket for the resistor.
I pulled all of the front loom out and unwrapped it inspecting all of the wires for damage and labelling everything up. Good thing I did, the NS headlamp dip wire was frayed.
The main things I wanted to replace were the earth strap from the battery to the engine, the battery to solenoid lead and to fit the proper connector for the alternator.
First thing I did was to fit the earth.
Then I fitted the correct alternator plug, the brown and yellow trace leads and thick brown leads just had spade connectors on, the smaller brown lead was loose and looks like it was cut. As far as I can find out from photos and the wiring diagram this just goes into the plug. Can someone confirm if this is correct?
The main harness to battery lead connectors arent available anymore and I wanted something that I could connect other things to so I fitted a small bus box next to the battery. I could then make up a new battery cable to connect to the solenoid.
New connectors...
Connected to the new bus box and a new battery cable made up, I may have to shorten this. All of the existing loom brown wires have had new terminals fitted and have been connected temporarily.
The hotstart ideally needs to be situated here next to the battery for easy pipe routing to the heater inlet and outlets. It isn't connected into the car electrics, you basically plug it into the mains.
It makes sense to put it here as the new bracket for it can also have the new fuseboxes and relays mounted to it.
So it was out with the cardboard pizza boxes!
Looking good so I cut it out of 1mm sheet
The fuse boxes and relays clear the bonnet stay.
With a bit of fettling it is screwed to the inner wing and the hotstart test mounted. It is surprisingly rigid and looks like it won't need any additional support.
It needs some tidying up and painting, I may cut some holes in the sides and top for cable entry and exit once I have decided how I'm going to route them. Overall I am very please how it has turned out.
Tomorrows jobs are to wire everything up, fit the headlights and tidy the wiring to make it all look factory again!
-
MIG Wielder
- TDC Member
- Posts: 2334
- Joined: Sun Mar 16, 2008 2:52 pm
Re: RUK - Project Recommission 1972 'Dolomite' Auto
Hi James, Yes, that is quite correct. My guess is that the car was originally fitted with the early 15ACR alternator with separate ignition warning light and alternator field excitation wires. So when the alternator was changed to the later 17 / 18ACR the unused yellow / brown wire was cut off and the spade connectors were fitted. Proper job there with the new connector.James467 wrote: ↑Sat Aug 05, 2017 8:12 pm Between thunderstorms today I have tried to crack on with wiring the headlights and relaying some things.
Then I fitted the correct alternator plug, the brown and yellow trace leads and thick brown leads just had spade connectors on, the smaller brown lead was loose and looks like it was cut. As far as I can find out from photos and the wiring diagram this just goes into the plug. Can someone confirm if this is correct?
I do like the new high current cable and terminations. Are these off the shelf or did you make them yourself?
Tony.
Re: RUK - Project Recommission 1972 'Dolomite' Auto
Thanks Tony, yes I did them myself. I have a nifty tool to crimp the cable ends on then I just put some heat shrink on to make them look professional!

I have been working on getting the wiring all organised today.

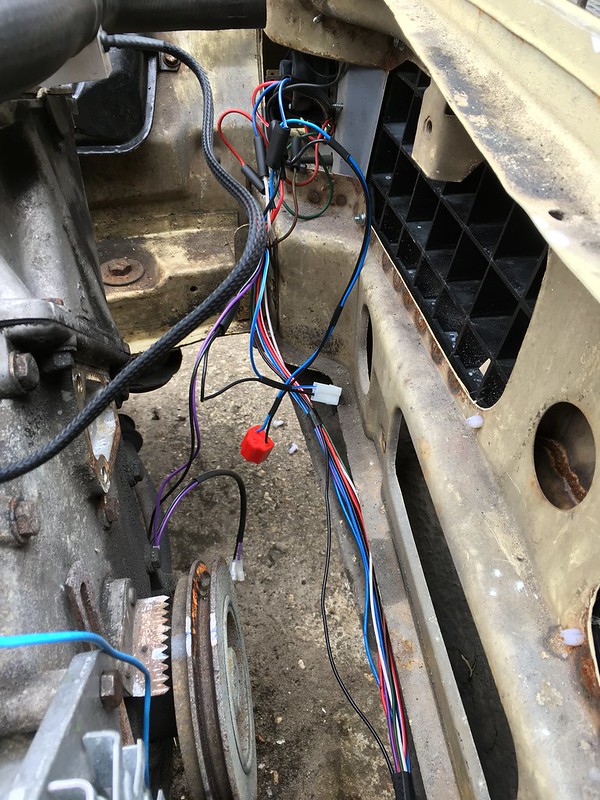
It looks like a bit of a rats nest but everything that is now relay controlled is wired up and ready to be tested, once I have tested everything then I will wrap the wire to protect it.
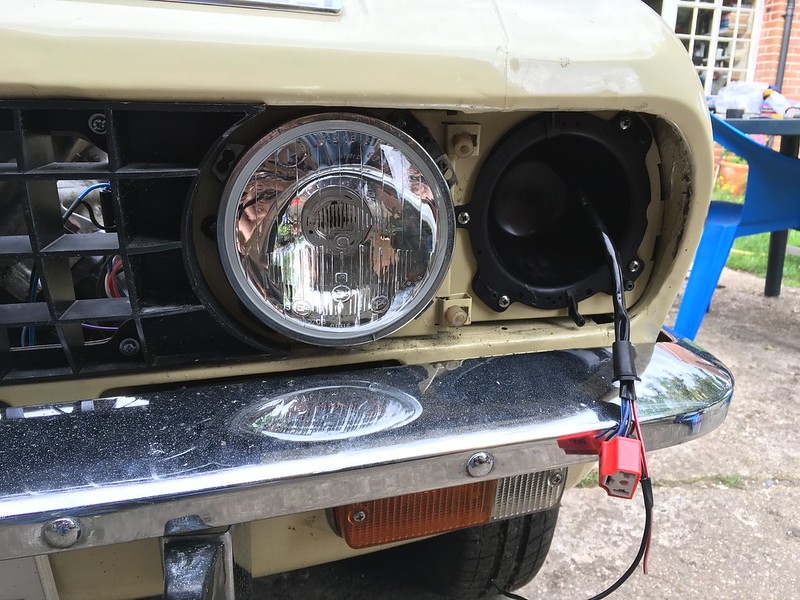
The only thing that I did find is that the Cibie lights don't fit in the plastic headlamp bowls, no problem as I can just swap them out for a set of NOS steel ones that I have.
I'm taking my time to ensure that everything is wired correctly, I just need to wire up the new fuse boxes and relays now.
I have been working on getting the wiring all organised today.
It looks like a bit of a rats nest but everything that is now relay controlled is wired up and ready to be tested, once I have tested everything then I will wrap the wire to protect it.
The only thing that I did find is that the Cibie lights don't fit in the plastic headlamp bowls, no problem as I can just swap them out for a set of NOS steel ones that I have.
I'm taking my time to ensure that everything is wired correctly, I just need to wire up the new fuse boxes and relays now.
-
Carledo
- TDC Shropshire Area Organiser
- Posts: 7242
- Joined: Sun Aug 21, 2011 5:12 pm
- Location: Highley, Shropshire
Re: RUK - Project Recommission 1972 'Dolomite' Auto
The rats nest is all part of the fun James!
I've just completely removed the front loom from another Sprint auto I am currently working on as the smoke it runs on was leaking all over the place when the (halogen converted) headlights were switched on. The loom had been thoroughly abused by someone without a clue about electrics. they had installed headlamp washers - with an 80 amp relay and a 30 amp fuse!!! And more 40 amp relays for rear foglights (3.5 amp load) boot release (momentary 5 amp load) and electric fuel pump (5 amp?) But NO relays on the headlamps!!!! This was not the cause of the escaping smoke however, once the loom was out and a few layers of oil and grime removed, it was apparent that the muppet had connected the live and earth for the n/s inner headlamp TOGETHER Sizzle Sizzle, I love the smell of burning insulation in the morning! 
A replacement loom will be going in shortly and the redundant relays will be retasked to something useful (guess what!)
Steve
I've just completely removed the front loom from another Sprint auto I am currently working on as the smoke it runs on was leaking all over the place when the (halogen converted) headlights were switched on. The loom had been thoroughly abused by someone without a clue about electrics. they had installed headlamp washers - with an 80 amp relay and a 30 amp fuse!!! And more 40 amp relays for rear foglights (3.5 amp load) boot release (momentary 5 amp load) and electric fuel pump (5 amp?) But NO relays on the headlamps!!!! This was not the cause of the escaping smoke however, once the loom was out and a few layers of oil and grime removed, it was apparent that the muppet had connected the live and earth for the n/s inner headlamp TOGETHER
A replacement loom will be going in shortly and the redundant relays will be retasked to something useful (guess what!)
Steve
'73 2 door Toledo with Vauxhall Carlton 2.0 8v engine (The Carledo)
'78 Sprint Auto with Vauxhall Omega 2.2 16v engine (The Dolomega)
'72 Triumph 1500FWD in Slate Grey, Now with RWD and Carledo powertrain!
Maverick Triumph, Servicing, Repairs, Electrical, Recomissioning, MOT prep, Trackerjack brake fitting service.
Apprentice served Triumph Specialist for 50 years. PM for more info or quotes.
'78 Sprint Auto with Vauxhall Omega 2.2 16v engine (The Dolomega)
'72 Triumph 1500FWD in Slate Grey, Now with RWD and Carledo powertrain!
Maverick Triumph, Servicing, Repairs, Electrical, Recomissioning, MOT prep, Trackerjack brake fitting service.
Apprentice served Triumph Specialist for 50 years. PM for more info or quotes.
Re: RUK - Project Recommission 1972 'Dolomite' Auto
The KA brake calipers have arrived for my TJ conversion, I also have my eye on some Sierra ones as well to give myself some options. The KA ones only cost me £10 and yes, the nipples and hoses are free, I'm only interested in the carriers though, I can get new Pagid calipers from euro car parts so there's no point me even thinking about rebuilding them.
I have been getting on with the wiring, everything has now been tested and works!

All terminals have been properly crimped and wrapped in heat shrink to protect them.

The mounting plate has had a coat of satin and the edges protected with rubber grommet strip to protect the cables
I have tided up the wiring for the coil, Lumenition box and ballast resistor.
This is as far as I have got before I had to go out and get something...

I have been getting on with the wiring, everything has now been tested and works!
All terminals have been properly crimped and wrapped in heat shrink to protect them.
The mounting plate has had a coat of satin and the edges protected with rubber grommet strip to protect the cables
I have tided up the wiring for the coil, Lumenition box and ballast resistor.
This is as far as I have got before I had to go out and get something...
Re: RUK - Project Recommission 1972 'Dolomite' Auto
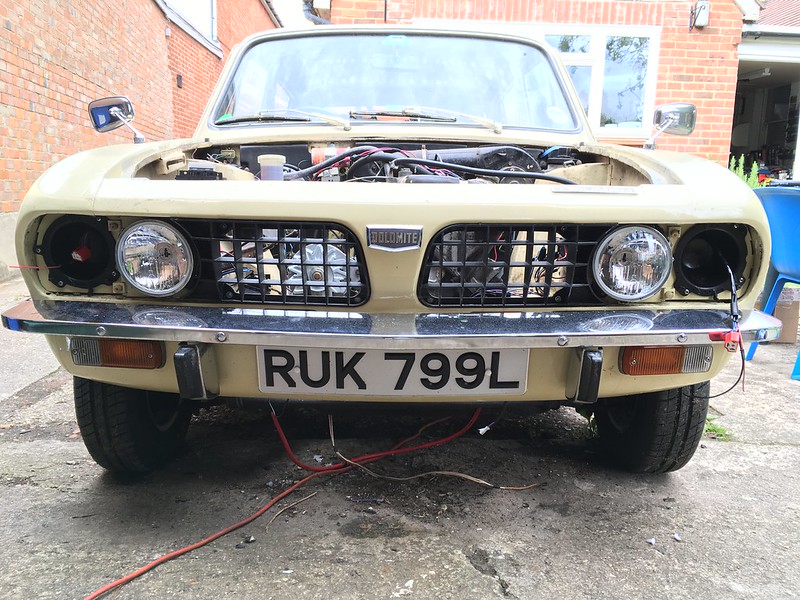
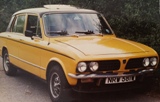
So if any of you read Classics Monthly then you'll notice that RUK has been featured as a restoration.

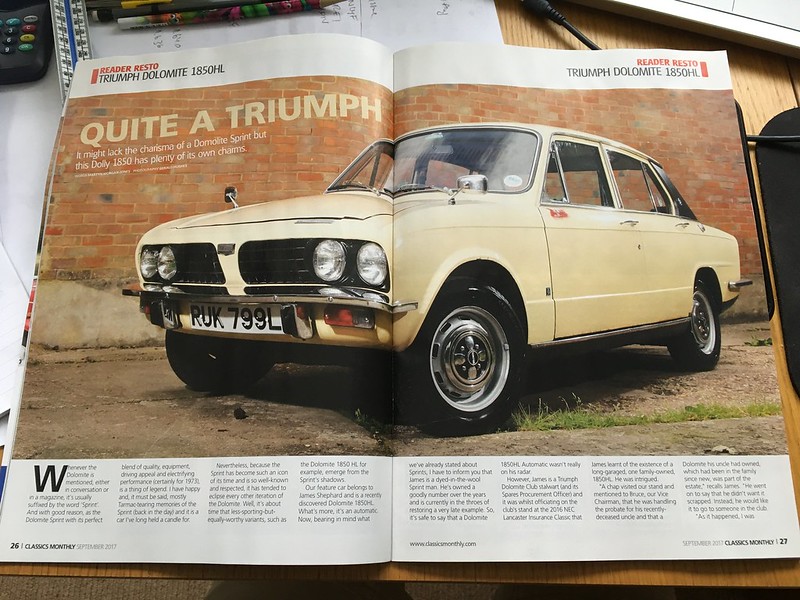
So I encourage you to get yourself down to your local newsagents and get a copy!!
So I encourage you to get yourself down to your local newsagents and get a copy!!

Re: RUK - Project Recommission 1972 'Dolomite' Auto
James, I notice that you have used the brake master cylinder bracket as an earthing point,
but I cannot see for zooming, if you have a nut first to brace the bracket to the turret
and then the ring connectors, or have you got the ring connectors first and then the nut.
As Steve (Carledo) pointed out to me, and as I saw when he pressed the brake pedal,
if not secured the whole bulkhead bulges into the engine bay at the M/S area.
NRW 581W Sprint
On the motorway no one can hear me sing!
Construed as a public service, self preservation in reality.
On the motorway no one can hear me sing!
Construed as a public service, self preservation in reality.
Re: RUK - Project Recommission 1972 'Dolomite' Auto
Yes, it's not clamped up at the moment, I am planning on putting a stud on there (I wanted to put a nut through from behind but cant get my hand up behind the suspension!) then a nut to clamp the bracket to the turret then a nyloc to clamp all of the earths on there.James, I notice that you have used the brake master cylinder bracket as an earthing point,
but I cannot see for zooming, if you have a nut first to brace the bracket to the turret
and then the ring connectors, or have you got the ring connectors first and then the nut.
Re: RUK - Project Recommission 1972 'Dolomite' Auto
I was going to suggest you weld a triangular fillet into the corner of your mounting plate, just to make it a bit more rigid, but you probably wouldn't welcome the idea now that you've painted it! 
Also, you could use or adapt the mountings of the mounting plate for your earths to keep the wires shorter and tidier (or even hide an earth point behind the mounting plate, although that would mean you'd have to remove the plate if you ever need to access the earths in future).
Also, you could use or adapt the mountings of the mounting plate for your earths to keep the wires shorter and tidier (or even hide an earth point behind the mounting plate, although that would mean you'd have to remove the plate if you ever need to access the earths in future).