Sprint Restoration in South Australia (pic heavy)

Restoring your car? Tell us about it here!
Message
Author
straylight

#31 Post by straylight »

hmmm, begs the question ! why ?
There is a channel in the head and a channel in the block, why wouldn't they be open to each other ?

not doubting you, but it was a good theory as to why the engine was damaged..... :D
User avatar
Mad Mart
TDC Member
Posts: 8529
Joined: Tue Oct 03, 2006 5:48 pm
Location: Winscombe, North Somerset, England
Contact:

#32 Post by Mad Mart »

Adam's correct, there is no hole in the gasket there.

Image
Sprintless for the first time in 35+ years. :boggle2: ... Still Sprintless.

Engines, Gearboxes, Overdrives etc. rebuilt. PM me.


2012 Porsche Boxster 981 S


Image
SPRINTPARTS

Head gasket

#33 Post by SPRINTPARTS »

As Adam has said, that is how they are, as not all the holes in the head and block are used for water flow, ie the head gasket blanks off or reduces the size of some of the holes.

My guess is a blown head gasket from the cylinder head not being retorqued after rebuild. Sometimes you might need to retorque the head 3-4 times after running the motor to ensure that it is seated.

Mark
straylight

#34 Post by straylight »

thanks guys.....it was a good theory while it lasted. To my shame I confess that the cylinder head wasn't retightened....so your idea is probably spot on Mark. No surprises there, you are running at 100% so far ! (and thanks)

I take back the harsh things I said about the sydney mechanic :oops:

any ideas on the flywheel bolts ? right or left hand thread ?
SPRINTPARTS

Flywheel Bolts

#35 Post by SPRINTPARTS »

Flywheel bolts are RH thread. A rattle gun is ideal for undoing, otherwise you need to lock the motor from turning and use a large knuckle bar or similar. From memory they are torqued to 45ftlb but more than likely they will have Loctite on the threads.

Mark
User avatar
Toledo Man
Guest contributor
Guest contributor
Posts: 7542
Joined: Tue Oct 03, 2006 5:52 pm
Location: Halifax, West Yorkshire
Contact:

#36 Post by Toledo Man »

When Jon (Rumpith) and I helped put Martin's (Raider) Sprint engine in his TR7 we swapped the flywheel over and I'm sure that they're RH threaded and that Martin used some sort of locking compound on the bolts. (I would)

I'm sure Martin will correct me if I'm wrong.
Toledo Man

West Yorkshire Area Organiser
Meetings take place on the first Wednesday of the month at 8.00pm at The Railway, 1 Birstall Lane, Drighlington, Bradford, BD11 1JJ

2003 Volvo XC90 D5 SE (PX53 OVZ - The daily driver)
2009 Mercedes-Benz W204 C200 CDI Sport (BJ58 NCV - The 2nd car)
1991 Toyota Celica GT (J481 ONB - a project car)
Former stable of SAY 414M (1974 Toledo), GRH 244D (1966 1300fwd), CDB 324L (1973 1500fwd), GGN 573J (1971 1500fwd), DCP 625S (1977 Dolomite 1300) & LCG 367N (1975 Dolomite Sprint), NYE 751L (1972 Dolomite 1850 auto) plus 5 Acclaims and that's just the Triumphs!

Check my blog at http://triumphtoledo.blogspot.com
My YouTube Channel with a bit of Dolomite content.

"There is only one way to avoid criticsm: Do nothing, say nothing and BE nothing." Aristotle
Sprint36

#37 Post by Sprint36 »

To undo tight flywheel bolts, bolt a length of angle to the flywheel using two of the clutch bolts (not across the middle!). About 4 feet long is good. That should stop it turning. Then find a nice long breaker bar.

David
User avatar
Mad Mart
TDC Member
Posts: 8529
Joined: Tue Oct 03, 2006 5:48 pm
Location: Winscombe, North Somerset, England
Contact:

#38 Post by Mad Mart »

The only LH threaded bolt I've come across on a Sprint is the one on the water pump. :)
Sprintless for the first time in 35+ years. :boggle2: ... Still Sprintless.

Engines, Gearboxes, Overdrives etc. rebuilt. PM me.


2012 Porsche Boxster 981 S


Image
straylight

#39 Post by straylight »

you guys are good....thanks

a rh threading we go....

just being a bit tentative when I come to a bolt or nut that doesn't want to shift....

slight delay of around a week while I sort out a few essential home tasks....like talk to the wife and smile at the kids (only joking, the youngsters are enthralled in watching the engine come apart)...

stu
straylight

#40 Post by straylight »

almost a week...more progress,

Image

sensational solution to stopping the engine rotating, many thanks sprint36, flywheel bolts gave up the uneven fight.

Image
inside, the steering wheel is now completely out. dash has had a very unprofessional recover (by me) so needs redoing. The heater/blower controls have also seized. I have the glove box lid.

Image
having seen the rust around Mad Mart's 73 Mimosa Brake servo in the forums and the amount of surface rust on mine....

Image
....I took off the brake servo...it reminded me of why I hate working inside the passenger compartment, quite hard to get to the servo retaining nuts...but minor victory, not much evidence of rust in that particular spot...

Image
I got stuck with the engine again, so I spent the rest of the afternoon taking off the bumper, scoop and odds and ends. A bit mre hacksaw work to remove some rusted bolts....

The next one liner from the worshop manual, deceptively straightforward "remove the crankshaft pulley"....didn't have a big enough spanner or socket. Bolted back the angle iron and flywheel and had a futile play with a big adjustable....nothing doing, not prepared to burr the bolt head....so next stop at REPCO....buy a big socket !

stu
Last edited by straylight on Sat Jan 19, 2008 2:04 pm, edited 1 time in total.
Jon Tilson
Guest contributor
Guest contributor
Posts: 11179
Joined: Tue Oct 03, 2006 9:45 pm
Location: Middlesex

Heater cables...

#41 Post by Jon Tilson »

The heater cables will be the problem. If you take them off carefulyl and dribble oil down them from either end thay can usuallly be saved.
Dont force the levers cos thay can break quite easilly and I doubt you will find it easy to get replacements in Oz! Also the vent flap in the tube between heater motor and inlet can seize as well. Responds well to lube...
as does the quadrant thing that opens it. Been there and done all this to mine last w/e but I had to have the whole dash out to sort a broken lever!


Jonners
Note from Admin: sadly Jon passed away in February 2018 but his humour and wealth of knowledge will be fondly remembered by all. RIP Jonners.
straylight

#42 Post by straylight »

thanks John....the dash is coming out anyway, so I can reskin it (or maybe replace it with the spare I've got in the russet dolomite)...then I can get stuck into all the broken bits in the heater/blower control.

I remember replacing the heater hoses years and years ago....I think I just used appropriate diameter rubber hose.

job tomorrow will be to take off the front subframe and then reattach it, so it is ready for the spray painter. Spare time will be spent stripping the interior.
KWM338R

#43 Post by KWM338R »

while you're in the engine bay Stu inspect the bulkhead for the dreaded crack where the go faster pedal mounts.

Image

cheers
Mark
straylight

#44 Post by straylight »

thanks Mark (KWM)...I'll check it out, looks nasty...where abouts in the colonies are you, KWM sounds like a NSW plate, my original was JQB269

got the first bit of ethusiasm-denting news last night...the local spray/crash repairer (George) came around last night to have a look at the car. He suggested I rub it back to metal using a variety of sandblasting and coarse grit. There is a fair bit of rust, particularly in the roof which he can fix but is worried about. George wants the car after it has been stripped and blasted, saving me money and reducing the tedious work he has to do, he will then cut out/refabricate the body where needed and patch it up before painting. His estimate is around $6k (pounds, oh, 2.4k i'd think). This is a lot of money ! He has just done an australian icon car (torana XU1) for a friend and yup, that is the kind of money for a top notch resto.

The good news is I have the spare russet dolomite for replacement doors and perhaps even the roof. That car is past it engine wise and has structural rust in some alarming places, but other parts are okay.

Alternatives include just patching the car up around the worst parts, but that is still a hefty sum to outlay.

I found a place nearby that uses a Soda-blast process, I have a hunch that once I strip it back to the body, they can have a go at doing the blasting. Not sure exactly how it works yet. Anyone heard of it ? George sounded quite pleased, he uses big soda baths for stripping doors back.

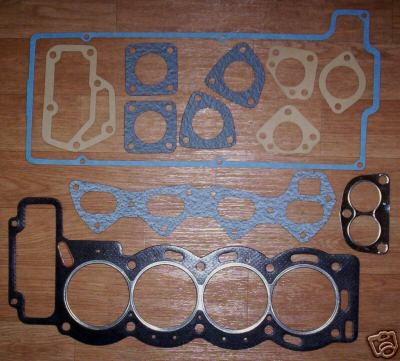
The engine and head get sent away on monday to Mt Gambier for reboring and skimming. Sprintparts offered me a new head for a good price, be a rare beast I'd have thought, but I'll see how I go redoing the old one.

I removed the facia, instrument panel has delaminated, but I think I can fix that with some resorcinol wood glue and a bit of work. Dash needs redoing. Inside I'm confident that the car will come up nicely.

So, a long haul to go, but impressed with the work so far. The bad news will be the finance side. I was getting cocky that I'd done so much and spent so little, but paying for the respray will need a loan or a lengthy payment plan with George. I might start now !

On other news, found the u-tube vids of dolly's....awesome ! Motivation.... :D It cemented the reasons why I'm doing this !

btw, thanks for the advice on the phone mark (sprintparts), sorry I had to cut it short, I stupidly called 5 minutes before I was due to be in front of students..... :oops:

more pics shortly

stu
newguy

#45 Post by newguy »

I did all of the prep work for my car, bare metal, small amount of bog and primer and undercoat and the respray cost me $370 NZ 6K sounds like alot of money to me.
This was no dodge respray either, just had to have the car ready for paint.
They did 2 coats of sealer, and then a bas coat and then 5 coats of the 2 pot creme that i went with.

Also i am loving the project, now you can see why it stayed there for 8 years.
Post Reply