Operation Orange - 1980 Sprint restoration

Restoring your car? Tell us about it here!
Message
Author
User avatar
SprintMWU773V
TDC Staffs Area Organiser
Posts: 5429
Joined: Wed Oct 18, 2006 2:08 pm
Location: The Old Asylum

Good things

#151 Post by SprintMWU773V »

Good things arrived on my desk this morning.

Image
Even the box is nice!

Image
All 4 pistons counted, rings, pins and clips all supplied along with some technical details for the engine people.

I ordered these in the US just over 2 weeks ago and they arrived today. All this for 'significantly' less than I can buy County or JP cast pistons for from UK suppliers. Given the scarcity of oversized Sprint pistons and the prices people want for even a so called budget brand, a lot of people are choosing to go forged. Certainly the engine people I'm using are being forced to go forged on a lot of Mercedes engines as cast pistons are just not available. Whilst for a road car it might seem a bit extreme, simple economics and lack of availability mean more Dolomite owners will probably have to go this way.

The factory have all the specs for making just about any piston you can think of to any size you want. We worked closely with my engine people to ensure what we've had made is just right for my engine. Unfortunately whilst I did visit the factory I could not witness the forging of my own pistons of indeed take any pictures of the process. All I will say though is that I was extremely impressed and they were extremely helpful.

If they're good enough for NASCAR then they'll be good enough for me!
Last edited by SprintMWU773V on Wed Jul 26, 2017 2:16 pm, edited 1 time in total.
Mark

1961 Chevrolet Corvair Greenbrier Sportswagon
1980 Dolomite Sprint project using brand new shell
2009 Mazda MX5 2.0 Sport
2018 Infiniti Q30
Edin Dundee

Re: Operation Orange - 1980 Sprint restoration

#152 Post by Edin Dundee »

Oooh that's shiny. I want a Sprint now just buy those pistons! :D
User avatar
Flyfisherman
Guest contributor
Guest contributor
Posts: 980
Joined: Sat Sep 04, 2010 10:42 am

Re: Operation Orange - 1980 Sprint restoration

#153 Post by Flyfisherman »

SprintMWU773V wrote: I'd encourage everyone to support their local specialist places as most of them them are up for some small cash jobs
Well I wouldn't especially this place.

1st visit no problems at all.
2nd visit problems - we cannot blast these parts our shot blaster not good enough - so these parts went elsewhere.
3rd visit today problems again - required me to get them shot blasted and then they would powder coat and zinc plate parts.

So sod them now - will never go there again.

Regards
paul
Image
User avatar
SprintMWU773V
TDC Staffs Area Organiser
Posts: 5429
Joined: Wed Oct 18, 2006 2:08 pm
Location: The Old Asylum

Re: Operation Orange - 1980 Sprint restoration

#154 Post by SprintMWU773V »

Sorry you had a bad experience Paul. Was this Diamond Metal Finishing? I've sent them 4 jobs now, the last one was the worst for them in terms of blasting but despite some complaints from them they did the job and it was not overly expensive. I rate them as significantly less friendly than Potteries Powder Coating who take great interest in what I bring in but unfortunately they don't do plating.

As a slight aside I must provide an update on my project when I get a chance!
Mark

1961 Chevrolet Corvair Greenbrier Sportswagon
1980 Dolomite Sprint project using brand new shell
2009 Mazda MX5 2.0 Sport
2018 Infiniti Q30
User avatar
Flyfisherman
Guest contributor
Guest contributor
Posts: 980
Joined: Sat Sep 04, 2010 10:42 am

Re: Operation Orange - 1980 Sprint restoration

#155 Post by Flyfisherman »

Mark

No worries Mark - every cloud has a silver lining, but my cloud was black this morning.

Yes it was - its was Dave I saw and spoke with this morning - all the excuses under the sun not to do the job.

My plating work is now at Niphos, Hope Street, Crewe.

I had considered Potteries Powder Coating - were you happy with them.

The other firm a used for the second batch of items was Wrexham Metal Finishing only powder coating, but they did what I wanted them to do, blast cleaned items and primer powder coated them, this included a zinc powder to prevent corrosion. Then I can top coat with my oil based paint when I am ready to do so. The only problem is its an 1:30 mins round trip and its poor road to Wrexham A534 except when your on the Farndon by pass.

Regards
paul
Image
User avatar
SprintMWU773V
TDC Staffs Area Organiser
Posts: 5429
Joined: Wed Oct 18, 2006 2:08 pm
Location: The Old Asylum

Re: Operation Orange - 1980 Sprint restoration

#156 Post by SprintMWU773V »

Paul, I would definately recommend PPC. The chap there actually lives in my little village and he's very accomodating and nice to deal with. The finish of their work is also much better than other local firms. They do a lot of work for JCB et al so have top quality equipment and are more than happy to process small jobs on the same run. I drop off and normally get the items back in a week or so. They do the blasting there as well so it's all in one place which is always easier.
Mark

1961 Chevrolet Corvair Greenbrier Sportswagon
1980 Dolomite Sprint project using brand new shell
2009 Mazda MX5 2.0 Sport
2018 Infiniti Q30
User avatar
SprintMWU773V
TDC Staffs Area Organiser
Posts: 5429
Joined: Wed Oct 18, 2006 2:08 pm
Location: The Old Asylum

Re: Operation Orange - 1980 Sprint restoration

#157 Post by SprintMWU773V »

Not quite sure what’s happened to the last few months but I have made a little more progress. I've been suffering with a nasty case of tennis elbow since July which has made some jobs rather difficult and painful but I think the worst is over now.

The bottom part of the engine has now come back from the engine machine shop. The crank was found to be in good condition. Mains have been ground to first undersize and big ends were polished and remain standard size. The block thoroughly cleaned and was bored to first oversize. I also go the shop to fit the pistons to the rods and gap the piston rings. Whilst I would have liked to have done this myself they have all the relevant tools to do so it seemed a bit pointless to do it myself and spend out on tools I may not need again. The original rods were inspected and found to be in good condition so they were re-used. The core plugs were not changed, they appeared in good condition and we agreed it seemed a little pointless to change them when there was nothing wrong with them. They also offered to paint the block for me. I quite fancied doing it myself but they included it in the price and it does look nice.

I also decided to have the moving parts balanced. This is not done in house at Crewe Engines but they use a local firm in Crewe to do it. The crankshaft, pistons, conrods, flywheel, crankshaft pulley and clutch cover were all sent off. I had a call a few days later to tell me that the NOS crank pulley I supplied (original one broke getting it off) was miles off balance and was fit only for scrap. I sourced a good used one for comparison and they didn’t complain about that one so assume it must have been better. I also had a problem with the clutch cover which was not quite the right one and wouldn’t locate on the dowels and bolts. Fortunately I was able to swap it for a correct one with the supplier even if it did mean lugging it to the NEC and back. The pistons, being new forged ones were very closely matched as were the rods. The crank itself and the pulley needed a little adjustment. The balancers marked everything up to make reassembly easier and I picked up as one big and rather heavy unit. Of course it’ll all need to come apart to fit it.

Image

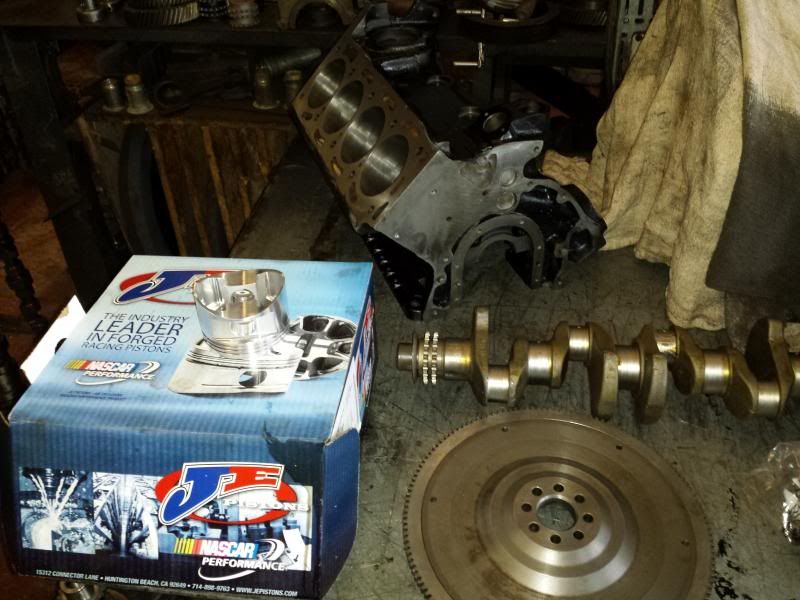
All the components arrived back just before Christmas. My plan had been to put it back together over the period but I never quite got round to it as we’ve had a lot of family things going on. I have at least assembled all the necessary parts to commence rebuild including new Vandervell Main and Big End bearings, a quality timing chain, tensioner and oil pump. Hopefully I’ll get onto the assembly before too long.

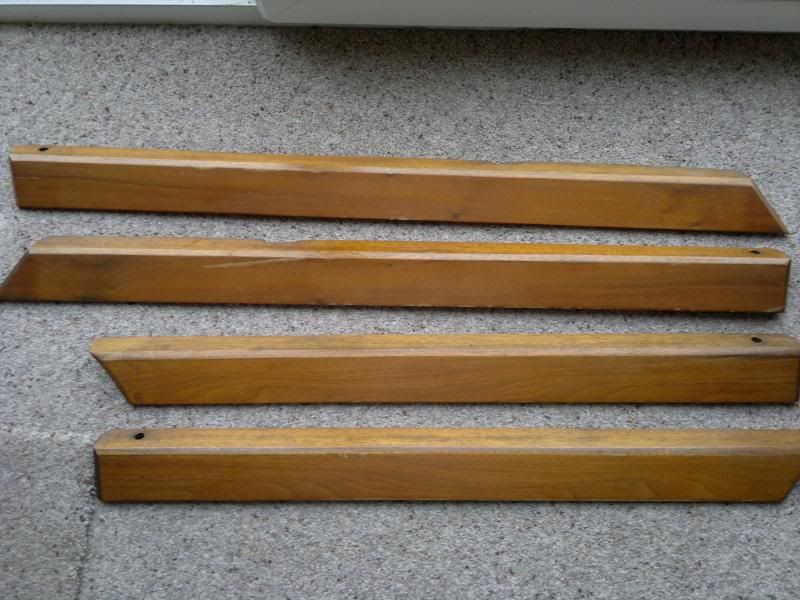
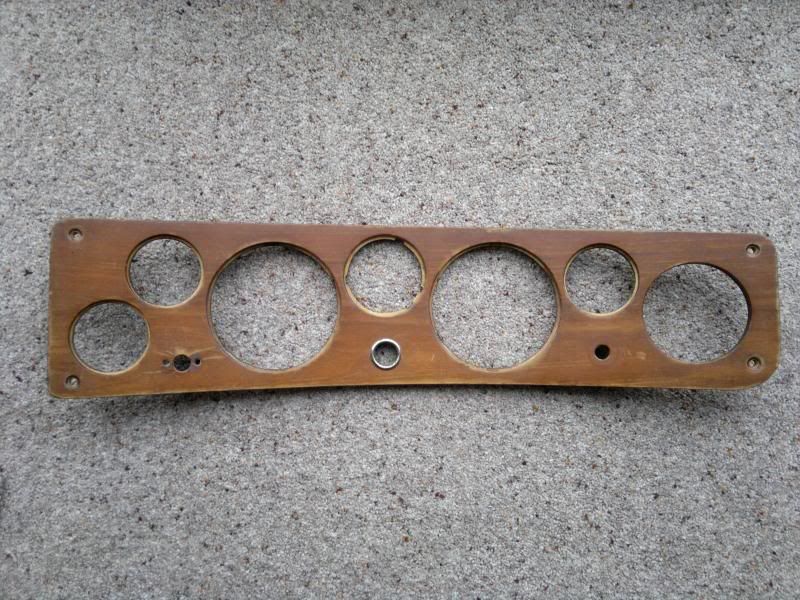
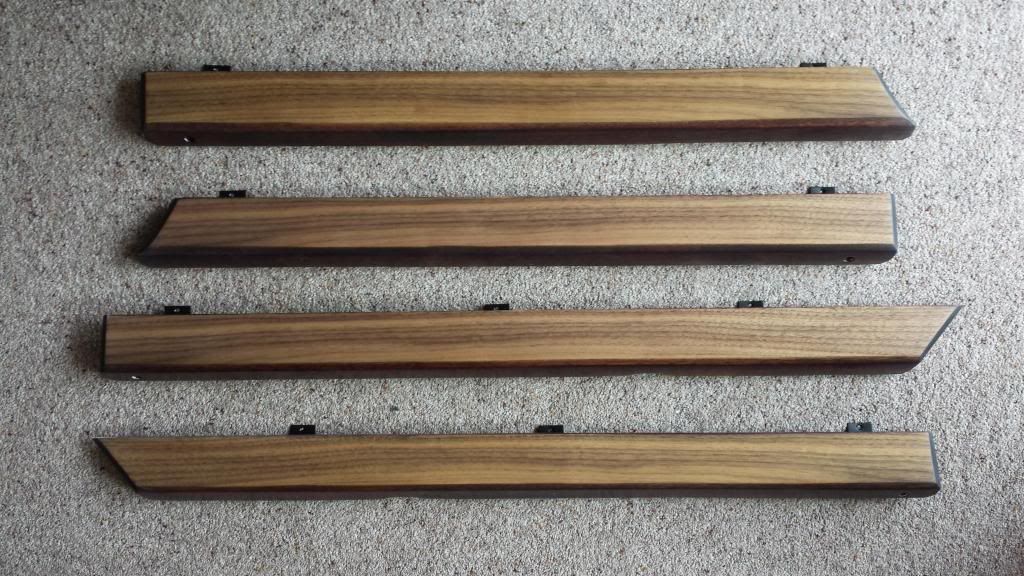
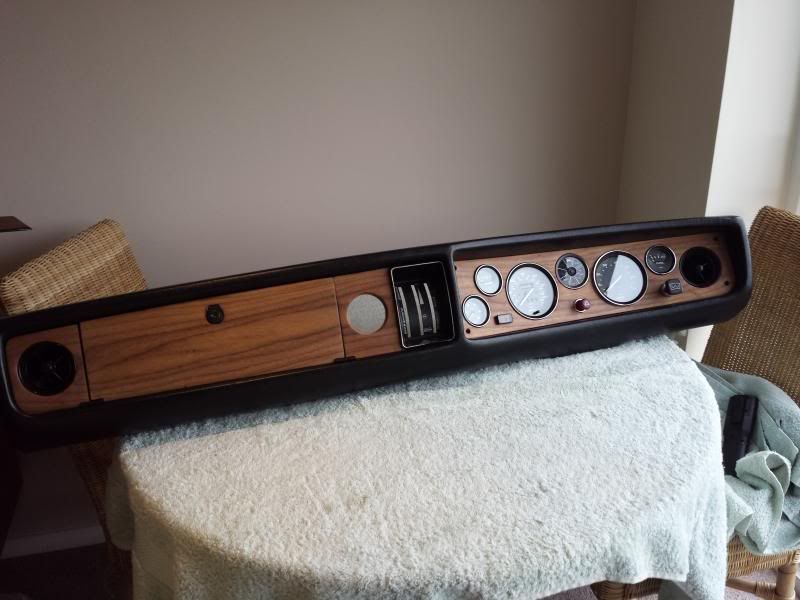
Moving on, I decided to start building up my dashboard. Over the summer I’d had a good set of wood trims restored at Chapman and Cliff who are not far from me. I mentioned in my June update that I hadn’t got a picture of the before and after on these, well here you go. The original colour is very Orange.

Image

Image

What I have is less 1970’s furniture and more wood coloured, I like it. It’s American Walnut apparently. It looks a lot darker in the pictures.

Image

My plan was to build up the dash using a spare carcass but on closer inspection I realised my original one was in better condition. I stripped all the parts and then commenced building everything back up. It was actually quite fiddly, you realise quite quickly that the fit isn’t Rolls Royce standard and that you won’t get it perfect but it is rewarding nonetheless.

I wanted to keep as many of my original dials and clocks as possible. All of them seemed in reasonable working order, some were better than other’s cosmetically. I had a few though that needed the bezels repainting and new glass. I also remember my speedo was not that smooth despite a good cable so sent that one off to be rebuilt and recalibrated. I asked them to keep the original reading though rather than reset to 00000 again.

Image

Image

Image

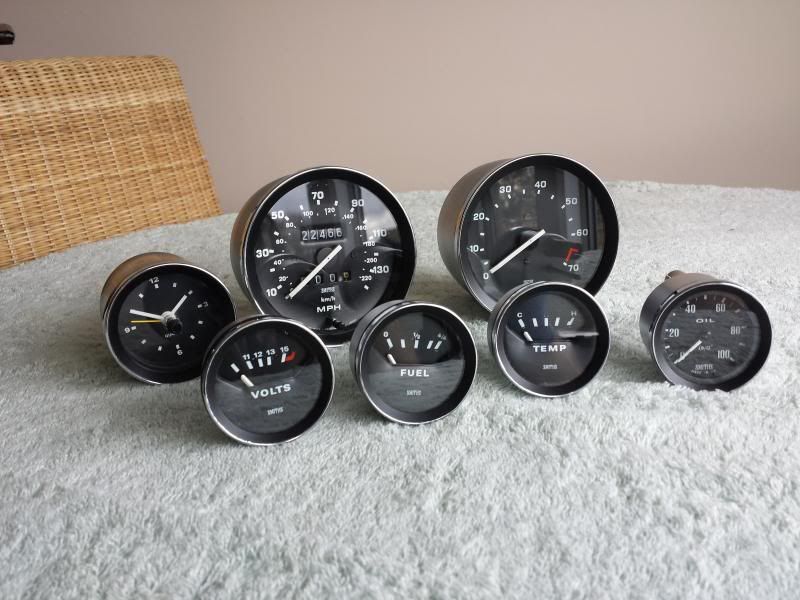
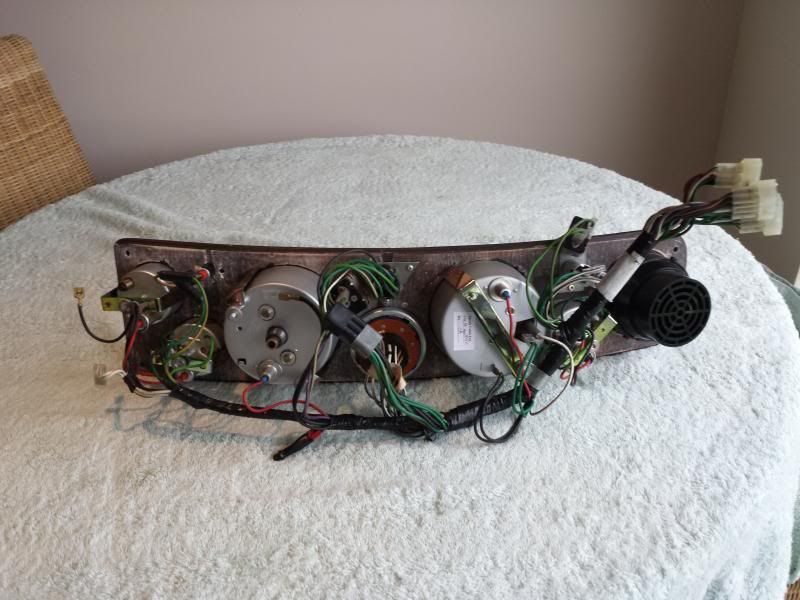
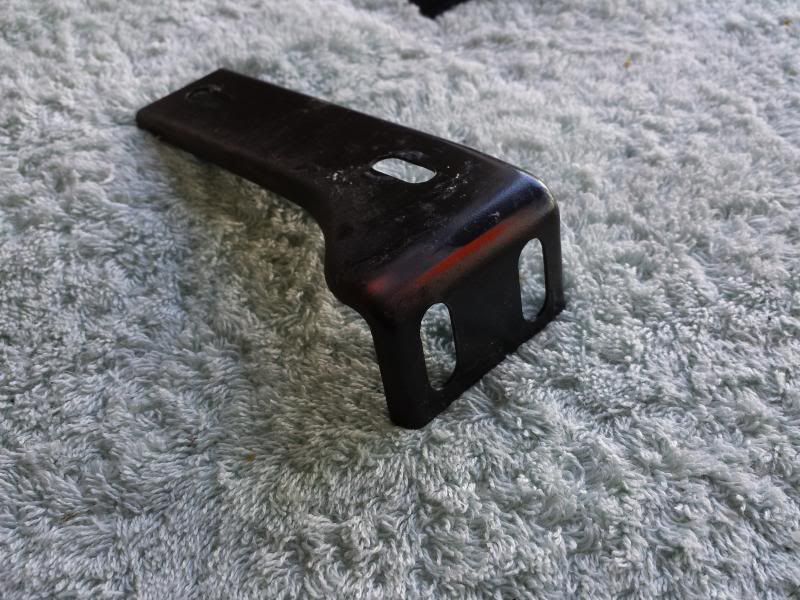
All the dials now look good as new. I had to get some electro-plating done too so threw the dial mounts into the bag. They might not be seen but it’s satisfying to put shiny things together! Likewise the dash mount brackets, I had some powder coating to do. The previous brackets had some orange overspray on them, rather than rub them down and paint them I put them into the box of parts and a week later they came back nice and black again.

Image
With the instruments assembled I’ve now completed the dashboard and it’s stored safely for when I need it.

Image

The other major job I have been working on are the brake and fuel lines. I removed the old ones from the donor car and kept them as a reference before purchasing a 5m roll of Kunifer 5/16” pipe and a set of Kunifer brake pipes c/w flared ends and unions from Stevsons. They are supplied pre-cut and labelled up.

Image

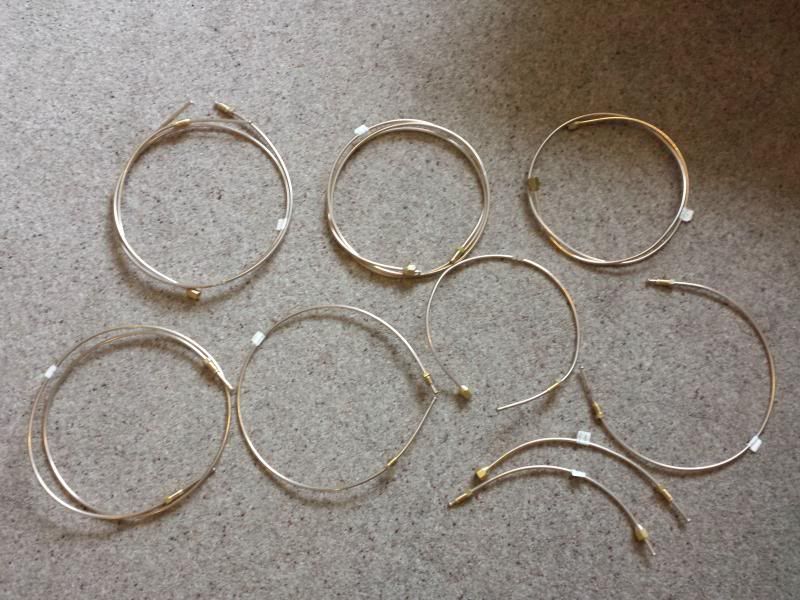
The fuel pipes were fairly straightforward to do. Measure the old ones (at least twice), cut length of pipe and bend to approximately the same shape as the old knackered one. I used a pipe bender for the job which made light work of the bends. I found visualising the bends very difficult though and it took me the best part of a weekend to cut and bend the 3 sections. Fitting and fettling them took quite a long time too but is a nice job to tick off.

The brake pipes have caused me no end of trouble. Unfortunately there have been 4 which are wrong for my car. This is not Stevsons fault, their information is not quite right. The two valve to M/Cylinder ones needed to be replaced due to later metric fittings and the two that go front to back were about 30cm too long. The kit bag says 1300/1500/1850 RHD tandem so I wonder whether the Sprint is different as it has the rear valve thing? Either way I ordered replacements and they have now amended their records. In hindsight I would have been better of measuring the existing pipes and just having them made but never mind! Bending them to shape is quite easy using a mini-pipe bender. Kunifer is a lot more difficult to bend than copper but copper seems to get a bad press and is not that much cheaper than Kunifer. I’ll bend up the rear pipes when I have reconditioned the axle.

In other developments I decided my steering column was in the way in the garage so I refitted it. It’s now in the way in the car! I've used a polybush in the support plate for a long life. The support bracket like my pedals has been shotblasted and powder coated.

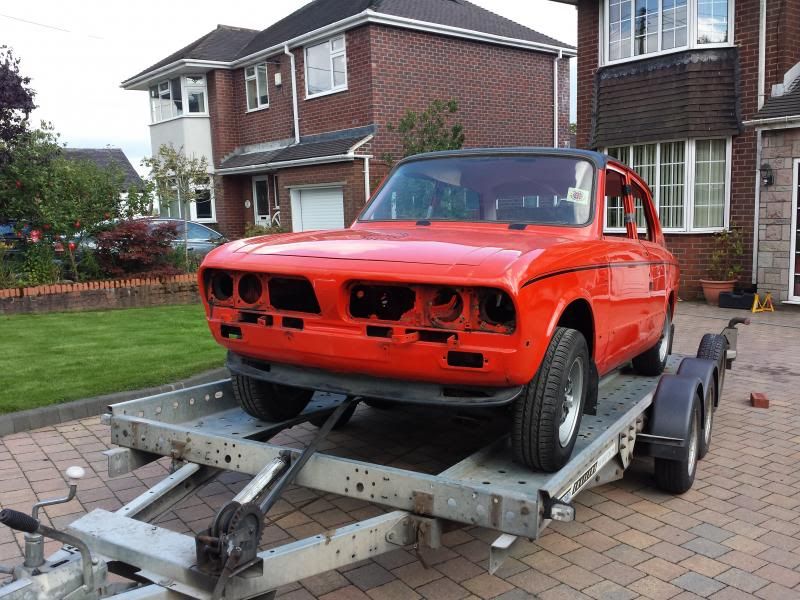
In amongst all of this I have also disposed of my old shell which I offered to a fellow club member who’s been tremendously helpful and was able to come and take it away. I spent some time loosening all the undercarriage bolts and the plan was to drop these and then heave the shell onto the trailer. However for those of you who have moved a bare shell it’s actually quite heavy so we opted to keep the wheels on for transport, the axle and sub frame were returned a few weeks later. Most of the donor was very tatty underneath but it did contain some useful parts which will help several others to live on.

Image

Everything takes a lot longer than you imagine and some things are expensive. I’ve just had a rather large tax bill which might slow some items down but hopefully not too much. I’ve just ordered a new radiator which will be re-made in aluminium and painted black to look original. It should fit into the original mounting frame. I’m also looking at getting the gearbox overhauled plus I need to rebuild the cylinder head.
Last edited by SprintMWU773V on Wed Jul 26, 2017 2:16 pm, edited 1 time in total.
Mark

1961 Chevrolet Corvair Greenbrier Sportswagon
1980 Dolomite Sprint project using brand new shell
2009 Mazda MX5 2.0 Sport
2018 Infiniti Q30
User avatar
soe8m
Guest contributor
Guest contributor
Posts: 3179
Joined: Thu Oct 06, 2011 1:13 am
Location: The continent

Re: Operation Orange - 1980 Sprint restoration

#158 Post by soe8m »

The colour of your wood is now as original. The oranging is due to the daylight. I have some NOS woodies and these are the same as your refurbished ones. My "new" 1300 what was stored for almost 3/4 of it's life has also the same woodlook and did not orangeing.

Jeroen
Classic Kabelboom Company. For all your wiring needs. http://www.classickabelboomcompany.com
User avatar
soe8m
Guest contributor
Guest contributor
Posts: 3179
Joined: Thu Oct 06, 2011 1:13 am
Location: The continent

Re: Operation Orange - 1980 Sprint restoration

#159 Post by soe8m »

Classic Kabelboom Company. For all your wiring needs. http://www.classickabelboomcompany.com
User avatar
SprintMWU773V
TDC Staffs Area Organiser
Posts: 5429
Joined: Wed Oct 18, 2006 2:08 pm
Location: The Old Asylum

Re: Operation Orange - 1980 Sprint restoration

#160 Post by SprintMWU773V »

I assumed it was as original they kind of implied that it was. I like it though either way.
Mark

1961 Chevrolet Corvair Greenbrier Sportswagon
1980 Dolomite Sprint project using brand new shell
2009 Mazda MX5 2.0 Sport
2018 Infiniti Q30
Robert 352
Guest contributor
Guest contributor
Posts: 389
Joined: Tue Sep 25, 2012 2:08 am
Location: Christchurch, New Zealand

Re: Operation Orange - 1980 Sprint restoration

#161 Post by Robert 352 »

Mark

Seven gauges but only six spots for them on the dash! Do let me into your secret - where is the 7th one going? I am delighted to see that my oil gauge matches yours. Nice looking wordwork, smart looking gauges. I had my speedo reset to zero arguing to myself that I was recreating a new car. Its okay to do that here for the mileage readings are recorded every six months we have a Warrant of Fitness check done on the car and the readings are logged onto a computer, which can be accessed by others if they need to do so. So my original readings are recorded somewhere but I doubt that anybody will be interested for I intend to wear the car out before I die.

And I read that you have invoked Stu "straylight's" rule about everything takes twice as long as expected - in his case at least 2 hours for even the most simple of jobs. But perhaps your rule might relate to everything being twice as expensive as it should be (which causes me to blush a little personally).

May 2014 see this project complete.

Robert
User avatar
SprintMWU773V
TDC Staffs Area Organiser
Posts: 5429
Joined: Wed Oct 18, 2006 2:08 pm
Location: The Old Asylum

Re: Operation Orange - 1980 Sprint restoration

#162 Post by SprintMWU773V »

Yes the gauges! I refurbed them all but plan to drop the volt meter and go with the oil pressure gauge. I should have mentioned that in the update. The car came with the oil pressure gauge and actually it's much more useful than a volt meter.

The start if the 2015 show season in May/June has always been my goal, mainly due to time but we'll have to wait and see how I get on over the next 6 months or so. Certainly if I more spare time I'd get it done this year.
Mark

1961 Chevrolet Corvair Greenbrier Sportswagon
1980 Dolomite Sprint project using brand new shell
2009 Mazda MX5 2.0 Sport
2018 Infiniti Q30
killysprint
Guest contributor
Guest contributor
Posts: 247
Joined: Sat Apr 26, 2008 2:52 pm
Location: Newcastle upon Tyne

Re: Operation Orange - 1980 Sprint restoration

#163 Post by killysprint »

Awesome - words fail me at the attention to detail.......

The dash looks fantastic, well worth the effort!!

I totally agree about the choice of replacing the voltmeter with an oil pressure gauge - I did it and used a gauge from a late mgb. It is the same style and "font" as the originals and doesn't look out of place.

Look forward to more updates
1976 Taihiti Sprint
2024 volvo XC90 T8 Hybrid
2011 Landrover Defender pickup - twisted :D
2023 Porsche 911 Carrera T Manual!!
2021 Toyota Yaris GR-Four
2015 Audi RS4 Avant (V8!!)

Gone but not forgotten 2008 BMW M5 (E61) Touring (George, as in Best, as it likes a Drink) to be replaced soon...... Epic epic car
User avatar
Toledo Man
Guest contributor
Guest contributor
Posts: 7542
Joined: Tue Oct 03, 2006 5:52 pm
Location: Halifax, West Yorkshire
Contact:

Re: Operation Orange - 1980 Sprint restoration

#164 Post by Toledo Man »

Make sure you don't rest anything on the dashboard because the resulting dent will be impossible to get out. This happened to somebody else on here (I think it was MikeyB). On the subject of your cylinder head, measure your exhaust valve clearances and the shims (you will need a micrometer) and if you're lucky you will be able to get all the clearances to within the specifications (by swapping the shims around) and you will have a quiet engine. I helped somebody do this on a Sprint engine which is how I know.
Toledo Man

West Yorkshire Area Organiser
Meetings take place on the first Wednesday of the month at 8.00pm at The Railway, 1 Birstall Lane, Drighlington, Bradford, BD11 1JJ

2003 Volvo XC90 D5 SE (PX53 OVZ - The daily driver)
2009 Mercedes-Benz W204 C200 CDI Sport (BJ58 NCV - The 2nd car)
1991 Toyota Celica GT (J481 ONB - a project car)
Former stable of SAY 414M (1974 Toledo), GRH 244D (1966 1300fwd), CDB 324L (1973 1500fwd), GGN 573J (1971 1500fwd), DCP 625S (1977 Dolomite 1300) & LCG 367N (1975 Dolomite Sprint), NYE 751L (1972 Dolomite 1850 auto) plus 5 Acclaims and that's just the Triumphs!

Check my blog at http://triumphtoledo.blogspot.com
My YouTube Channel with a bit of Dolomite content.

"There is only one way to avoid criticsm: Do nothing, say nothing and BE nothing." Aristotle
Robert 352
Guest contributor
Guest contributor
Posts: 389
Joined: Tue Sep 25, 2012 2:08 am
Location: Christchurch, New Zealand

Re: Operation Orange - 1980 Sprint restoration

#165 Post by Robert 352 »

I opted not to put the oil gauge up in the main cluster because it is attached by a capillary tube. So I mounted mine in a panel (illustrated in the thread TC dash) I am less likely to want to disturb it in that position and I can and have coiled some of the capillary tube up behind it, which is now sitting beside the heater box, to allow it to flex – if it needs to.

When you hold your hands in the ten to two position on the steering wheel they tend to mask those smaller dials. My oil gauge is always in view for it sits at about the 8 o’clock position in relation to the steering wheel.

Robert
Post Reply