Page 11 of 28
Re: Project PFJ (French Blue Sprint)
Posted: Fri Mar 13, 2009 8:29 pm
by Stevie P
Hi Mart
The shell looks superb.
How much work was there to the bulkhead?
Do you plan to paint the engine bay, boot, cabin and under the arches to show standards?
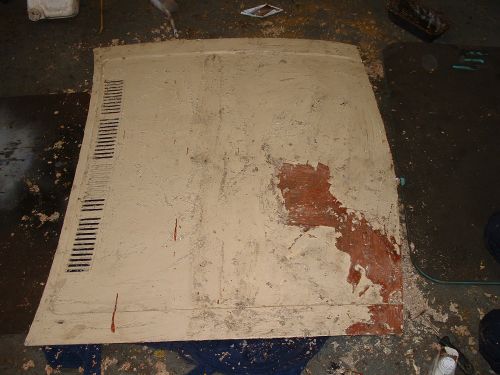
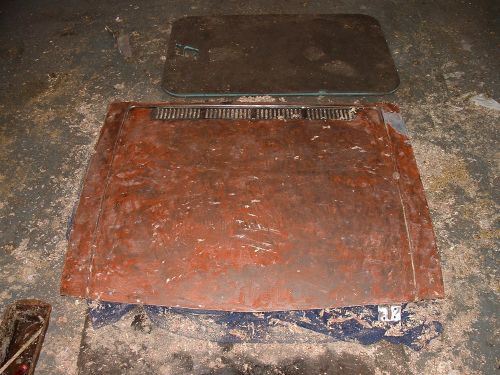
Has the roof gone on as well as you expected?
Steve
Re: Project PFJ (French Blue Sprint)
Posted: Fri Mar 13, 2009 9:15 pm
by MalcGE
Excellent Mart, just the hole to cut in the roof for the folding fabric sunroof

Re: Project PFJ (French Blue Sprint)
Posted: Sat Mar 14, 2009 12:11 am
by Mad Mart
Stevie P wrote:Hi Mart
The shell looks superb.
How much work was there to the bulkhead?
Do you plan to paint the engine bay, boot, cabin and under the arches to show standards?
Has the roof gone on as well as you expected?
Steve
Hi Steve. There was very little to do on the bulkhead. Looking at the fifth pic down, on the left, around the accelerator pedal & clutch pedal areas are the only places that needed any attention.
The engine bay & boot will be painted to a similar finish to the main body. The wheel arches will be painted in stonechip & then sprayed body colour. The cabin/interior will stay as is. Painting will be to a high standard (see JYD, SFB & BFR).

I'm very happy with the roof. It's hard to tell that it's been replaced even before the vinyl roof/trim has been reinstated.
Re: Project PFJ (French Blue Sprint)
Posted: Sat Mar 14, 2009 3:11 am
by straylight
phwoooarrrrr....great job mart, looking the goods.
stu
Re: Project PFJ (French Blue Sprint)
Posted: Sat Mar 14, 2009 9:50 am
by mbellinger
Excellent work with the roof panel Mart - it is really coming together.
Re: Project PFJ (French Blue Sprint)
Posted: Sat Mar 14, 2009 12:51 pm
by trackerjack
I wish I could get a car to look that good in such a short time.
Re: Project PFJ (French Blue Sprint)
Posted: Sat Mar 14, 2009 6:35 pm
by SCMike
Uuummm...uuummm...ahhhhhhhhhhhh. Those gorgeous photos of nekkid restored sheet-metal...visualizing all that clad in French Blue...with an alluring touch of black vinyl draping the top... oooooooooooooooo. Much better than the naughty bits on the internet........
Re: Project PFJ (French Blue Sprint)
Posted: Sat Mar 14, 2009 6:50 pm
by Mad Mart
Re: Project PFJ (French Blue Sprint)
Posted: Sat Mar 14, 2009 9:16 pm
by Autonet7
Looking good Mart.
So what colour is it to be, or is that still under negotiation ?
Re: Project PFJ (French Blue Sprint)
Posted: Sat Mar 14, 2009 11:51 pm
by Mad Mart
Nope!, it's going to be................................................................
Re: Project PFJ (French Blue Sprint)
Posted: Sun Mar 15, 2009 1:33 pm
by Mad Mart
.........................................FRENCH BLUE colour code 126.
Re: Project PFJ (French Blue Sprint)
Posted: Sun Mar 15, 2009 5:42 pm
by SprintMWU773V
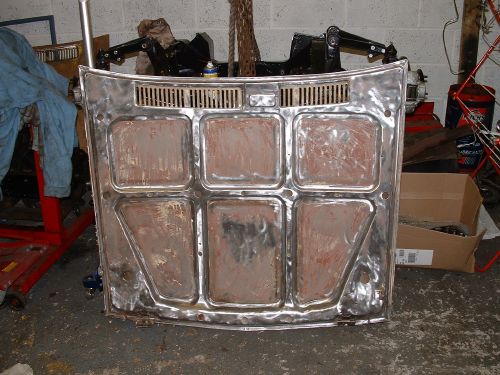
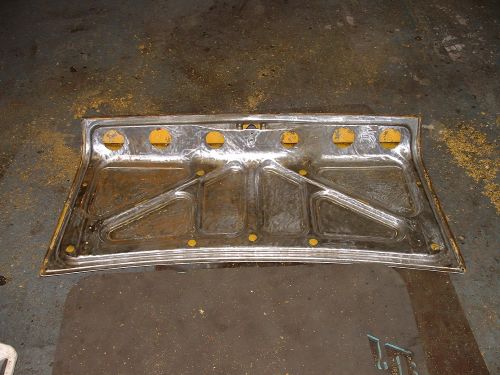
Glad to see that bonnet looking a bit cleaner than when I gave it to you. Hope it'll be OK on the car too.
Re: Project PFJ (French Blue Sprint)
Posted: Sun Mar 15, 2009 6:09 pm
by Autonet7
Mad Mart wrote:.........................................FRENCH BLUE colour code 126.
Cool. Wise choice IMO.
Re: Project PFJ (French Blue Sprint)
Posted: Thu Mar 19, 2009 1:46 pm
by Mad Mart
Just a quick update. All welding has now been finished & the Sprint has been moved into the spray shop. Will get it's first primer coat at the beginning of next week. First I need to get the dims for the holes in the sill that hold the trim on.
Re: Project PFJ (French Blue Sprint)
Posted: Thu Mar 19, 2009 1:49 pm
by xvivalve
If they aren't drilled Mart I'd glue the trim on, the holes are just a rust trap. If you insist on having them drilled, they could go anywhere as the trim has potential to clip over the plastic fixings anywhere along its length, so surely 5 or 6 equally spaced would suffice?