Right so I've finally admitted that I need to replace my whole leg (on the car). I'm confident I can chop away the old one as much as possible and then grind the rest away until there's nothing left. My question is, how do I go about attaching a new one?
Like this..? http://i154.photobucket.com/albums/s273 ... 213747.jpg
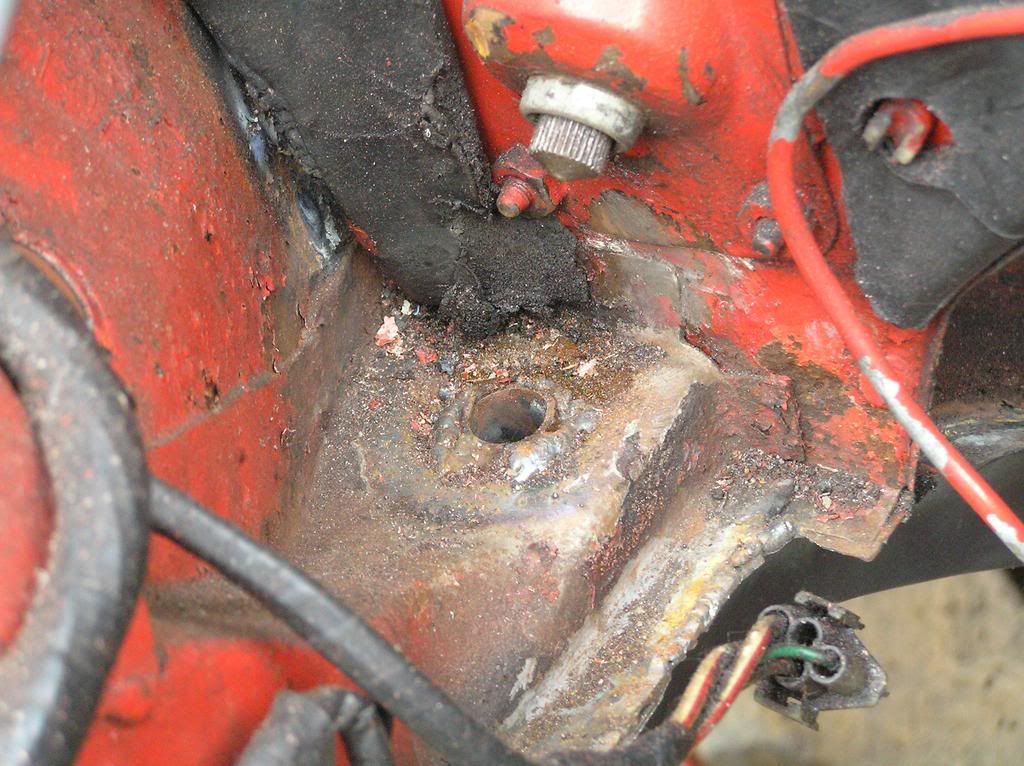
And what do you do about the tube? Drill the old one out and weld in the new one at the top like so..? http://i154.photobucket.com/albums/s273 ... 073754.jpg
That is not the way but i'm very precautious talking about welding at the moment.
You drill holes from about 6mm every 4cm in the lip and those holes you are going to weld again so the underlaying, in this case the floorpanel is attached to the lip. Like spotwelds but then with a mig. There are three "layers" around the tube. It's the top one what you see when you look into the enginebay. Then you have the bootfloor that also goes in the middle and the lower is the leg. So the tube is welded on the three layers. You can only weld it to the top and bottom and if you like to weld it in the middle you have to make a little hole where you can weld through and then close it again. I can make a drawing if you like.
So you're suggesting to drill holes of diameter 6~mm every 4cm all the way round the leg?
Where I've marked it:
Then use spotwelds to secure it in each hole like this?
What would be the best way to attach the tube, drill out the old one and weld the new one in at the top or leave the old tube attached to the body, cut the mount out of the new leg and weld the bottom of the old tube to the new leg?
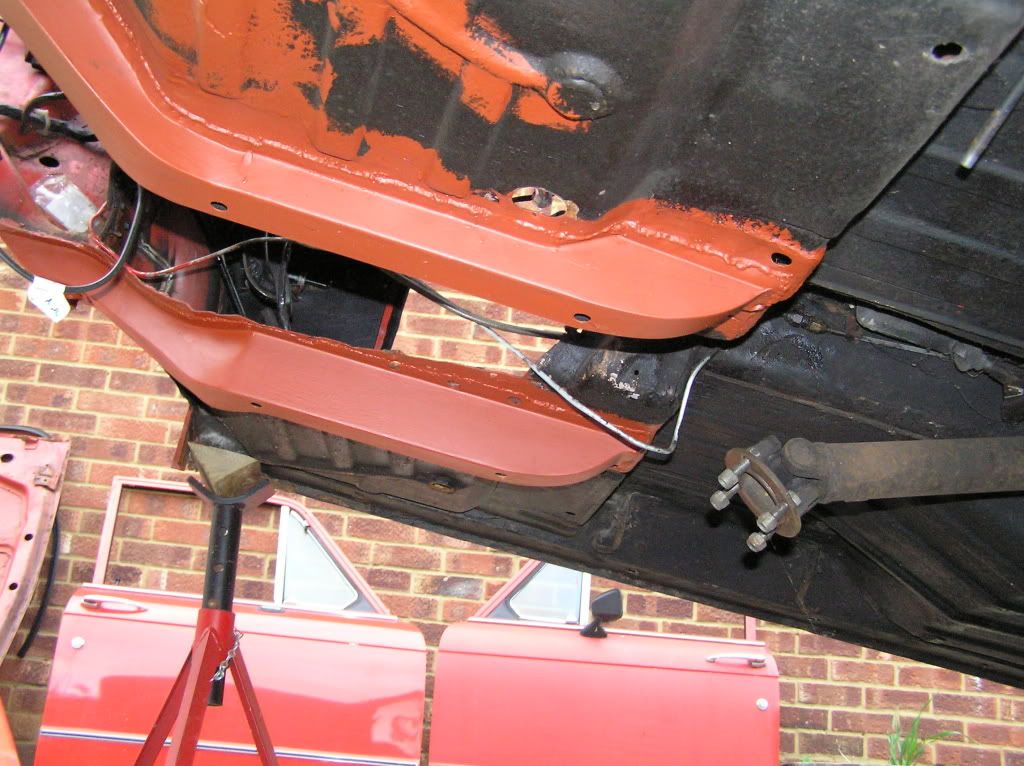
Just had mine replaced with a club chassis leg. The existing tube on my car was fine so it was left in place, the rest of the leg was cut off & ground flat.
The tube & plate on the new leg was removed, The new leg was then drilled every 25mm along the flanges & plug welded into place. A new round flat plated was fabricated & plug welded to the chassis leg, then seam welded to the tube.
Will post pictures soon, I used mobile welding services who advertise in PC, they took photos just waiting for them to email them through, then I will post them.
You can plug weld but your MOT man might prefer it to be seam welded. If you're very good then you could make a decent plug weld look like a spot weld but not many can.
Mark
1961 Chevrolet Corvair Greenbrier Sportswagon
1980 Dolomite Sprint project using brand new shell
2009 Mazda MX5 2.0 Sport
2018 Infiniti Q30
Seems to be lots of discussion about this on welding forums, the general view is if you are welding in a patch it needs to be fully seam welded, if you are replacing a full panel as long as the original is fully removed it can be spot or plug welded.
Plug welding if done properly is stronger than spot welding.
Dolly-Nut wrote:Right so I've finally admitted that I need to replace my whole leg (on the car). I'm confident I can chop away the old one as much as possible and then grind the rest away until there's nothing left. My question is, how do I go about attaching a new one?
Like this..? http://i154.photobucket.com/albums/s273 ... 213747.jpg
And what do you do about the tube? Drill the old one out and weld in the new one at the top like so..? http://i154.photobucket.com/albums/s273 ... 073754.jpg
Any experience welcome
My experience would be to show and try to emulate the finished article, not the 'tacked in' pic.
This way it never does fall off but it's actual strenght is less than with plug welding. The lip has to be attached then the leg acts like a box how it's intended. In your picture the lip can move/torque on the floorpanand is less rigid.
Tony Burd wrote:Seems to be lots of discussion about this on welding forums, the general view is if you are welding in a patch it needs to be fully seam welded, if you are replacing a full panel as long as the original is fully removed it can be spot or plug welded.
Plug welding if done properly is stronger than spot welding.
What Tony said! And Jeroen! If you are replacing an original spot welded panel joint then plug welding is acceptable but patches must be seam welded (though the MOT regs actually say something like 1" in every 4" must be welded "but continuous seamweld is acceptable"! Yes and your tester will love it - NOT!)
In the case of the chassis rails, plugs are much stronger than seam because (as Jeroen said) they allow far less flex in the box section.
Steve
'73 2 door Toledo with Vauxhall Carlton 2.0 8v engine (The Carledo)
'78 Sprint Auto with Vauxhall Omega 2.2 16v engine (The Dolomega)
'72 Triumph 1500FWD in Slate Grey, Now with RWD and Carledo powertrain!
Maverick Triumph, Servicing, Repairs, Electrical, Recomissioning, MOT prep, Trackerjack brake fitting service.
Apprentice served Triumph Specialist for 50 years. PM for more info or quotes.
Tony Burd wrote:The existing tube on my car was fine so it was left in place, the rest of the leg was cut off & ground flat.
The tube & plate on the new leg was removed, The new leg was then drilled every 25mm along the flanges & plug welded into place. A new round flat plated was fabricated & plug welded to the chassis leg, then seam welded to the tube.
Will post pictures soon
Tony
I'm in the middle of doing this now. So far I've drilled 6mm holes every 25mm and now I need to decide what to do with the tube.
Did you cut the original washer/mount off the original tube and then weld a newly fabricated one back on once the new leg was in place?
Pictures would be great if possible.
Yes the existing tube was left in place, the washer was cut off and destroyed during the removal of the old leg.
The tube and square washer on the new club leg were removed, there was a bit of filing to get the new leg to fit over the old tube, the leg was then plug welded in place, a new round washer was made, plug welded to the chassis leg then seam welded to the old tube.
One thing to watch out for, make sure you offer up the gearbox cross member as the new leg does not have the scalloped indentations like the originals, mine even though the holes are lined up with the body, is a bit tight.
Off to Stonleigh now I will post a picture later, I only have a picture of the finished item, as unfortunately the guys who did the work didn't take any progressive pictures.


