Start of another new project

For everything to do with Dolomites, Toledos, FWD cars and Dolomite-based kitcars.
Message
Author
User avatar
tony g
TDC Member
Posts: 2283
Joined: Sat Apr 12, 2014 11:02 pm
Location: Nr Kenilworth

Re: Start of another new project

#31 Post by tony g »

When are you going to do a Stag engine to this spec?[/quote]


When the sprint heads fit :mrgreen:

Tony
Membership 2014047
User avatar
soe8m
Guest contributor
Guest contributor
Posts: 3179
Joined: Thu Oct 06, 2011 1:13 am
Location: The continent

Re: Start of another new project

#32 Post by soe8m »

tinweevil wrote:Two questions:
Don't you think that headed note paper is showing off a tad?
When are you going to do a Stag engine to this spec?
IMG_4697.JPG
IMG_4697.JPG (37.94 KiB) Viewed 2281 times
tony g wrote:When are you going to do a Stag engine to this spec?

When the sprint heads fit :mrgreen:

Tony[/quote]

No need when you have a few of these in stock: :lol: :lol: 8)
Autocar Photo 7.jpg
Autocar Photo 7.jpg (109.91 KiB) Viewed 2281 times
Classic Kabelboom Company. For all your wiring needs. http://www.classickabelboomcompany.com
User avatar
tony g
TDC Member
Posts: 2283
Joined: Sat Apr 12, 2014 11:02 pm
Location: Nr Kenilworth

Re: Start of another new project

#33 Post by tony g »

Should sound nice :mrgreen:

Tony
Membership 2014047
User avatar
soe8m
Guest contributor
Guest contributor
Posts: 3179
Joined: Thu Oct 06, 2011 1:13 am
Location: The continent

Re: Start of another new project

#34 Post by soe8m »

Finished the head tonight. Made some dowels on the inlet side and m10 helicoils on the outlet side. I'm using m10 studs with copper locknuts on the manifold. This way you can tighten and retighten the manifold easy without the threads damaged in the alu head.
IMG_4710.jpg
IMG_4710.jpg (311.27 KiB) Viewed 2247 times
Valves do not need to be lapped when they are new or machined and put in new or machined seats. But you can lap them to check the contact area of the valve. For LPG i use a slightly bigger area because of the better valve cooling. LPG burns hotter and this way the valve can dispense the heat more.
IMG_4705.jpg
IMG_4705.jpg (233.11 KiB) Viewed 2247 times
These pics are of the original head of this engine. This was the LPG injected head after about 300.000km. I did run it for a while on 3 cilinders but at once it was within 20km 2, 1, none.
DSC00563.jpg
DSC00563.jpg (750.43 KiB) Viewed 2247 times
Classic Kabelboom Company. For all your wiring needs. http://www.classickabelboomcompany.com
User avatar
soe8m
Guest contributor
Guest contributor
Posts: 3179
Joined: Thu Oct 06, 2011 1:13 am
Location: The continent

Re: Start of another new project

#35 Post by soe8m »

Assembling some shiny new parts. As the collets are very inexpensive you can replace them. They do wear. You can test them by pulling lightly on the springseat and it has to clamp. When it falls down most of the time the collets are worn.
IMG_4713.jpg
IMG_4713.jpg (305.36 KiB) Viewed 2247 times
Classic Kabelboom Company. For all your wiring needs. http://www.classickabelboomcompany.com
User avatar
soe8m
Guest contributor
Guest contributor
Posts: 3179
Joined: Thu Oct 06, 2011 1:13 am
Location: The continent

Re: Start of another new project

#36 Post by soe8m »

I de-tr7nized the manifold because i do not have egr.
IMG_4715.jpg
IMG_4715.jpg (82.51 KiB) Viewed 2247 times
I have to get used by the sight of one carb on a slant. This is a HS8 carb. The tr7 had originally a stromberg fitted.

Jeroen
IMG_4717.jpg
IMG_4717.jpg (491.02 KiB) Viewed 2247 times
Classic Kabelboom Company. For all your wiring needs. http://www.classickabelboomcompany.com
straylight

Re: Start of another new project

#37 Post by straylight »

this is beautiful info Jeroen, thanks for taking the time to document how it all goes together and the reasons why.

stu
Edin Dundee

Re: Start of another new project

#38 Post by Edin Dundee »

Jeroen, is that rubber between the carb and the manifold?
User avatar
soe8m
Guest contributor
Guest contributor
Posts: 3179
Joined: Thu Oct 06, 2011 1:13 am
Location: The continent

Re: Start of another new project

#39 Post by soe8m »

It is tryfitting. There are no pistons in the engine yet. I did order a club alloy one. This is the std rubber one for the hs6 type.

Jeroen
Classic Kabelboom Company. For all your wiring needs. http://www.classickabelboomcompany.com
User avatar
trackerjack
Guest contributor
Guest contributor
Posts: 4727
Joined: Fri Nov 23, 2007 11:33 pm
Location: hampshire

Re: Start of another new project

#40 Post by trackerjack »

Does your lovely wife (I know she is as we met the poor lass :D ) mind you building engines in the family kitchen? :lol:
track action maniac.

The lunatic is out................heres Jonny!
User avatar
soe8m
Guest contributor
Guest contributor
Posts: 3179
Joined: Thu Oct 06, 2011 1:13 am
Location: The continent

Re: Start of another new project

#41 Post by soe8m »

That isn't such a good idea because the backdoor of the house is locating in the kitchen :lol:

Jeroen
Classic Kabelboom Company. For all your wiring needs. http://www.classickabelboomcompany.com
User avatar
soe8m
Guest contributor
Guest contributor
Posts: 3179
Joined: Thu Oct 06, 2011 1:13 am
Location: The continent

Re: Start of another new project

#42 Post by soe8m »

Tonight was cranckshaft night. It all started with a freshly balanced combi of a cranckshaft of another engine, my "old" lightened flywheel and a new saab clutch cover. I wanted to re use the cranckshaft what was originally in the engine so i didn't need to have all balanced but there was too much wear on that one.
IMG_4903.jpg
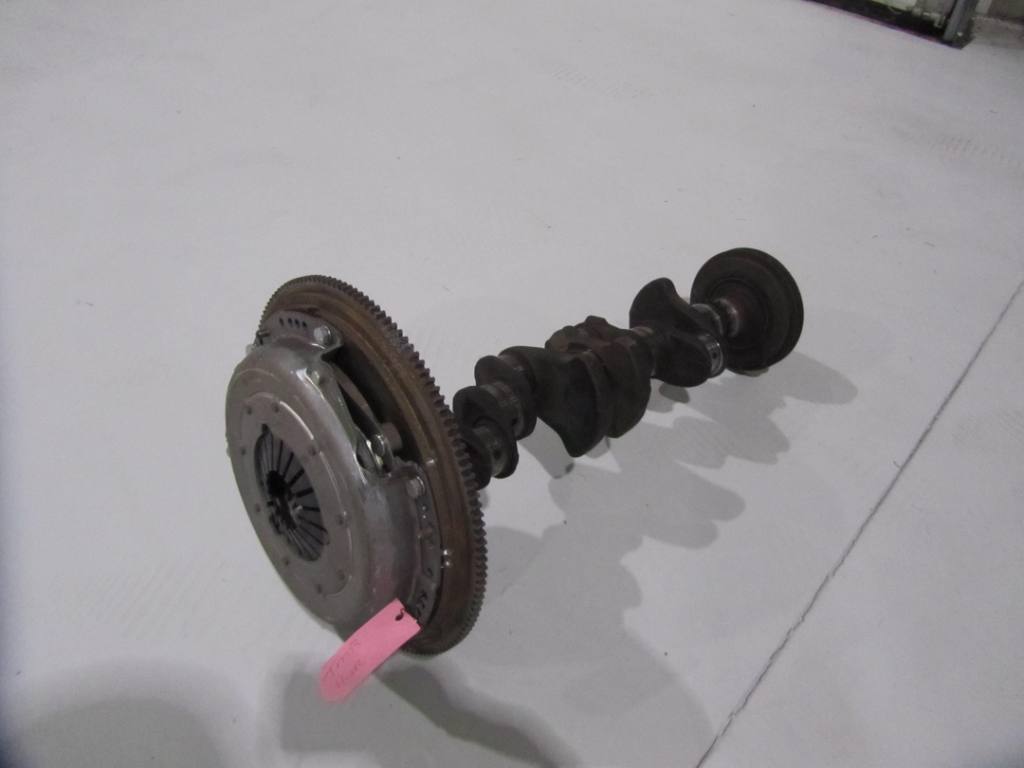
IMG_4903.jpg (47.32 KiB) Viewed 2145 times
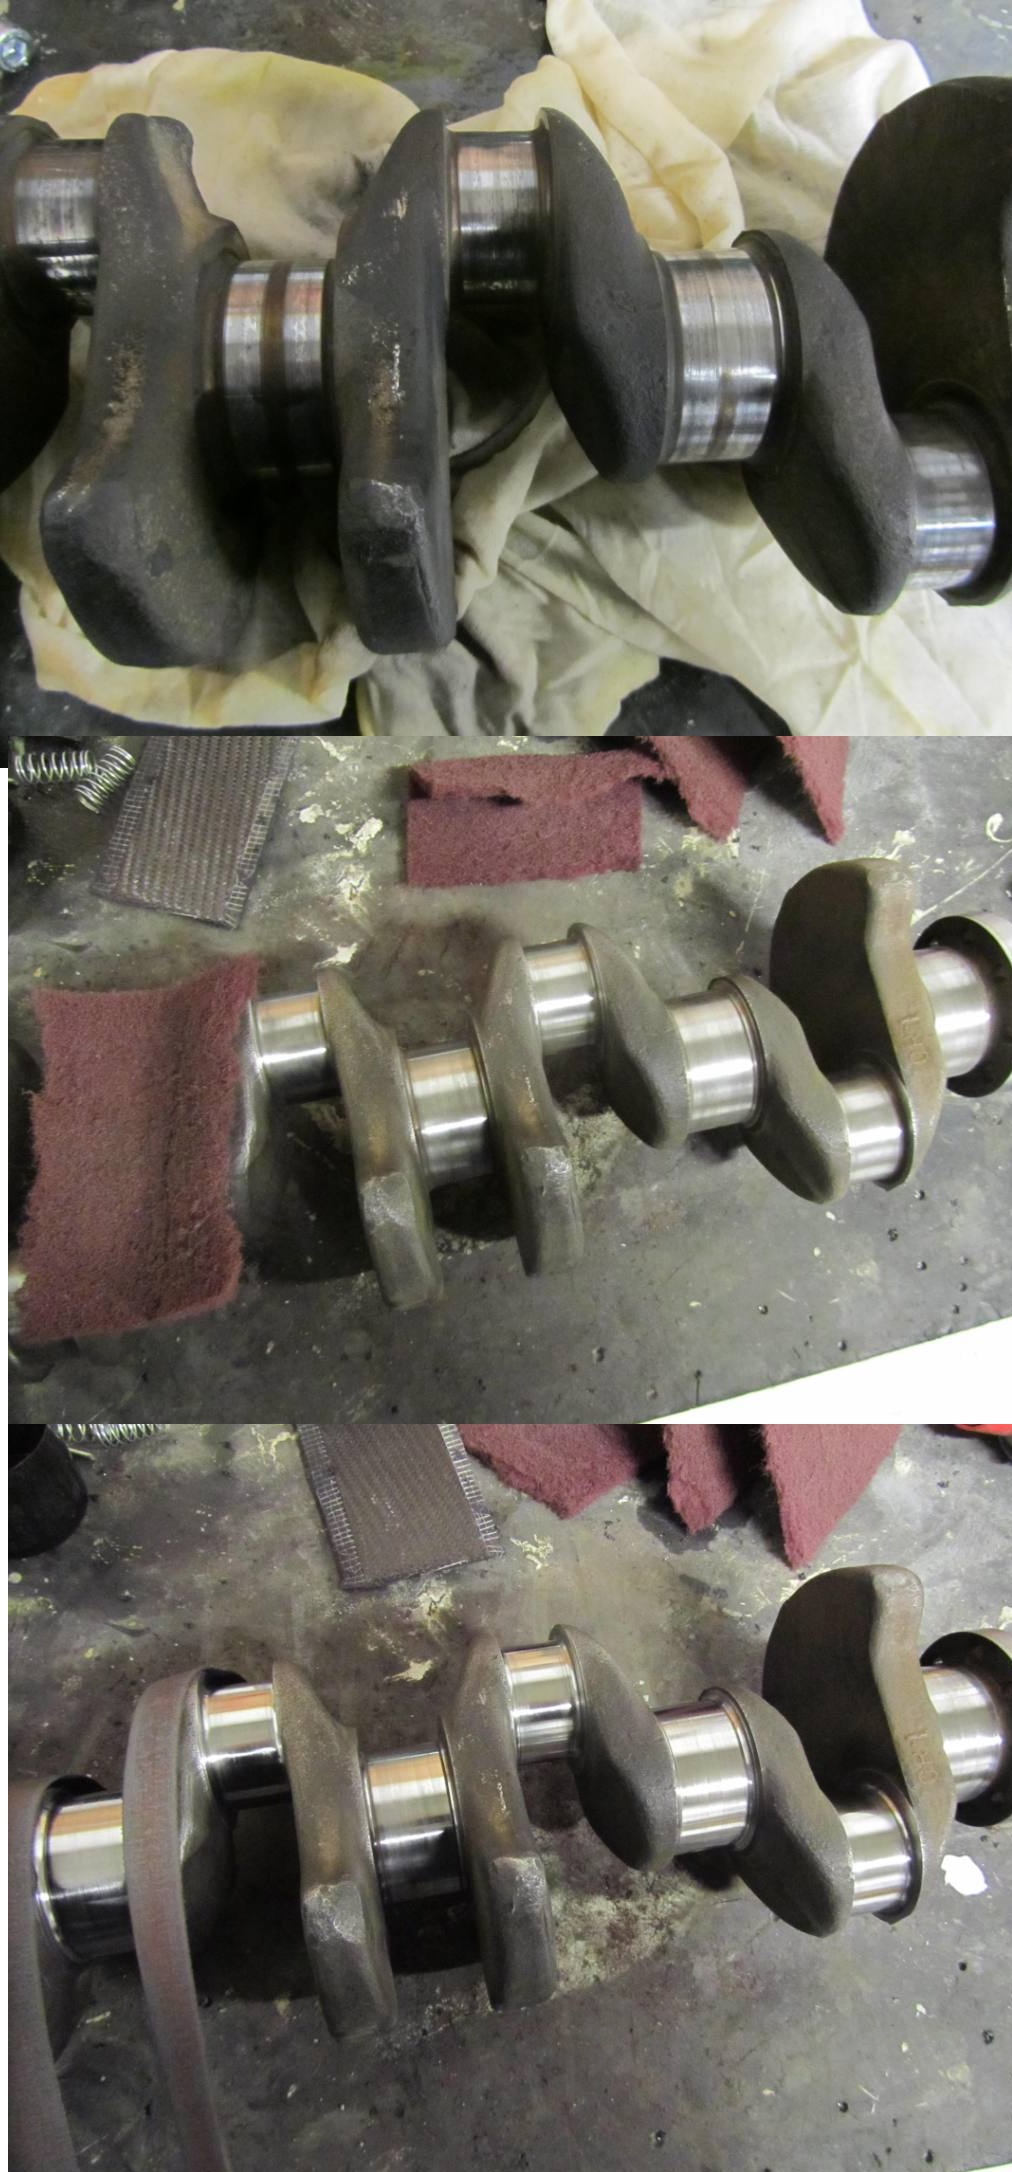
I like to use std size cranckshafts because the hardening is deeper, it is cheaper, no grinding and 70% of my vandervell stock is std size. I took this one out of a very original engine and it was on size. The marks on the journals are just optical marks. This engine did not run for a very long time and then you can get these marks/discolourisation.

First you use some scotts brite to remove all the marks and residu's of old baked oil. Then you have to lap the journals to have the smooth shiny surface. That is with a sort of canvas grinding band but very fine. You can tear it of a roll to journal width.
IMG_4905.jpg
IMG_4905.jpg (422.51 KiB) Viewed 2145 times
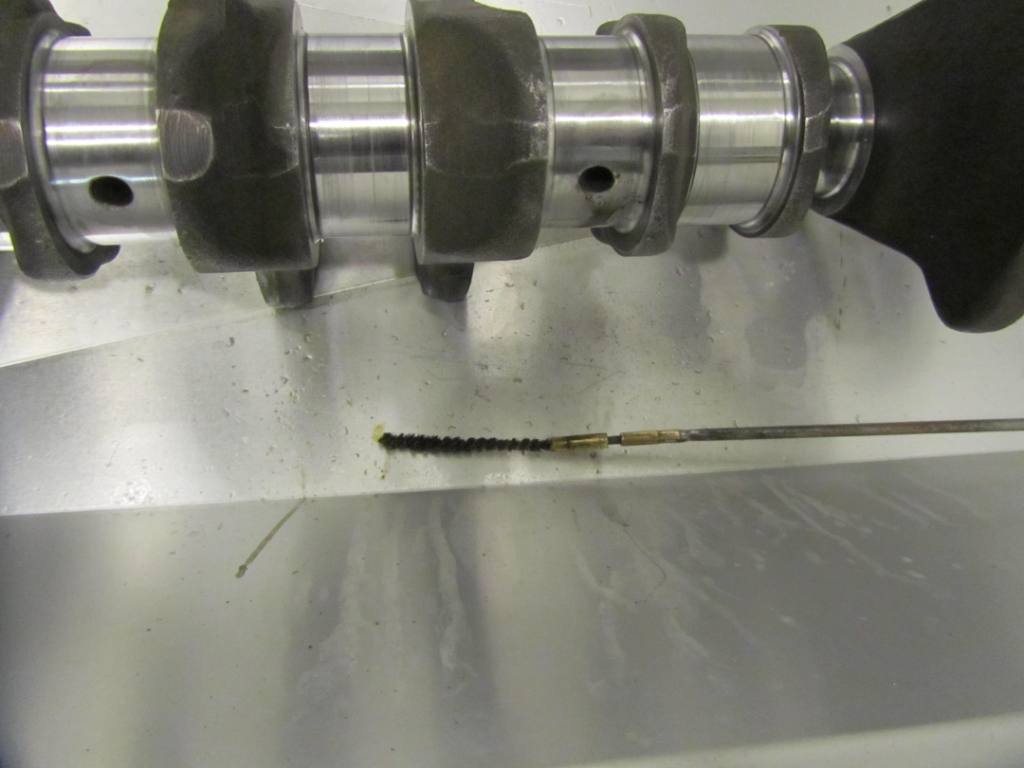
Then it is cleaning. I use a riffle barrel cleaner stick with different diameter brushes and that goes fine. It is a copper brush. For alloy parts i have nylon brushes.
IMG_4909.jpg
IMG_4909.jpg (65.06 KiB) Viewed 2145 times
Classic Kabelboom Company. For all your wiring needs. http://www.classickabelboomcompany.com
User avatar
soe8m
Guest contributor
Guest contributor
Posts: 3179
Joined: Thu Oct 06, 2011 1:13 am
Location: The continent

Re: Start of another new project

#43 Post by soe8m »

Fitting the ARP main bearing studs. Not all engines but a few have the bearingcap bolt bores not inline with the threaded hole in the engineblock. Using original bolts which are a bit thinner and have still a threaded in the lower area of the cap all is well but the ARP studs are slightly thicker and have a non threaded part in the lower area of the bearingcap is does matter.

Cap number 4 and 5 you had to tap with a plastic hammer to fit, the rest did just slide over. In the picture you can see that the bore on one side is not inline and that there is a marginal gap between the side of the cap and the engineblock. The cap is on one side pushed to the inside. If the cranckshaft was fitted in this engine it would not have turned by hand. The same happenend at the other (blue) sprint engine of the "new project". From then by every engine i do drill the holes of all the caps 0,5mm bigger and the problem is solved. All the caps because the ones who feel ok you cannot check if the stud is free in the hole or is slightly toughing the edge.
IMG_4902.jpg
IMG_4902.jpg (301.81 KiB) Viewed 2142 times
When fitting the studs permanently i do loctite them. There's no need but i have a better feeling glueing them. I use studs because the holes where the caps are bolted in are a weak point of a slant four so studs are much better and less stress when tightening the caps. But filling the threads with locktite also can't harm. When installing the studs with loctite you have to fit the cap and tighten it direcly. You want to have the thread coils toughing and the loctite filling up the non toughing gaps. Otherwise it can happen when tightening there's loctite between the stresses thread coils of the stud and engineblock and that is not a good fit.
Classic Kabelboom Company. For all your wiring needs. http://www.classickabelboomcompany.com
User avatar
soe8m
Guest contributor
Guest contributor
Posts: 3179
Joined: Thu Oct 06, 2011 1:13 am
Location: The continent

Re: Start of another new project

#44 Post by soe8m »

Measuring the bearing play is easy. For the journals i use a micrometer to start with but when all is fitted plastigauge is ok. It is a soft plastic strip what you do fit between the journal and bearing. Tighten ands it's compressed. How much it is compressed you can read waht the play is. Journal number 5 has the most play and is about 0,04-0,045mm. Triumph has a line somewhere in the big book that say's that the play should be 0,02 till 0,06mm. New ones did have around 0,03 so this cranckshaft is a good one.
IMG_4910.jpg
IMG_4910.jpg (212.13 KiB) Viewed 2142 times
Jeroen
Classic Kabelboom Company. For all your wiring needs. http://www.classickabelboomcompany.com
User avatar
Howard81
TDC Member
Posts: 3415
Joined: Fri Jan 11, 2008 9:02 am
Location: London

Re: Start of another new project

#45 Post by Howard81 »

Oh so that's how plastigauge works!

Excellent write up, very interesting indeed :)
1978 Triumph Dolomite Sprint (project thread)
1966 Volkswagen 1300 (project thread)
1962 Austin Mini (project)
1962 MGA 1600 Mark II
1965 Mobylette SP50 (project)
2001 Rover 75 2.5-litre V6
Post Reply